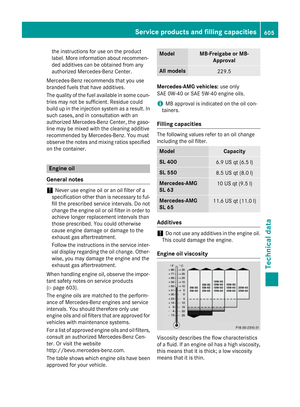
Page 545 of 614

Observe the legal requirements in all coun-
tries concerned.
XDo not use hot water and do not wash the
vehicle in direct sunlight.
XUse a soft sponge to clean.
XUse a mild cleaning agent, such as a car
shampoo approved by Mercedes-Benz.
XThoroughly hose down the vehicle with a
gentle jet of water.
XDo not point the water jet directly towardsthe air inlet.
XUse plenty of water and rinse out the
sponge frequently.
XRinse the vehicle with clean water and dry
thoroughly with a chamois.
XDo not let the cleaning agent dry on the
paintwork.
When using the vehicle in winter, remove all
traces of road salt deposits carefully and as
soon as possible.
Power washers
GWARNING
The water jet from a circular jet nozzle (dirt
blasters) can cause invisible exterior damage
to the tires or chassis components. Compo-
nents damaged in this way may fail unexpect-
edly. There is a risk of an accident.
Do not use power washers with circular jet
nozzles to clean the vehicle. Have damaged
tires or chassis components replaced imme-
diately.
!Always maintain a distance of at least
11.8 in (30 cm) between the vehicle and the
power washer nozzle. Information about
the correct distance is available from the
equipment manufacturer.
Move the power washer nozzle around
when cleaning your vehicle.
Do not aim directly at any of the following:
Rtires
Rdoor gaps, roof gaps, joints, etc.
Relectrical components
Rbattery
Rconnectors
Rlights
Rseals
Rtrim
Rventilation slots
Damaged seals or electrical components
can lead to leaks or failures.
!Vehicles with HANDS-FREE ACCESS: if a
SmartKey with KEYLESS-GO is within the
detection range of the KEYLESS-GO
antenna, the following situations could lead
to the unintentional opening of the trunk
lid:
Rusing a car wash
Rusing a power washer
Make sure that the SmartKey is at least
6.5 ft (2 m) away from the vehicle.
!Mille Miglia special model: parts of your
vehicle are covered with a decorative foil.
Maintain a distance of at least 70 cm
between the foil-wrapped parts of the vehi-
cle and the nozzle of the power washer.
Information about the correct distance is
available from the equipment manufac-
turer.
Move the power washer nozzle around
when cleaning your vehicle.
Cleaning the paintwork
!Do not affix:
Rstickers
Rfilms
Rmagnetic plates or similar items
to painted surfaces. You could otherwise
damage the paintwork.
Scratches, corrosive deposits, areas affected
by corrosion and damage caused by inade-
quate care cannot always be completely
repaired. In such cases, visit a qualified spe-
cialist workshop.
Care543
Maintenance and care
Z
Page 546 of 614

XRemove dirtimmediately, wher epossible,
while avoidin grubbin gto ohard.
XSoak insec tremain swit hinsec tremove r
and rinse off th etreated area safterwards .
XSoak birddroppings wit hwater and rinse
off th etreated area safterwards .
XRemove coolant, brak efluid ,tree resin ,
oils ,fuel sand greases by rubbin ggentl y
wit h a cloth soaked in petroleum ether or
lighte rfluid .
XUse tar remove rto remove tar stains.
XUse silicon eremove rto remove wax .
If water no longer forms "beads "on th epain t
surface, use th epain tcar eproducts recom-
mended and approve dby Mercedes-Benz.
This is th ecas eapproximately every three to
fiv emonths, dependin gon th eclimat econ-
dition sand th ecar eproduc tused .
If dir thas penetrated th epain tsurfac eor if
th epain thas become dull, th epain tcleane r
recommended and approve dby Mercedes -
Benz should be used .
Do no tuse these car eproducts in th esun or
on th ehoo dwhile th ehoo dis hot .
XUseasuitable touch-up stick ,e.g. MB
Touch-Up Stick ,to repair slight damag eto
th epaintwork quickl yand provisionally.
Matt e finish car e
!Never polis hth evehicl eor th eligh talloy
wheels. Polishing causes th efinish to
shine .
!The followin gmay caus eth epain tto
become shiny and thus reduce th ematte
effect:
Rstron grubbin gof th epaintwork wit h
unsuitable materials
Rfrequen tuse of automatic car washes
Rwashin gth evehicl ein direc tsunligh t
!Never use pain tcleaner, buffin gor pol-
ishin gproducts ,or glos spreserver ,e.g.
wax .These products are only suitable for
high-gloss surfaces. Their use on vehicles wit
hmatte finish leads to considerable sur -
fac edamag e(shiny, spotted areas).
Always hav epaintwork repairs carrie dout
at aqualified specialist workshop .
!Do notuse wash programs wit h ahot wax
treatmen tunder any circumstances.
Observ ethese note sif your vehicl ehas a
clear matte finish .This will help you to avoid
damag eto th epaintwork due to incorrec t
treatment.
These note salso apply to ligh talloy wheels
wit h a clear matte finish .
iThe vehicleshould preferably be washed
by han dusin g asoftsponge, car shampoo
and plenty of water.
iUse only insec tremove rand car shampoo
from th erange of recommended and
approve dMercedes-Ben zcar eproducts .
Cleaning th e vehicle part s
Cleaning th ewheels
GWARNIN G
The water je tfrom acircula rje tnozzle (dir t
blasters )can caus einvisible exterio rdamage
to th etires or chassi scomponents. Compo-
nent sdamaged in this way may fail unexpect-
edly. There is aris kof an accident.
Do no tuse powe rwashers wit hcircula rje t
nozzles to clean th evehicle. Hav edamaged
tires or chassi scomponent sreplaced imme-
diately.
!Do no tuse acidic whee lcleaning products
to remove brak edust .This could damag e
whee lbolt sand brak ecomponents.
!Do no tpark th evehicl efor an extended
period straight after cleaning it ,particularly
after havin gcleane dth ewheels wit hwhee l
cleaner. Wheel cleaners could caus e
increase dcorrosio nof th ebrak edisc sand
brak epads/linings. Fo rthis reason ,you
should drive for afew minute safter clean-
544Care
Maintenance and care
Page 547 of 614

ing. Braking heats the brake discs and the
brake pads/linings, thus drying them. The
vehicle can then be parked.
Cleaning the windows
GWARNING
You could become trapped by the windshield wipers if they start moving while cleaning the
windshield or wiper blades. There is a risk of
injury.
Always switch off the windshield wipers and
the ignition before cleaning the windshield or
wiper blades.
!Only fold the windshield wipers away from
the windshield when vertical. Otherwise,
you will damage the hood.
!Do not use dry cloths, abrasive products,
solvents or cleaning agents containing sol-
vents to clean the inside of the windows. Do
not touch the insides of the windows with
hard objects, e.g. an ice scraper or ring.
There is otherwise a risk of damaging the
windows.
!Clean the water drainage channels of the
windshield and the rear window at regular
intervals. Deposits such as leaves, petals
and pollen may under certain circumstan-
ces prevent water from draining away. This
can lead to corrosion damage and damage
to electronic components.
XClean the inside and outside of the win-
dows with a damp cloth and a cleaning
agent that is recommended and approved
by Mercedes-Benz.
Cleaning wiper blades
GWARNING
You could become trapped by the windshield wipers if they start moving while cleaning the
windshield or wiper blades. There is a risk of
injury.
Always switch off the windshield wipers and
the ignition before cleaning the windshield orwiper blades.
!Do not pull the wiper blade. Otherwise,
the wiper blade could be damaged.
!Do not clean wiper blades too often and
do not rub them too hard. Otherwise, the
graphite coating could be damaged. This
could cause wiper noise.
!Hold the wiper arm securely when folding
back. The windshield could be damaged if
the wiper arm smacks against it suddenly.
XFold the windshield wiper arms away from
the windshield.
XCarefully clean the wiper blades with a
damp cloth.
XFold the windshield wiper arms back again
before switching on the ignition.
Cleaning the exterior lighting
!Only use cleaning agents or cleaning
cloths which are suitable for plastic light
lenses. Unsuitable cleaning agents or
cleaning cloths could scratch or damage
the plastic light lenses.
XClean the plastic lenses of the exterior
lighting using a wet sponge and a mild
cleaning agent, e.g. Mercedes-Benz car
shampoo or cleaning cloths.
Cleaning the mirror turn signals
!Only use cleaning agents or cleaning
cloths that are suitable for plastic lenses.
Unsuitable cleaning agents or cleaning
cloths could scratch or damage the plastic lenses of the mirror turn signals.
XClean the plastic lenses of the mirror turn
signals in the exterior mirror housing usinga wet sponge and mild cleaning agent, e.g.
Mercedes-Benz car shampoo or cleaning
cloths.
Care545
Maintenance and care
Z
Page 548 of 614

Cleaning the sensors
!If you clean the sensors with a power
washer, make sure that you keep a dis-
tance of at least 11.8 in (30 cm)betwee n
th evehicl e and the power washer nozzle.
Information about the correct distance is
available from the equipment manufac-
turer.
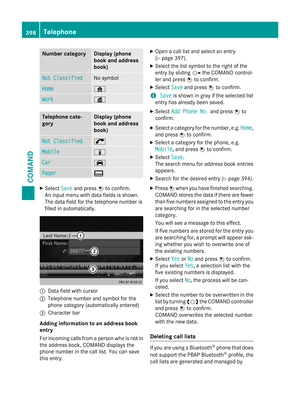
XClean sensors :of the driving systems
with water, car shampoo and a soft cloth.
Cleaning the rear view camera
!Do not clean the camera lens and the area
around the rear view camera with a power
washer.
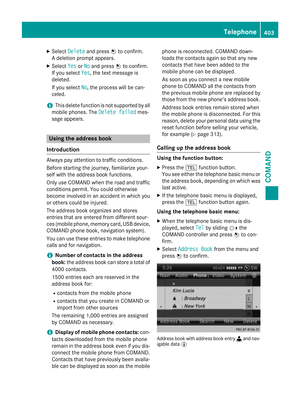
XUse clear water and a soft cloth to clean
camera lens :.
Cleaning the exhaust pipe
GWARNING
The exhaust tail pipeand tail pipetrim can
become very hot. Ifyou come into contact
wit h these parts of the vehicle, you could burn
yourself. There isa risk of injury.
Always be particularly careful around the
exhaust tail pipeand the tail pipetrim. Allow
these components to cool downbefore touch-
ing them.
!Do not clean the exhaust pipe with acid-
based cleaning agents, such as bathroom
cleaner or wheel cleaner.
XClean the exhaust pipe with a chrome care
product tested and approved by Mercedes-
Benz.
Impurities combined with the effects of road
grit and corrosive environmental factors may
cause flash rust to form on the surface. You
can restore the original shine of the exhaust
pipe by cleaning it regularly, especially in win-
ter and after washing.
Interior care
Cleaning the display
!For cleaning, do not use any of the fol-
lowing:
Ralcohol-based thinner or gasoline
Rabrasive cleaning agents
Rcommercially-available household clean-
ing agents
These may damage the display surface. Do not put pressure on the display surface
when cleaning. This could lead to irrepara-
ble damage to the display.
546Care
Maintenance and care
Page 549 of 614

XBefore cleaning the display, make sure thatit is switched off and has cooled down.
XClean the display surface using a commer-
cially available microfiber cloth and
TFT/LCD display cleaner.
XDry the display surface using a dry micro-
fiber cloth.
Cleaning Night View Assist Plus
!Never clean the camera lens. When clean-
ing the field of vision of the driving systems,
make sure that you do not spray glass
cleaner on the camera lens. If the camera
lens is dirty, visit a qualified specialist work-
shop.
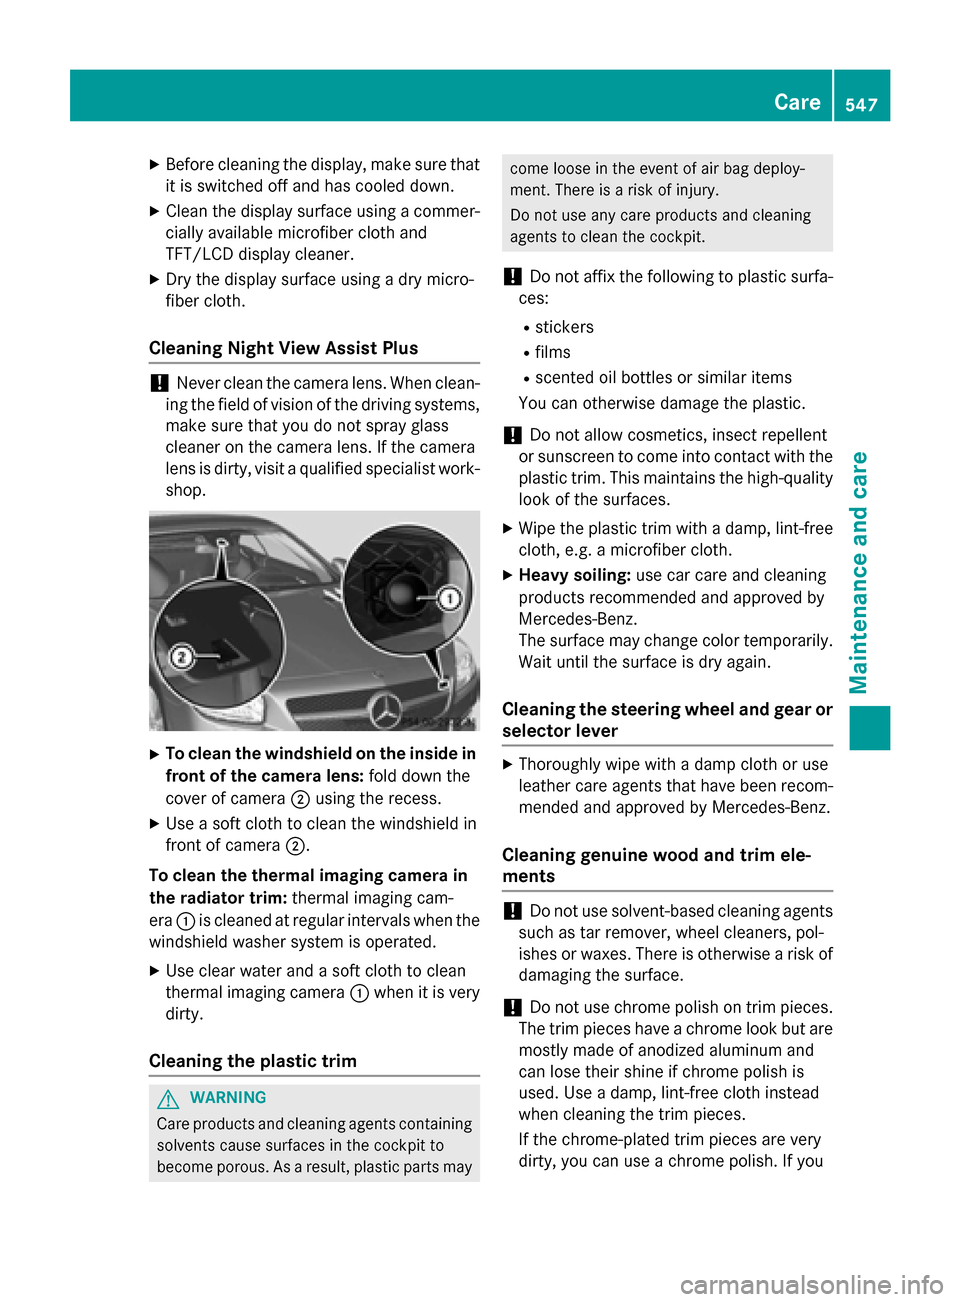
XTo clean the windshield on the inside in
front of the camera lens: fold down the
cover of camera ;using the recess.
XUse a soft cloth to clean the windshield in
front of camera ;.
To clean the thermal imaging camera in
the radiator trim: thermal imaging cam-
era :is cleaned at regular intervals when the
windshield washer system is operated.
XUse clear water and a soft cloth to clean
thermal imaging camera :when it is very
dirty.
Cleaning the plastic trim
GWARNING
Care products and cleaning agents containing solvents cause surfaces in the cockpit to
become porous. As a result, plastic parts may
come loose in the event of air bag deploy-
ment. There is a risk of injury.
Do not use any care products and cleaning
agents to clean the cockpit.
!Do not affix the following to plastic surfa-
ces:
Rstickers
Rfilms
Rscented oil bottles or similar items
You can otherwise damage the plastic.
!Do not allow cosmetics, insect repellent
or sunscreen to come into contact with the
plastic trim. This maintains the high-quality
look of the surfaces.
XWipe the plastic trim with a damp, lint-free
cloth, e.g. a microfiber cloth.
XHeavy soiling: use car care and cleaning
products recommended and approved by
Mercedes-Benz.
The surface may change color temporarily.
Wait until the surface is dry again.
Cleaning the steering wheel and gear or
selector lever
XThoroughly wipe with a damp cloth or use
leather care agents that have been recom-
mended and approved by Mercedes-Benz.
Cleaning genuine wood and trim ele-
ments
!Do not use solvent-based cleaning agents
such as tar remover, wheel cleaners, pol-
ishes or waxes. There is otherwise a risk of
damaging the surface.
!Do not use chrome polish on trim pieces.
The trim pieces have a chrome look but are
mostly made of anodized aluminum and
can lose their shine if chrome polish is
used. Use a damp, lint-free cloth instead
when cleaning the trim pieces.
If the chrome-plated trim pieces are very
dirty, you can use a chrome polish. If you
Care547
Maintenance and care
Z
Page 550 of 614

are unsure as to whether the trim pieces
are chrome-plated or not, consult an
authorized Mercedes-Benz Center.
XWipe the wooden trim and trim pieces with
a damp, lint-free cloth, e.g. a microfiber
cloth.
XHeavy soiling:use car care and cleaning
products recommended and approved by
Mercedes-Benz.
Cleaning the seat covers
General notes
!Do not use microfiber cloths to clean gen-
uine leather, artificial leather or DINAMICA
covers. If used often, these can damage the cover.
iNote that regular care is essential to
ensure that the appearance and comfort of
the covers is retained over time.
Genuine leather seat covers
!To retain the natural appearance of the
leather, observe the following cleaning
instructions:
RClean genuine leather covers carefully
with a damp cloth and then wipe the cov-
ers down with a dry cloth.
RMake sure that the leather does not
become soaked. It may otherwise
become rough and cracked.
ROnly use leather care agents that have
been tested and approved by Mercedes-
Benz. You can obtain these from a quali-
fied specialist workshop.
Leather is a natural product.
It exhibits natural surface characteristics, for
example:
Rdifferences in the texture
Rmarks caused by growth and injury
Rslight nuances of color
These are characteristics of leather and not
material defects. Seat covers of other materials
!Observe the following when cleaning:
Rclean artificial leather covers with a cloth
moistened with a solution containing 1%
detergent (e.g. dish washing liquid).
Rclean cloth covers with a microfiber cloth
moistened with
a solution c
ontaining 1%
detergent (e.g. dish washing liquid). Rub
carefully and always wipe entire seat sec-
tions to avoid leaving visible lines. Leave
the seat to dry afterwards. Cleaning
results depend on the type of dirt and
how long it has been there.
Rclean DINAMICA covers with a damp
cloth. Make sure that you wipe entire
seat sections to avoid leaving visible
lines.
Cleaning the seat belts
GWARNING
Seat belts can become severely weakened if
bleached or dyed. This could cause the seat
belts to tear or fail, for instance, in the event of an accident. This poses an increased risk of
injury or fatal injury.
Never bleach or dye the seat belts.
!Do not clean the seat belts using chemical
cleaning agents. Do not dry the seat belts
by heating at temperatures above 176 ‡
(80 †) or in direct sunlight.
XUse clean, lukewarm water and soap solu-
tion.
Cleaning the headliner and carpets
XHeadliner: if it is very dirty, use a soft brush
or dry shampoo.
XCarpets: use the carpet and textile clean-
ing agents recommended and approved by
Mercedes-Benz.
548Care
Maintenance and care
Page 551 of 614
Useful information............................550
Where will I find...? ...........................550
Flat tire .............................................. 550
Battery (vehicle) ................................ 555
Jump-starting .................................... 559
Towing and tow-starting ..................561
Fuses .................................................. 564
549
Breakdown assistance
Page 552 of 614

Useful information
i
This Operator's Manual describes all
models and all standard and optional equip-
ment of your vehicle available at the time of
publication of the Operator's Manual.
Country-specific differences are possible.
Please note that your vehicle may not be
equipped with all features described. This
also applies to safety-related systems and
functions.
iRead the information on qualified special-
ist workshops (
Ypage 34).
Where will I find...?
Vehicle tool kit
General notes
The vehicle tool kit consists of a towing eye
and test gauge for measuring the brake pad
thickness (
Ypage 178). The towing eye is
located in the trunk in a bracket below the
trunk lid lock. The gauge for measuring brake
pad/lining thickness is in the vehicle docu-
ment wallet. If the vehicle is equipped with a
TIREFIT kit, it is located in the stowage com-
partment under the trunk floor.
Vehicles with a TIREFIT kit
:Towing eye
;Tire sealant filler bottle
=Fuse allocation chart
?Tire inflation compressor
XOpen the trunk lid.
XOpen the trunk partition (Ypage 103).
XLift the trunk floor upwards (Ypage 518).
XUse the TIREFIT kit (Ypage 552).
Tire-change tool kit
:Bag containing the tire-changing tools
XOpen the trunk lid.
XOpen the trunk partition (Ypage 103).
XLift the trunk floor upwards (Ypage 518).
iDepending on the equipment, tools
required for a wheel change, such as a jack or a lug wrench, are not available in all vehi-
cles. Tools approved for your vehicle are
available at a qualified specialist workshop.
Bag with tire-changing tools :contains:
RJack
RLug wrench
RAlignment bolt
RWheel chock
RGloves
Flat tire
Preparing the vehicle
Your vehicle may be equipped with:
Rtires with run-flat characteristics
(MOExtended tires) (
Ypage 551)
Vehicle preparation is not necessary on
vehicles with MOExtended tires
Ra TIREFIT kit (Ypage 550)
550Flat tire
Breakdown assistance