Page 97 of 200

Heating and air conditioning
Temperature selection ŌĆō
When you switch on the ignition, control 1ŌĆ║ŌĆ║ŌĆ║
Fig. 88 ŌĆ║ŌĆ║ŌĆ║ page 94 can be used to set the
required interior temperature.
It is possible to select interior temperatures
from +18 ┬░C (+64 ┬░F) to +29 ┬░C (+84 ┬░F). In
this range the temperature is regulated auto-
matically. If a temperature below +18 ┬░C
(+64 ┬░F) is selected, ŌĆ£LOŌĆØ is displayed on the
screen. If a temperature above +29 ┬░C
(+84 ┬░F) is selected, ŌĆ£HIŌĆØ is displayed on the
screen. At both extremes, Climatronic works
at maximum cooling or heating power, re-
spectively. The temperature is not regulated.
In the event of prolonged, irregular distribu-
tion of the air flow from the outlets (particu-
larly the footwells) and significant differen-
ces in temperature, e.g. on leaving the vehi-
cle, sensitive people may catch cold.
Air recirculation Air recirculation prevents unpleasant smells,
e.g. when passing through a tunnel or in
queuing traffic, from entering the interior.
Switching on air recirculation mode
ŌĆō Press button ’Ć╗
17
ŌĆ║ŌĆ║ŌĆ║
Fig. 88 ŌĆ║
ŌĆ║
ŌĆ║
page 94
and the ’Ć╗ symbol is displayed on the
screen. Switching off air recirculation mode
ŌĆō Press button ’Ć╗
17
ŌĆ║ŌĆ║ŌĆ║ Fig. 88
ŌĆ║
ŌĆ║ŌĆ║ p
age 94
and the ’Ć╗ symbol disappears from the
screen. WARNING
Read and observe the safety warnings ŌĆ║ŌĆ║ŌĆ║ in
General notes on page 87. Note
If air recirculation mode remains on for 15 mi-
nutes, the ’Ć╗ symbol will start to flash on
the screen to indicate prolonged air recircula-
tion. If air recirculation is not switched off,
the symbol will continue to flash for about 5
minutes. Blower selection
Climatronic automatically regulates the blow-
er speed according to the interior tempera-
ture. It is possible, however, to set the blower
speed to suit requirements.
ŌĆō
Turn rotary control 10
ŌĆ║ŌĆ║ŌĆ║
Fig. 88 ŌĆ║
ŌĆ║
ŌĆ║
page 94
counter-clockwise (to lower the speed) or
clockwise (to increase the speed).
Climatronic will switch off when the blower
switches off. WARNING
ŌŚÅ Used air can cause tiredness, reduce atten-
tion spans and cause the windows to mist
over. This increases the risk of an accident.
ŌŚÅ Do not switch off Climatronic for longer
than necessary.
ŌŚÅ Switch Climatronic back on as soon as the
windows begin to mist over. Windscreen defrosting
Switching on windscreen defrosting
ŌĆō Press button ’Ć║
13
ŌĆ║ŌĆ║ŌĆ║
Fig. 88 ŌĆ║
ŌĆ║
ŌĆ║
page 94.
Switching off windscreen defrosting ŌĆō Press button ’Ć║
13
ŌĆ║ŌĆ║ŌĆ║
Fig. 88 ŌĆ║
ŌĆ║
ŌĆ║
page 94
several times or press the AUTO button.
The temperature is regulated automatically.
The air output is increased from vents 1
ŌĆ║ŌĆ║ŌĆ║ page 88 and
2
. 95
Technical specifications
Advice
Operation
Safety
Page 98 of 200

Operation
Driving Starting and stopping the
engine Introduction WARNING
ŌŚÅ Never adjust the steering wheel while the
vehicle is moving!
ŌŚÅ For safety reasons, the steering wheel ad-
justment lever must always be pushed se-
curely against the steering column to prevent
the steering wheel from accidentally chang-
ing position while driving. Risk of accident!
ŌŚÅ If the steering wheel is adjusted closer to
your face, the protective effect of the driver
airbag will be decreased in the event of an ac-
cident. Check that the steering wheel is
pointing towards the upper part of your body.
ŌŚÅ When driving, always hold the steering
wheel with both hands on the outside part at
the 9 o'clock and 3 o'clock positions. Never
hold the steering wheel at the 12 o'clock po-
sition, or in any other manner (e.g. in the cen-
tre of the steering wheel). In such cases, if
the airbag is triggered, you may sustain inju-
ries to the arms, hands and head.
ŌŚÅ When moving with the engine switched off,
the ignition key must always remain in posi-
tion 2
ŌĆ║ŌĆ║ŌĆ║ Fig. 89 ŌĆ║ŌĆ║ŌĆ║ page 97 (ignition on).
The contr
ol lamps will light up in this posi- tion. Otherwise, the steering lock could en-
gage suddenly. Risk of accident!
ŌŚÅ
Do not remove the key from the ignition un-
til the vehicle has come to a standstill and is
secure (e.g. the handbrake is engaged). Oth-
erwise, the steering lock could suddenly en-
gage. Risk of accident!
ŌŚÅ Always take the ignition key with you when
you leave the vehicle. This is particularly im-
portant if you leave children in the vehicle.
Children could, for example, start the engine
with the subsequent risk of accident.
ŌŚÅ Never leave the engine running in unventi-
lated or closed rooms. The exhaust gases
contain carbon monoxide, an odourless and
colourless poisonous gas. Risk of fatal acci-
dents! Carbon monoxide can cause people to
lose consciousness and can cause death.
ŌŚÅ Never leave the vehicle unattended if the
engine is running.
ŌŚÅ Never switch the engine off until the vehi-
cle has come to a complete stop. Risk of acci-
dent! CAUTION
ŌŚÅ Turning the steering wheel fully in either
direction when the vehicle is stationary and
the engine is in gear puts the power steering
under great stress. This could lead to noise.
Never leave the steering wheel turned fully in
either direction for more than 15 seconds.
Risk of damage to the power steering system! ŌŚÅ
The starter motor may only be used (key
position 3
ŌĆ║ŌĆ║ŌĆ║ Fig. 89 ŌĆ║ŌĆ║ŌĆ║ p
age 97 in the igni-
tion) if the engine is off. Using the starter mo-
tor when the engine is running could damage
it.
ŌŚÅ Immediately release the ignition key when
the engine starts, otherwise damage could be
caused to the starter motor.
ŌŚÅ When the engine is cold, you should avoid
high engine speeds, driving at full throttle
and over-loading the engine before it reaches
operating temperature. Risk of engine dam-
age!
ŌŚÅ Do not tow-start the engine. Risk of engine
damage! In vehicles with a catalytic convert-
er, fuel that has not been burned could reach
the catalytic converter and catch fire in it.
This would lead to a fault in the catalytic con-
verter. You may use the battery from another
vehicle to help you start your engine
ŌĆ║ŌĆ║ŌĆ║ page 157, Jump-starting.
ŌŚÅ After prolonged and demanding operation
of the engine, when the journey has ended,
do not stop the engine immediately. Let the
engine run at idle for about one more minute.
This will stop the engine from overheating. For the sake of the environment
Do not warm up the engine when the vehicle
is stationary. If possible, move off immediate-
ly after starting the engine. This will help the
engine reach operating temperature more
quickly, reducing the quantity of emissions. 96
Page 99 of 200

Driving
Note
ŌŚÅ The engine can only be started with the
original SEAT key.
ŌŚÅ Loud running noises may be heard briefly
after cold-starting the engine. This is normal
and is no cause for concern.
ŌŚÅ After the engine has been stopped and the
ignition switched off, the radiator fan may
continue running for around 10 minutes.
ŌŚÅ If the engine still does not start after a sec-
ond attempt, the fuel pump fuse might have
blown. Check it and replace if necessary
ŌĆ║ŌĆ║ŌĆ║ page 163 or contact your Specialised
Ser v
ice.
ŌŚÅ You should always engage the steering lock
when you exit the vehicle. This will hinder
any attempts at theft. Power steering
The power steering allows you to turn the
steering wheel more easily.
If the power steering fails or the engine is off
(towing), it is still possible to turn the vehi-
cle's steering wheel fully. However, you need
more strength to steer the vehicle. Start-up lock security system
(immobiliser) There is an electronic chip in the key. The
electronic immobiliser is deactivated when
the key is inserted into the ignition. The elec-
tronic immobiliser is automatically activated
when the key is removed from the ignition.
The engine will not start if an unauthorised
key is used.
The informative display indicates:
Immobiliser active!
Ignition lock Fig. 89
Ignition key positions. Petrol engines
1 ŌĆō Ignition switched off, engine stopped,
steering can be locked
2 ŌĆō Ignition switched on3 ŌĆō Starting
Diesel engines 1 ŌĆō Fuel supply stopped, ignition switched
off, engine stopped, steering can be locked
2 ŌĆō Engine pre-heating, ignition switched
on
3 ŌĆō Starting
To engage the Steering lock without the key
in the ignition, t urn the s
teering wheel slight-
ly until you hear it engage.
If the steering lock is engaged and it is diffi-
cult or impossible to turn the key to position 2 , release the lock by turning the steering
wheel slightly in both directions.
Starting the engine Vehicles with a
diesel engine are equipped
with a glow plug system. When you switch on
the ignition, the glow plug warning lamp ’üż
will light up. The engine can be started
straight away when the lamp switches off.
Do not connect electrical appliances during
preheating so as not the drain the vehicle
battery unnecessarily. ┬╗
97
Technical specifications
Advice
Operation
Safety
Page 100 of 200

Operation
Starting the engine
ŌŚÅ Move the gearbox lever into neutral or
move the selector lever to position P
or N and
pull firmly on the handbrake.
ŌŚÅ Press the clutch pedal all the way down 2ŌĆ║ŌĆ║ŌĆ║
Fig. 89
ŌĆ║
ŌĆ║ŌĆ║ p
age 97 and start the engine 3 ,
without pressing the accelerator. Keep the
clutch pedal pressed down until the engine
starts.
ŌŚÅ Release the ignition key as soon as the en-
gine starts. The key returns to position 2 .
ŌŚÅ If the engine does not start after 10 sec-
onds, turn the key back to position 1 . Re-
peat the action after 30 seconds.
ŌŚÅ Release the handbrake before moving off.
Switching off the engine Stop the engine by turning the ignition key to
position
1
ŌĆ║ŌĆ║ŌĆ║
Fig. 89 ŌĆ║
ŌĆ║
ŌĆ║
page 97. Brakes and brake servo
systems
Introduction WARNING
ŌŚÅ The brake servo only works when the en-
gine is running. Braking when the engine is
switched off requires applying more strength
to the brake pedal. Risk of accident!
ŌŚÅ Press down on the clutch pedal when stop-
ping and braking with a manual gearbox, pet-
rol engine vehicle at low speed. Otherwise,
the brake servo might not work properly. Risk
of accident!
ŌŚÅ In the event of damage to the standard
front spoiler or where a different front spoil-
er, wheel trims, etc. are subsequently fitted,
make sure the air vent to the brakes on the
front wheels is not blocked. Otherwise, brak-
ing operations may be impaired. Risk of acci-
dent!
ŌŚÅ Always fully release the handbrake. If it is
only partially released, this will cause over-
heating of the rear brakes, which can impair
the function of the brake system. Risk of acci-
dent!
ŌŚÅ Never leave children unsupervised in the
vehicle. They could release the handbrake or
move the gear lever. The vehicle could start
moving. Risk of accident! ŌŚÅ
Insufficient fuel can cause the engine to run
irregularly or to switch off. Brake assist sys-
tems could be impaired. Risk of accident!
ŌŚÅ Always adjust your driving style to suit visi-
bility, the weather and road and traffic condi-
tions. The best vehicle safety offered by
brake assist systems must never encourage
you to run greater risks. Risk of accident! CAUTION
ŌŚÅ Observe the information concerning new
brake pads ŌĆ║ŌĆ║ŌĆ║ page 104
.
ŌŚÅ Wher e br
aking is not necessary, do not
wear down the brake pads by pressing down
gently on the brake pedal. This causes the
brakes to overheat, increasing their wear and
increasing braking distances.
ŌŚÅ To ensure the brake assist systems work
properly, all wheels must be fitted with tyres
approved by the manufacturer. Note
ŌŚÅ If you brake suddenly and the brake system
control unit regards the situation as hazard-
ous for the drivers behind you, the brake
lights will begin to flash automatically. After
reducing speed to approximately 10 km/h (6
mph) or stopping the vehicle, the brake lights
will stop flashing and the hazard warning
lights will switch on. The hazard warning
lights are automatically switched off when
you accelerate or restart the vehicle. 98
Page 101 of 200
 or move the selector lever to a lower
gear position (automatic gearbox). This uses
the force of the")
Driving
ŌŚÅ
On long, steep gradients, reduce your
speed and change to a lower gear (manual
gearbox) or move the selector lever to a lower
gear position (automatic gearbox). This uses
the force of the engine and the brakes do not
suffer as much. If you still have to brake, do
so intermittently, pressing down repeatedly
on the brake pedal.
ŌŚÅ Vehicle modifications (e.g. to the engine,
brakes, frame or a combination of wheels and
tyres) could impair the brake assist systems
ŌĆ║ŌĆ║ŌĆ║ page 122, Accessories and modifications
to the vehicle .
ŌŚÅ In the event of a fault in the ABS system,
the ESC, TCS and EDL are switched off auto-
matically. A fault in the ABS is indicated by
the ’ü¬ ŌĆ║ŌĆ║ŌĆ║ page 36 warning lamp. Brakes
Wear
The rate of wear of the brake pads depends
on the driving style and on the way in which
the vehicle is used. The brake pads will wear
more quickly if you use your vehicle frequent-
ly in urban traffic and short trips or drive in a
sporty style. Under these
demanding condi-
tions , visit your specialised service, even be-
f or
e the scheduled service date, so that the
thickness of the brake pads can be meas-
ured. Wet roads or road salt
If brakes are wet or frozen, or if you are driv-
ing on roads which have been gritted with
salt, braking power may set in later than nor-
mal. Dry the brakes as soon as possible by
braking repeatedly.
Corrosion
Long periods of inactivity and little use can
lead to rust on the brake discs and dirt on the
brake pads. Where the brake system is sub-
jected to light stress or in the case of corro-
sion, clean the brake discs by braking fully
several times at a high speed.
Brake system fault
If you notice that the braking distance sud-
denly increases and the brake pedal can be
pressed down more fully, there may be a fault
in the brake system. Visit a specialised serv-
ice immediately and adjust your driving style
to the extent of the damage and to limit the
effect of the brakes.
Low brake fluid level
Insufficient brake fluid could cause faults in
the brake system. The brake fluid level is con-
trolled electronically
ŌĆ║ŌĆ║ŌĆ║ page 33, Brake sys-
tem ’ü© . Brake servo
The brake servo supplements the pressure
you exert on the brake pedal. The brake servo
only works when the engine is running.
Handbrake Fig. 90
Centre console: handbrake. Applying the handbrake
ŌĆō Pull the handbrake lever up all the way.
Releasing the handbrake
ŌĆō Pull the handbrake lever up slightly and
press the unlock button at the same time
ŌĆ║ŌĆ║ŌĆ║ Fig. 90 .
ŌĆō Keep the b
utton pressed down and push
the lever all the way down.
The warning lamp lights up when the hand-
brake is applied with the ignition on ’ü¦.
99
Technical specifications
Advice
Operation
Safety
Page 102 of 200

Operation
Manual gearbox Changing gears Fig. 91
Gear shift diagram of a 5- or 6-speed
manual gearbox When changing gear, always depress the
clutch pedal fully and keep it pressed down
to avoid excessive clutch wear.
In order to drive at an optimum RPM, follow
the gear change indications
ŌĆ║ŌĆ║ŌĆ║ page 32.
Engage reverse gear only when the vehicle is
stopped. On engaging reverse gear while the
engine is running, first wait a moment with
the clutch pedal pressed down fully to limit
gear shift noise.
The reverse lights switch on when the reverse
gear is selected and the ignition is on. WARNING
Never engage reverse gear when moving for-
ward. Risk of accident! Note
Do not rest your hand on the gear lever while
driving. The pressure of your hand could lead
to premature wear of the gear system. Automatic gearbox
Basic information The gearbox changes up and down automati-
cally. The gearbox can be set to
Tiptronic
mode. The gears can be changed manually in
this mode ŌĆ║ŌĆ║ŌĆ║
page 102 .
The en gine c
an only be started
in positions P
or N. If, on engaging the steering lock,
switching the ignition on/off or starting the
engine, the selector lever is not in these posi-
tions, the informative display will show Move
the selector lever to position P/N! , or ’Ć┤ P/N
is
shown on the general dash panel display.
At temperatures below -10 ┬░C (14 ┬░F), the en-
gine can only be started in position P.
Mov
e the selector lever to position P when
parking the vehicle on a flat surface. On a
slope, the handbrake should be firmly ap-
plied before moving the selector lever to the park position. This reduces the load on the
lock mechanism while making it easier to
move the selector lever from position P.
If, while the vehicle is moving, the selector
lever is accidentally moved to position
N, re-
le
ase the accelerator and wait for the engine
to idle before moving it back into position. WARNING
ŌŚÅ Never press the accelerator when selecting
the automatic gearbox operating mode when
the vehicle is stationary. Risk of accident!
ŌŚÅ Never move the selector lever to positions
R or P when driving. Risk of accident!
ŌŚÅ If the vehicle is to be stopped with a gear
selected and the engine idling (e.g. waiting
or moving slowly at traffic lights), press down
on the brake pedal because the transmission
is not entirely interrupted when the engine is
idling and the vehicle will tend to start mov-
ing.
ŌŚÅ Apply the handbrake firmly and put the se-
lector lever in position P before opening the
bonnet and working on the vehicle with the
engine running. Risk of accident! Strictly fol-
low the safety instructions ŌĆ║ŌĆ║ŌĆ║ page 132, En-
gine compartment.
ŌŚÅ When s t
opping on a slope (hill), try not to
stop the vehicle from moving by pressing the
ŌĆ£acceleratorŌĆØ with a gear selected. This could
overheat the clutch. If the clutch risks being
burnt due to this force, it would switch off 100
Page 103 of 200

Driving
and the vehicle could move backwards. Risk
of accident!
ŌŚÅ
If you have to stop on a hill, press down on
the brake pedal to stop the vehicle from mov-
ing.
ŌŚÅ The drive wheels could lose traction on a
slippery road surface when the kick-down
function is activated. Risk of sliding! CAUTION
ŌŚÅ In DSG automatic gearboxes, the double
clutch is protected from overloads. If the hill
hold control is used, the clutches are subjec-
ted to greater force if the vehicle is at a
standstill on a slope or suddenly accelerating
on a slope.
ŌŚÅ Should the clutches overheat, the ’āé sym-
bol is shown on the informative display with
a warning message Gear overheated. Stop! In-
struction Manual! An audible warning is also heard. Stop the vehicle in this case, stop the
engine and wait until the symbol ’āé has
switched off. Danger of damage to the gear-
box! You can continue driving once the sym-
bol is switched off. Starting and driving
Starting
ŌĆō Press and hold the brake pedal.
ŌĆō Press and hold the interlock button on the
selector lever knob and move the selector lever to position
ŌĆ║ŌĆ║ŌĆ║ page 101 before releas-
ing the interlock button.
ŌĆō Release the brake and press the accelera-
tor.
Stopping
ŌĆō The selector lever does not have to be
moved to position N
if the vehicle is stop-
ped f
or a short period, e.g. at intersections.
Applying the brake is enough. However, the
engine must remain idling.
Parking
ŌĆō Press the brake pedal.
ŌĆō Apply the handbrake.
ŌĆō Press the interlock button, move the selec-
tor lever to position P and release the but-
ton.
Kick-down feature
The kick-down feature allows maximum ac-
celeration to be reached.
In any gear programme, press down fully on
the accelerator for the automatic gearbox to
activate the kick-down feature. This function
takes priority over the gear programmes with-
out taking into account the position of the se-
lector lever (
D, S or Tiptronic) and is used to
reach maximum acceleration, using full en-
gine power. Depending on the road speed
and engine speed, the automatic gearbox shifts down and the vehicle accelerates. It
only shifts up after the maximum engine
speed has been reached.
Selector lever positions Fig. 92
Selector lever/Informative display: se-
lector lever positions. The current position of the selector lever is
shown on the general instrument panel dis-
play
1
ŌĆ║ŌĆ║ŌĆ║ Fig. 92 .
┬╗
101
Technical specifications
Advice
Operation
Safety
Page 104 of 200

Operation
P ŌĆō Parking position
In this position, the driven wheels are me-
chanically locked.
The parking position can only be selected
when the vehicle is stationary.
If you want to move the selector lever from
this position, press the interlock button on
the selector lever knob while pressing down
on the brake pedal.
If the battery is drained, the selector lever
cannot be moved from position P.
R ŌĆō Reverse
Reverse gear must be engaged only when the
vehicle is stationary and the engine is idling.
To move the selector lever to position R from
positions P or
N, press the interlock button
on the selector lever knob and press down on
the brake pedal.
The reverse lights come on when the selector
lever is in position R and the ignition is on.
N ŌĆō Neutral (idling)
Neutral (idling) is engaged in this position.
To move the selector lever from position N (if
the lever has remained in this position for
more than 2 seconds) to position D or R at
speeds of less than 5 km/h (3 mph) and
when the vehicle is stationary, press down on
the brake pedal. D ŌĆō Drive (forwards)
In this position, the gearbox automatically
changes to a lower or higher gear, depending
on engine requirements, the driving speed
and the gear shift programme.
To move the selector lever to position D from
position N
at speeds of less than 5 km/h (3
mph) and when the
vehicle is stationary,
press down on the brake pedal.
In some situations (e.g. on mountain roads or
when towing a trailer or caravan), it can be
advantageous to switch temporarily to the
manual shift programme ŌĆ║ŌĆ║ŌĆ║ page 102 so that
the gear ratios can be selected manually to
suit driving conditions.
S ŌĆō Sports driving position
Shifting up later than usual makes full use of
the engine power. This shifts down earlier in
relation to position D
.
T
o move the selector lever to position S from
position
D, press the interlock button on the
selector lever knob. Tiptronic gearbox Fig. 93
Selector lever: Tiptronic. The Tiptronic gearbox allows the driver to
change gears manually using the selector
lever.
Activating the manual gearbox
ŌĆō From position D
, push the selector lever to
the right
. The selected position of the se-
lector lever is shown on the general instru-
ment panel display together with the gear
engaged 1
ŌĆ║ŌĆ║ŌĆ║ Fig. 92 .
Shif tin
g up
ŌĆō Push the selector lever gently forwards + ŌĆ║ŌĆ║ŌĆ║
Fig. 93 .
Shif tin
g down
ŌĆō Push the selector lever gently backwards
-
ŌĆ║ŌĆ║ŌĆ║ Fig. 93 .
102
 1
1 2
2 3
3 4
4 5
5 6
6 7
7 8
8 9
9 10
10 11
11 12
12 13
13 14
14 15
15 16
16 17
17 18
18 19
19 20
20 21
21 22
22 23
23 24
24 25
25 26
26 27
27 28
28 29
29 30
30 31
31 32
32 33
33 34
34 35
35 36
36 37
37 38
38 39
39 40
40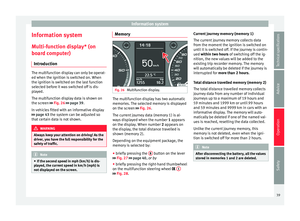 41
41 42
42 43
43 44
44 45
45 46
46 47
47 48
48 49
49 50
50 51
51 52
52 53
53 54
54 55
55 56
56 57
57 58
58 59
59 60
60 61
61 62
62 63
63 64
64 65
65 66
66 67
67 68
68 69
69 70
70 71
71 72
72 73
73 74
74 75
75 76
76 77
77 78
78 79
79 80
80 81
81 82
82 83
83 84
84 85
85 86
86 87
87 88
88 89
89 90
90 91
91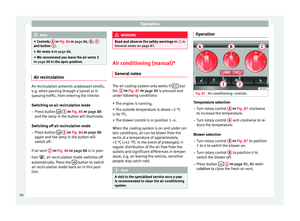 92
92 93
93 94
94 95
95 96
96 97
97 98
98 99
99 100
100 101
101 102
102 103
103 104
104 105
105 106
106 107
107 108
108 109
109 110
110 111
111 112
112 113
113 114
114 115
115 116
116 117
117 118
118 119
119 120
120 121
121 122
122 123
123 124
124 125
125 126
126 127
127 128
128 129
129 130
130 131
131 132
132 133
133 134
134 135
135 136
136 137
137 138
138 139
139 140
140 141
141 142
142 143
143 144
144 145
145 146
146 147
147 148
148 149
149 150
150 151
151 152
152 153
153 154
154 155
155 156
156 157
157 158
158 159
159 160
160 161
161 162
162 163
163 164
164 165
165 166
166 167
167 168
168 169
169 170
170 171
171 172
172 173
173 174
174 175
175 176
176 177
177 178
178 179
179 180
180 181
181 182
182 183
183 184
184 185
185 186
186 187
187 188
188 189
189 190
190 191
191 192
192 193
193 194
194 195
195 196
196 197
197 198
198 199
199