Page 73 of 262

On the road
Steering
Adjusting the steering wheel column
The steering wheel position can be continu
ously adjusted in height and distance.
Fig. 70 Lever under the stee ring column
• Push the lever~ fig. 70 -Arrow-~ .&,..
• Move the steering wheel to the desired po
sition.
• Push the lever against the steering column
until it locks.
There must be at least 10 inches (25 cm) be tween your chest and the center of the steer
ing wheel. If you cannot sit more than 10 in
ches (25 cm) from the steering wheel, see if
adaptive equipment is available to help you
reach the pedals and increase the distance
from the steering wheel.
For detailed information on how to adjust the
driver's sea t, see
Q page 56 .
A WARNING
Improper use of steering wheel adjust
ment and improper seating position can
cause serious personal injury.
- Adjust the steering wheel column only
when the vehicle is not moving to pre
vent loss of vehicle control.
- Adjust the driver's seat or steering wheel so that there is a minimum of 10 inches
(25 cm) between your chest and the
steering wheel
~page 91, fig. 91. If
you cannot maintain this minimum dis
tance, the airbag system cannot protect
you properly.
On the road 71
-If physical limitations prevent you from
sitt ing 10 inches (25 cm) or more from
the steering wheel, check with your au
thorized Audi dealer to see if adaptive equipment is ava ilable .
- If the steering wheel is aligned with your
face, the supplemental dr iver 's airbag
cannot provide as much protection in an
accident. Always make sure that the
steering wheel is al igned with your
chest .
-Always hold the steer ing wheel w ith your
hands at the 9 o'clock and 3 o'clock posi
tions to reduce the risk of persona l injury
if the driver's airbag deploys .
- Never hold the steering wheel at the 12
o'clock position or with your hands inside
the steering wheel rim or on the steering
wheel hub. Holding the steering wheel
the wrong way can cause serious injuries
to the hands, arms and head if the driv
er's airbag deploys.
Ignition lock and ignition switch
Ignition lock
The ignition key starts or stops the engine.
Fig. 71 Ignit ion lock posit ions
Ignition off @
In position ~ fig. 71 @both the ignition and
engine are off, and the steering is locked .
To
lock the steering after you have removed
the ignition key , turn the steering wheel in ei
ther direction until you hear it lock into place .
You should always lock the steering whenever ..,.
Page 74 of 262

72 On the road
you leave your veh icle . This makes a vehicle
theft even more difficult ¢ .&. .
Ignition ke y saf ety lock
After swi tching off the ignition, the ig nit ion
key can on ly be removed from the ign it ion
lock when the se lector lever is in the "P"
(Park) position . After you have removed the
key, the selector lever is locked and cannot be
moved.
Ignition on @
If it is diffic ult to turn the key after you have
inserted it into the ignition lock, turn the
steering wheel back and forth. This will take
the load
off the steering lock mechanism and
you will be able to turn the key freely and
start the engine.
Starting the engine @
In this position the engine starts . While the
engine is starting, the power supply to the headlights and other e lectrica l consumers is
temporari ly interrupted to conserve battery
power. After the engine has started, release
the key and it will return to posit ion
(D .
Before the starter can be operated again the
key must be turned back to position @. The
non -repeat loc k prevents you from damaging
the starter when the engine is runn ing .
A WARNING
-Never remove the key from the ign ition
lock whi le the vehicle is moving. The
steeri ng wheel will lock causing loss of
c ontrol.
- If you have to leave your vehicle -even
for just a m inute -always remove t he ig
nition key and take it with you. This is es
pecially important if you a re going to
leave ch ildren behind in the vehicle. The
children co uld start the engine or use
other vehicle controls. Unsupervised use
of vehicle controls (for examp le, power
windows) can cause serious personal in
jur ies .
(!) Tips
If the vehicle battery has been disconnect
ed and then reconnected, then you must
l eave the key in position
(D for about 5
seconds before you can start the engine.
Starting and stopping
the engine
Starting the engine
The engine can only be started with an origi
nal Audi key.
.,. Set the park ing brake.
.,. Move the se lector lever to the neutral posi
tion (automatic transmission): selector lever
in
P or N) ¢ .&_ .
.,. On vehicles with manua l transmission, fully
depress the clutch pedal.
.,. Turn the ignition key to pos it ion @
¢ page 71, fig . 71 -do not depress the gas
pedal when starting the engine!
.,. Let go of the key as soon as the engine
starts.
A cold engine may at first be loud after it has
been sta rted. This is due to the hydrau lic
valves bu ild ing up the oil pressure. This nor
mal and no need for co nce rn .
If the engine does not start immediately, stop
trying after 10 seconds and then try to restart
the engine abou t 30 seconds late r.
A WARNING
Neve r star t or let the eng ine run in a con
f ined or enclosed area . Exhaust fumes
from the engine contain carbon monoxide,
a colorless and odor less gas . Ca rbon mon
oxide can be fatal if inhaled.
- Never leave the engine id ling unattend
ed. An unattended veh icle w ith a runn ing
engine poses a danger of personal injury
or theft.
Page 75 of 262

CD Note
-Avoid high engine speeds, fast accelera
tion or heavy engine loads whi le the en
gine is still cold. This could damage the
engine.
- The engine cannot be started by pushing or towing the veh icle.
@) For the sake of the environment
To avoid unnecessary engine wear and to
reduce exhaust emissions, do not let your
veh icle stand and warm up. Be ready to
drive off immediately after starting your
veh icle. Maintain moderate speed until the
eng ine is completely warm . Remember,
the engine performs best at operating
temperature .
Stopping the engine
~ Turn the ign ition key to position @
~page 71, fig. 71.
_& WARNING
-Never turn off the engine before the ve
hicle has come to a complete stop. The
full function of the brake booster and the
power steering is not guaranteed . You
must use more force to turn or brake if
necessary. Because you cannot steer and
brake as you usually would, this could
lead to crashes and serious injur ies.
- The radiator fan can continue to run for
up to 10 minutes even after you have
turned
off the engine and removed the
ignition key . The radiator fan can also
turn on again if the engine coolant heats
up because of intense sunlight or heat
build-up in the engine compartment.
CD Note
Do not stop the engine immed iate ly after
hard or extended driving. Keep the engine
running for approximately two minutes to
prevent excessive heat build-up.
On the road 73
Parking brake
Parking brake
When the parking brake is set, it prevents the
vehicle from rolling away unintentionally .
Fig. 72 Center console: Parki ng b rake set
Setting the parking brake
~ Pull the park ing brake lever all the way up.
Releasing the parking brake
~ Pull the parking brake lever up slightly and
press the release button at the same time
~ fig. 72 -arrow-.
~ Keep the release button pressed and lower
the parking brake~&_ .
If you should drive
off with the parking brake
still set, a warning tone will sound and the
follow ing will appear in the instrument clus
ter to rem ind you to release the parking
brake:
Handbrake is applied
The parking brake warning comes on only af
ter you have driven for longer than 3 seconds
and faster than 5 mph (5 km/h) .
The parking brake warning light_
(USA)/ . (CON) illuminates when the park
ing brake is set and you switch on the ignition .
A WARNING
Always re lease the park ing brake com -
pletely. A partially engaged brake will
overheat the rear brakes, reduce their ef
fectiveness and cause excessive wear. This
could lead to brake failure and an accident. .,.
Page 76 of 262

74 On the road
Only afte r the vehic le has come to com
p lete stop, should you f irm ly set the park
ing brake and either move the gearshift
lever into 1st. gear (manual transm iss ion)
or move the selector lever into "P" (Auto
mat ic transm ission).
Parking
Parking
.,. Stop the veh icle using the brake pedal.
.,. Set the parking brake firmly .
.,. Switc h off the eng ine.
.,. Move t he selecto r lever in to the P position
(autom atic tr an smi ssio n) or move the gear
shift lever into 1st . gear
(manual t ransmi s
sion ).
.,. Remove the ign ition key from the ignit ion
lock.
In addition on incline s and grad es
.,. Turn the steering whee l so that your vehicle
wi ll ro ll against the curb in case it should
start to move.
A WARNING
This is how you can reduce the risk of in
jury when leaving your veh icle.
- Never park the vehicle where it can come in contact with dry grass, sp illed fuel or
any other flammable mater ials .
- Never allow anyone - especially small
children -to remain in the vehicle when
it is locked. Locked doors make it more
difficult for rescuers to access the pas
senger compartment in the event of an
emergency. Danger to life!
- Never leave children unsupervised in the
vehicle. Children could re lease the park
ing brake o r move the gea rshift lever out
of gear. The vehicle could start to roll
away and cause an accident .
- No matter what the season is, the tem
perature in a parked vehicle can reach
dangerous levels .
Starting on hills
Applies to vehicles: wi th hill hold assist
Hill ho ld assist makes it easier to start on
hills.
T he system is activated when the bra ke peda l
is depressed
for a few sec ond s.
After releasing the brake pedal, the brake
power is held for a
brief moment to p reven t
the vehi cle from rolling back when s tarti ng. At
th is time, you can easi ly beg in to move your
vehicle .
A WARNING
- If you did not begin moving immediate ly
after releasing the brake pedal, under
certain circumstances, the vehicle would
begin to roll backward. Depress the
brake peda l immediately or engage the
hand brake.
- Should the engine stall, depress the
brake peda l immediately or engage the
hand brake .
- In order to prevent the vehicle from roll ing back unintentionally when starting in
stop-and-go traffic, keep the brake pedal
depressed for a few seconds before driv
i n g off.
@ Tips
You can find o ut if yo ur vehicle is equ ipped
with "Hill hold ass ist" at an authorized
Audi dealersh ip.
Speed warning system
Overview
The speed warning system helps you to keep
your driving speed below a set speed limit.
The speed warning system warns the driver if
he exceeds a previous ly stored maximum
speed. A warning tone will so und as soon as
the vehicle speed exceeds the set speed by
about 3 mph (3 km/h). At the same time, a
warning symbol appears in the display. .,,.
Page 77 of 262

The speed warning system has two warning
thresholds
that function independently of
each other and that have somewhat different
purposes:
Speed warning 1
You can use speed warn ing 1 to set the maxi
mum speed while you are driving. This setting
will remain in effect until you turn
off the igni
tion, assuming that you have not changed or
reset the setting.
The speed warning symbo l
(mj (USA models)/
(SJ (Canada models) in the warning 1 display
appears when you exceed the maximum
speed.
It goes out when the speed falls below
the stored max imum speed.
The speed warning symbo l wi ll also go out if
the speed exceeds the stored maximum speed
by more than about 2S mph (40 km/h) for at
least 10 seconds. The stored maximum speed
is deleted.
Setting speed warning l <=:> page
75.
Speed warning 2
Stor ing warn ing 2 is recommended if you al
ways want to be reminded of a certa in speed,
for example when you are traveling in a coun
try that has a general maximum speed limit,
or if you do not want to exceed a spec ified
speed for winter tires.
The speed warning 2 symbol,
(zj
els)/
(•j (Canada models) appears in the dis
p lay when you exceed the stored speed lim it.
Unlike warning 1, it will not go out until the
vehicle speed drops below the stored speed limit .
Sett ing speed warning 2 <=:>page 76.
@ Tips
Even though your vehicle is equipped with
a speed wa rning system, you should sti ll
watch the speedometer to make sure you
are not driving faster than the speed lim it.
On the road 75
Speed warning 1: setting a speed limit
Warning threshold 1 is set by the button.
Fig. 73 Sect ion of instrument clus ter: Set/C heck but ·
ton
Storing the maximum speed
.,. Drive at the des ired maximum speed .
.,. Press the knob buttonr=:>fig .
73 unti l the
speed warning symbol
[iJ (USA models)/ ~
(Canada models) appears.
Resetting the maximum speed
.,. Drive the vehicle at a speed of at least
3 mph (5 km/h)
.,. Press the knob for more than 2 seconds.
The speed warning symbol
(G:l (USA models)/
i•j rcanada models) will appear briefly in the
display when you release the button to indi
cate that the maximum speed has been stored
successfully .
The maximum speed remains stored until it is
changed by pressing the button aga in brief ly
or until it is deleted by a lengthy push on the
button.
Page 78 of 262

76 On the road
Speed warning 2: setting a speed limit
Switches in the wiper arm are used to operate
warning threshold
2 .
'----I ®
Fig. 74 Wiper lever: Tr ip computer con trols
To store maximum speed
> Turn off the ignit ion.
> Briefly press the button in the instrument
cl uster ¢
page 75, fig. 73. The odometer
and the digital clock are now illuminated .
> Press the button for at least 2 seconds. The
currently stored maximum speed appears in
the display
or the crossed out symbol for
warning threshold 2, if no max imum speed
was set previously.
> Press the function selector sw itch in the
wipe r lever @¢
fig. 74 up or down to
change the set value. Values run up or dow n
i n steps of 6.2 mph (10 km/h).
To delete maximum speed
> Turn off the ignit ion .
> Briefly press the button in the instrument
cluster ¢
page 75, fig . 73. T he odometer
and the digital clock are now illumi nated.
> Press the button for at least 2 seconds . Th e
cu rrently stored maxim um speed appears in
the display.
> Press the reset button in the wiper lever ®
¢fig . 74 until the crossed out speed warn
ing symbol for warning threshold 2 appears
i n the display.
A few seconds after the adjustment is com
pleted, the illumination for the odometer and
the dig ital clock will go out.
(D Tips
This warning threshold can a lso be con
trolled thro ugh the tr ip computer
¢ page 25, Navigating the menu.
Cruise control
Switching the system on
The cruise control system makes it possible to
drive at a constant speed starting at 20 mph (30 km/h) .
®-
Fig. 75 Contro l leve r with set b utton
Fig. 76 D isplay : Se lecte d speed
> Pull the lever to position (D ¢ fig. 75 to
switch the system on.
> Dr ive at the speed you w is h to set.
> Press button @ to set that speed.
.., ....
i
The display ¢ fig. 76 will show the set speed .
The display may vary depending on the type of
display in your vehicle. The indicator light
M;ll)~14 (US model)/ . (Canadian model) will
also light up in the instrument cluster .
A WARNING
- Always pay attention to traffic even when
the cruise control is switched on. You are
always responsib le for your speed and
Page 79 of 262

the distance between your vehicle and
other vehicles.
- For safety reasons, the cruise control
should not be used in the city, in stop
and-go traff ic, on twisting roads and
when road conditions are poor (such as
ice, fog, grave l, heavy rain and hydro
planing) -risk of acc ident .
- Turn off the cruise control temporari ly
when entering turn lanes, highway exit
lanes or in construction zones .
- Please note that inadvertent ly "rest ing"
yo ur foot on the accelerator peda l causes
the cruise control not to brake. This is
because t he cr uise con trol is overridden
by the driver's acce lerat ion.
(D Tips
- Vehicles with manual t ransmission: You
can attain the set speed only if the cur
r ently e ngaged gear a llows i t and the en
gine i s not stressed. Shift ing to a h igher
or lower gear p romp tly will allow t he en
gine to run smoothly.
- The cruise cont ro l cannot main tain a
constant speed when driving downhill.
The vehicle will accelerate unde r its own
weig ht. Downsh ift to a lower gear or use
the brakes to slow down.
Changing speed
"' Press lever in the 0 or 0 direction
i=> page 76, fig . 75 to increase or decrease
you r speed .
"' Re lease the lever to save that speed.
You can a lso press the accelerator pedal down
to inc rease your speed, e.g . if yo u want to
pass someone . The speed you saved ea rlier
will resume as soon as you release the acceler
ator peda l.
If , however, you exceed your saved speed by
5 mph ( 10 km/h) for longe r than 5 minutes,
the cruise cont ro l w ill tu rn off tempora rily .
The symbol will go o ut but the saved speed
will be retained .
On the ro ad 77
Presetting your speed
You can preset your desired speed while the
vehicle is not moving.
"' Turn on the ignition.
"' Pull lever into position
(D c:> page 76,
fig . 75.
"' Press the leve r in the 0 or 0 direction to
increase or decrease your speed.
"' Re~asethelevertosave thatspeed.
This function makes it possible, for example,
to save the speed you want before dr iving on
the highway. Once on the h ighway, act ivate
t h e cr uise con trol by pulling the lever toward
(D .
Switching the system off
Temporary deactivat ion
"' Press the brake pedal, or
"' Keep the cl utch pedal pressed down longer ,
or
"' Press the lever into position @(not clicked
into place)
¢page 76, fig . 75, or
"' Drive for longer than 5 minutes at more
than 5 mph (10 km/h) above the stored
speed.
Switching off completely
"' Press lever into position @(clicked into
place), or
"' Switch the ignit io n off.
The system retains the saved speed if you de
activate the cruise control temporar ily. To re
sume the saved speed, re lease the brake or
clutch pedal and pull the lever to position
(D.
Switching the ignit ion off erases the saved
speed.
A WARNING
You shou ld only return to the saved speed
if it is not too fast for the current traffic
conditions -ris k of an accident!
Page 80 of 262

78 On the road
Audi magnetic ride
Applies to vehicles: with mag netic r ide
Damping can be adjusted to the driver's pref
erence and it adapts automatically to the cur
rent driving situation.
Fig. 77 Cente r console: Switch for Audi magnetic r ide
.,. Press the switch ~ fig . 77 to turn spo rt set-
t ing o n or off.
Aud i magnetic ride is an electron ically con
trolled damp ing system . Th is chassis system
assists the driver by adapting to the par ticular
situatio n th rough imper cep tible con trol p roc
esses. The
damping provides individual mod u
l ation of damping forces. For example, with
dampi ng cha racterist ics set to p rovide greater
comfort, damping is set somewhat harder for
a brief period only as required, when rounding
a curve and when braking.
Standard setting
Select the standard sett ing if you prefer a sus
pension setting emphasizing comfort.
Sport setting
Select the sport setti ng if you prefe r a sporty
suspe nsio n setting . The LED in the sw itch
8
comes on to indicate spo rt setting .
@ Tips
The w arning/indicator light 8 in the in stru
ment cluster comes on in the even t of a
malfunction . Drive to the closest au thor
ized Audi dealer as soon as possible and
have the malfunction repaired.
Sport mode
Applies to vehicles: wit h Sport but ton
F ig . 7 8 Button in th e ce nte r console
.,. To switch sport mode on, press the button
in th e cente r console. The indicator light
t ur ns on .
.,. To swi tch spor t mo de off, press the bu tto n
in the center co nsole again. The indicator
light turns on .
A mo re agile and spo rty d riv in g style is po ssi
ble when driving the vehicle in "sport mode".
T his mode affec ts thrott le response and the
sound of the engine and the damping charac
teristics of the Audi magnetic ride for dynamic
s uspension tuning .
@ Tips
If there is a malfunct ion in the retracta ble
rear spoiler* or the Audi magnetic ride*, it
may not be poss ible to activate sport
mode.
Acoustic parking system
Rear acoustic park assist
Applies to vehicles: wit h 4-channel acoustic park assist
Acous tic park assist gives a warning about
obstacles behind the vehicle.
Description
T he rea r acousti c park ass ist (4-cha nnel
a coustic park ass ist) determines the distance
of the vehicle from an obstacle using ultra
son ic sensors. The sensors are in the rear
bumper. The volume a nd the pitch of the
 1
1 2
2 3
3 4
4 5
5 6
6 7
7 8
8 9
9 10
10 11
11 12
12 13
13 14
14 15
15 16
16 17
17 18
18 19
19 20
20 21
21 22
22 23
23 24
24 25
25 26
26 27
27 28
28 29
29 30
30 31
31 32
32 33
33 34
34 35
35 36
36 37
37 38
38 39
39 40
40 41
41 42
42 43
43 44
44 45
45 46
46 47
47 48
48 49
49 50
50 51
51 52
52 53
53 54
54 55
55 56
56 57
57 58
58 59
59 60
60 61
61 62
62 63
63 64
64 65
65 66
66 67
67 68
68 69
69 70
70 71
71 72
72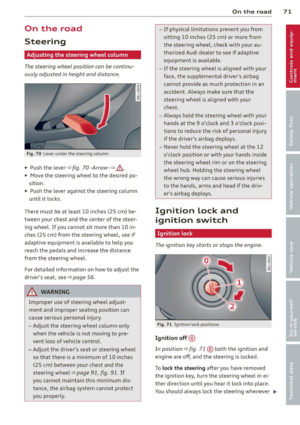 73
73 74
74 75
75 76
76 77
77 78
78 79
79 80
80 81
81 82
82 83
83 84
84 85
85 86
86 87
87 88
88 89
89 90
90 91
91 92
92 93
93 94
94 95
95 96
96 97
97 98
98 99
99 100
100 101
101 102
102 103
103 104
104 105
105 106
106 107
107 108
108 109
109 110
110 111
111 112
112 113
113 114
114 115
115 116
116 117
117 118
118 119
119 120
120 121
121 122
122 123
123 124
124 125
125 126
126 127
127 128
128 129
129 130
130 131
131 132
132 133
133 134
134 135
135 136
136 137
137 138
138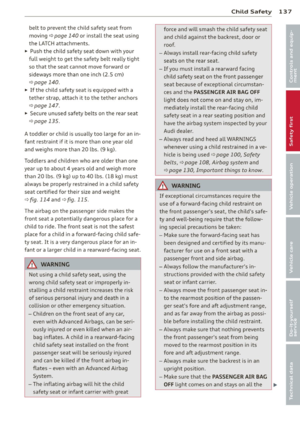 139
139 140
140 141
141 142
142 143
143 144
144 145
145 146
146 147
147 148
148 149
149 150
150 151
151 152
152 153
153 154
154 155
155 156
156 157
157 158
158 159
159 160
160 161
161 162
162 163
163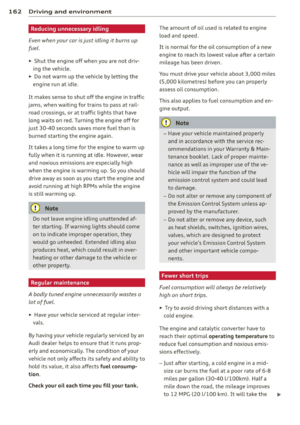 164
164 165
165 166
166 167
167 168
168 169
169 170
170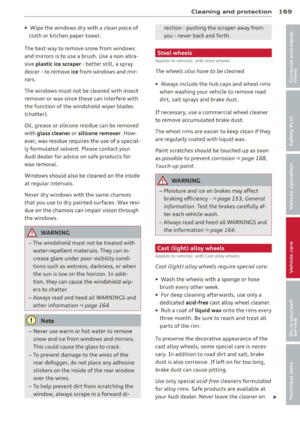 171
171 172
172 173
173 174
174 175
175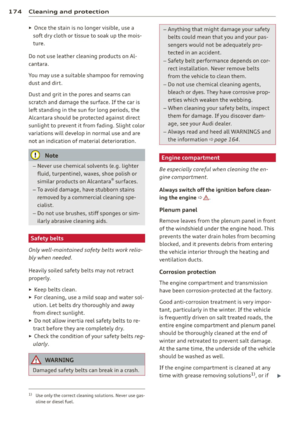 176
176 177
177 178
178 179
179 180
180 181
181 182
182 183
183 184
184 185
185 186
186 187
187 188
188 189
189 190
190 191
191 192
192 193
193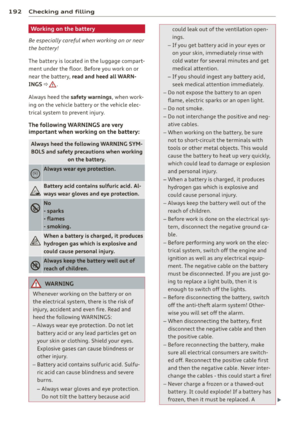 194
194 195
195 196
196 197
197 198
198 199
199 200
200 201
201 202
202 203
203 204
204 205
205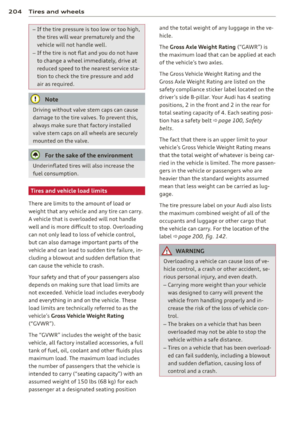 206
206 207
207 208
208 209
209 210
210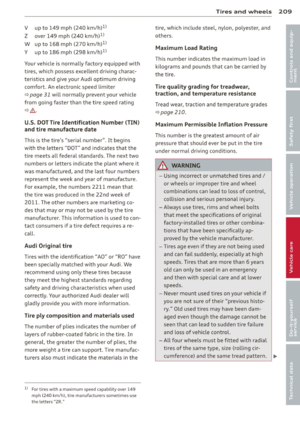 211
211 212
212 213
213 214
214 215
215 216
216 217
217 218
218 219
219 220
220 221
221 222
222 223
223 224
224 225
225 226
226 227
227 228
228 229
229 230
230 231
231 232
232 233
233 234
234 235
235 236
236 237
237 238
238 239
239 240
240 241
241 242
242 243
243 244
244 245
245 246
246 247
247 248
248 249
249 250
250 251
251 252
252 253
253 254
254 255
255 256
256 257
257 258
258 259
259 260
260 261
261