Page 105 of 248
 Owners Manual WARNING
● The parking aid is not a substitute for the driver paying proper attention
and it is always the drivers responsibility to take care when parking the vehi-
cle or carrying out similar mano")
WARNING
● The parking aid is not a substitute for the driver paying proper attention
and it is always the driver's responsibility to take care when parking the vehi-
cle or carrying out similar manoeuvres.
● You should therefore satisfy yourself, before reversing, that there is no
small obstacle, such as a rock, thin post, trailer drawbar etc., behind your vehi-
cle. Such an obstacle might not be within the range detected by the sensors.
● Under certain circumstances, surfaces of certain objects and types of
clothing cannot reflect the signal of the parking aid. Thus, these objects or
people who wear such clothing are not recognised by the sensors of the park-
ing aid. Note
● The parking aid does not operate if you are towing a trailer (applies to models
which feature a factory-fitted towing device).
● If a warning signal sounds for about 3 seconds after switching the ignition on
and engaging reverse gear, and there is no obstacle close to your car, this indi-
cates a system fault. Have the fault rectified by a specialist workshop.
● The sensors must be kept clean and free of ice to enable the parking aid to
operate properly.
Front and rear parking aid The parking aid provides a warning of obstacles in front and behind
the vehicle. Fig. 103 Activating the parking aid/detection range of the front sensors The audible parking aid determines the distance between the front or rear bump-
er and an obstacle with the aid of ultrasound sensors. The sensors are integrated
in the front and rear bumper. The signal tones for the front parking aid sound
higher as standard than for the rear parking aid. The tones of the parking aid can
be adapted in the menu of the Information display ⇒ page 19.
Range of sensors
The distance warning begins at a distance of about 120 cm from the obstacle in
front of the vehicle (area A ⇒
fig. 103) and about 160 cm from the obstacle behind
the vehicle (area A ⇒ fig. 102
). The interval between the warning signals becomes
shorter as the clearance is reduced.
A continuous tone sounds from a distance of approx. 30 cm (area B ) - danger
area. From this moment on do not continue driving! If the vehicle is equipped with
a factory-fitted towing device, the border of the danger area starts -
continuous
tone - 5 cm further away from the vehicle. The vehicle can be extended through
an installed detachable towing device.
On factory-fitted radio navigation systems and car stereos, the distance to the ob-
struction can also be shown graphically in the display. On vehicles with a factory-
fitted towing device, the rear sensors are deactivated when towing a trailer. The
driver is informed about this by a graphic display (vehicle towing a trailer) in the
radio or the radio navigation display. In some factory fitted radios or radio naviga-
tion systems, you can configure the system to reduce the playback volume when
the parking aid is active, see the owner's manual for the radio or radio navigation
system. This makes it easier to hear the parking aid.
Activating
The parking aid is activated when the reverse gear is engaged and the ignition is
switched on or by pressing the button ⇒ fig. 103 - left, the symbol lights up in
the button. The activation is confirmed by a brief acknowledgement signal.
Deactivating
The parking aid is deactivated after pressing the button
⇒
fig. 103 - left, or at a
speed of more than 10 km/h - the symbol in the button is no longer illuminated. £ 103
Starting-off and Driving Using the system Safety Driving Tips General Maintenance Breakdown assistance Technical data
Page 106 of 248
 Owners Manual WARNING
● The parking aid is not a substitute for the driver paying proper attention
and it is always the drivers responsibility to take care when reversing the ve-
hicle or carrying out similar ma")
WARNING
● The parking aid is not a substitute for the driver paying proper attention
and it is always the driver's responsibility to take care when reversing the ve-
hicle or carrying out similar manoeuvres.
● You should therefore satisfy yourself, before reversing, that there is no
small obstacle, such as a rock, thin post, trailer drawbar etc., in front or behind
your vehicle. Such an obstacle might not be within the range detected by the
sensors.
● Under certain circumstances, surfaces of certain objects and types of
clothing cannot reflect the signal of the parking aid. Thus, these objects or
people who wear such clothing are not recognised by the sensors of the park-
ing aid. Note
● Only the front parking aid operates if you are towing a trailer (applies only to
models which feature a factory-fitted towing device).
● If a warning signal sounds for about 3 seconds after activating the system and
there is no obstacle close to your car, this indicates a system fault. The fault is
confirmed additionally when the symbol flashes in the button ⇒ fig. 103 - left.
Have the fault rectified by a specialist workshop.
● The sensors must be kept clean and free of ice to enable the parking aid to
operate properly.
● If the parking aid is activated and the selector lever of the automatic gearbox
is in the position P , warning signal indicates interruption (vehicle can no longer
move).
Cruise control system (CCS) Introduction The cruise control system (CCS) maintains a constant speed, more than 30 km/h
(20 mph), once it has been set, without you having to depress the accelerator
pedal. This is only possible within the range which is permitted by the power out-
put and braking power of the engine. The cruise control system makes it possible
- particularly on long journeys - for you to rest your
“accelerator foot”. WARNING
● For safety reasons, the cruise control system must not be used in dense
traffic or on unfavourable road surfaces (such as icy roads, slippery roads,
loose gravel) - risk of accident!
● In order to prevent unintentional use of the cruise control system, always
switch off the system after use. Note
● Models fitted with a manual gearbox: Always depress the clutch pedal if you
switch on the cruise control system when the gearbox is in Neutral! Otherwise the
engine can rev up unintentionally.
● The cruise control system is not able to maintain a constant speed when driv-
ing on steep downhill sections. The weight of the vehicle increases the speed at
which it travels. One should shift down in good time to a lower gear or slow the
vehicle down by applying the foot brake.
● It is not possible on vehicles fitted with an automatic gearbox to switch on the
cruise control system if the selector lever is in the position P, N or R.
Storing a speed Fig. 104 Operating lever: Rocker button
and switch of the cruise control system
The cruise control system is operated by means of the switch A
⇒ fig. 104 and
the rocker button B in the left lever of the multi-functional switch.
– Press the switch A into the position ON.
– After the desired speed has been reached, press the rocker button B into the
SET position. £104
Starting-off and Driving
Page 107 of 248
 Owners Manual After you have released the rocker button
B out of the position SET
, the speed
you have just stored is maintained at a constant speed without having to depress
the accelerator.
You can increase the")
After you have released the rocker button
B out of the position SET
, the speed
you have just stored is maintained at a constant speed without having to depress
the accelerator.
You can increase the speed by depressing the accelerator. Releasing the accelera-
tor will cause the speed to drop again to the set speed.
This does not apply, however, if you drive at a speed which is more than 10 km/h
higher than the set speed for a period of longer than 5 minutes. The stored speed
will be cancelled in the memory. You then have to re-store the desired speed.
One can reduce the speed in the usual manner. The system is switched off tempo-
rarily by actuating the brake or clutch pedal ⇒ page 105
. WARNING
First ensure that it is not too high for the traffic conditions which exist at that
moment before resuming the stored speed.
Changing a stored speed You can also change the speed of the vehicle without depressing
the accelerator.
Faster
– You can increase the stored speed without depressing the accelerator, by
pressing the rocker button B
⇒
fig. 104
in the RES position.
– The speed of the car will increase continuously if you hold the rocker button
pressed in the RES position. Once the car has reached the desired speed, re-
lease the rocker button. The set speed is then stored in the memory.
Slower
– You can decrease the stored speed by pressing the rocker button B in the
SET position.
– Holding down the rocker button pressed in the SET position will cause the
speed of the vehicle to reduce continuously. Once the car has reached the de-
sired speed, release the rocker button. The set speed is then stored in the
memory.
– If you release the rocker button when the car is travelling at a speed of less
than 30 km/h, the speed is not stored, the memory is erased. It is then neces-
sary to again store the speed with the rocker button B in the position
SET
after an increase in speed of the vehicle to more than 30 km/hour. Switching off the cruise control system temporarily –
You can switch off the cruise control system temporarily by depressing the
brake pedal or clutch pedal, on vehicles fitted with an automatic gearbox only
with the brake pedal.
– You can switch off temporarily the cruise control system, if you press the
switch A in the middle position.
The set speed remains stored in the memory.
The Resumption of the stored speed is achieved by releasing the brake or clutch
pedal, on vehicles fitted with automatic gearbox only after releasing the brake
pedal and after shortly pressing the rocker button B
⇒ fig. 104 into the position
RES. WARNING
First ensure that it is not too high for the traffic conditions which exist at that
moment before resuming the stored speed.
Switching off the cruise control system completely –
Press the switch A
⇒
fig. 104
to the right into position OFF.
“(START-STOP)” Fig. 105 Dash panel: START-STOP Sys-
tem button
The “START-STOP” system helps you to save fuel while at the same time reducing
harmful exhaust emissions and CO 2 emissions.
£ 105
Starting-off and Driving Using the system Safety Driving Tips General Maintenance Breakdown assistance Technical data
Page 108 of 248
 Owners Manual The function is automatically activated each time the ignition is switched on.
In the start-stop mode, the engine automatically switches to the vehicles idle
phase, e.g. when stopped at traffic light")
The function is automatically activated each time the ignition is switched on.
In the start-stop mode, the engine automatically switches to the vehicle's idle
phase, e.g. when stopped at traffic lights.
Information regarding the current state of the
“START-STOP” system is indicated
in the display of the instrument cluster.
Automatic engine shut down (stop phase)
– Stop the vehicle (where necessary, apply the handbrake).
– Take the vehicle out of gear.
– Take your foot off the clutch.
Automatic engine restart (start phase).
– Push down on the clutch.
Switching the
“START-STOP” system on and off
You can switch the “START STOP” system on/off by pressing the button ⇒ fig. 105.
When start-stop mode is deactivated, the warning light in the button lights up.
If the vehicle is in the stop phase when manually switching off the system, the en-
gine starts immediately.
The “START-STOP” system is very complex. Some of the procedures are hard to
check without servicing. The general conditions for the proper functioning of the
“START-STOP” system are listed in the following overview.
Conditions for the automatic engine shut down (stop phase) The gearshift lever is in Neutral.
The clutch pedal is not pressed!
The driver has fastened the seat belt.
The driver's door is closed.
The bonnet is closed.
The vehicle is at a standstill.
The factory-fitted towing device is not electrically connected to a trailer.
The engine is at operating temperature.
The charge state of the vehicle battery is sufficient.
The stationary vehicle is not on a steep slope or a steep downhill section.
The engine speed is less than 1200 1/min. The temperature of the vehicle battery is not too low or too high.
The pressure in the brake system is sufficient.
The difference between the outdoor- and the set temperature in the interior is
not too great.
The vehicle speed since the last time the engine was switched off was greater
than 3 km/h.
No cleaning of the diesel particle filter takes place
⇒ page 23 The front wheels are not turned excessively (the steering angle is less than 3/4
of a steering wheel revolution). Conditions for an automatic restart (start phase)
The clutch is pressed.
The max./min. temperature is set.
The Defrost function for the windscreen is switched on.
A high blower stage has been selected.
The “START STOP” button is pressed.
Conditions for an automatic restart without driver intervention
The vehicle moves at a speed of more than 3 km/h.
The difference between the outdoor- and the set temperature in the interior is
too great.
The charge state of the vehicle battery is not sufficient.
The pressure in the brake system is not sufficient.
Messages in the instrument cluster display (valid for vehicles without
Information display) ERROR: START STOP
Error in the START-STOP system
START STOP NOT POSSIBLE Automatic engine shut down is not
possible
START STOP ACTIVE Automatic engine shut down (stop
phase)
SWITCH OFF IGNITION
Switch off the ignition
START MANUALLY
Start the engine manually
£106
Starting-off and Driving
Page 109 of 248
 Owners Manual WARNING
● The brake servo unit and power steering only operate if the engine is run-
ning.
● Never let the vehicle roll with the engine switched off. CAUTION
If the “START-STOP” system is used")
WARNING
● The brake servo unit and power steering only operate if the engine is run-
ning.
● Never let the vehicle roll with the engine switched off. CAUTION
If the “START-STOP” system is used at very high outside temperatures over a very
long period of time, the vehicle battery can be damaged. Note
● Changes to the outdoor temperature can have an effect on the internal tem-
perature of the vehicle battery even after several hours. If the vehicle remains
outdoors for a long time in minus temperatures or in direct sunlight, it can take
several hours until the internal temperature of the vehicle battery reaches a suita-
ble temperature for proper operation of the
“START STOP” system.
● In some instances it may be necessary to start the engine manually with the
ignition key (e.g. when the seat belt is not inserted or the driver's door is opened
for more than 30 seconds). Follow the messages in the instrument cluster display.
● If the Climatronic is running in automatic mode, under certain conditions, the
engine may not switch off automatically. 107
Starting-off and Driving Using the system Safety Driving Tips General Maintenance Breakdown assistance Technical data
Page 110 of 248
 Owners Manual Automatic gearbox
Information for driving with the 6-speed automatic
gearbox The maximum speed is reached in the 5th gear. The 6th gear serves as an eco-
nomic driving programme, which is intended to")
Automatic gearbox
Information for driving with the 6-speed automatic
gearbox The maximum speed is reached in the 5th gear. The 6th gear serves as an eco-
nomic driving programme, which is intended to reduce the fuel consumption.
Shifting up and down through the gears is performed automatically. You can also,
however, switch the gearbox over into the Tiptronic mode. This mode makes it
possible for you to also shift gears manually ⇒ page 112.
Starting-off and Driving
– Depress the brake pedal fully and keep it depressed.
– Press the Shiftlock button (button in handle of the selector lever), move the
selector lever into the desired position, e.g. D ⇒ page 110, and then release
the Shiftlock button.
– Wait a moment until the gearbox has shifted (a slight engagement nudge can
be felt).
– Release the brake pedal and depress the accelerator ⇒ .
Stop
– The selector lever position N does not have to be selected when stopping just
for a short time, such as at a cross roads. It is absolutely sufficient to hold the
stopped vehicle stationary by depressing the foot brake. The engine can, how-
ever, be allowed just to idle.
Parking
– Depress the brake pedal and hold it depressed.
– Apply the handbrake firmly.
– Press and Shiftlock button in the selector lever, move the selector lever to P
and then release the Shiftlock button.
The engine can only be started when the selector lever is in position P or N . If the
selector lever is not in the P or N positions when locking the steering, switching
the ignition on or off or when leaving the engine on, the following message will
appear in the Information display Move selector lever to position P/N! or, in the
instrument cluster display: P/N. It is sufficient to engage selector lever position
P when parking on a flat surface.
When parking on a slope you should first apply the handbrake firmly and then
move the selector lever into position P. This is to ensure that there is no excessive
pressure acting on the lock mechanism and that it is easier to subsequently move
the selector lever out of position P. If the selector lever is not in the P positin
when the driver's door is open and the ignition is switched off, or if it is not in the
P position when the ignition is switched off and the driver's door is opened, the
following message will appear in the Information display: Move selector lever to
position P! or, in the instrument cluster display: P. The message disappears af-
ter a few seconds by switching on the ignition or by moving the selector lever into
the position P .
If the selector lever position N is selected by accident while driving it is first nec-
essary to release pressure on the accelerator pedal and wait for idling speed of
the engine to be reached before engaging a drive position in the selector lever. WARNING
● Do not depress the accelerator when changing the position of the selector
lever if the car is stationary and the engine is running - risk of accident!
● Never move the selector lever into position R or P when driving - risk of an
accident!
● When the engine is running and the vehicle is stationary, it is necessary to
hold the car with the brake pedal in all the positions of the selector lever (ex-
cept P and N) since the power transmission is never completely interrupted,
also not when the engine is idling - the vehicle creeps.
Information for driving with the automatic gearbox
DSG The abbreviation DSG means Direct shift gearbox (Direct shift gear-
box).
Two independent clutches are needed for the power transmission between the
engine and the gearbox. These replace the torque converter of the conventional
automatic gearbox. Their shifting is matched in such a way that there are no jerks
when shifting the gear and the power transmission of the engine to the front
wheels is not interrupted. Shifting up and down through the gears is performed £108
Automatic gearbox
Page 111 of 248
 Owners Manual automatically. You can also, however, switch the gearbox over into the
Tiptronic
mode. This mode makes it possible for you to also shift gears manually
⇒ page 112.
Starting-off and Driving
– De")
automatically. You can also, however, switch the gearbox over into the
Tiptronic
mode. This mode makes it possible for you to also shift gears manually
⇒ page 112.
Starting-off and Driving
– Depress the brake pedal fully and keep it depressed.
– Press the Shiftlock button (button in handle of the selector lever), move the
selector lever into the desired position, e.g. D ⇒ page 110, and then release
the Shiftlock button.
– Release the brake pedal and depress the accelerator ⇒ .
Stop
– The selector lever position N does not have to be selected when stopping just
for a short time, such as at a cross roads. It is absolutely sufficient to hold the
stopped vehicle stationary by depressing the foot brake. The engine can, how-
ever, be allowed just to idle.
Parking
– Depress the brake pedal and hold it depressed.
– Apply the handbrake firmly.
– Press and Shiftlock button in the selector lever, move the selector lever to P
and then release the Shiftlock button.
The engine can only be started when the selector lever is in position P or N . If the
selector lever is not in the P or N positions when locking the steering, switching
the ignition on or off or when leaving the engine on, the following message will
appear in the Information display Move selector lever to position P/N! or, in the
instrument cluster display: P/N. At temperatures below -10 °C the engine can
only be started in the selector lever position P.
It is sufficient to engage selector lever position P when parking on a flat surface.
When parking on a slope you should first apply the handbrake firmly and then
move the selector lever into position P. This is to ensure that there is no excessive
pressure acting on the lock mechanism and that it is easier to subsequently move
the selector lever out of position P. If the selector lever is not in the P positin
when the driver's door is open and the ignition is switched off, or if it is not in the
P position when the ignition is switched off and the driver's door is opened, the
following message will appear in the Information display: Move selector lever to
position P! or, in the instrument cluster display: P. The message disappears af-
ter a few seconds by switching on the ignition or by moving the selector lever into
the position P . If the selector lever position
N is selected by accident while driving it is first nec-
essary to release pressure on the accelerator pedal and wait for idling speed of
the engine to be reached before engaging a drive position in the selector lever. WARNING
● Do not depress the accelerator when changing the position of the selector
lever if the car is stationary and the engine is running - risk of accident!
● Never move the selector lever into position R or P when driving - risk of an
accident!
● If you are stopping at a hill (downhill section), never try to hold the car sta-
tionary with the gear engaged by means of the “accelerator”, this means by
letting the clutch slip. This can lead to overheating of the clutch. If there is a
risk of overheating of the clutch due to overload, the clutch is opened auto-
matically and the vehicle rolls backward - risk of accident!
● If you must stop at a slope, depress and hold the brake pedal, so that you
can prevent the vehicle from rolling back. CAUTION
● The double clutch on the automatic gearbox DSG is equipped with an overload
protection. If you make use of the uphill function on a vehicle which is stationary
or driving slowly uphill, it will result in an increase of thermal stress of the clutch-
es.
● In the event that they overheat, the symbol appears in the information dis-
play with the warning text ⇒ page 29. In such a case bring the vehicle to a stop,
switch off the engine and wait until the warning light and the warning go out -
risk of gearbox damage! You can continue the trip as soon as the symbol and the
warning go out. 109
Automatic gearbox Using the system Safety Driving Tips General Maintenance Breakdown assistance Technical data
Page 112 of 248
 Owners Manual Selector lever positions
Fig. 106 Selector lever/information display: Selector lever positions
The current selector lever position is indicated in the information display of the in-
strument cluster")
Selector lever positions
Fig. 106 Selector lever/information display: Selector lever positions
The current selector lever position is indicated in the information display of the in-
strument cluster ⇒ fig. 106 - right. In the positions D and S the gear you have al-
ready engaged will be additionally displayed on the display.
P - Parklock
The driven wheels are locked mechanically in this position.
The Parklock must only be engaged when the vehicle is stationary ⇒ .
If you wish to move the selector lever into or out of this position, you must press
the Shiftlock button in the handle of the selector lever and at the same time de-
press the brake pedal.
If the battery is used, the selector lever cannot be moved out of the position P.
R - Reverse gear
Reverse gear must only be engaged when the vehicle is stationary and the engine
idling ⇒ .
The brake pedal must be depressed and at the same time the Shiftlock must be
pressed, if you wish to obtain the selector lever positions R, P or N.
When the ignition is switched on and the selector lever is in position R, the re-
verse lights will come on.
N - Neutral
The transmission is in Neutral in this position. The brake pedal must be depressed (if the lever is in its position for longer than 2
seconds) in order to move the selector lever out of the position
N into the position
D or R, with the ignition switched on, on a vehicle travelling at less than 5 km/
hour or on a stationary vehicle.
D - Position for driving forward
When the selector lever is in this position, the forward gears are shifted up and
down automatically in line with engine load, vehicle speed and the dynamic shift
programme.
You must depress the brake pedal if you wish to move into position D from N
when the vehicle is travelling at less than 5
km/hour or is stationary ⇒ .
Under certain circumstances (e.g. when driving in mountainous regions or when
towing a trailer) it may be beneficial to select the manual shift programme
⇒ page 112 for a short time in order to adapt the gearbox ratios manually to the
driving situations.
S - Position for sporty style of driving
Shifting up later into a higher gear makes it possible to fully exploit the power po-
tential of the engine. The gearbox also then shifts down at higher engine speeds
as in the position D .
The gearbox does not shift into the 6th gear in the position S, because the maxi-
mum speed is reached with the 5th gear 1)
.
The Shiftlock on the selector lever grip must be pressed when moving the selec-
tor lever out of the position D into the position S. WARNING
● Never move the selector lever into position
R or P when driving - risk of an
accident!
● When the engine is running and the vehicle is stationary, it is necessary to
hold the car with the brake pedal in all the positions of the selector lever (ex-
cept P and N) since the power transmission is never completely interrupted,
also not when the engine is idling - the vehicle creeps. £1)
Not valid for vehicles with automatic gearbox DSG. 110
Automatic gearbox
 1
1 2
2 3
3 4
4 5
5 6
6 7
7 8
8 9
9 10
10 11
11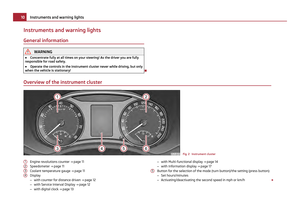 12
12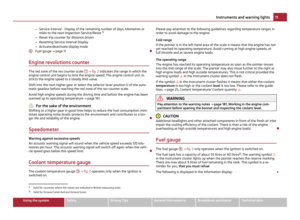 13
13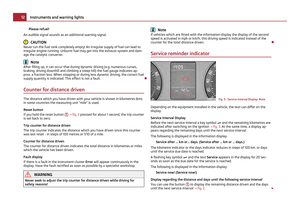 14
14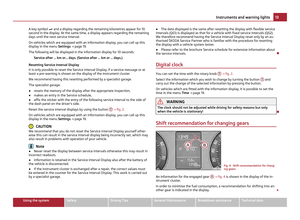 15
15 16
16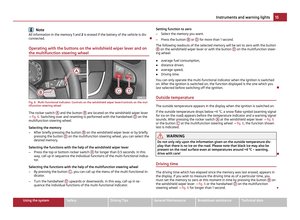 17
17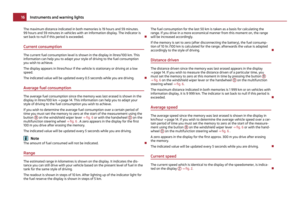 18
18 19
19 20
20 21
21 22
22 23
23 24
24 25
25 26
26 27
27 28
28 29
29 30
30 31
31 32
32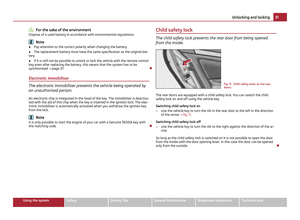 33
33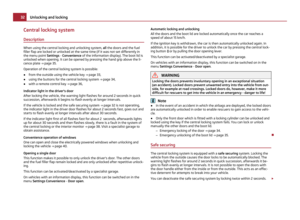 34
34 35
35 36
36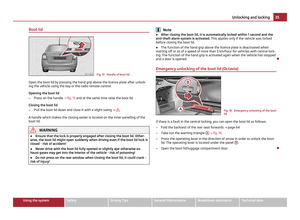 37
37 38
38 39
39 40
40 41
41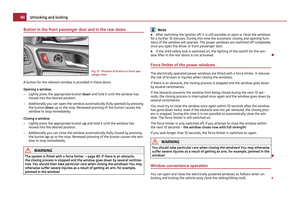 42
42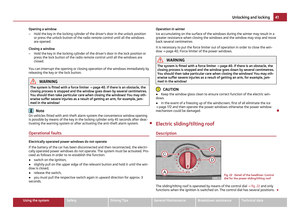 43
43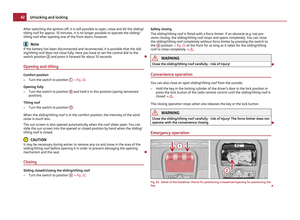 44
44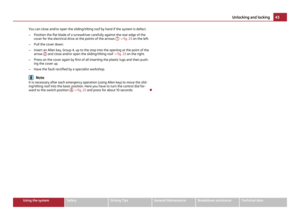 45
45 46
46 47
47 48
48 49
49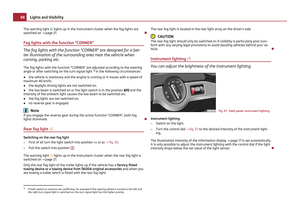 50
50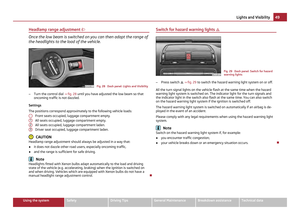 51
51 52
52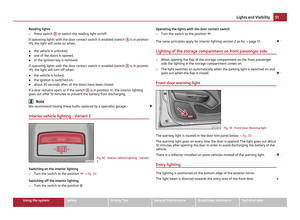 53
53 54
54 55
55 56
56 57
57 58
58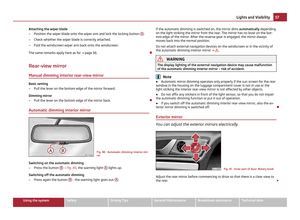 59
59 60
60 61
61 62
62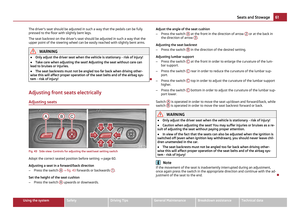 63
63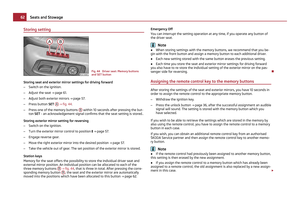 64
64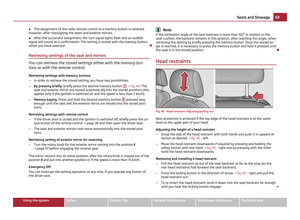 65
65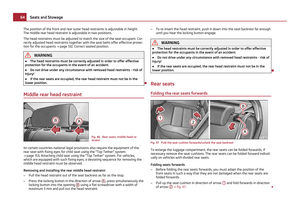 66
66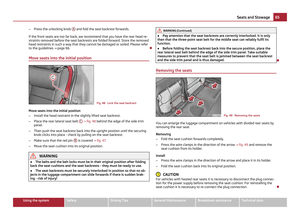 67
67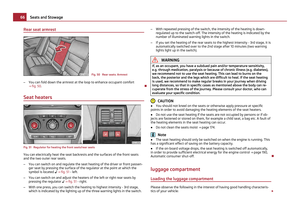 68
68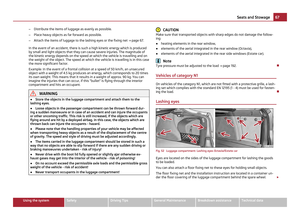 69
69 70
70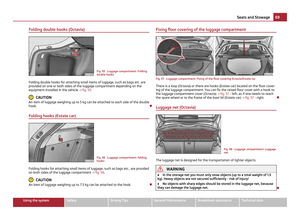 71
71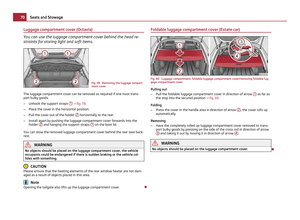 72
72 73
73 74
74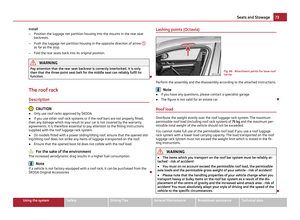 75
75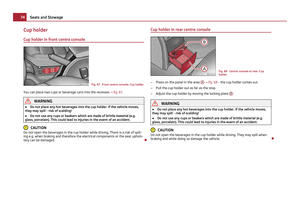 76
76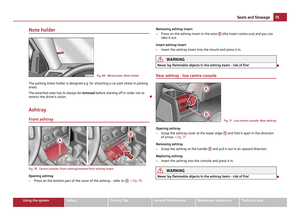 77
77 78
78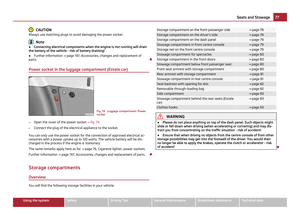 79
79 80
80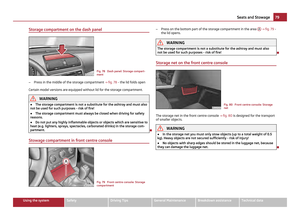 81
81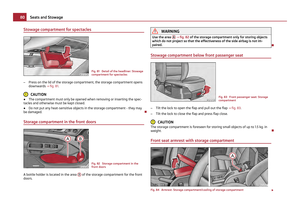 82
82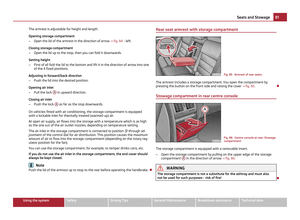 83
83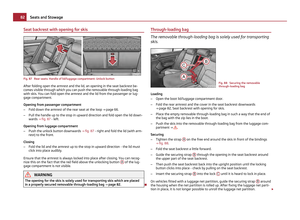 84
84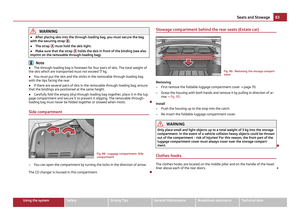 85
85 86
86 87
87 88
88 89
89 90
90 91
91 92
92 93
93 94
94 95
95 96
96 97
97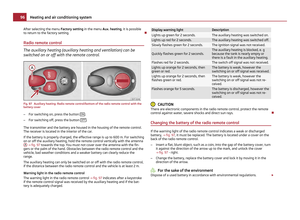 98
98 99
99 100
100 101
101 102
102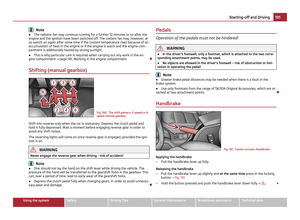 103
103 104
104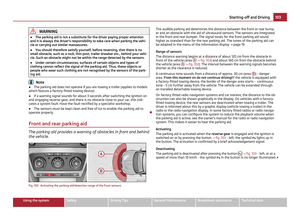 105
105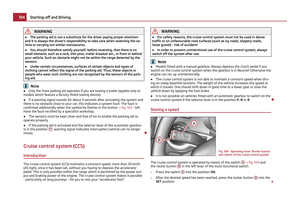 106
106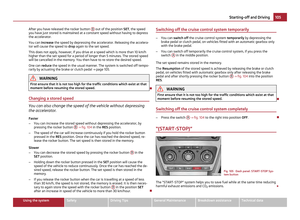 107
107 108
108 109
109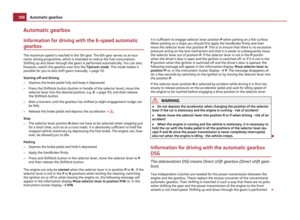 110
110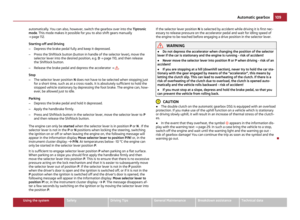 111
111 112
112 113
113 114
114 115
115 116
116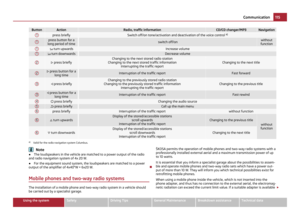 117
117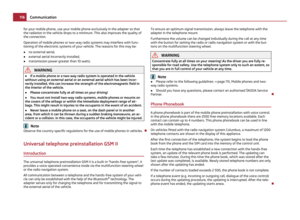 118
118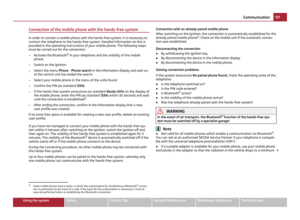 119
119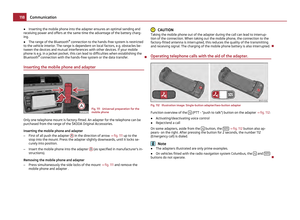 120
120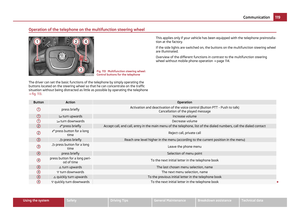 121
121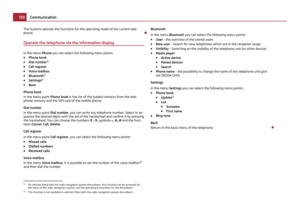 122
122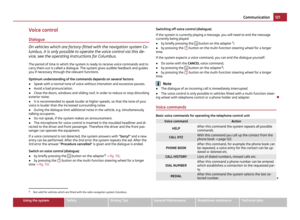 123
123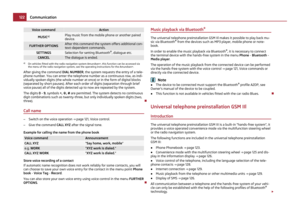 124
124 125
125 126
126 127
127 128
128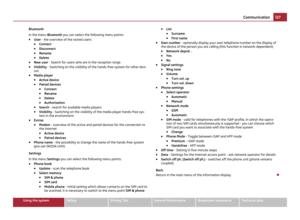 129
129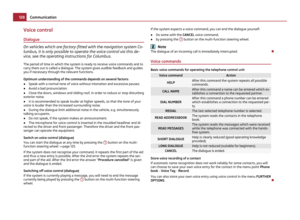 130
130 131
131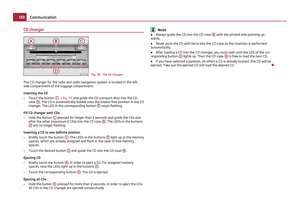 132
132 133
133 134
134 135
135 136
136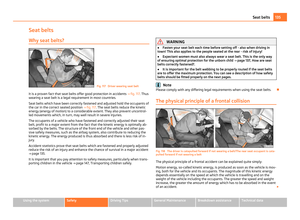 137
137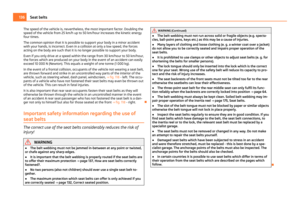 138
138 139
139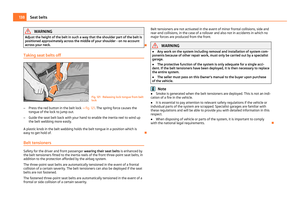 140
140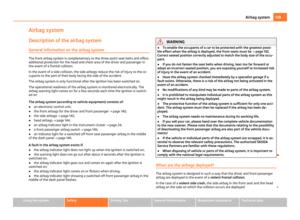 141
141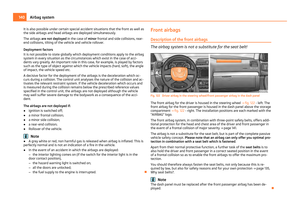 142
142 143
143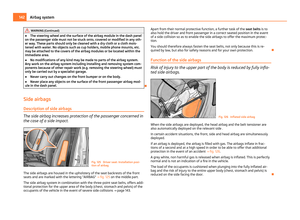 144
144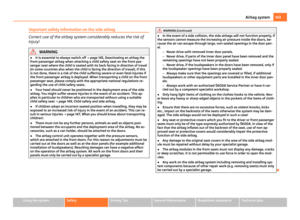 145
145 146
146 147
147 148
148 149
149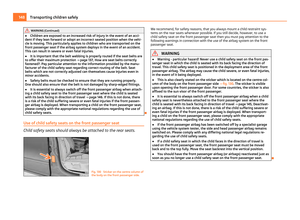 150
150 151
151 152
152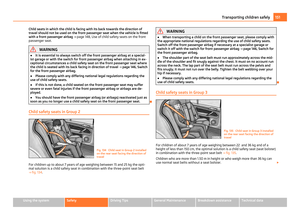 153
153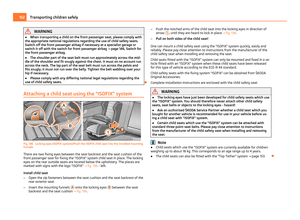 154
154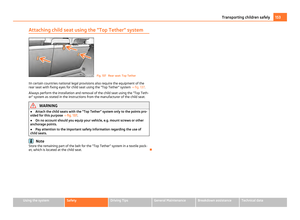 155
155 156
156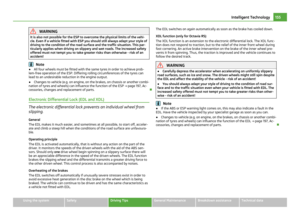 157
157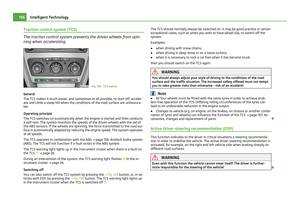 158
158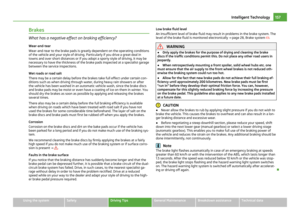 159
159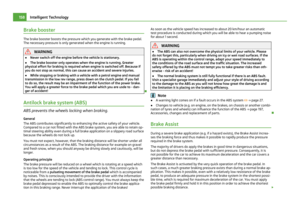 160
160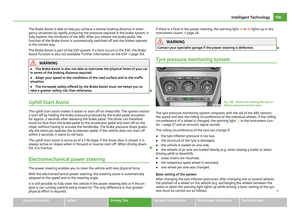 161
161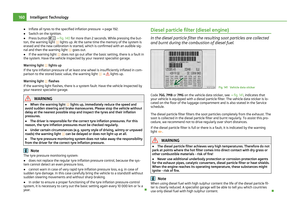 162
162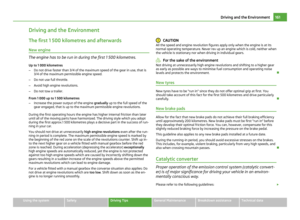 163
163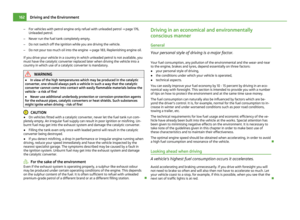 164
164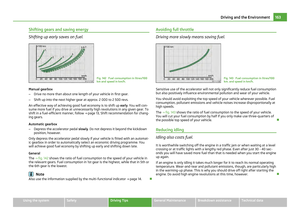 165
165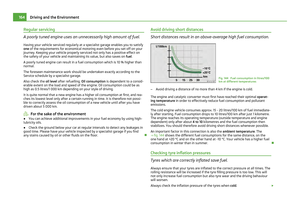 166
166 167
167 168
168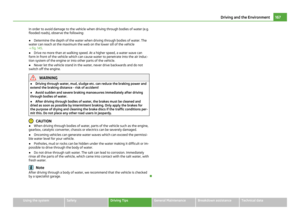 169
169 170
170 171
171 172
172 173
173 174
174 175
175 176
176 177
177 178
178 179
179 180
180 181
181 182
182 183
183 184
184 185
185 186
186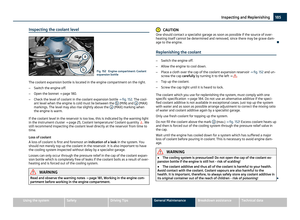 187
187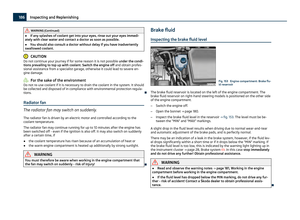 188
188 189
189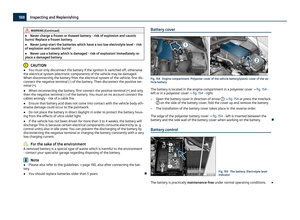 190
190 191
191 192
192 193
193 194
194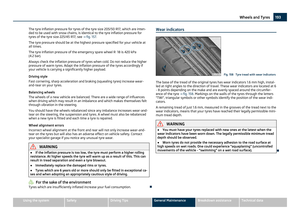 195
195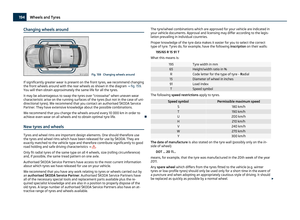 196
196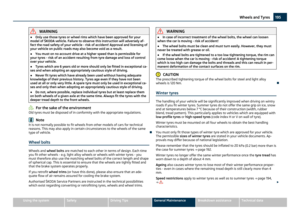 197
197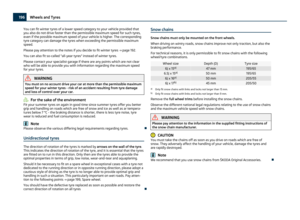 198
198 199
199 200
200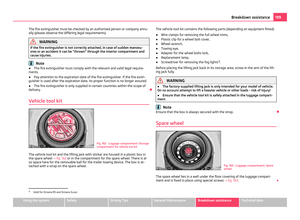 201
201 202
202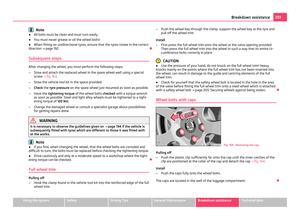 203
203 204
204 205
205 206
206 207
207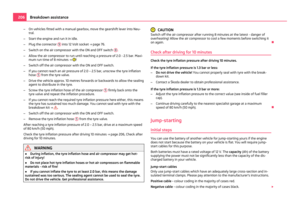 208
208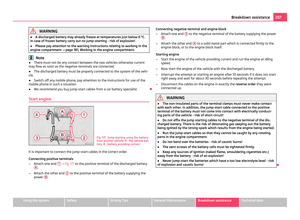 209
209 210
210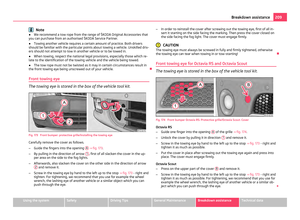 211
211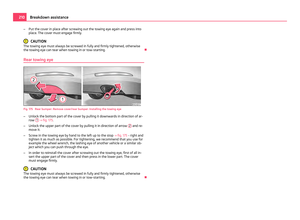 212
212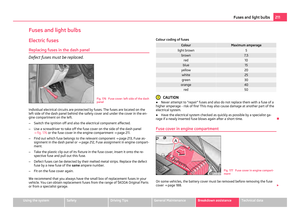 213
213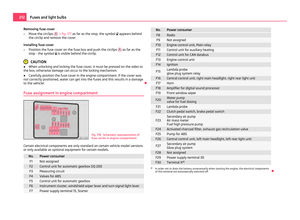 214
214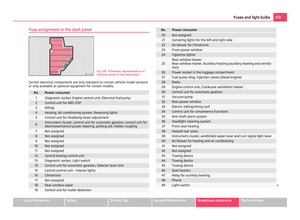 215
215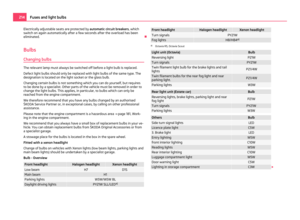 216
216 217
217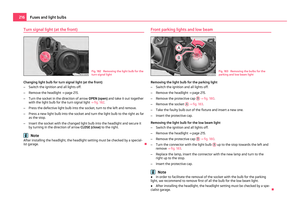 218
218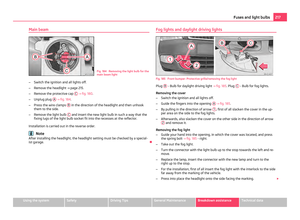 219
219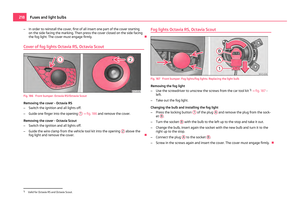 220
220 221
221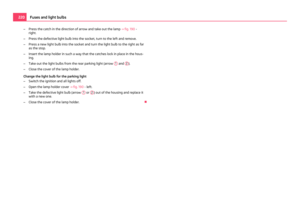 222
222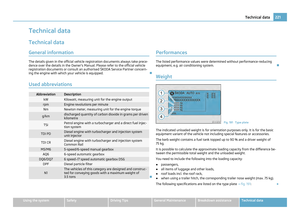 223
223 224
224 225
225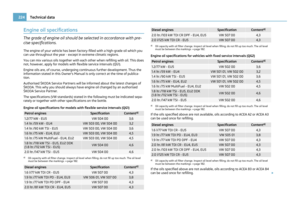 226
226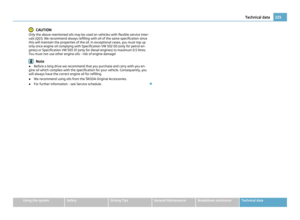 227
227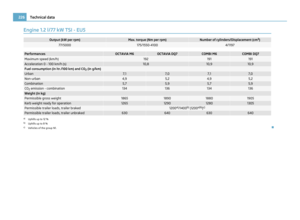 228
228 229
229 230
230 231
231 232
232 233
233 234
234 235
235 236
236 237
237 238
238 239
239 240
240 241
241 242
242 243
243 244
244 245
245 246
246 247
247