Page 97 of 248
 Owners Manual Direct switching on/off
Fig. 96 Button for direct switching on/
off of the auxiliary heating (auxiliary
heating and ventilation) on the operat-
ing part of the air conditioning system
The auxiliary h")
Direct switching on/off
Fig. 96 Button for direct switching on/
off of the auxiliary heating (auxiliary
heating and ventilation) on the operat-
ing part of the air conditioning system
The auxiliary heating (auxiliary heating and ventilation) can be switched on or off
directly with the button on the air conditioning system, Climatronic- or heating
⇒ fig. 96 .
If the auxiliary heating and ventilation is not switched off earlier, it switches off
automatically after the expiration of the set operating period, in the menu Run-
ning time.
Using the system So that the auxiliary heating (auxiliary heating and ventilation)
functions according to your expectations, it is necessary to carry
out the basic setting before its programming.
Basic setting
– On the information display, select in the Main menu the menu point Aux. heat-
ing.
– In the menu Aux. heating select the menu point Day of the wk. and set to-
day's date.
– By selecting the menu point Back, you will reach one level higher in the menu
Aux. Heating.
– In the menu Aux.
heating select the menu point Running time and set the de-
sired operating time in steps of 5 minutes. The running time can be 10 to 60
minutes.
– By selecting the menu point Back, you will reach in the menu Aux. heating.
– In the menu Aux.
heating select the menu point Mode. –
In the menu Mode select the desired mode Heating or Ventilation .
Programming For the programming of the auxiliary heating (auxiliary heating and ventilation) in
the menu Aux. heating there are three pre-set times:
● Starting time 1
● Starting time 2
● Starting time 3
In each pre-set time, the day and the time (hour and minute) can be set for
switching on the auxiliary heating and/or ventilation.
An empty position can be found between Sunday and Monday when selecting the
day. If this empty position is selected, the activation is performed without taking
into account the day.
If you leave the pre-set menu by selecting the menu Back or do not make changes
on the display for longer than 10 seconds, the set values are stored, but the pre-
set time is not active.
Both other pre-set times can be programmed and stored in the same way.
Only one programmed pre-set time can be active.
The last programmed pre-set time remains active.
After the auxiliary heating activates at the set time, it is necessary to pre-set a
time again.
Changing the active pre-set time is carried out after selecting the menu point Ac-
tivate in the menu Aux.
heating by selecting a pre-set time.
The prerequisite for the correct switching on of the auxiliary heating (auxiliary
heating and ventilation) according to the programmed pre-set time is the correct
setting of the current time and the weekday ⇒ page 95.
If the system is running, a warning light in the button for direct switching on/off
of the auxiliary heating lights up.
The running system deactivates after expiration of the operating period or is de-
activated earlier by pressing the button for direct switching on/off of the auxiliary
heating
⇒
page 95.
A random pre-set time can be deactivated by selecting the menu point Deactivate
in the menu Activate. £ 95
Heating and air conditioning system Using the system Safety Driving Tips General Maintenance Breakdown assistance Technical data
Page 98 of 248
 Owners Manual After selecting the menu
Factory setting in the menu Aux. heating, it is possible
to return to the factory setting.
Radio remote control The auxiliary heating (auxiliary heating and ventilation)")
After selecting the menu
Factory setting in the menu Aux. heating, it is possible
to return to the factory setting.
Radio remote control The auxiliary heating (auxiliary heating and ventilation) can be
switched on or off with the remote control. Fig. 97 Auxiliary heating: Radio remote control/bottom of the radio remote control with the
battery cover
–
For switching on, press the button ON .
– For switching off, press the button OFF .
The transmitter and the battery are housed in the housing of the remote control.
The receiver is located in the interior of the car.
If the battery is properly charged, the effective range is up to 600
m. For switching
on or off the auxiliary heating, hold the remote control vertically with the antenna A
⇒ fig. 97 towards the top. You must not cover over the antenna with the fin-
gers or the palm of the hand. Obstacles between the radio remote control and the
vehicle, bad weather conditions and a weaker battery can clearly reduce the
range.
The auxiliary heating can only be switched on or off with the radio remote control,
if the distance between the radio remote control and the vehicle is at least 2 m.
Warning light in the radio remote control
The warning light in the radio remote control ⇒ fig. 97
indicates after a keystroke
if the remote control signal was received by the auxiliary heating and if the bat-
tery is adequately charged. Display warning light Description
Lights up green for 2 seconds. The auxiliary heating was switched on.
Lights up red for 2 seconds. The auxiliary heating was switched off.
Slowly flashes green for 2 seconds. The ignition signal was not received.
Quickly flashes green for 2 seconds. The auxiliary heating is blocked, e. g
because the tank is nearly empty or
there is a fault in the auxiliary heating.
Flashes red for 2 seconds. The switch off signal was not received.
Lights up orange for 2 seconds, then
green or red. The battery is weak, however the
switching on or off signal was received.
Lights up orange for 2 seconds, then
flashes green or red. The battery is weak, however the
switching on or off signal was not re-
ceived.
Flashes orange for 5 seconds. The battery is discharged, however the
switching on or off signal was not re-
ceived. CAUTION
There are electronic components in the radio remote control, protect the remote
control against water, severe shocks and direct sun rays.
Changing the battery of the radio remote control If the warning light of the radio remote control indicates a weak or discharged
battery,
⇒ fig. 97, it must be replaced. The battery is located under a cover on the
back of the radio remote control.
– Insert a flat, blunt object, such as a coin, into the gap of the battery cover, turn
it against the direction of the arrow up to the mark, and unlock the cover
⇒ fig. 97 - right.
– Change the battery, replace the battery cover and lock it by moving it in the
direction of the arrow. For the sake of the environment
Dispose of a used battery in accordance with environmental regulations. £96
Heating and air conditioning system
Page 99 of 248
Note
● Pay attention to the correct polarity when changing the battery.
● The replacement battery must have the same specification as the original bat-
tery. 97
Heating and air conditioning system Using the system Safety Driving Tips General Maintenance Breakdown assistance Technical data
Page 100 of 248
 Owners Manual Starting-off and Driving
Setting steering wheel position Fig. 98 Adjustable steering wheel: Lever below the steering wheel/safe distance to the
steering wheel
You can set the height and the forward/b")
Starting-off and Driving
Setting steering wheel position Fig. 98 Adjustable steering wheel: Lever below the steering wheel/safe distance to the
steering wheel
You can set the height and the forward/back position of the steering wheel to the
desired position.
– Adjust the driver seat ⇒ page 60, Adjusting the front seats.
– Pull the lever below the steering wheel down ⇒ fig. 98 - left ⇒
.
– Set the steering wheel to the desired position (concerning height and forward/
back position).
– Push the lever upwards as far as the stop. WARNING
● You must not adjust the steering wheel when the vehicle is moving!
● The driver must maintain a distance of at least 25 cm to the steering wheel
⇒ fig. 98 - right. Not maintaining this minimum distance will mean that the air-
bag system will not be able to properly protect you - hazard!
● For safety reasons the lever must always be firmly pushed up to avoid the
steering wheel altering its position unintentionally when driving - risk of acci-
dent! WARNING (Continued)
● If you adjust the steering wheel further towards the head, you will reduce
the protection offered by the driver airbag in the event of an accident. Check
that the steering wheel is aligned to the chest.
● When driving, hold the steering wheel with both hands firmly on the outer
edge in the 9 o'clock and 3 o'clock position. Never hold the steering wheel
firmly in the 12 o'clock position or in another way (e.g. in the middle of the
steering wheel or at the inner steering wheel edge). In such cases, injuries to
the arms, the hands and the head can occur when the driver airbag is de-
ployed.
Ignition lock Fig. 99 Ignition lock positions
Petrol engines 1 - ignition switched off, engine off, the steering can be locked.
2 - ignition switched on
3 - start engine
Diesel engines 1 - interruption of fuel supply, ignition switched off, engine off, the steering can
be locked.
2 - heating glow plugs on, ignition switched on
● You should not switch on any major electrical components during the heating
period otherwise the vehicle battery will be drained unnecessarily. £98
Starting-off and Driving
Page 101 of 248
 Owners Manual 3
- start engine
Applies to all models:
Position 1 To
lock the steering , with the ignition key withdrawn, turn the steering wheel un-
til the steering locking pin is heard to engage. You should al")
3
- start engine
Applies to all models:
Position 1 To
lock the steering , with the ignition key withdrawn, turn the steering wheel un-
til the steering locking pin is heard to engage. You should always lock the steering
as a general rule if you leave your vehicle. This acts as a deterrent against possible
theft of your vehicle ⇒ .
Position 2 Move the steering wheel back and forward a little if the ignition key cannot, or
cannot easily be turned into this position, in order to release the steering lock.
Position
3 The engine is started in this position. At the same time switched on low beam or
main beam or other electrical components with major power consumption are
briefly switched off. The ignition key moves back into position
2 when one relea-
ses the key.
The ignition key must be turned back into position 1 each time before starting
the engine again. The starter repeat lock in the ignition lock prevents the starter
being engaged when the engine is running and thus getting damaged.
Ignition key withdrawal lock (automatic gearbox)
You can only withdraw the ignition key after switching off the ignition if the selec-
tor lever is in position P.WARNING
● When driving, the ignition key must always be in the position 2 (ignition
switched on) without the engine running. This position is indicated by the
warning lights coming on. If this is not the case, it could result in unexpected
locking of the steering wheel - risk of accident!
● Only remove the ignition key from the ignition lock when the vehicle has
come to a standstill (by applying the handbrake or moving the selector lever
into the position
P). The steering lock can engage immediately - risk of acci-
dent!
● Always withdraw the ignition key if you are going to leave the vehicle,
even for a short time. This is particularly important if children are left in the
vehicle. The children might otherwise start the engine or switch on electrical
equipment (e.g. power windows) - risk of accident or injury! Starting the engine
General You can only start the engine only using an original ignition key.
Manual gearbox
– Place the gearshift lever into neutral and put on the handbrake firmly before
starting the engine.
– Engage the clutch pedal and keep it depressed until the engine starts.
If you start the engine without depressing the clutch pedal, the engine does not
start and the following message appears in the Information display Depress
clutch! or CLUTCH in the display of the instrument cluster.
– Let go of the key as soon as the engine starts otherwise there may be damage
to the starter.
Automatic gearbox
– Place the gearshift lever into P or N before starting the engine, and apply the
handbrake firmly.
– Let go of the key as soon as the engine starts otherwise there may be damage
to the starter.
The engine running noises may louder at first be louder for a short time after
starting the cold engine until oil pressure can be built up in the hydraulic valve
clearance compensation. This is quite normal and is not an operating problem.
If the engine does not start ...
You can use the battery of another vehicle as a jump-start aid ⇒
page 206. WARNING
● Never run the engine in non ventilated or enclosed areas. The exhaust
gases of the engine contain besides the odorless and colourless carbon mon-
oxide a poisonous gas - hazard! Carbon monoxide can cause unconsciousness
and death.
● Never leave your vehicle unattended with the engine running. £ 99
Starting-off and Driving Using the system Safety Driving Tips General Maintenance Breakdown assistance Technical data
Page 102 of 248
 Owners Manual CAUTION
● The starter may only be operated (ignition key position 3 ), if the engine is not
running. If the starter is immediately operated after switching off the engine, the
starter or the engine")
CAUTION
● The starter may only be operated (ignition key position 3 ), if the engine is not
running. If the starter is immediately operated after switching off the engine, the
starter or the engine can be damaged.
● Avoid high engine revolutions, full throttle and high engine loads as long as
the engine has not yet reached its normal operating temperature - risk of damag-
ing the engine!
● Do not tow start the engine - danger of damaging the engine. On vehicles with
a catalytic converter, unburnt fuel may get into the catalytic converter where it
may ignite. This in turn may damage or destroy the catalytic converter. You can
use the battery of another vehicle as a jump-start aid ⇒ page 206
, Jump-starting.For the sake of the environment
Never warm up the engine when the vehicle is standing. Drive off right away.
Through this the engine reaches its operating temperature more rapidly and the
pollutant emissions are lower.
Petrol engines These engines are fitted with a starter system which selects the correct fuel-air
mixture for every external air temperature.
●
Do not operate accelerator before and when starting engine.
● Interrupt the attempt at starting after 10 seconds if the engine does not start
right awayand wait for about 30 seconds before repeating the attempt.
● It is possible that the fuse on the electrical fuel pump is defect if the engine
still does not start. Check the fuse and replace it if necessary ⇒ page 211.
● Contact the nearest specialist garage to obtain professional assistance.
It may be necessary, if the engine is very hot, to slightly depress the accelerator
after the engine has started.
Diesel engines Glow plug system
Diesel engines are equipped with a glow plug system, the preglow period being
controlled automatically in line with the coolant temperature and outside temper-
ature.
The preglow indicator light comes on after the ignition has been switched on. You should not switch on any major electrical components during the heating
period otherwise the vehicle battery will be drained unnecessarily.
● You should start the engine immediately after the glow plug warning light
has gone out.
● The glow plug warning light will come on for about one second if the engine is
at a normal operating temperature or if the outside temperature is above +5 °C.
This means that you can start the engine right away.
● Interrupt the attempt at starting after 10 seconds if the engine does not start
right away and wait for about 30 seconds before repeating the attempt.
● It is possible that the fuse on the diesel preglow system is defect if the engine
still does not start. Check the fuse and replace it if necessary ⇒ page 211.
● Contact the nearest specialist garage to obtain professional assistance.
Starting the engine after the fuel tank has run dry
It may take longer than normal to start the engine after refuelling if the fuel tank
has run completely dry - up to one minute. This is because the fuel system must
first of all be filled while the attempting to start the engine.
Switching off the engine –
The engine can be switched off by turning the ignition key into position 1 ⇒
fig. 99 . WARNING
● Never switch off the engine before the vehicle is stationary - risk of acci-
dent!
● The brake booster only operates when the engine is running. Greater
physical effort for braking is required when engine is switched off. Because if
you do not stop as normal, this can cause an accident and severe injuries. CAUTION
you should not switch the engine off right away at the end of your journey after
the engine has been operated for a lengthy period at high loads but should be al-
lowed it to run at idling speed for about 2
minutes. This prevents any accumula-
tion of heat when the engine is switched off. £100
Starting-off and Driving
Page 103 of 248
 Owners Manual Note
● The radiator fan may continue running for a further 10 minutes or so after the
engine and the ignition have been switched off. The coolant fan may, however, al-
so switch on again after some")
Note
● The radiator fan may continue running for a further 10 minutes or so after the
engine and the ignition have been switched off. The coolant fan may, however, al-
so switch on again after some time if the coolant temperature rises because of an
accumulation of heat in the engine or if the engine is warm and the engine com-
partment is additionally heated by strong sunlight.
● This is why particular care is required when carrying out any work in the en-
gine compartment ⇒
page 181, Working in the engine compartment.
Shifting (manual gearbox) Fig. 100 The shift pattern: 5-speed or 6-
speed manual gearbox
Shift into reverse only when the car is stationary. Depress the clutch pedal and
hold it fully depressed. Wait a moment before engaging reverse gear in order to
avoid any shift noises.
The reversing lights will come on once reverse gear is engaged, provided the igni-
tion is on. WARNING
Never engage the reverse gear when driving - risk of accident! Note
● One should not lay the hand on the shift lever while driving the vehicle. The
pressure of the hand will be transferred to the gearshift forks in the gearbox. This
can, over a period of time, lead to early wear of the gearshift forks.
● Depress the clutch pedal fully when changing gears, in order to avoid unneces-
sary wear and damage. Pedals Operation of the pedals must not be hindered!
WARNING
● In the driver's footwell, only a footmat, which is attached to the two corre-
sponding attachment points, may be used.
● No objects are allowed in the driver's footwell – risk of obstruction or limi-
tation in operating the pedal! Note
● Greater brake pedal distances may be needed when there is a fault in the
brake system.
● Use only footmats from the range of ŠKODA Original Accessories, which are at-
tached at two attachment points.
Handbrake Fig. 101 Centre console: Handbrake
Applying the handbrake
– Pull the handbrake lever up fully.
Releasing the handbrake
– Pull the handbrake lever up slightly and at the same time press in the locking
button ⇒
fig. 101 .
– Hold the button pressed and push the handbrake lever down fully ⇒ .
£ 101
Starting-off and Driving Using the system Safety Driving Tips General Maintenance Breakdown assistance Technical data
Page 104 of 248
 Owners Manual The handbrake warning light
lights up when the handbrake is applied, provided
the ignition is on.
A warning signal sounds and the following text appears in the Information display
if you have ina")
The handbrake warning light
lights up when the handbrake is applied, provided
the ignition is on.
A warning signal sounds and the following text appears in the Information display
if you have inadvertently driven off with the handbrake applied:
Release parking brake! (Release parking brake!)
The handbrake warning is activated if you drive at a speed of more than 6 km/h
for more than 3 seconds. WARNING
● Please note that the handbrake must be fully released. A handbrake which
is only partially released can result in the rear brakes overheating which will
have a negative effect on the operation of the brake system - risk of accident!
In addition this can result in premature wear of the rear brake pads.
● Never leave children unattended in the vehicle. The children might, for ex-
ample, release the handbrake or take the vehicle out of gear. The vehicle
might then move off - risk of accident! CAUTION
After the car has come to a stop, always first of all apply the handbrake firmly be-
fore then additionally engaging a gear (manual gearbox) or moving the selector
lever into position P (automatic gearbox).
Rear parking aid The parking aid provides a warning of obstacles behind the vehicle.
Fig. 102 Parking aid: Detection range of
rear sensorsThe audible parking aid determines the distance from the rear bumper to an ob-
stacle behind the car with the aid of ultrasound sensors. The tones of the parking
aid can be adapted in the menu of the Information display
⇒
page 19. The sensors
are integrated in the rear bumper.
Range of sensors
The clearance warning begins at a distance of about 160 cm from the obstacle
(area A ⇒
fig. 102). The interval between the warning signals becomes shorter as
the clearance is reduced.
A continuous tone sounds from a distance of approx. 30 cm (area B ) - danger
area. You should not reverse any further after this signal sounds! If the vehicle is
equipped with a factory-fitted towing device, the indication threshold of the dan-
ger area starts -
continuous tone - 5 cm further behind the vehicle. The vehicle
can be extended through an installed detachable towing device.
On factory-fitted radio navigation systems and car stereos, the distance to the ob-
struction can also be shown graphically in the display. On vehicles with a factory-
fitted towing device, the rear sensors are deactivated when towing a trailer. The
driver is informed about this by a graphic display (vehicle towing a trailer) in the
radio or the radio navigation display. In some factory fitted radios or radio naviga-
tion systems, you can configure the system to reduce the playback volume when
the parking aid is active, see the owner's manual for the radio or radio navigation
system. This makes it easier to hear the parking aid.
Activating
The parking aid is activated automatically when reverse gear is engaged and the
ignition is turned on. This is confirmed by a brief audible signal.
Deactivating
The parking aid is deactivated by removing the reverse gear. £102
Starting-off and Driving
 1
1 2
2 3
3 4
4 5
5 6
6 7
7 8
8 9
9 10
10 11
11 12
12 13
13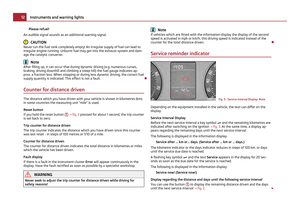 14
14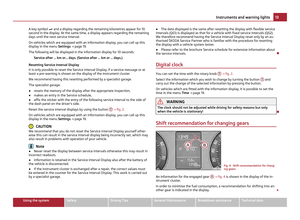 15
15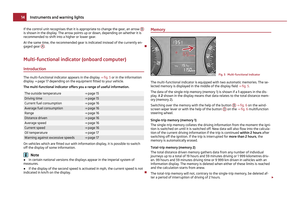 16
16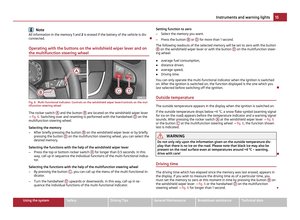 17
17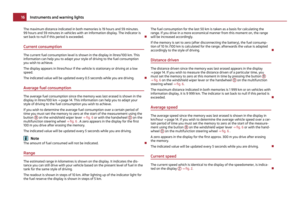 18
18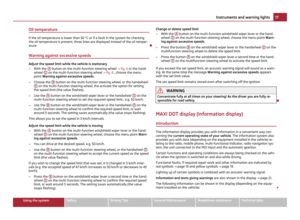 19
19 20
20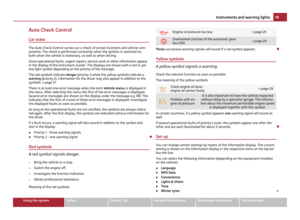 21
21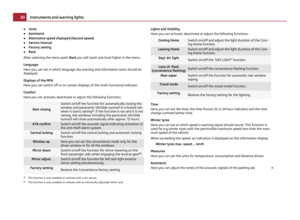 22
22 23
23 24
24 25
25 26
26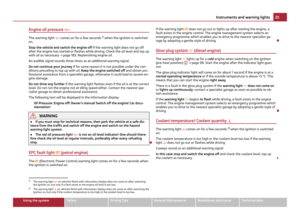 27
27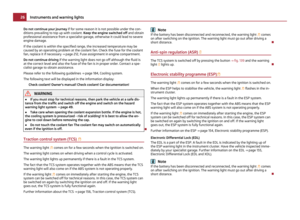 28
28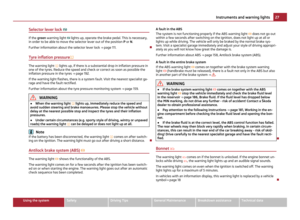 29
29 30
30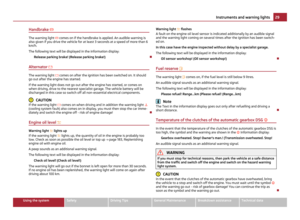 31
31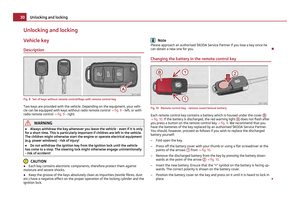 32
32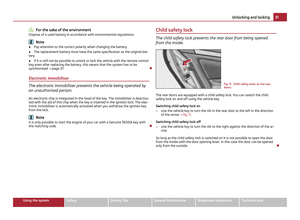 33
33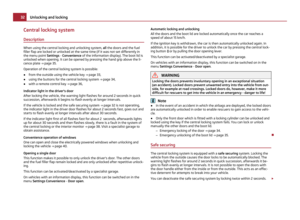 34
34 35
35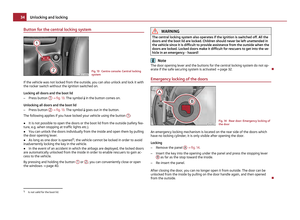 36
36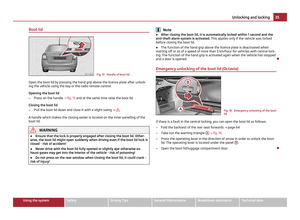 37
37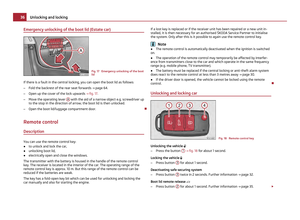 38
38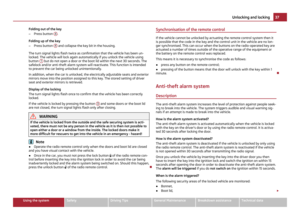 39
39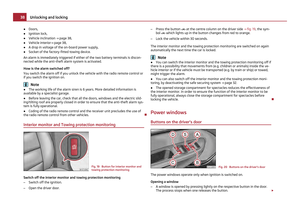 40
40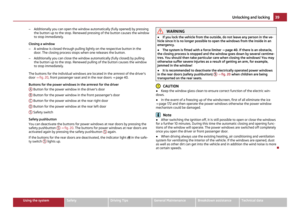 41
41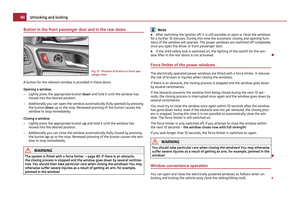 42
42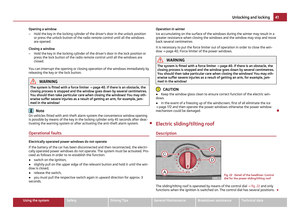 43
43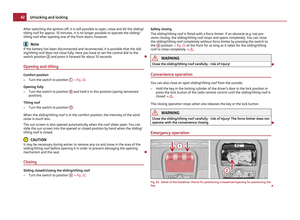 44
44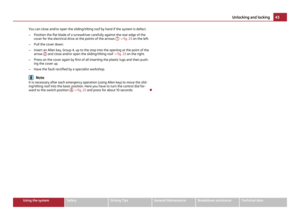 45
45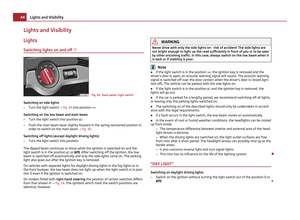 46
46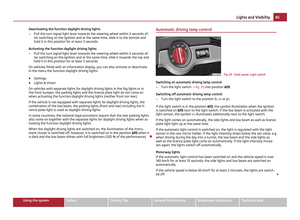 47
47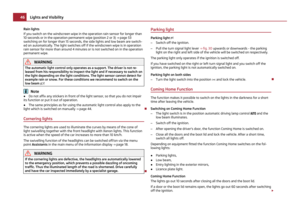 48
48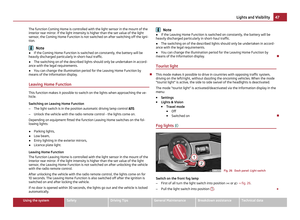 49
49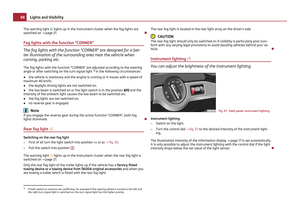 50
50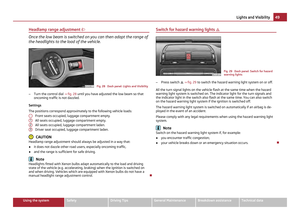 51
51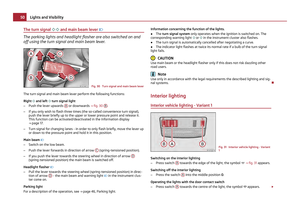 52
52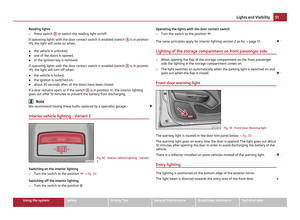 53
53 54
54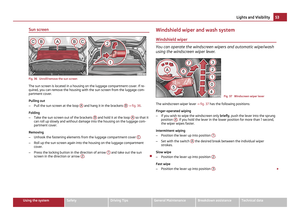 55
55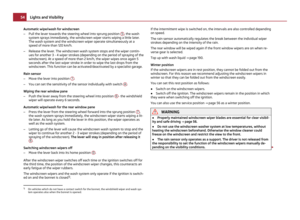 56
56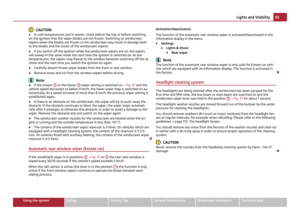 57
57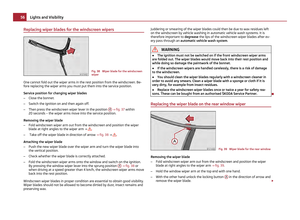 58
58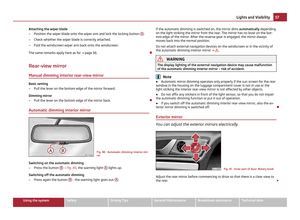 59
59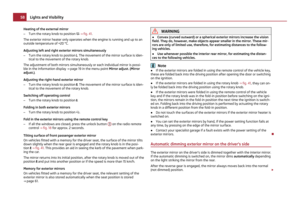 60
60 61
61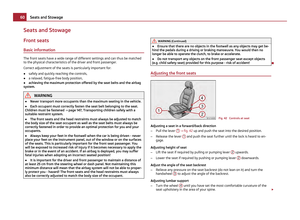 62
62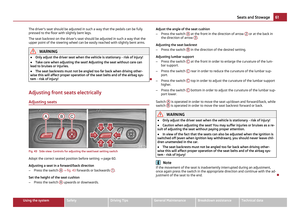 63
63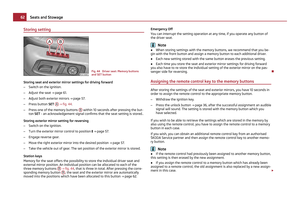 64
64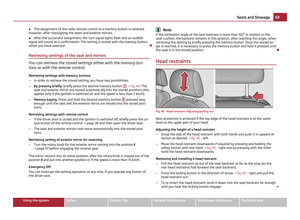 65
65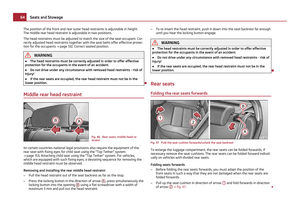 66
66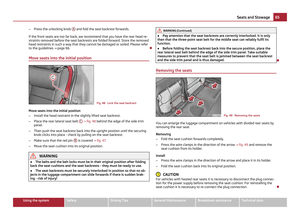 67
67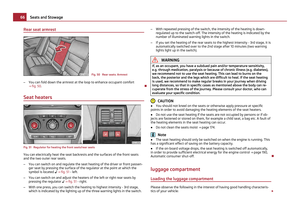 68
68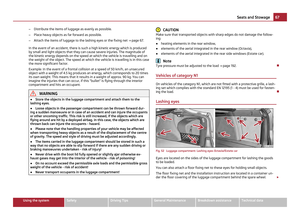 69
69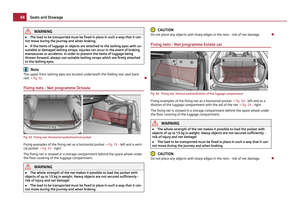 70
70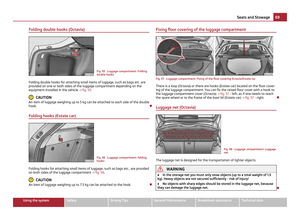 71
71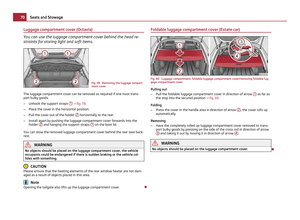 72
72 73
73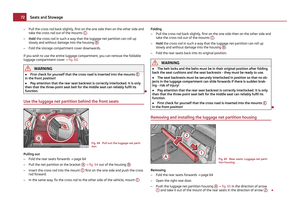 74
74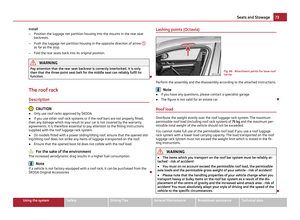 75
75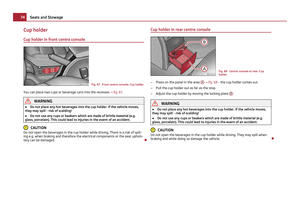 76
76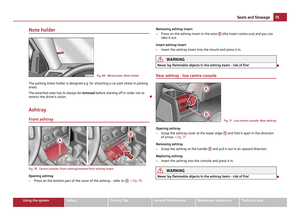 77
77 78
78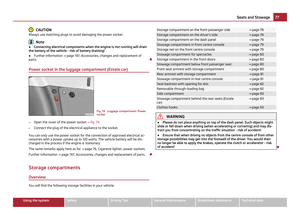 79
79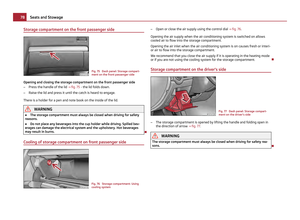 80
80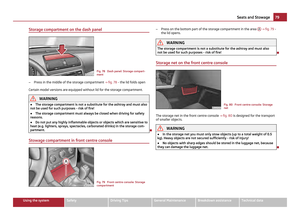 81
81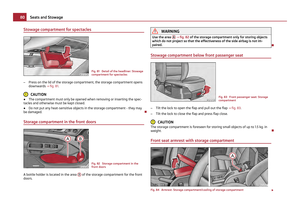 82
82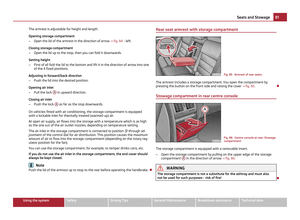 83
83 84
84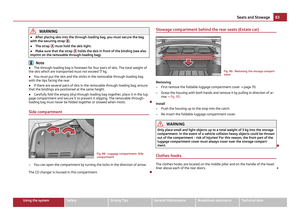 85
85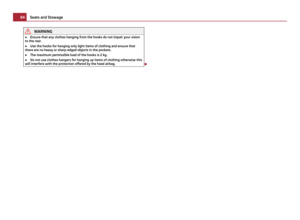 86
86 87
87 88
88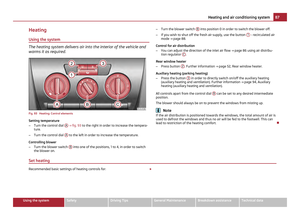 89
89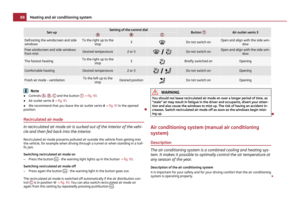 90
90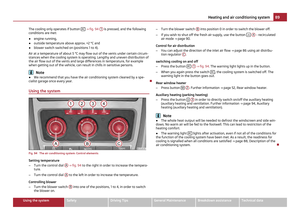 91
91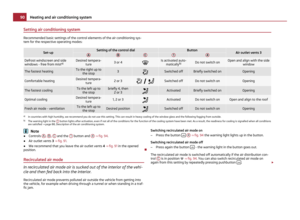 92
92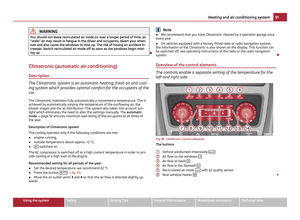 93
93 94
94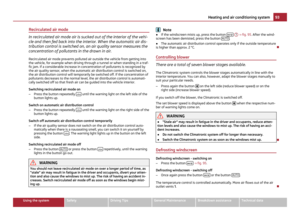 95
95 96
96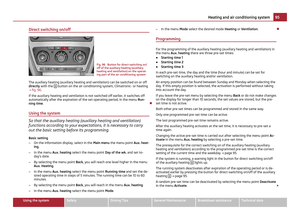 97
97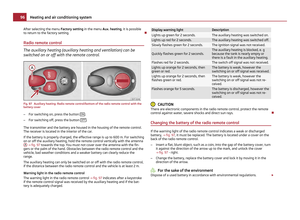 98
98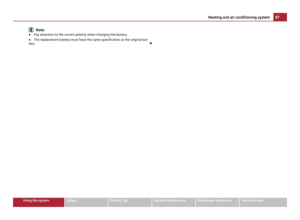 99
99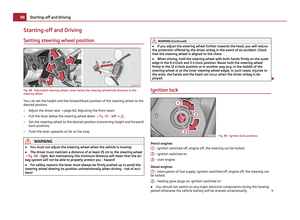 100
100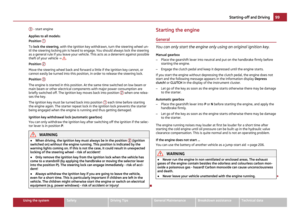 101
101 102
102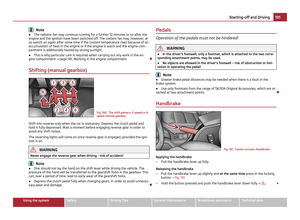 103
103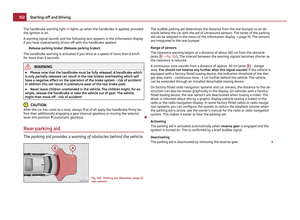 104
104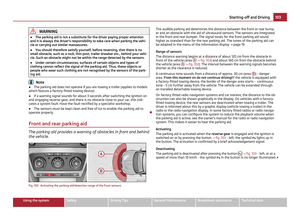 105
105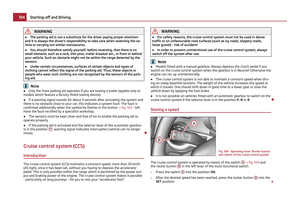 106
106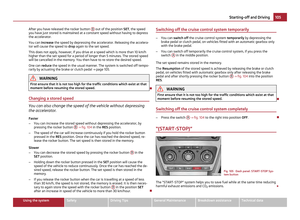 107
107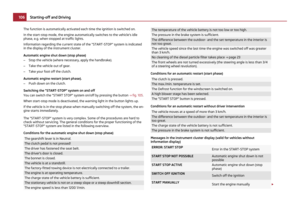 108
108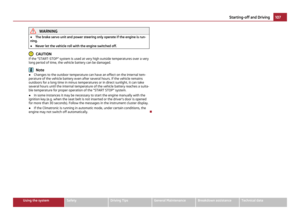 109
109 110
110 111
111 112
112 113
113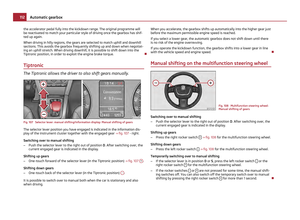 114
114 115
115 116
116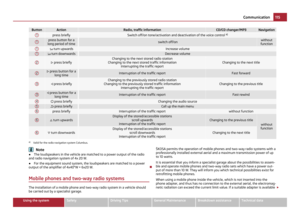 117
117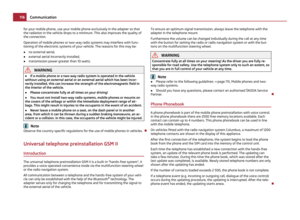 118
118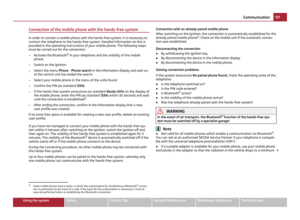 119
119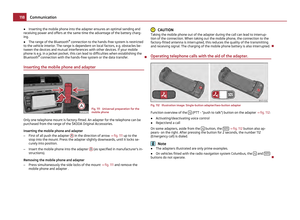 120
120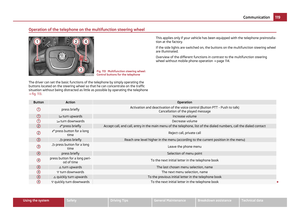 121
121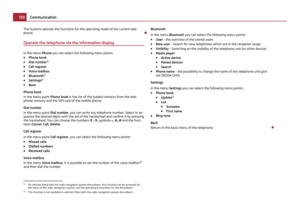 122
122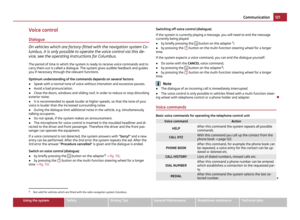 123
123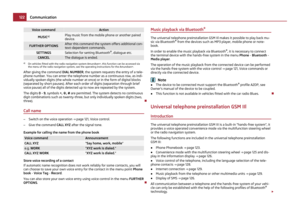 124
124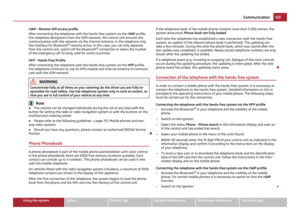 125
125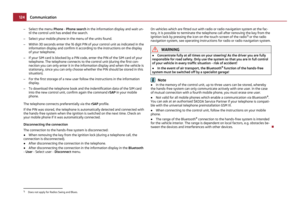 126
126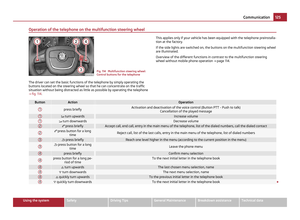 127
127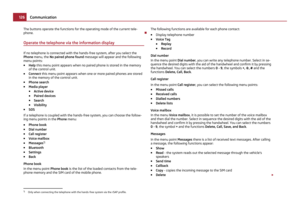 128
128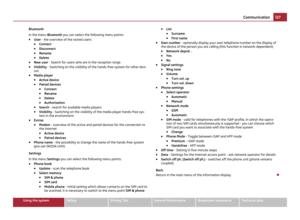 129
129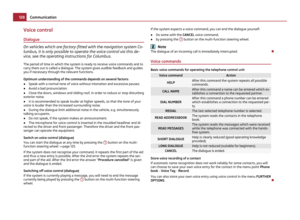 130
130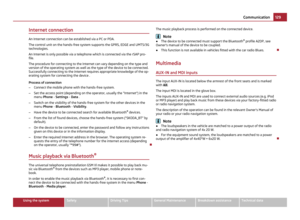 131
131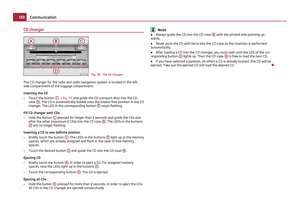 132
132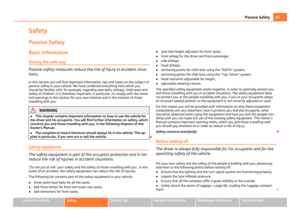 133
133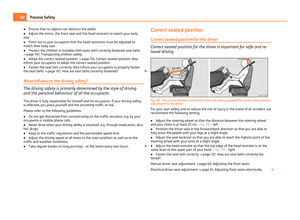 134
134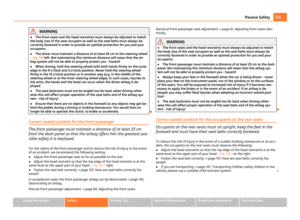 135
135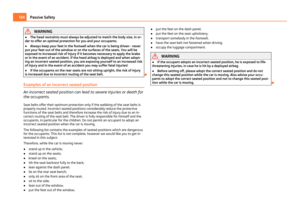 136
136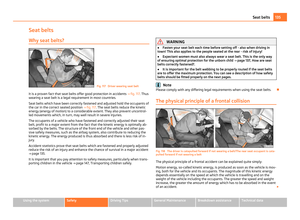 137
137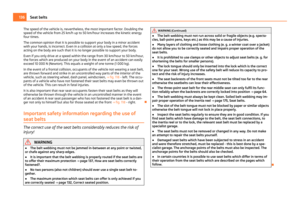 138
138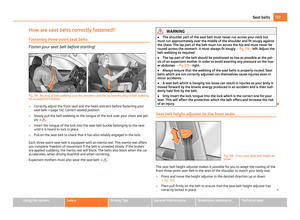 139
139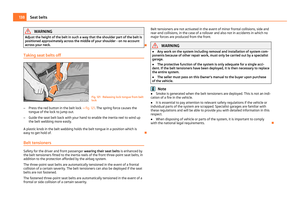 140
140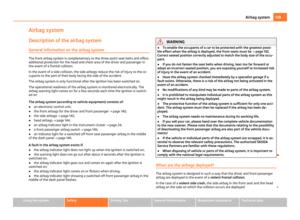 141
141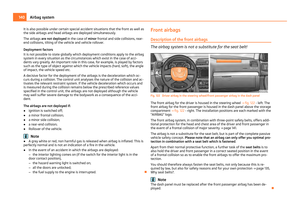 142
142 143
143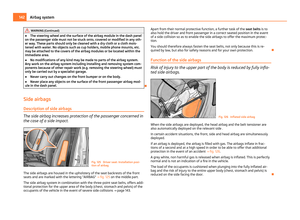 144
144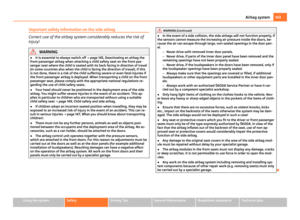 145
145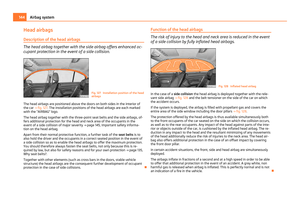 146
146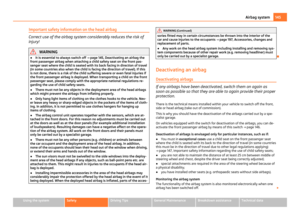 147
147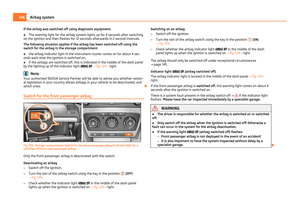 148
148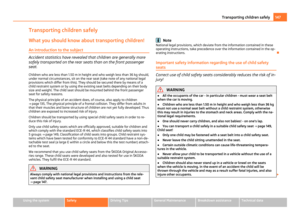 149
149 150
150 151
151 152
152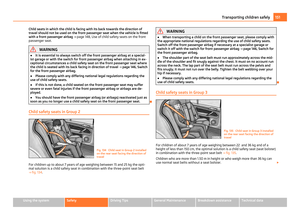 153
153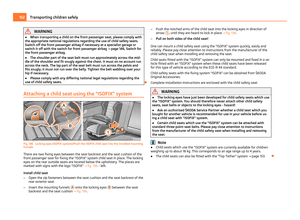 154
154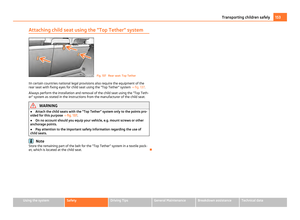 155
155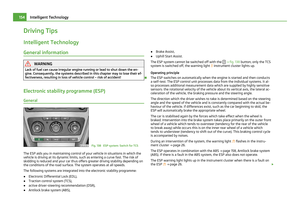 156
156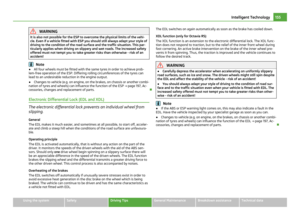 157
157 158
158 159
159 160
160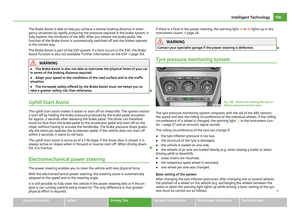 161
161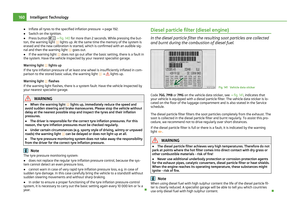 162
162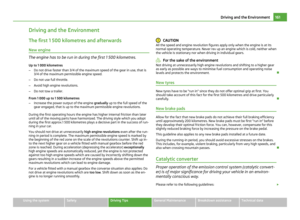 163
163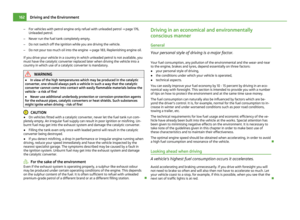 164
164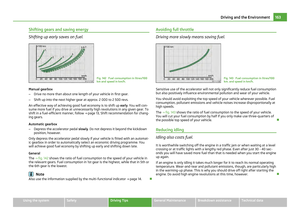 165
165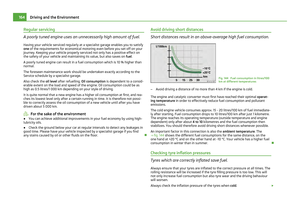 166
166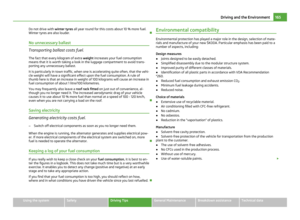 167
167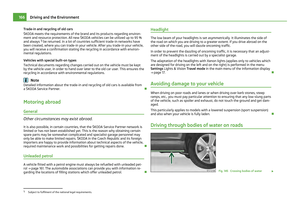 168
168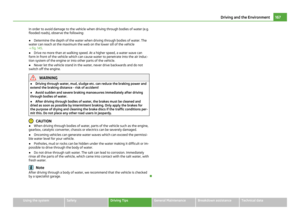 169
169 170
170 171
171 172
172 173
173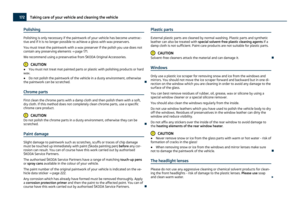 174
174 175
175 176
176 177
177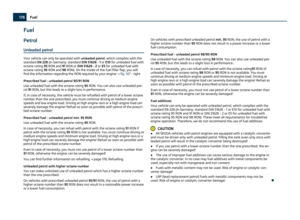 178
178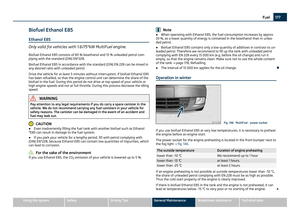 179
179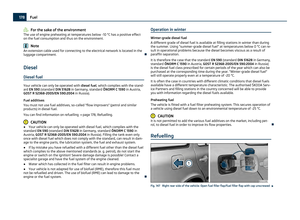 180
180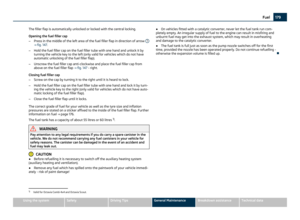 181
181 182
182 183
183 184
184 185
185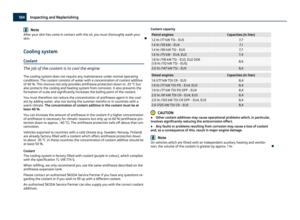 186
186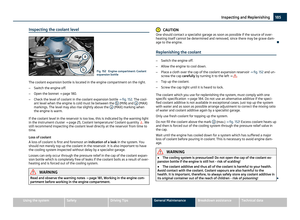 187
187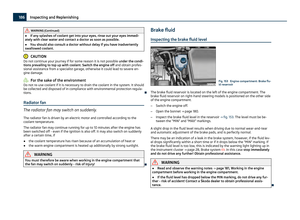 188
188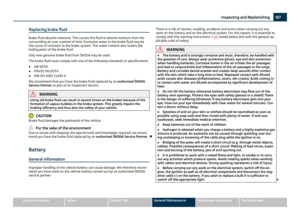 189
189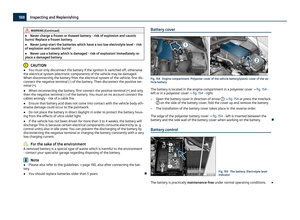 190
190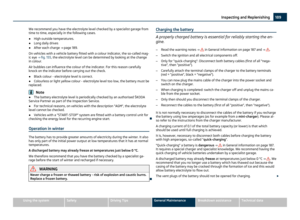 191
191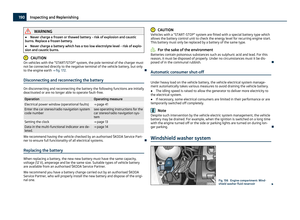 192
192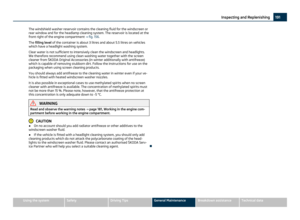 193
193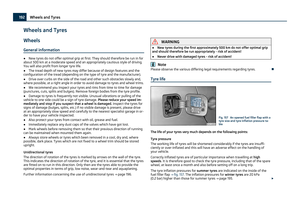 194
194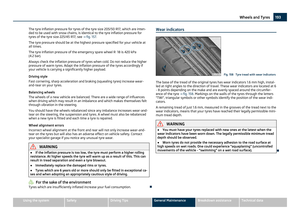 195
195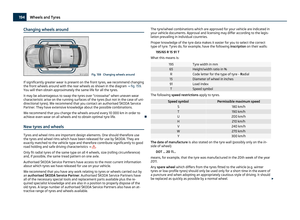 196
196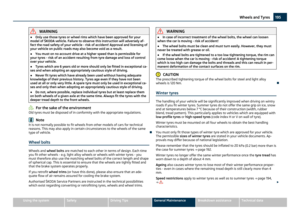 197
197 198
198 199
199 200
200 201
201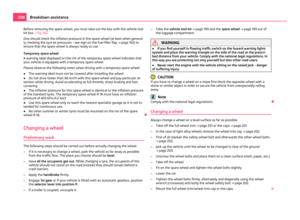 202
202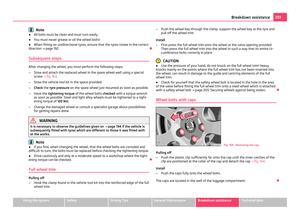 203
203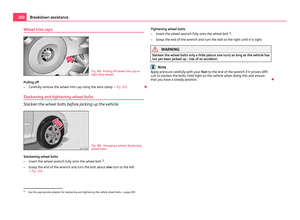 204
204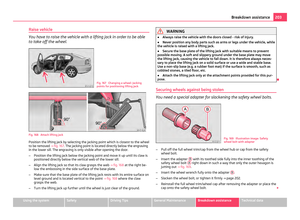 205
205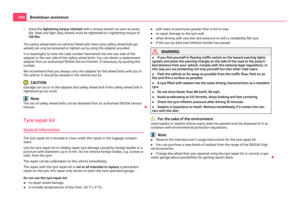 206
206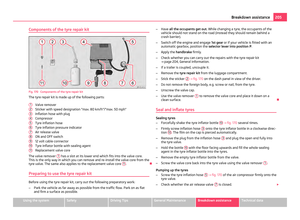 207
207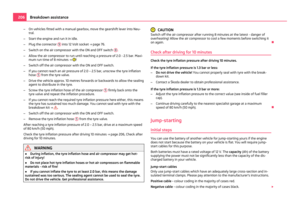 208
208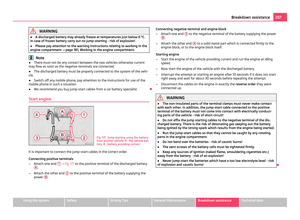 209
209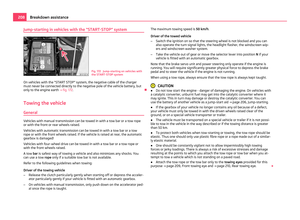 210
210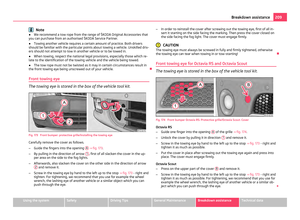 211
211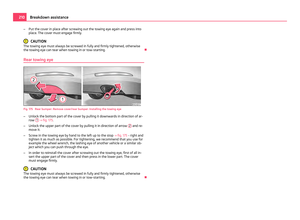 212
212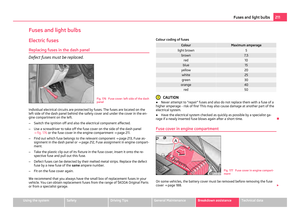 213
213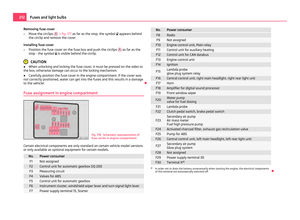 214
214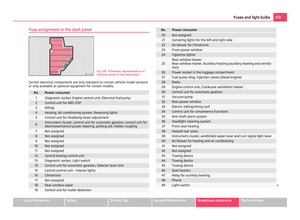 215
215 216
216 217
217 218
218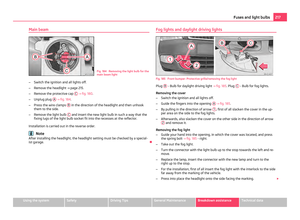 219
219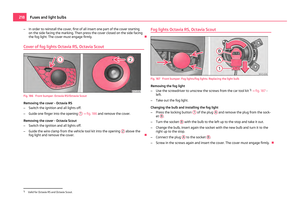 220
220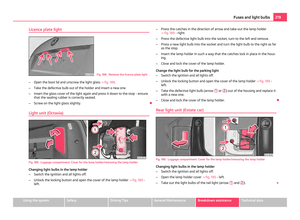 221
221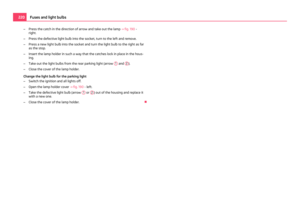 222
222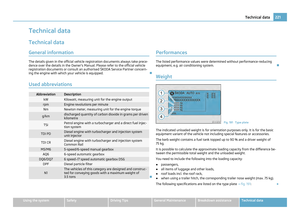 223
223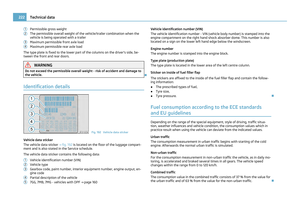 224
224 225
225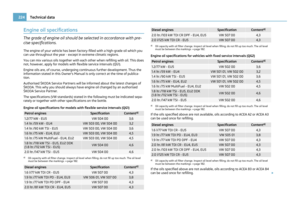 226
226 227
227 228
228 229
229 230
230 231
231 232
232 233
233 234
234 235
235 236
236 237
237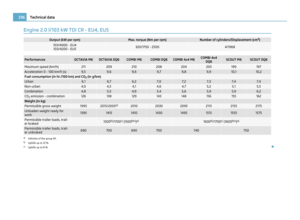 238
238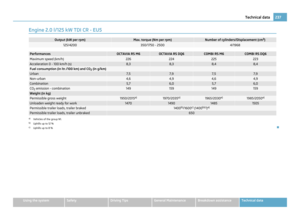 239
239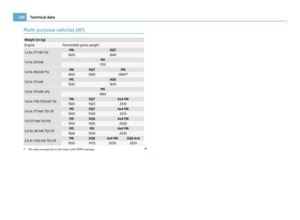 240
240 241
241 242
242 243
243 244
244 245
245 246
246 247
247 Owners Manual Note
● Pay attention to the correct polarity when changing the battery.
● The replacement battery must have the same specification as the original bat-
tery. 97
Heating and air conditioning sy")