Page 113 of 273
 Steering wheel lock
E00601500083To lock
Remove the key at the “LOCK” position.
Turn the steering wheel until it is locked.
To unlock
Turn
the key to the “ACC” position while moving
the")
Steering wheel lock
E00601500083To lock
Remove the key at the “LOCK” position.
Turn the steering wheel until it is locked.
To unlock
Turn
the key to the “ACC” position while moving
the steering wheel slightly. CAUTION
l
Remove the key when leaving the vehicle.
NOTE l If
the front wheels are turned, the anti-theft
lock may sometimes make it difficult to turn
the key from “LOCK” to “ACC”. Firmly
turn the steering wheel to the left or to the
right as you turn the key. Starting
E00601600941
Tips for starting l Do
not operate the starter motor continuous-
ly longer than 10 seconds; doing so could
run down the battery. If the engine does not
start, turn the ignition switch back to
“LOCK” position, wait a few seconds, and
then try again.
Trying repeatedly with the starter motor still
turning will damage the starter mechanism.
l If the engine cannot be started because the
battery is weak or dead, refer to the “Emer-
gency starting” section for instructions on
starting the engine.
l The engine is well warmed up if the coolant
temperature gauge needle starts to move (the
engine speed decreases). Extended warming-
up operation will result in excessive fuel con-
sumption. WARNING
l Never
run the engine in a closed or poor-
ly ventilated area any longer than is nee-
ded to move your vehicle in or out of the
area. Carbon monoxide gases are odour-
less and can be fatal. CAUTION
l
Never
attempt to start the engine by push-
ing or pulling the vehicle. Especially in
the A/T, since the structure is different
from a M/T, it is not possible to start the
engine by using this technique. Never at-
tempt this or it could damage the A/T.
l Do not run the engine at high rpm or
drive the vehicle at high speed until the en-
gine has had a chance to warm up.
l Release the ignition key as soon as the en-
gine starts to avoid damaging the starter
motor.
l If your vehicle is equipped with a turbo-
charger, do not stop the engine immedi-
ately after high-speed or uphill driving.
First allow the engine to idle to give the
turbocharger a chance to cool down.
Starting the engine (petrol-powered ve-
hicles) E00601701239
This vehicles is equipped with an electronically con-
trolled
fuel injection system which is automatically
controlled. When starting the engine, do not de-
press the accelerator pedal.
Normal conditions
The starting procedure is as follows: 1. Insert the ignition key and fasten the seat belt.
2. Make sure the parking brake is applied.
3. Depress and hold the brake pedal.
4. Fully depress the clutch pedal (M/T).
5. On vehicles with M/T, place the gearshift lev-er in the “N” (Neutral) position. Starting and driving
4-10
4
Presented by http://mmc-manuals.ru/ \251
Page 114 of 273
 On vehicles with A/T,
make sure the selector
lever is in the “P” (PARK) position. 6. After
turning the ignition key to the “ON” po-
sition, make certain that all warning lamps
are fun")
On vehicles with A/T,
make sure the selector
lever is in the “P” (PARK) position. 6. After
turning the ignition key to the “ON” po-
sition, make certain that all warning lamps
are functioning properly before starting the
engine.
7. Turn the ignition key to the “START” posi- tion without depressing the accelerator pedal,
and release it when the engine starts.
At extreme cold ambient temperature
If the engine won’t start, depress the accelerator ped-
al about halfway while cranking the engine. Once
the engine starts, release the accelerator pedal. CAUTION
l
When
starting the engine, make sure that
you press on the brake pedal. At extreme
cold ambient temperature move your foot
to the brake pedal immediately after the
engine has started. Flooded engine
If
the engine was flooded during starting, first oper-
ate the starter for 5 to 6 seconds while fully depress-
ing the accelerator pedal, then start the engine with-
out depressing the accelerator pedal.
Using the MIVEC engine
The MIVEC engine automatically switches its in-
take-valve control between a low-speed mode and
a high-speed mode in accordance with driving con-
ditions for maximum engine performance.
NOTE
l To protect the engine, the high-speed mode
may not be selected while the engine coolant
temperature is low. In such a case, the engine
revolutions do not rise to over 5,000 rpm
even if the accelerator pedal is depressed.
Starting the engine (diesel-powered ve-
hicles) E00601701242
1. Insert
the ignition key and fasten the seat belt.
2. Make sure the parking brake is applied.
3. Depress and hold the brake pedal.
4. Fully depress the clutch pedal. 5. Place
the gearshift lever in the “N” (Neutral)
position. 6. Turn the ignition key to the “ON” position.
The
diesel preheat indication lamp will first
illuminate, and then after a short time go out,
indicating that preheating is completed.
NOTE l If the engine is cold, the diesel preheat indi-
cation lamp is on for a longer time.
l When the engine has not been started within
about 5 seconds after the diesel preheat indi-
cation lamp went out, return the ignition key
to the “LOCK” position. Then, turn the key
to the “ON” position to preheat the engine
again.
l When the engine is warm, the diesel preheat
indication lamp does not come on even if the
ignition key is placed in the “ON” position.
Start the engine by turning the ignition key
right to the “START” position.
7. Turn the ignition key to the “START” posi- tion without depressing the accelerator pedal,
and release it when the engine starts. Starting and driving
4-11 4M/T
A/T
Presented by http://mmc-manuals.ru/ \251
Page 115 of 273
 NOTE
l A
ticking noise may be heard after starting
the engine. This is not an abnormal condi-
tion. The noise will disappear after a short
time of engine running.
If the ticking n")
NOTE
l A
ticking noise may be heard after starting
the engine. This is not an abnormal condi-
tion. The noise will disappear after a short
time of engine running.
If the ticking noise continues after the engine
is warmed up, we recommend you to have
your vehicle checked. Diesel particulate filter (DPF)*
E00619800069
The
diesel particulate filter (DPF) is a device that
captures most of the particulate matter (PM) in the
exhaust emissions of the diesel engine. The DPF au-
tomatically burns away trapped PM during vehicle
operation. Under certain driving conditions, howev-
er, the DPF is not able to burn away all of the trap-
ped PM and, as a result, an excessive amount of
PM accumulates inside it. WARNING
l The DPF reaches very high temperatures.
Do
not park your vehicle in areas where
combustible materials such as dry grass
or leaves can come in contact with a hot
exhaust system since a fire could occur. CAUTION
l
Do
not use any type of fuel or engine oil
that is not specified for your vehicle. Al-
so, do not use any moisture-removing
agent or other fuel additive. Such substan-
ces could have a detrimental effect on the
DPF.
Refer to “Fuel selection” on page 02 and
“Engine oil” on page 8-06.
NOTE l To
minimize the likelihood of excessive ac-
cumulation of PM, try to avoid driving for
long periods at low speeds and repeatedly
driving short distances. DPF warning lamp
The DPF warning lamp comes on in the event of an
abnormality
in the DPF system. Provided the DPF
system is working normally, the DPF warning
lamp comes on when the ignition switch is turned
to the “ON” position and goes off a few seconds later. If the DPF warning lamp comes on dur-
ing vehicle operation
Steady
illumination of the DPF warning lamp
shows that the DPF has not been able to burn away
all of the trapped PM and that, as a result, an exces-
sive amount of PM has accumulated inside it. To en-
able the DPF to burn away the PM, try to drive the
vehicle as follows:
l With the gearshift lever in the 4 th
gear posi-
tion or 5 th
gear position, drive more than 15
minutes at a speed of at least 60 km/h
(37 mph) and an engine revolutions of at
least 2,000 rpm.
If the DPF warning lamp subsequently stays on, con-
tact your MITSUBISHI MOTORS Authorized Serv-
ice Point. Starting and driving
4-12
4
Presented by http://mmc-manuals.ru/ \251
Page 116 of 273
 CAUTION
l
You do not have to continuously drive ex-
actly as indicated above. Always strive to
drive safely in accordance with road con-
ditions.
If the DPF warning lamp and check en-
gine warn")
CAUTION
l
You do not have to continuously drive ex-
actly as indicated above. Always strive to
drive safely in accordance with road con-
ditions.
If the DPF warning lamp and check en-
gine warning lamp come on during ve-
hicle operation
When
the DPF warning lamp and check engine
warning lamp come on, this indicates an abnormal-
ity in the DPF system. Have the system inspected
by a MITSUBISHI MOTORS Authorized Service
Point. CAUTION
l
Continuing
to drive when the DPF warn-
ing lamp and check engine warning lamp
remain on could result in engine trouble
and DPF damage. Manual transmission*
E00602000492
The
shift pattern is shown on the gearshift lever
knob. Be sure to always fully depress the clutch ped-
al before attempting to shift the lever. CAUTION
l
Do
not move the gearshift lever into re-
verse while the vehicle is moving for-
ward; doing so will damage the transmis-
sion.
l Do not rest your foot on the clutch pedal
while driving as this will cause premature
clutch wear or damage.
NOTE l If
it is hard to shift into 1 st
, depress the
clutch pedal again; the shift will then be eas-
ier to make. Moving the gearshift lever to the “R”
(Reverse) position CAUTION
l
Do
not move the gearshift lever to the
“R” (Reverse) position while the vehicle
is moving forward. This could damage
the transmission.
Vehicles equipped with 5-speed man-
ual transmission
To
shift into the “R” (Reverse) position from 5 th
gear, move the gearshift lever to the “N” (Neutral)
position, and then move it to the “R” (Reverse) po-
sition.
Vehicles equipped with 6-speed man-
ual transmission
Pull up the pull-ring (A), then move the gearshift
lever to the “R” (Reverse) position with the pull-
ring still pulled. Starting and driving
4-13 4 5 M/T
6 M/T
Presented by http://mmc-manuals.ru/ \251
Page 117 of 273
 CAUTION
l
Do not pull up the pull-ring (A) when mov-
ing the gearshift lever to any position oth-
er than the “R” (Reverse) position. If you
always pulled up the pull-ring (A) when
moving")
CAUTION
l
Do not pull up the pull-ring (A) when mov-
ing the gearshift lever to any position oth-
er than the “R” (Reverse) position. If you
always pulled up the pull-ring (A) when
moving the gearshift lever, you could un-
intentionally move the gearshift lever to
the “R” (Reverse) position and cause an
accident and/or a transmission fault.
The pull-ring will return to its original position
when
you return the gearshift lever to the “N” (Neu-
tral) position. CAUTION
l
If
the pull-ring will not return from the
pulled-up position, we recommend you to
have the vehicle inspected.
Changing gears E00610600022
Always take care to change the gear with the vehi-
cle
speed matched to the engine speed. Proper shift-
ing will improve fuel economy and prolong engine
life.
Avoid shifting down at high speed, as this may
cause excessive engine speed (the tachometer nee-
dle into the red zone) and damage the engine.
Economical driving speed E00610700443
The following shift points are recommended to as-
sist
fuel economy. The driver may vary these
points to suit driving conditions and load. 5 M/T Shift point Speed limit
1
st
gear to 2 nd
gear 30 km/h (19 mph) 2
nd
gear to 3 rd
gear 55 km/h (34 mph) 3
rd
gear to 4 th
gear 85 km/h (53 mph) 4
th
gear to 5 th
gear 115 km/h (71 mph)
6 M/T
Shift point Speed limit
1
st
gear to 2 nd
gear 10 km/h (6 mph) 2
nd
gear to 3 rd
gear 25 km/h (16 mph) 3
rd
gear to 4 th
gear 35 km/h (22 mph) 4
th
gear to 5 th
gear 50 km/h (30 mph) 5
th
gear to 6 th
gear 65 km/h (40 mph) Possible driving speed
E00610800431
5 M/T Shift point Speed limit
1
st
gear 50 km/h (30 mph) 2
nd
gear 90 km/h (56 mph) 3
rd
gear 140 km/h (87 mph) 4
th
gear 185 km/h (115 mph) 5
th
gear is an overdrive ratio and its use reduces en-
gine speed below that of the 4 th
gear. Use 5 th
gear
whenever vehicle speed allows, for maximum fuel
economy.
6 M/T Shift point Speed limit
1
st
gear 35 km/h (22 mph) 2
nd
gear 65 km/h (40 mph) 3
rd
gear 95 km/h (59 mph) 4
th
gear 135 km/h (84 mph) 5
th
gear 170 km/h (106 mph) The 4
th
,
5 th
, and 6 th
gears have overdrive ratios,
and their use reduces the engine speeds below
those of the 3 rd
, 4 th
, and 5 th
gear, respectively. Use
the 4 th
, 5 th
, or 6 th
gear whenever the vehicle speed
allows, for maximum fuel economy. Starting and driving
4-14
4
Presented by http://mmc-manuals.ru/ \251
Page 118 of 273
 Automatic transmission
INVECS-II Sports Mode 4A/T
(Intelligent & Innovative Vehicle Electronic Control System II)* E00603200606
Designed for optimum control and equipped with
adaptive control c")
Automatic transmission
INVECS-II Sports Mode 4A/T
(Intelligent & Innovative Vehicle Electronic Control System II)* E00603200606
Designed for optimum control and equipped with
adaptive control capabilities, the electronically con-
trolled transmission optimally matches gear shifts
to almost all driving and road conditions. CAUTION
l
This
system is strictly intended to provide
supplementary functions. When travel-
ling downhill under certain conditions or
immediately after starting off when the
A/T is cold, no automatic shiftdown may
be made. The driver should shiftdown to
a lower gear to use engine braking. Try
to drive safely at all time.
NOTE l During
running-in period or immediately af-
ter reconnection of the battery cable, there
may be a case where gear shifts are not made
smoothly. This does not indicate a faulty trans-
mission.
Gear shifts will become smooth after the trans-
mission has been shifted several times by the
electronic control system.
Selector lever operation E00603300131
The transmission has 4 forward gears and 1 reverse
gear. The individual gears are selected automatically, de-
pending
on the position of the gear selector lever,
the speed of the vehicle and the position of the ac-
celerator pedal.
The selector lever (A) has 2 gates; the main gate
(B) and the manual gate (C). NOTE
l In
the main gate, selector lever has 4 positions.
l For information on manual gate operation,
please refer to “Sports mode” on page 4-17. While depressing the brake pedal,
move
the selector lever through the gate. Move the selector lever through the gate.
WARNING
l Always
depress the brake pedal when
shifting the selector lever into a gear
from the “P” (PARK) or “N” (NEU-
TRAL) position.
When beginning to drive, do not shift the
selector lever from the “P” (PARK) or
“N” (NEUTRAL) position while depress-
ing the accelerator pedal, doing so is dan-
gerous because the vehicle will “jump” for-
ward or backward. Starting and driving
4-15 4 LHD RHD
Presented by http://mmc-manuals.ru/ \251
Page 119 of 273
 NOTE
l To
avoid erroneous operation, move the se-
lector lever firmly into each position and brief-
ly hold it there. Always check the position
shown by the selector lever position")
NOTE
l To
avoid erroneous operation, move the se-
lector lever firmly into each position and brief-
ly hold it there. Always check the position
shown by the selector lever position indica-
tion lamp after moving the selector lever.
l If the brake pedal is not depressed and held,
the shift-lock device activates to prevent the
selector lever from being moved from the
“P” (PARK) position.
l For a shift indicated by in the illustration,
depress
the brake pedal before moving the se-
lector lever. If you attempt to move the selec-
tor lever before depressing the brake pedal,
the selector lever may become immovable. Selector lever position indication
lamps/“N” indication lamp
E00603500452 A- Selector lever position indication lamps
When
the ignition switch is turned to the
“ON” position, the indication lamps in the
instrument panel illuminate to show the po-
sition of the selector lever (i.e. “PARK”,
“DRIVE”, “REVERSE”, etc.).
B- “N” indication lamp When
the “N” indication lamp blinks with
the “D” (DRIVE) position or “Sports
mode” being selected, the A/T may be mal-
functioning. CAUTION
l
If
a malfunction occurs in the A/T while
driving, the “N” indication lamp will blink.
In this case, immediately park your vehi-
cle in a safe place and follow these proce-
dures:
(The “N” indication lamp warning func-
tion does not operate with the selector lev-
er in the “P” (PARK), “R” (REVERSE)
or “N” (NEUTRAL) position.)
[The “N” indication lamp blinks rapidly
(twice per second)]
The automatic transmission fluid is over-
heating.
Park your vehicle in a safe place but do
not turn off the engine. Move the selector
lever to the “P” (PARK) position and
open the bonnet. Keep the engine idling.
After a while, move the selector lever to
the “D” (DRIVE) position and confirm
that the “N” indication lamp stops blink-
ing. It is safe to continue driving if the
“N” indication lamp no longer is no lon-
ger blinking.
If the “N” indication lamp continues blink-
ing or blinks intermittently, we recom-
mend you to have your vehicle inspected.
[The “N” indication lamp blinks slowly
(once per second)]
The A/T safety device may be operating
due to a malfunction.
We recommend you to have your vehicle
inspected as soon as possible. Starting and driving
4-16
4
Presented by http://mmc-manuals.ru/ \251
Page 120 of 273
 Selector lever positions (Main gate)
E00603800077
“P” PARK
This
position locks the transmission to prevent the
vehicle from moving. The engine can be started in
this position.
“R�")
Selector lever positions (Main gate)
E00603800077
“P” PARK
This
position locks the transmission to prevent the
vehicle from moving. The engine can be started in
this position.
“R” REVERSE
Move the lever to this position only after the vehi-
cle has come to a complete stop. CAUTION
l
Never
shift into the “P” (PARK) or “R”
(REVERSE) position while the vehicle is
in motion. If the lever is shifted into the
“P” (PARK) or “R” (REVERSE) position
while the vehicle is in motion, the trans-
mission may be damaged.
“N” NEUTRAL
At this position the transmission is disengaged. It is
the
same as the neutral position on a M/T, and
should be used when the vehicle is stationary for
an extended length of time during driving, such as
in a traffic jam. WARNING
l Never
move the selector lever to the “N”
(NEUTRAL) position while driving. A se-
rious accident could occur since you
could accidentally move the lever into the
“P” (PARK) or “R” (REVERSE) position
or you will lose engine braking. WARNING
l On
a gradient the engine should be star-
ted in the “P” (PARK) position, not in the
“N” (NEUTRAL) position.
l Always keep your right foot on the brake
pedal when the vehicle is in “N” (NEU-
TRAL), or when shifting into or out of
“N” (NEUTRAL), to minimize the risk of
loss of control.
“D” DRIVE
This
position is for normal driving. The transmis-
sion automatically selects a suitable gear for your
speed and acceleration.
Engine braking is automatically applied when nec-
essary, depending on road conditions.
Please refer to “Uphill/downhill driving” on page
4-19.
Sports mode E00603901121
Whether the vehicle is stationary or in motion,
sports
mode is selected by pushing the selector lev-
er from the “D” (DRIVE) position into the manual
gate (A). To return to “D” range operation, push
the selector lever back into the main gate (B).
In sports mode, gear shifts can be made rapidly sim-
ply
by moving the selector lever backward and for-
ward. In contrast to a M/T, the sports mode allows
gear shifts with the accelerator pedal depressed.
SHIFT UP
SHIFT DOWN + (SHIFT UP)
Push
the lever forward once to shift up one gear.
- (SHIFT DOWN)
Pull the lever backwards once to shift down one
gear. CAUTION
l
In
sports mode, the upward shift from
the 1 st
to 2 nd
gear is made automatically
while the upward shifts to the 3 rd
and 4 th
gears are made by the driver. The driver
must execute upward shifts in accordance
with prevailing road conditions, taking
care to keep the engine speed below the
red zone. Starting and driving
4-17 4
Presented by http://mmc-manuals.ru/ \251
 1
1 2
2 3
3 4
4 5
5 6
6 7
7 8
8 9
9 10
10 11
11 12
12 13
13 14
14 15
15 16
16 17
17 18
18 19
19 20
20 21
21 22
22 23
23 24
24 25
25 26
26 27
27 28
28 29
29 30
30 31
31 32
32 33
33 34
34 35
35 36
36 37
37 38
38 39
39 40
40 41
41 42
42 43
43 44
44 45
45 46
46 47
47 48
48 49
49 50
50 51
51 52
52 53
53 54
54 55
55 56
56 57
57 58
58 59
59 60
60 61
61 62
62 63
63 64
64 65
65 66
66 67
67 68
68 69
69 70
70 71
71 72
72 73
73 74
74 75
75 76
76 77
77 78
78 79
79 80
80 81
81 82
82 83
83 84
84 85
85 86
86 87
87 88
88 89
89 90
90 91
91 92
92 93
93 94
94 95
95 96
96 97
97 98
98 99
99 100
100 101
101 102
102 103
103 104
104 105
105 106
106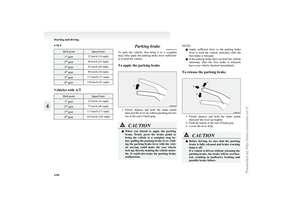 107
107 108
108 109
109 110
110 111
111 112
112 113
113 114
114 115
115 116
116 117
117 118
118 119
119 120
120 121
121 122
122 123
123 124
124 125
125 126
126 127
127 128
128 129
129 130
130 131
131 132
132 133
133 134
134 135
135 136
136 137
137 138
138 139
139 140
140 141
141 142
142 143
143 144
144 145
145 146
146 147
147 148
148 149
149 150
150 151
151 152
152 153
153 154
154 155
155 156
156 157
157 158
158 159
159 160
160 161
161 162
162 163
163 164
164 165
165 166
166 167
167 168
168 169
169 170
170 171
171 172
172 173
173 174
174 175
175 176
176 177
177 178
178 179
179 180
180 181
181 182
182 183
183 184
184 185
185 186
186 187
187 188
188 189
189 190
190 191
191 192
192 193
193 194
194 195
195 196
196 197
197 198
198 199
199 200
200 201
201 202
202 203
203 204
204 205
205 206
206 207
207 208
208 209
209 210
210 211
211 212
212 213
213 214
214 215
215 216
216 217
217 218
218 219
219 220
220 221
221 222
222 223
223 224
224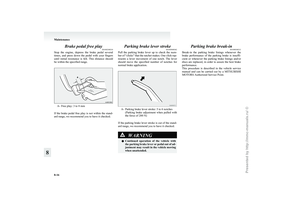 225
225 226
226 227
227 228
228 229
229 230
230 231
231 232
232 233
233 234
234 235
235 236
236 237
237 238
238 239
239 240
240 241
241 242
242 243
243 244
244 245
245 246
246 247
247 248
248 249
249 250
250 251
251 252
252 253
253 254
254 255
255 256
256 257
257 258
258 259
259 260
260 261
261 262
262 263
263 264
264 265
265 266
266 267
267 268
268 269
269 270
270 271
271 272
272