Page 161 of 364

____________________________________________________ T _r_a _n_ s_m _ i_s _s_ i_ o _ n _ ___._
& WARNING
Be careful when using the kick-down feature on slippery roads.
Rapid acceleration may cause the vehicle to skid.•
Appli es to vehi cles: wit h mul tit ro nic ® Con tin uousl y Va riable Tra ns mi ssion (CVT )
Dynamic shift program {DSP)
The multitronic ® transmission is electronically
controlled.
The transmission selects the appropriate gear ratio (upshifts and
downshifts) automatically based on preset driving programs.
The transmission will select one of the
economy programs when you
drive at a steady speed or a gradually changing speeds without heavy
acceleration . This gives best fuel efficiency, with early upshifting and
delayed downshifting .
The transmission will automatically select the
sporty shift programs
when you drive at higher speeds, or with heavy acceleration and
frequently changing speeds . Upshifts are delayed to make full use of
engine power . Downshifting takes place at higher engine speeds than
in the economy programs.
The selection of the most suitable shift program is a continuous,
automat ic p rocess . The driver can also make the transmission switch
to a sporty program by
quickly pressing down the gas pedal.
This causes the transmission to shift down into a lower gear ratio and
makes quick acceleration possible (to pass another vehicle) You do
not need to press the gas pedal into the kickdown range . After the
transmission has upshifted, the original program is selected
according to your driving style.
An additional shift program allows the automatic transmission to
select the proper gear for uphill and downhill gradients.
This prevents the transmission from shifting up and down unneces sarily on hills. The transmission will shift down to a lower gear ratio
Con tro ls a nd e quip
m en t Vehicle
OP-eration
when the driver presses the brake pedal on a downhill gradient . This
makes use of the braking effect of the engine without the need to
shift down manually.
If you are driving in h ills and mountains, the transmission will contin
uously adjust the gear ratio to the road grade. If you press the brake
pedal when driving downhill, the transmission will downshift auto
matically. This increases the braking effect of the engine.
If the cruise control is on when you are traveling downhill, the trans
mission will automatically select a lower gear ratio in order to main
tain the set vehicle speed. This will cause the engine speed to
increase. •
App lies to veh icle s: with m ult itr on ic ® Contin uous ly Va riabl e Tra nsmi ssion ( CVT)
tiptronic ® manual shift program
Using the manual shift program (tiptronic ®) you can
manually shi~ between seven pre-programmed gear
ratios (transmission positions).
Vehicle care
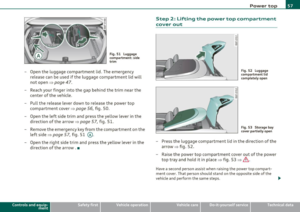
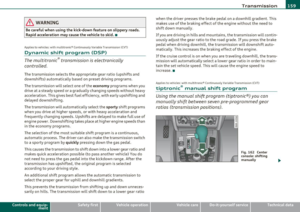
Fig . 162 Center
console: shifting
manually
Do-it-yourselt service iTechnical data
Page 162 of 364

ffl..__T_ r_a _n_ s_ m_ is_ s_io _ n ___________________________________________________ _
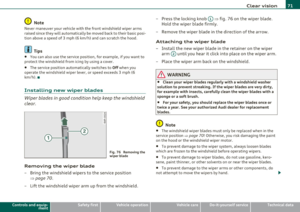
Fig. 163 Display:
manual shift progra m,
selec ted gear
Switching to manual shift program
- Push the selector lever to the right from D. As soon as the
transmission has switched over, the selected gear appears
in the display~ fig. 163.
To upshift
-Push the selector lever forward to the plus position
~ page 159, fig. 162 G).
To down shift
- Push the lever to the minus position Q.
When accelerating , the transmission will automatically shift into the
next higher gear before the engine reaches the maximum RPM.
Wh en accelerating, if you apply a light thrott le, the tiptronic ® will
automatically shift into the next higher gear to save fuel. If you apply
a heavy throttle, the transmission will stay in gear engaged until near
maximum RPM are reached, or until the driver manua lly shifts into a
higher gear.
If you take your foot off the accelerato r pedal when driving down a
steep incline , the tiptronic ® will downshift from the selected gear
into the next lower gear based on road speed and engine RPM. The
automatic downshifting is interrupted as soon as you apply throttle
again .
[I] Tips
• When you shift into the next lower gear, the engine w ill downshift
only when there is no possibility of over-revving .
• When the kick-down comes on, the transmission will sh ift down to
a lower gear depending on vehicle and engine speeds.
• The tiptronic ® is inoperative when the transmiss ion is in the fail
safe mode .•
Applies to vehicles: with mult itron ic ® Cont inuously Variable Transm ission (CV T)
Steering wheel with tiptronic ®
The shift buttons on the steering wheel allow the driver to
shift gears manually.
Fig . 164 Steering
w hee l: Shift buttons
- To downshift, touch the button on the left Q.
- To upshift, touch the button on the right G).
The shift buttons are activated when the selector lever is in D, Sor in
the manual shift program (tiptronic).
Of course, you can continue to use the manual shift program with the
selector lever on the center console . •
Page 163 of 364

______________________________________________________ T_ r_a _n_ s_m _ i_ s _s_ i_ o_ n _ __.1111
App lies to vehicles : w ith mu lt itron ic® Continuous ly Variab le Transm ission (CVT)
Automatic transmission malfunction )
In the event of a system malfu nction, the automatic transmission
swi tches to emergency opera tion mode.
Gearbox malfunction: you can continue driving
You can continue to drive the vehicle . See an authorized Aud i dea ler
or other qualified workshop at the next opportunity .
Gearbox malfunction: you can continue driving (limited
functionality)
There is a serious system malfunct ion :
• Th e program sh ifts only into certain gea rs.
• The engin e may s tall.
• It is not poss ible to restart the engine if it has been sw itched off.
• Continuing to drive could result in subsequent damage .
0 Note
If the transmission switches to fail-safe mode , you should take the
vehicle to an authorized Aud i dealership as soon as poss ible to have
the condition corrected .•
Con tro ls a nd e quip
m en t Vehicle
OP-eration
Applies to vehicles : w ith mu ltitron ic® Cont inuous ly Va riab le Transm ission (CVT)
Emergency release for selector lever
If the vehicle's power supply fails, the selector lever can
be released in an emergency .
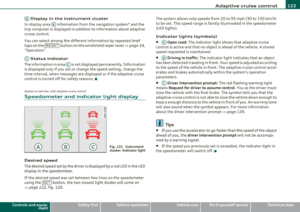
Fig. 1 65 Removing
ashtray inse rt
Fig. 166 Emergency
release for selector
l ever
- To access the emergency release mechanism, remove the
ashtray insert ® using the release switch@=> fig . 165.
- Loosen and remove the cap in the ashtray mount .
- You now have access to a pin . Using a screwdrive r or
similar object , press the pin down and hold it in that posi-
tion => fig . 166. ._
Vehicle care Do-it-yourselt service iTechnical data
Page 164 of 364
1111....__T_ r_a _n_ s_m _ i_s _s _ i_o _n ___________________________________________________ _
- Now press the interlock button and move the se lector
leve r to the
N position.
T he selecto r leve r ca n only be moved from the P pos ition if the igni
tion key is in the lock and the ignition is turned on . If the vehicle has
to be pushed or towed if the powe r supp ly fa ils (e.g. batte ry is
discharged), the selector lever must firs t be moved to t he N posi tion
using the emergency lo cki ng device .•
Page 165 of 364

______________________________________________________ P_a _ r_ k_ a_ s_s _i _ s _t __ _
Park assist
Applies to vehic les: wit h pa rk ing s yst e m
Parking system
D iff erent park assist systems may be used for parking or
maneuvering, depending on the vehicle's features .
Parking system (rear)*:
For the parking system, the acoustic par k assist system is installed in
the rear of the vehicle=>
page 163.
The rear par king assist sys tem uses ultrason ic sensors to determine
the distance of the vehicle from a detected obstacle. There are a total
o f f our sensors located on t he rear bumper (two in the middle and
two on the sides).
Parking system (rear, with rear-view camera)*:
For the parking system (rear , wi th rear-view camera), the rear
aco ustic park assist system is integ ra ted in the rear of the vehicle and
the rear-view camera is integrated in the rear lid=>
page 167.
The parking system (rear, with rear-view camera) uses ultrasonic
senso rs to determine the distance of the vehicle from a detected
obstacle. The re are a total of four sensors located on the rear bumper
(two in the m iddle and two on t he sides). •
Controls and equip
ment Safety first
Parking system (rear)
Ap
plies to vehicl es: w ith pa rk ing s yste m (r ear)
Rear acoustic park assist
The rear acous tic park assist warns you of obstacles or
objects behind your car .
Description
The rear a co ustic parki ng assis t sys tem de termines t he d istance o f
the vehicle from an obstacle us ing ultraso nic sensors . There are 4
sensors in the rear bumpe r.
T he range at which the sensors start to measure is
about :
To the side
Center rear
Acti vation
2 ft (0.60 m)
5.2 ft (1.60 m)
Aco ustic park ing assis t is activated au tomatically when
rever se gear
is engaged. A brief tone confirms that the system is activated .
Warning tones
Distance warning is given by chimes which are generated by the rear
signal generator . The vo lume and the pi tch of the chimes can be
adjusted in the radio or i n the MMI* =>
page 164 .
Reversing
Distance warn ing when reversing starts when an obstacle is detected
in the range o f th e parking ass ist system . As t he distance decre ases,
the time interva l between the a udible tones becomes shorter .
Whe n the distance is less than 1 ft (0.30 m), the tone becomes
c ont inuo us. A t this point you should stop ba cking up.
Vehicle care Technical data
Page 166 of 364

1111...._ __ P_a _ r_ k_ a_ s_ s_is _ t ____________________________________________________ _
Please note that low objects already signa led by a warning can disap
p ear from the system 's de te ct io n ra nge and will not co nti nu e to be
signaled .
If the distance to an obstacle remains the same, the vo lume of the
dis tance war ning is g radually reduce d after abou t 4 seconds.
Approaching another obstacle wi ll result in the distance warning
so unding at t he normal vo lume aga in.
Malfunctions in the system
If a wa rning tone is aud ible fo r abo ut five seconds when you turn on
the ignition, there is a ma lfunction in the system. Have the prob lem
c o rrected by yo ur autho riz e d Aud i de aler.
Keep the se nsors i n the rear bumper clean and free from ice so t hat
t he a cous tic p ark ass is t sys tem can func tion prope rly.
& WARNING
• Sen sor s have dead space s in whi ch objects cannot be dete cted.
Be especiall y alert for small children and animals , since they are
not alway s detected by the sen sors .
• The Acoustic Par king Sy stem is not a substitute for the dr iver 's
own caution and alertne ss. Ul timate re spon sibility always
rema ins with the drive r dur ing pa rking and similar maneu ve rs .
Always watch where you ar e driving .
• You should alwa ys adjust the volume and frequency of the
c hime s so that you can easily hear the a cou stic distan ce warning
e v en if the radio is playing, the air -cond itioner blower is on High
or there i s a high l evel of outside noi se .
- Check the setting s whenever anyone else ha s driven the
vehi cle b efore you .
0 Note
• Remembe r that low obstacles fo r which a war ning has already
been issued may "dive" below the system's sensing zone if the vehicle
is be ing b acked up closer . In this case, the warn ing so und sh utting off does
not ind
icate that you have cleared the obstacle. Instead, impact
is imm inen t.
• Objects such as tra iler hitches, chains, narrow posts or fences
c overed by a th in laye r of pa int may no t always be detected by the
system . They can still damage your vehicle without warning .
[ i ] Tips
Keep the sensors in the rear bumper clean and free of snow and ice so
that the acoustic parking assist system can function properly .•
Ap plies to veh icles : w it h park ing s yst em (rea r)
Adjusting the chimes
T he volume and the pitch (frequency) of the chimes can
be adjusted in the radio or in the fv1fv1I *.
Rear volume adjustment
-Select: [CAR]> Parking system .
-Select Rear volume if you wa nt to cha nge the volume of
the rear s igna l generator .
Rear frequency adjustment
-Sele ct: [CAR)> Parking system.
- Select Rear frequency when you want to change the
frequency of t he rear audible signa l generator.
When ad justing the vo lume and frequency, the new sett ing will
sound for approx. 2 seconds from each aud ible signal generator. The
volume and frequency settings a re automat ica lly stored and assigned
to the master key with remote control. .,,,
Page 167 of 364

______________________________________________________ P_a _ r_ k_ a_ s _ s_is _ t _ __.fflll
& WARNING
• You should a lways adju st the volum e and fr equency of the
c hime s so that you can ea sily hear the ac oustic di stance warning
even if the rad io is playing, the air-conditioner blowe r is on High
or there is a high level of outside noise.
- Check the setting s whenever anyone els e ha s dri ven the
vehicle before you. •
Parking system (rear, with rear
view camera)
App lies to vehicl es: w ith par king system (rear) and rear -view camera
Introduction
Contro ls a nd e quip
m en t
0 ~ 9
" co m
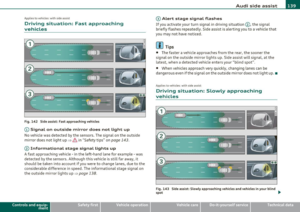
Fig . 167 Parking
mode 1 : rever se
parking
Vehicle OP-eration
Fig. 168 Pa rkin g
mode 2: p ara llel
p ark in g
Vehicles with the park ing system are equ ipped with a rear-view
camera in additio n to the aco ust ic and visual pa rking system .
You ca n choose between two modes to ass ist yo u w ith pa rk ing . Fo r
example, you can use "parking model" when parking in a parking
sp ace or garage ~ fig . 167. When you wan t to p ark paralle l to the
edge of the street, select "park ing mode 2"
~ fig. 168.
& WARNING
• The rear-view camera has blind spots, in which objects cannot
be detected. Be especially careful to check for small children and
animals before backing up. Small ch ildren and animals will not
alway s be detected by the sen sors. •
Vehicle care Do-it-yourselt service iTechnical data
Page 168 of 364

llffl..__P_ a_r_ k_ a_ s_ s_ is_t ____________________________________________________ _
Applie s to vehicles : wi th par king syst em (rear) an d rear-vi ew camera
General Information
®
Sensors in the bumper
Fig. 169 Covered area
G:) and uncovered area
@ of the rear-view
camera
Fig. 170 Trunk lid:
Location of the rear
view camera
Sensors are located in the front and rear bumpers. If these detect an
obstacle, audible and visual signals warn you . The range at which the
sensors begin to measure is approximately:
To the side
Center rear 2 ft (0.60 m)
5.2
ft (1.60 m)
The closer you get to the obstacle, the shorter the interval between
the audible signals. A continuous tone sounds when the obstacle is less than approximately 1 foot (0.30 meters) away. Do not continue
driving
farther.
If the distance to an obstacle stays the same, the volume of the
distance signal chime is gradually reduced after about
4 seconds
(does not affect the continuous signal tone). Approaching another
obstacle will cause the distance signal to sound again at the normal
volume.
Rearview camera coverage area
The MMI display shows the area covered by the rearview
camera => fig.
169 (D. Objects that are not in the area covered 0 are
not shown on the MMI display.
We recommend that you practice parking with the rear-view camera in a traffic-free location or parking lot to become familiar with the
system, the orientation lines, and their function . When doing this,
there should be good light and weather conditions.
In the MMI display, objects or vehicles appear closer or further away
if:
• you are driving in reverse gear from a level surface onto an incline,
or a downward slope,
• you are driving in reverse gear toward protruding objects,
• the vehicle is carrying too much load in the rear.
The accuracy of the orientation lines and blue surfaces diminishes if:
• the rear-view camera does not provide a reliable image, for
example, in poor visibility conditions or if the lens is dirty,
• the image on the screen is not visible due to sun glare and reflec
tion.
Caring for the rear-view camera lens
The rear-view camera is located above the rear license plate bracket.
F or the parking assist to operate, the lens=> fig. 170 must be kept
clean:
• Dampen the lens with a household alcohol-based glass cleaner,
and clean the lens with a dry cloth=>
0. ~