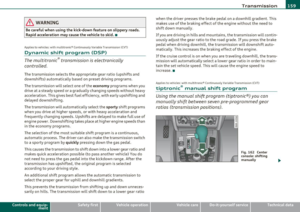
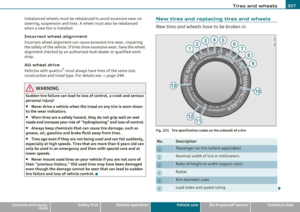
Page 81 of 364

Adjusting the curvature of the lumbar support
- Push the switch p late @forward or backward to increase
or red uce the curvature .
Adjusting the height of the lumbar support
-Push the sw itch p late @ up or down to position the curva
ture higher or lower.
Fore-and-aft adjustment
- Push th e switc h® forward or backward~ pag e 78,
fig . 81.
Adjusting seat height
- Pull or push the switch ® up or down.
Front seat cushion up/ down
-Press th e sw itch ® at the fr ont up or down .
Rear seat cushion up / down
- Press t he switch ® at the rear up or down.
Adjusting seat back angle
-Push th e switc h @ forwa rd or backwar d.
Head restraint height adjustment*
-Press the switch © from up to down or t he ot her way.
Lengthening or shortening upper thigh
support*
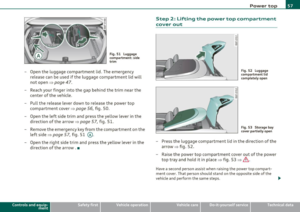
- Lift the button @ under the seat cus hion . The front sea t
cushion moves fo rward u nder spring force .
Control s and equ ip
m ent Vehicle OP-eration
Seats and storage
-Push the seat c ushion back w hen you have f in ished using
i t.
& WARNING
• Adjust the driver 's seat only when the vehicle is stationary . You
risk an accident otherw ise.
• The power adjustment for the front seat s al so works with the
ignit ion switched off or with the ignition key removed. For this
reason, children should never be left unattended in the vehicle -
they could be injured!
• Exerci se caution when adjusting the seat height . Unsupervised
or careless seat adjustment can pi nch fingers or hands causing
injuries .
• While the vehicle is mo ving , the seat bac ks of the front seats
mu st not b e inclined to o far to the rear bec ause the effectiveness
of the safety belts and the airbag system is se verely compromised
- there is a risk of injury .•
Easy entry function
The easy entry function makes it easier for the rear
passengers to enter and leave the vehicle.
Vehicle care
... N 0
~
~
F ig . 82 D riv er 's se at:
C ont ro ls for e asy e ntry
assi st
~
Do-it-yourselt service iTechnical data
Page 82 of 364

Seats and storage Folding down the front seat backs
- Lift the latch=> page 79, fig. 8 2.
- Tilt the seat bac k forward.
Moving the front seats forward
- Press a nd ho ld the switch @ until th e seat has r eached t he
desir ed p osition .
Moving front seats back
-Press and ho ld t he switc h@ until th e seat has reached t he
des ired position. The seat stops a utomatically when it has
reached its starting position again .
To make it easier to enter and leave the rear seat , t h e seatbacks of the
front sea ts ca n be folded forward and the he ad restraints are a uto
matically lowered . At the same time, the front seats can be moved
forward and back.
W hen the front seats a re moved forward, their or ig inal position is
sto red . When it is moved back, the seat automat ically stops in this
posit io n. T o move the seat even further b ack, you have to release the
switch @ and reactivate it.
T he head rest raints from the front sea ts, depending on t he se at
height that has been set, a re a utomatically retracted when t he seat
backs are folded down. They return to their or iginal position again
when the sea tbacks for the fron t seats a re ra ised .
(I) Tips
With the driver 's o r passenger's door closed, the corresponding
switch to move the seat is inoperative. •
Seat memory
Applies to veh icles : w it h seat memo ry
Memory for driver's seat
The seat adjustment settings for t wo drivers can be
stored using the memory buttons in the driv er's door .
Fig. 83 Driver 's doo r:
Seat memory
In additio n to the setting for the driver's seat, the exterior rear v iew
m irror setting ca n be stored and reca lled throug h seat memory if the
veh icle is properly equipped.
Storing and recalling settings
With the he lp of the memory b uttons 1 a nd 2 ~ fig. 83 the settings
for two different drivers can be stored and recalled~
page 81.
The cur rent settings are also automatically stored on the remote
c o ntrol key being used when the vehicle is locke d. Whe n the vehicle is
unlocked, the settings stored on the remote contro l key being used
are autom atic ally re calle d.
Turning seat memory on and off
If the [ ON/OFF ] switc h is depressed , th e seat memo ry is inoperative.
The word
OFF in the [ ON/OFF] sw itch illuminates .
All the stored setti ngs are retained . We recommend using the
I O N/OFF ] switch and deact ivating the seat memory if the vehicle is .,
Page 83 of 364

only going to be used temporarily by a driver whose settings are not
going to be stored. •
Applies to vehicles : w ith seat memory
Storing and recalling settings
Before you can store or recall your settings, the [ ON/OFF]
switch on the seat memory must be engaged (not raised).
Storing settings
- Adjust the driver's seat.
- Adjust the two exterior mirrors .
- Press the
I SETI button and hold it down. In addition, press
one of the memory buttons for at least one second .
- Release the buttons. The settings are now stored under
the corr esponding memory button .
Recalling settings
- If the driver's door is open, tap the corresponding memory
button briefly .
- If the driver's door is closed , press the appropriate
memory button unt il the stored position is reached .
Successful storage is confirmed audibly and by the light in the [SET)
button illuminat ing=> page 80, fig . 83 .
When the vehicle is
loc ked , the current settings are stored and
ass igned to the remote contro l key. B ut the setti ngs sto red on
memory buttons 1 to 2 are not deleted. They can be reca lled at any
time. When the vehicle is
unlo ck ed , the settings stored on the
remote control key are restored.
If your vehicle is driven by other persons using your remote control
key , you should save your individua l seat position on one of the
Controls and equip
ment Safety first
S
eats and storage
memory buttons. You can recall your settings again simply and
conveniently by press ing the cor responding memory button. When
the vehicle is locked, these settings are automatically re-assigned to
the remote control key and stored.
& WARNING
• Fo r sa fe ty reaso ns, th e se at se tting can only b e recalled when
t h e ve hicl e is s tat ion ary -oth erwise yo u risk ha ving an acc ident .
• In an emer gency th e re ca ll pro ce du re can be cancelled b y
p ressing the [
ON/OFF) sw itch or by t appin g of the the memo ry
b utto ns. •
App lies to ve hicles: with seat memory
Activating remote control key memory
To be able to recall the stored settings with the remote
control key, the function has to be activated in the radio
or in the MM!*.
-Select : Function button I CAR]> Seat adjustment >
D river's se at > Key mem . profile > On .
(I) Tips
If you do not want another driver to store their settings on the
remote key, switch
off the Memory function using the radio or the
MMI* or the [OFF] button => page 80 . •
Vehicle care Technical data
Page 84 of 364

Seats and storage
Head restraints
Applies to vehicles: with adjustable head restra ints
Adjusting the front head restraints
Head restraints that are adjusted according to body size,
along with the seat bealt, offer effective protection.
Fig. 84 Front seat:
Adjusting head
restraint electrically
-Push the switch up or down=> fig. 84 to adjust the height
of the head restraint.
- Adjust the headrests so the upper edge is as even as
possible with the top of your head=>
page 181, "Proper
adjustment of head restraints".
Refer to~ page 181, "Proper adjustment of head restraints" for
guidelines on how to adjust the height of the front head restraints to
suit the occupant's body size.
& WARNING
• Driving without head restraints or with head restraints that are
not properly adjusted increases the risk of serious or fatal neck
injury dramatically.
• Read and heed all WARNINGS~
page 181.
[I] Tips
Correctly adjusted head restraints and safety belts are an extremely
effective combination of safety features. •
Applies to vehicles: with front armrest
Front armrest
The center armrest can be adjusted to several levels.
Adjusting the center armrest
Fig. 85 Armrest
between the
driver· s/front
passenger 's seats.
- To adjust the angle, raise the armrest from the starting
position detent by detent => fig. 85.
- To bring the armrest back into the starting position, raise
it out of the top detent and fold it back down.
The armrest can slide forward and back. •
Page 85 of 364

Luggage compartment
Loading Luggage compartment
Items of luggage must be stowed securely.
Fig. 86 Place heavy
objects as far forward
as possible.
Note the following to preserve the vehicle's good handling
characteristics.
- Distribute the load as evenly as possible.
- Place heavy objects as far forward as possible=> fig. 86.
- Secure the items of luggage with the non-elastic retaining
straps to the tie-down rings=>
page 83.
& WARNING
• Loose objects in the luggage compartment can slide about
suddenly and alter the vehicle's handling characteristics.
• Loose objects in the passenger compartment can fly forward
during abrupt maneuvers or accidents and injure occupants.
• Always store objects in the luggage compartment and use suit
able straps, particularly with heavy objects.
Con tro ls a nd e quip
m en t Vehicle
OP-eration
Seats and storage
& WARNING (continued)
• When you transport heavy objects, always remember that a
change in the center of gravity may result in a change in the
vehicle's handling characteristics.
• Follow all warnings=> page
176, "Driving Safely"
[I] Tips
The tire pressure must be adjusted to the load -see the tire pressure
sticker on the edge of the driver's door. •
Tie-down rings
The luggage compartment is equipped with four tie-down
rings to secure luggage and other items.
Fig. 87 Location of
the tie-down rings in
the luggage compart ment
- Secure the cargo to the tie-down rings=> fig. 87 -Arrows- .
- Observe the safety notes=>
page 185. •
Vehicle care Do-it-yourselt service iTechnical data
Page 86 of 364

Seats and storage
Increasing the size of the Luggage
compartment
The rear seat backrests can be folded forward either
separately or together.
Folding the backrest forward
Fi g. 88 Lug gag e
compa rtment: releas e
l e ver
- Pull the release lever in the direction of the arrow to fold
the bac krest forward.
Folding the backrest down
- Fold the backrest down unti l it latches securely => & .
& WARNING
The backrest must be secure ly latched so obje ct s cannot slide
forward out o f the luggage compartment dur ing sudden braking.
0 Note
When fold ing t he backrest forward, make sure the rear safety be lts
are in the belt guides so they do not become pinched in the backrest
lock and damaged . Othe r objects should be removed from the rear
bench seat to protect the backrest from damage. •
Beverage holders
Front beverage holders
Fig. 8 9 Ce nter
c on sole: Front
b ev era g e ho lder s
Fi g. 90 Beve rag e
st or age* in the re ar
- You can accommodate two beverages in t his sto rage
=> fig. 89 .
A maximum of two beverages can be placed in the rear beverage
holders* .
& WARNING
Spilled hot liquid can c ause an accident and personal injury.
• Never carry any beverage container s with h ot liquid s, such a s
hot coffee or hot tea, in the vehicle while it i s moving. In case of .,_
Page 87 of 364

& WARNING (co ntinued )
an accident, sudden braking or other vehicle movement , hot liquid
c ould spill, cau sing scalding burn s. Spilled hot liquid can also
cause an accident and personal injury .
• Use only soft cups in the cupholder. Hard cups and glasses can
cause inju ry in an accident.
• Never use the cupholder or adapter as an ashtray -risk of fire .
0 Note
Only drink conta iners with lids shou ld be ca rr ied in the c upholder .
Liquid could spill out and damage your vehicle's e lectronic eq uipment
or s tain t he upho ls tery, e tc. •
Ashtray
Opening the ashtray
- Slide th e cover open.
Closing the ashtray
Fi g. 91 Ce nter
c onsol e: a shtray
- Tap the lid to close the as htray a utomatically.
Con tro ls a nd e quip
m en t Vehicle
OP-eration
Seats and storage
Removing ashtray insert
- Release the ash tray i nsert by sliding the switch@
=> fig. 91 to t he ri ght.
- Remove t he as htr ay insert ®=> fig. 9 1.
Reinstalling ashtray insert
-Press th e as htra y insert into i ts ho ld e r.
& WARNING
Never put waste paper in the ashtray. Hot ashes or other hot
objects in the ashtray could set waste paper on fire .•
Cigarette lighter
Fig. 92 Op en front
a shtray
Using the cigarette lighter
- Open t he lid of the front ash tray.
- Push t he knob on the c igarette lig hter i n.
- Wait unti l the knob po ps o ut sligh tly.
- Remov e the cigar ette lig ht er immediat ely.
Vehicle care Do-it-yourselt service iTechnical data
Page 88 of 364

Seats and storage
- Light your cigarette from the red-hot heating co il of the
cigare tte ligh ter .
- Return the cigarette lighter to its socket .
Using the socket
- Remove the cigarette lighter.
- Insert the plug of the electrical device into the cigarette
ligh ter socke t.
The socket o f the ciga re tte lighter may be used for 12-volt appliances
w ith maximum consumption of up to 100 watts, such as a flash light,
small vacuum cleane r, etc.
Before you purchase any accessor ies, always read and follow the
information in =>
page 345, "Additional accessor ies and parts
replacement" .
& WARNING
• Use care wh en u sing the cigar ette lighter . Inattentive or unsu
pervised u se of the cigarette lighter can cause burns -risk of
injury!
• The cigarette lighter work s when the ignition is swit ched off or
w ith the ignition key removed . Children should nev er be left unsu
pervised in the vehicle, or there could be risk of fire!
• The po wer outlets and therefore the electrical accesso ries
c onnected to them ope rate only with the ignition on . Improper
use of the outlet s or of electrical acce ssor ies can lead to serious
injurie s or cau se a fire. For this rea son , children should ne ver be
left unatt ended in the veh icle -they could be injured!
0 Note
• To avoid damag ing the socket, only use plugs that fit p roperly . •
Only use the cigarette lighter socket as a power source for elec
t rical accessories for short du rat ions. Use the socke ts * in the vehi cle
w hen a power sou rce is needed for longer durations .
(I] Tips
When the engine is off and accessories a re st ill p lugged in and are o n,
the vehicle battery can sti ll be drained .•
Storage
General overview
There are numerous places to store i tems in your vehicle.
Glove compartment => page 87
Storage compartments in the front seats
& WARNING
• Alway s re mo ve object s from the instrument panel. Any item s
not put away could slide ar ound in side the vehicle while d riving or
wh en accelerating or when apply ing the brake s or wh en driving
around a co rner .
• When you ar e driving make sure that anything you may have
pla ced in the center console o r othe r st orage lo cation s cannot fall
out into the footwell s. In case of sudden braking you would not be
able to brake, depress the clutch or accelerate. •