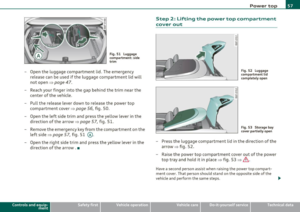
Page 73 of 364

0 Note
Never maneuver your vehicle with the front windshield wiper arms
raised since they will automatically be moved back to their basic posi
tion above a speed of 3 mph (6 km/h) and can scratch the hood.
W Tips
• You can also use the se rvice position, for example, if you want to
protect the w indshield from icing by using a cover.
• T he service position automatica lly switches to
Off when you
operate the windsh ield wiper lever, or speed exceeds 3 mph (6
km/h). •
Installing new wiper blades
Wiper blades in good condition help keep the windshield
clear.
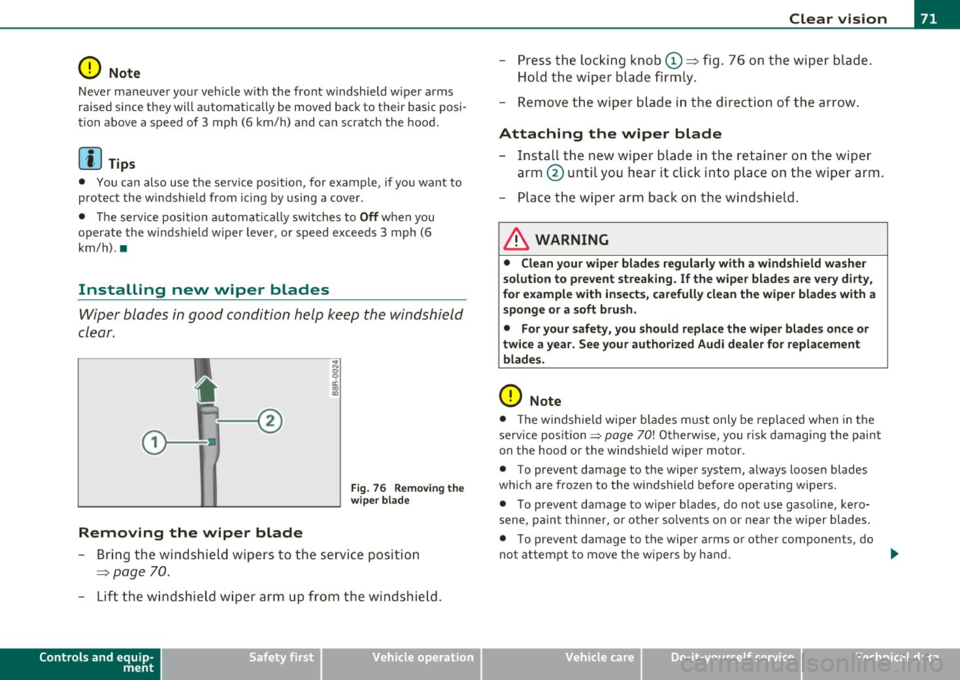
Removing the wiper blade
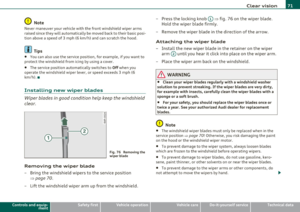
F ig . 76 Re movin g th e
wi per bla de
- Bring the windsh ield wipers to the service position
=:>
page 70 .
- Lift the windshi eld wi per arm up from the windshie ld.
Controls and equip
ment Safety first
Clear v
ision
- Press the loc king knob© =:> fig. 76 on the wiper blade .
Hold the wiper blade firmly .
- Remove the wiper b lade in the direction of the arrow .
Attaching the wiper blade
- Install the new wiper blade in the retainer on the wiper
arm @unti l you hear it click into p lace on the wiper arm.
- Place the wiper arm back on t he windsh ield .
& WARNING
• Clean your wiper blade s regularly with a wind sh ield wa sher
solut ion to pre vent st reaking . If the wiper blades are ver y dirt y,
f o r e xampl e w ith insects , ca refull y clean the wiper blade s w ith a
s ponge or a soft brush .
• For your safety, you should repla ce the w iper blade s once or
t w ice a year. See you r autho riz ed Aud i dea ler for replacem ent
blade s.
0 Note
• T he windshield wipe r blades must only be replaced when in the
serv ice posit ion~
page 70! Otherw ise, you risk damaging the paint
on the hood or the windshie ld wiper motor.
• To prevent damage to the wiper system, always loosen blades
wh ic h are frozen to the windshield be fore ope rating wipe rs .
• To prevent damage to wiper blades, do not use gasoline, kero
sene, paint th inner, o r other solvents on or nea r th e w iper blades .
• To prevent damage to the wiper arms or other components, do
not attempt to move the wipers by hand. .,,_
Vehicle care Technical data
Page 74 of 364
![AUDI A5 CABRIOLET 2010 Owners Manual Clear vision
(I] Tips
Commercial hot waxes applied by automatic car washes affect t he
how easily the glass surface can be cleaned. •
Mirrors
Manual glare-dimming
Standard settin AUDI A5 CABRIOLET 2010 Owners Manual Clear vision
(I] Tips
Commercial hot waxes applied by automatic car washes affect t he
how easily the glass surface can be cleaned. •
Mirrors
Manual glare-dimming
Standard settin](/manual-img/6/57573/w960_57573-73.png)
Clear vision
(I] Tips
Commercial hot waxes applied by automatic car washes affect t he
how easily the glass surface can be cleaned. •
Mirrors
Manual glare-dimming
Standard setting
- Move the small lever (located on the bottom edge of the
mirror) to the front.
Anti-glare setting
- Move the small lever (located on the bottom edge of the
m irror) to the rear .•
A ppli es to vehicl es: w ith automat ica lly dim ming in side m ir ro r
Automatically dimming inside mirror
The automatic dimming function con be turned on and
off if required.
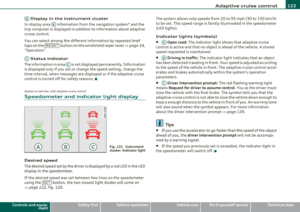
Fi g. 7 7 In sid e re ar
v iew mirr or
Disabling auto dimming
- Press button@=> fig. 77 briefly, -the indicator light ®
goes out.
Activating /reactivating auto dimming
- Press button @ briefly, -the indicator light ® goes on .
Automatic dimming function
The automat ic dimm ing function is act ivated eve ry time t he ig nitio n
is turned on. The green indicator lig ht is lit to indicate auto dimming
is active.
When d imming is activated, the inside mirror w ill darken
automati
cally
in respo nse to the amount o f light s triking the mir ror (suc h as
headlights from rearward approach ing ve hicles). Even in dimming
mode, the mirror surface turns brigh t when:
• the interior light is sw itched on
• reverse gear is engaged .
& WARNING
Broken glass of automatic dimming mirror can cause electrolyte
fluid leak age. Electrolyte fluid can irritate skin, eyes , and resp ira
tory sy stem.
• Repeated or p rolonged e xposu re to electrolyte can cause i rrita
tion to the re spiratory system, especially among people with
asthma or other respiratory conditions . Get fresh air immediately
by leaving the vehicle or , if that is not po ssible , open window s and
doors all the way.
• If electrolyte get s into the eye s, flu sh them thoroughly with
large amounts of clean water fo r at least 15 minutes; medical
attention is recommended.
• If elect rolyte contacts skin , flush affected area with clean
water for at lea st 15 minute s and then wash affected area with
Page 75 of 364

& WARNING (cont inued )
soap and water; medical attention is recommended. Thoroughly
wash affe cted clothing and shoes before reuse.
• If swallowed and person is conscious, rinse mouth with water
for at least 15 minutes. Do not induce vomiting unle ss instructed
to do so by medical professional. Get medical attention immedi
ately .
0 Note
Liquid elec tro ly te le aked fro m a broken mirro r g la ss w ill damage any
plast ic surfaces it comes i n contact with . Clean up spilled electro lyte
immedi ately wit h cle ar wa te r an d a spo nge.
[ i ] Tips
• If you switch off the automatic dimming function on the inside
mirror, automatic dimming of the outside mirrors will likewise be
disabled.
• Check to make s ure there are no objects preventing light from
reach ing the inside m irro r.
• Do not attach any st ickers to the w indshield in front of the light
s ensor, as this wo uld inter fere wi th both t he a utom atic oper ation of
the headlights and the automatic d imm ing of the inside mi rror. •
Contro ls a nd e quip
m en t Vehicle
OP-eration
Clear vision
Outside mirrors
Th e outs ide m irrors are e lec tricall y adj ust ed ( pow er
m irr ors )
Adjusting exterior mirrors
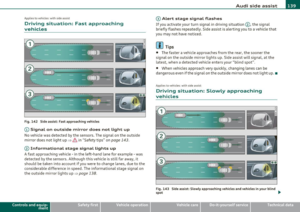
Fig. 78 Forward
section of d river 's
armr est : p ower mirror
controls
- R otate the kn ob to the© position (driver's ex ter ior
m irror) or t o th e® p osit io n (passe nger's e xterior mi rro r)
=> fig. 78 .
- R otate the k nob a nd th e mirror so t hat you have a clear
v iew to the rea r.
Heated mirrors
- Rotat e the k nob to position
@ .
Depen ding on the outs ide te mperature, the mir ror surfa ce s a re
heated until the ignit ion is sw itched off- even if the knob is no longer
in pos itio n
@.
You are w ell -advis ed to fold th e outside m irro rs in when man euv ering
in tight spaces or when leaving the ca r parked close to other vehicles ._..
Vehicle care Do-it-yourselt service Technical data
Page 76 of 364

Clear vision
Memory for exterior mirrors*
On vehicles with memory for the drive r's seat, the curren t sett ing for
t he exter io r mir rors is automatically stored a long w it h t he seat posi
tion ~
page 80.
Tilt funct ion for the passenger's mirror* (only with
memory for exterior mirrors)
W hen the reverse gear is engaged , th e mirror su rface t ilts downwa rd
slightly if the setting is for the passenger 's mirror (knob in position
@ ~ page 73, fig . 78) . T hi s allows you to see the curb dur ing pa ralle l
par king .
T he mir ror r etur ns to it s in iti al position as soon as reverse gear is
disengaged and ve hicle speed is above about 9 mph (15 km/h). The
m irro r also retu rn s t o its in itia l pos it ion i f th e swi tch is moved to the
dr iver's outside mirror © or the ignition is sw itched off.
If t he position of t he mir ro r su rface is changed on a ti lted mirror, this
new position will be automatically assig ned to the remote key when
the vehicle is taken out of reverse gear.
0 Note
Curved mirror su rfaces (convex or spherica l*) increase your fie ld of
view. Remembe r th at veh icles o r o the r object s will appear sm alle r
and fart her away than when seen in a flat m irro r. If you use this
m irror to est ima te dis tanc es o f following vehicles when cha nging
lanes, you cou ld estimate incorrect ly and cause an accident .
[I] Tips
If there should be a malfu nction in the electrical system, you can st ill
a djus t the ou ts id e mir rors by pressing the edge o f the m irro r.•
A pp lies to vehicles: with aut omat ica lly adj usting outs id e m irr ors
Automatic dimming for the outside
mirrors
Th e o utside mirrors dim at the same time as the inside m irror. Whe n
the ignition is switched o n, the mirrors a utomatically dim depending
on the a mou nt of light s triki ng t he m irro rs (su ch as he adlights
shining into the veh icle from the rear) .
W hen the inter io r li ght ing is switche d on and when reverse gear is
engaged, the m irro rs a re switched back to their original brig htn ess
(not dimmed) .
& WARNING
Broken gla ss of automatic dimming mirror can cause electrolyte
fluid leakage. Electrolyte fluid can irritate skin, eyes, and respira
tory sy stem.
• Repeated or prolonged exposure to electrolyte can cause irrita
tion to the re spiratory system, especially among people with
asthma or other respiratory conditions . Get fresh air immediately
by leaving the vehicle or , if that is not po ssible , open window s and
doors all the way.
• If electrolyte gets into the eye s, flush them thoroughly with
large amounts of clean water fo r at least 15 minutes; medical
attention i s recommended .
• If electrolyte contacts skin , flush affected area with clean
water for at lea st 15 minute s and then wash affected area with
soap and water; medical attention is recommended. Thoroughly
wash affected clothing and shoes before reu se.
• If swallowed and person is conscious, r inse mouth with water
for at least 15 minutes . Do not induce vomiting unles s instru cted
to do so by medical professional. Get medical attent ion immedi-
ately .
~
Page 77 of 364

0 Note
Liquid electrolyte leaked from a broken mirror g lass w ill damage any
plastic surfaces it comes in contact with. Clean up spi lled electro lyte
immediately with clear water and a sponge.
[I) Tips
• Swit ching off the dimming function of the insid e rearview
mir ror also deact ivates the automa tic dimm ing funct ion of the
e xterior mirrors.
• Automatic dimm ing for the mirror only operates properly if the
ligh t str ik ing the inside m irror is not h indered by o ther objects. •
Digital compass
Appli es to v eh icl es: w it h dig ital comp ass
Activating or deactivating the compass
The direction is displayed on the interior rear view mirror.
Fig. 79 In side rear
vi ew m irror: digi ta l
compass ac tiva ted
To activate or deact ivate, hold the @button dow n until
the red display appears or disappears.
Con trol s and equ ip
m ent Vehicle
OP-eration
Clear vision
The d ig ita l compass on ly works w it h the ignit ion turned on . The d irec
ti ons are d isp layed as ini tials:
N (No rth), NE (No rthe ast), E (East), SE
(Southeast), S (South), SW (Southwest), W (West), NW (Northwest).
[I) Tips
To avoid inaccurate directions, do not allow any remote controls,
electrical systems, or metal parts close to the mirror .•
A pp lies to veh icl es : w it h d igital com pass
Setting the magnetic deflection zone
The correct magnetic d eflection zone must be set in order
t o display the directions co rrectly.
@
©
Fi g. 8 0 Nor th Am eric a : ma gnet ic d efle ction zo ne bou ndarie s
Vehicle care Do-it-yourselt service iTechnical data
Page 78 of 364
Clear vision
-Hold the@=> page 75, fig. 79 button down until the
number of the set magnetic deflection zone appears on
the interior rear view mirror.
- Adjust the magnetic deflection zone by repeatedly pressing on the @button . The set mode automatically
deactivates after a few seconds. •
Applies to veh icles : w ith d ig ita l comp ass
Calibrating the compass
The compass has to be recalibrated if the display is wrong
or inaccurate.
- Hold the@ button down until the letter C is displayed on
the interior rear view mirror.
- Drive in a circle at a speed of about 5 mph (10 km/h) until a direction is shown on the interior rear view mirror.
& WARNING
The digital compass is to be used as a directional aid only. Even
though you may want to look at it while you are driving, you must
still pay attention to traffic, road and weather conditions as well
as other possible hazards. •
Page 79 of 364

Seats and storage
General recommendations
Why is your seat adjustment so important?
The safety belts and the airbag system can only provide
maximum protection if the front seats are correctly
adju sted.
Th ere a re various ways of adjusting t he front seats to provide safe and
comfortable support for the driver and the front passenger . Ad just
your seat properly so that :
• you can easily and quickly reach a ll the switc hes and contro ls in the
ins trumen t pa nel
• your body is properly supported thus reducing phys ica l stress and
fatigue
• the safety be lts and airbag system can offer maximum protection
=>
page 200 .
In the following sections, you w ill see exact ly how you can best ad just
your sea ts .
Th ere are special regulations a nd instr uctions for install ing a child
safety seat on the front passenger's sea t. Always follow the informa
tion regarding child safety p rovided in=>
page 222, "Child Safety ".
& WARNING
Incorrect seating posit ion of the dri ver and all other passengers
can result in seriou s personal injury.
• Always keep your feet on the floor when the vehicle is in
motion -never put your feet on top of the instrument panel, out
of the window o r on top of the seat cush ion. This applies especially
to the passengers.
If your seating po sition is incorrect, you
increase the ri sk of injury in the case of sudden braking or an acci-
Controls and equip
ment Safety first
Seats and storage
& WARNING
(con tinu ed)
dent . If the airbag inflates and the seating position is incorrect ,
this could result in per sonal injury or even death .
• It is important for both the dri ver and front passenger to keep
a distan ce of at least 10 inche s (25 cm) between themselves and
the steering wheel and /or instrument panel. If you 're sitting any
closer than this , the airbag system cannot protect you properly. In
addition, the front seats and head restraints must be adjusted to
your body height so that they can give you maximum protection .
• Always try to keep as much distance as possible between your
self and the steering wheel or instrument panel.
• Do not adjust the driver's or front passenger 's seat while the
vehicle is moving. You r seat may move unexpectedly , causing
sudden loss of vehicle control and personal injury . If you adjust
your seat while the vehicle is moving , you are out of position. •
Driver's seat
The correct seat position is important for saf e and
re lax ed driving.
W e recomme nd that you a djust the drive r's sea t in the
f ollowing man ner :
- Ad just the seat in fore and aft direction so that you can
easily pus h the pedals to the floor w hile keeping your
knees slightly bent=>
& in "Why is yo ur seat a djus tme nt
so importa nt?" .
- Adjust the seatback so that when yo u sit with yo ur back
agai nst t he seatback , you can st ill grasp t he top of the
steering w heel. ..,
Vehicle care Technical data
Page 80 of 364

Seats and storage
-Position the head restraint according to the occupant's
height=>
page 82. For maximum protection, the top of
the head restraint should be at least at eye level, prefer
ably higher and ideally level with the top of the head
=>
page 181, fig. 180.
& WARNING
Never place any objects in the driver's footwell. An object could
get into the pedal area and interfere with pedal function. In case
of sudden braking or an accident, you would not be able to brake
or accelerate. •
Front passenger's seat
Always move the front passenger seat into the rearmost
position.
To avoid contact with the airbag while it is deploying, do not
sit any closer to the instrument panel than necessary and
always wear the three-point safety belt provided adjusted
correctly. We recommend that you adjust the passenger's
seat in the following manner:
- Bring the backrest up to an (almost) upright position.
Do
not ride with the seat reclined.
- The ideal position for the head restraint is with the upper
edge of the restraint level with the top of your head
=> page 82. You should not lower the top of the restraint
below the level of your eyes.
- Place your feet on the floor in front of the passenger's
seat. •
Power front seat adjustment
Seat adjustment controls
The operating logic for the switches corresponds to the
construction and function of the seat.
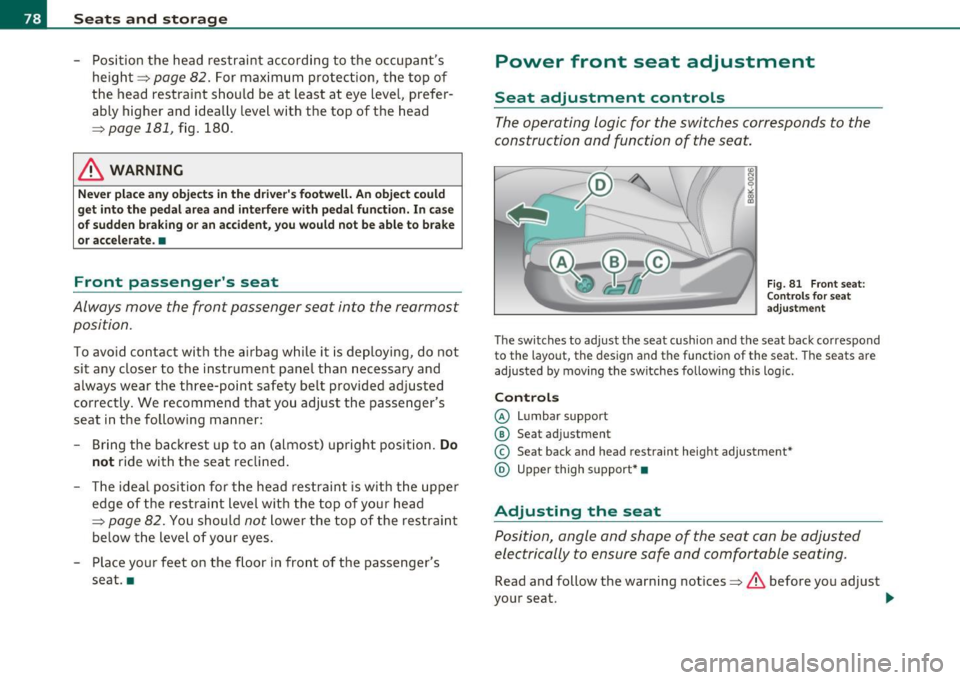
Fig. 81 Front seat:
Controls for seat
adjustment
The switches to adjust the seat cushion and the seat back correspond
to the layout, the design and the function of the seat. The seats are
adjusted by moving the switches following this logic.
Controls
© Lumbar support
© Seat adjustment
© Seat back and head restraint height adjustment*
@ Upper thigh support* •
Adjusting the seat
Position, angle and shape of the seat can be adjusted
electrically to ensure safe and comfortable seating.
Read and follow the warning notices=>.&, before you adjust
your seat.
~