Page 7 of 3000
PP–6PREPARATION – 2GR-FE ENGINE MECHANICAL
PP
EQUIPMENT
Abrasive compound
Brush
Caliper gauge
Carbide cutter (30
)
Carbide cutter (45
)
Carbide cutter (60
)
Carbide cutter (75
)
Connecting rod aligner
Cylinder gauge
Dial indicator
Dye penetrant
Engine tune-up tester
Groove cleaning tool
Heater
Micrometer
Piston ring compressor
Piston ring expander
Plastigage
Precision straight edge
Press
Reamer (5.5 mm)
Ridge reamer
Soft brush
Solvent
Spring tester
Steel square
Thermometer
To r q u e w r e n c h
Torx socket wrench
Valve seat cutter
Valve guide bushing brush
V-block
Vernier calipers
Wire brush
Bar
Chain Block
CO/HC meter
Compression gauge
Dial indicator with magnetic base
Engine Sling Device
Feeler gauge
Radiator cap tester
Slide calipers
Tachometer
Timing light
Wooden block
Deep socket wrench
Screwdriver
Hammer
Page 127 of 3000
PP–14PREPARATION – 2GR-FE COOLING
PP
EQUIPMENT
Ohmmeter -
Radiator cap tester -
Thermometer -
To r q u e w r e n c h -
Slide calipers -
Heater -
Ammeter (A) -
Page 155 of 3000
PP–64PREPARATION – AIR CONDITIONING
PP
EQUIPMENT
Vo l t m e t e r
Anmeter
Ohmmeter
Vinyl tape
Hexagon wrench 4 mm (0.15 in.)
Hexagon wrench 14 mm (0.55 in.)
Gas leak detector
Dial indicator with magnetic base
Radiator cap tester
To r q u e w r e n c h
Gas leak detector
Page 208 of 3000
AC–238AIR CONDITIONING – CONDENSER
AC
12. DISCONNECT NO. 2 OIL COOLER OUTLET TUBE
SUB-ASSEMBLY
(a) Remove the 2 bolts and No. 2 oil cooler outlet tube
sub-assembly.
13. REMOVE RADIATOR SUPPORT CUSHION (See page
CO-32)
14. REMOVE NO. 1 RADIATOR SUPPORT (See page CO-
32)
15. REMOVE COOLER CONDENSER CORE
(a) Remove the 2 screws and cooler condenser core.
DISASSEMBLY
1. REMOVE COOLER DRYER
(a) Using a hexagon wrench 14 mm (0.55 in.), remove
the cap from the modulator.
(b) Remove the O-ring from the cap.
(c) Using needle nose pliers, remove the cooler dryer.
E146681
E145273
I032993E06
I032475
I032994
Page 209 of 3000
AIR CONDITIONING – CONDENSERAC–239
AC
REASSEMBLY
1. INSTALL COOLER DRYER
(a) Using needle nose pliers, install the cooler dryer.
(b) Install a new O-ring on the cap.
(c) Sufficiently apply compressor oil to the fitting
surfaces of the O-ring and the cap.
Compressor oil:
ND-OIL 8 or equivalent
(d) Using a hexagon wrench 14 mm (0.55 in.), install
the cap to the cooler condenser assembly.
Torque: 2.9 N*m (30 kgf*cm, 25 in.*lbf)
INSTALLATION
1. INSTALL COOLER CONDENSER CORE
(a) Install the cooler condenser core with the 2 screws.
Torque: 3.9 N*m (40 kgf*cm, 35 in.*lbf)
HINT:
If the condenser is replaced with a new one, add
compressor oil to the new condenser.
Capacity:
40 cc (1.4 fl.oz.)
Compressor oil:
ND-OIL 8 or equivalent
2. INSTALL NO. 1 RADIATOR SUPPORT (See page CO-
40)
3. INSTALL RADIATOR SUPPORT CUSHION (See page
CO-41)
I032994
E055408
I032993E06
E145272
Page 1238 of 3000

2GR-FE COOLING – COOLING SYSTEMCO–1
CO
COOLING SYSTEM
ON-VEHICLE INSPECTION
1. INSPECT FOR COOLANT LEAK
CAUTION:
Do not remove the radiator cap while the engine and
radiator are still hot. Pressurized, hot engine coolant
and steam may be released and cause serious
burns.
NOTICE:
Before performing each inspection, turn the A/C
switch OFF.
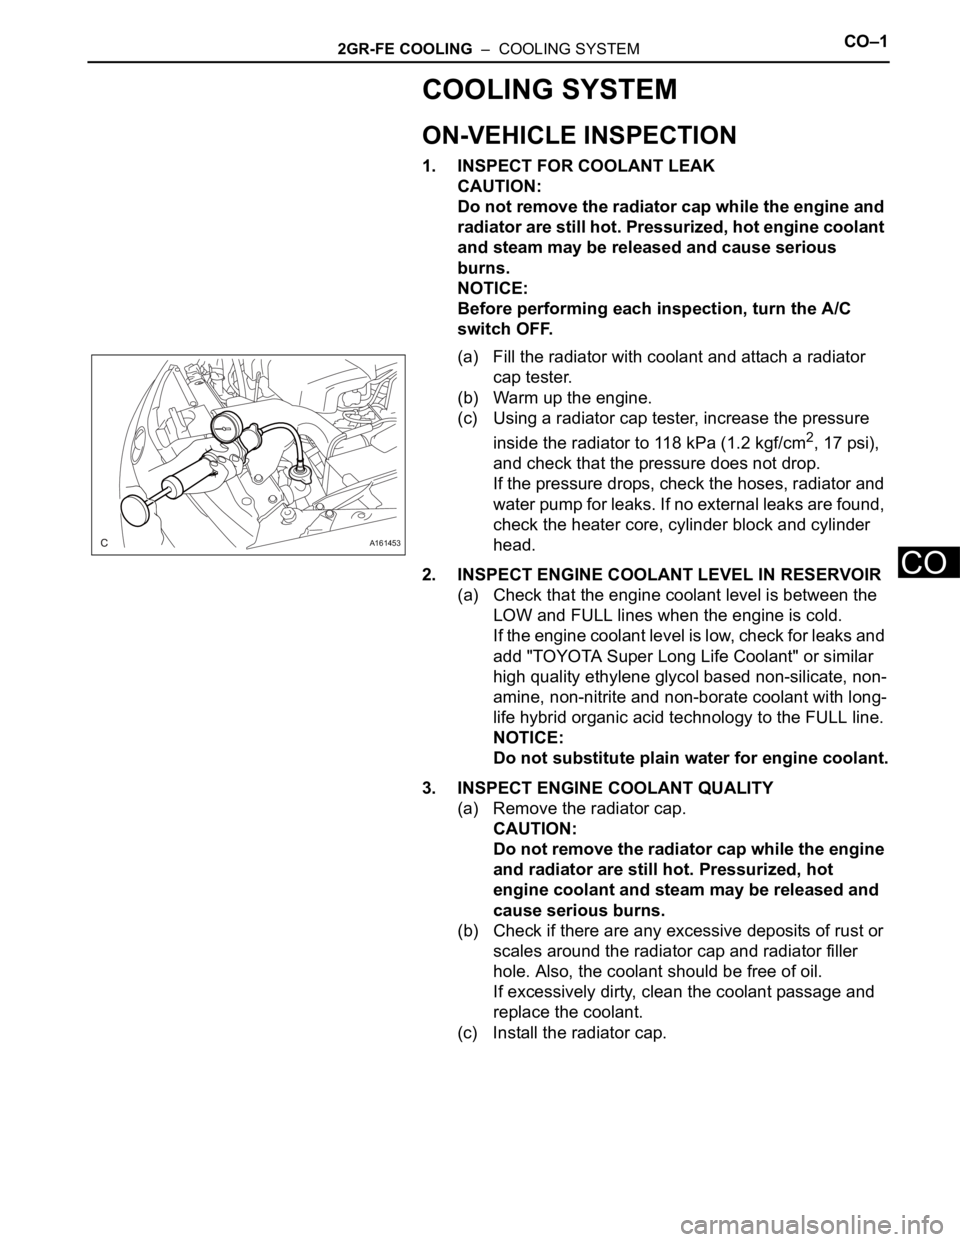
(a) Fill the radiator with coolant and attach a radiator
cap tester.
(b) Warm up the engine.
(c) Using a radiator cap tester, increase the pressure
inside the radiator to 118 kPa (1.2 kgf/cm
2, 17 psi),
and check that the pressure does not drop.
If the pressure drops, check the hoses, radiator and
water pump for leaks. If no external leaks are found,
check the heater core, cylinder block and cylinder
head.
2. INSPECT ENGINE COOLANT LEVEL IN RESERVOIR
(a) Check that the engine coolant level is between the
LOW and FULL lines when the engine is cold.
If the engine coolant level is low, check for leaks and
add "TOYOTA Super Long Life Coolant" or similar
high quality ethylene glycol based non-silicate, non-
amine, non-nitrite and non-borate coolant with long-
life hybrid organic acid technology to the FULL line.
NOTICE:
Do not substitute plain water for engine coolant.
3. INSPECT ENGINE COOLANT QUALITY
(a) Remove the radiator cap.
CAUTION:
Do not remove the radiator cap while the engine
and radiator are still hot. Pressurized, hot
engine coolant and steam may be released and
cause serious burns.
(b) Check if there are any excessive deposits of rust or
scales around the radiator cap and radiator filler
hole. Also, the coolant should be free of oil.
If excessively dirty, clean the coolant passage and
replace the coolant.
(c) Install the radiator cap.
A161453
Page 1252 of 3000
CO–62GR-FE COOLING – COOLANT
CO
COOLANT
REPLACEMENT
1. REMOVE NO. 1 ENGINE UNDER COVER (See page
EM-26)
2. REMOVE V-BANK COVER SUB-ASSEMBLY (See
page EM-28)
3. DRAIN ENGINE COOLANT
(a) Loosen the radiator drain cock plug.
HINT:
Collect the coolant in a container and dispose of it
according to the regulations in your area.
(b) Remove the radiator cap sub-assembly from the
radiator assembly.
NOTICE:
Do not remove the radiator cap sub-assembly
while the engine and radiator are still hot.
Pressurized, hot engine coolant and steam may
be released and cause serious burns.
(c) Loosen the 2 cylinder block drain cock plugs.
A161473E01
Page 1253 of 3000

2GR-FE COOLING – COOLANTCO–7
CO
4. ADD ENGINE COOLANT
(a) Tighten the radiator drain cock plug by hand.
(b) Tighten the 2 cylinder block drain cock plugs.
Torque: 13 N*m (130 kgf*cm, 9 ft.*lbf) for
cylinder block drain cock plugs
(c) Remove the air drain cock plug from the water inlet
housing.
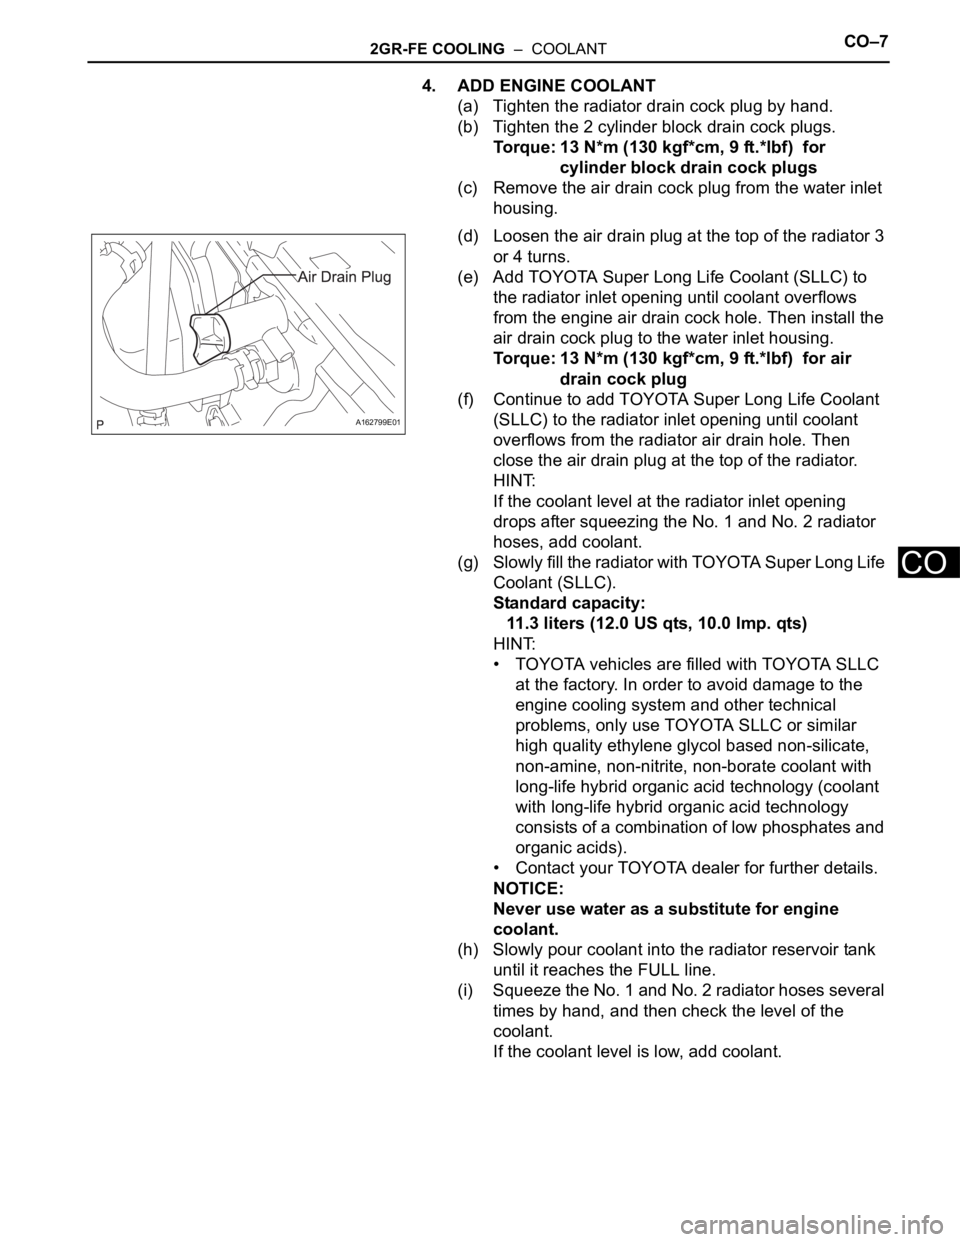
(d) Loosen the air drain plug at the top of the radiator 3
or 4 turns.
(e) Add TOYOTA Super Long Life Coolant (SLLC) to
the radiator inlet opening until coolant overflows
from the engine air drain cock hole. Then install the
air drain cock plug to the water inlet housing.
Torque: 13 N*m (130 kgf*cm, 9 ft.*lbf) for air
drain cock plug
(f) Continue to add TOYOTA Super Long Life Coolant
(SLLC) to the radiator inlet opening until coolant
overflows from the radiator air drain hole. Then
close the air drain plug at the top of the radiator.
HINT:
If the coolant level at the radiator inlet opening
drops after squeezing the No. 1 and No. 2 radiator
hoses, add coolant.
(g) Slowly fill the radiator with TOYOTA Super Long Life
Coolant (SLLC).
Standard capacity:
11.3 liters (12.0 US qts, 10.0 Imp. qts)
HINT:
• TOYOTA vehicles are filled with TOYOTA SLLC
at the factory. In order to avoid damage to the
engine cooling system and other technical
problems, only use TOYOTA SLLC or similar
high quality ethylene glycol based non-silicate,
non-amine, non-nitrite, non-borate coolant with
long-life hybrid organic acid technology (coolant
with long-life hybrid organic acid technology
consists of a combination of low phosphates and
organic acids).
• Contact your TOYOTA dealer for further details.
NOTICE:
Never use water as a substitute for engine
coolant.
(h) Slowly pour coolant into the radiator reservoir tank
until it reaches the FULL line.
(i) Squeeze the No. 1 and No. 2 radiator hoses several
times by hand, and then check the level of the
coolant.
If the coolant level is low, add coolant.
A162799E01