Page 654 of 3229
Publi s hed: 11-May-2011
Engine - I6 3.2L Petrol - Valve Clearance Check
General Procedures
Special T ool(s) 303-1235
Hol der, Camshaft
• NOTE: Only the exhaus t cam shaft has adjus t abl e t appet s. 1. W ARNING: Make sure t o s upport the vehicle wit h axle
s tands .
Rais e and s upport t he vehi cl e.
1.
Remove t he cover and dis connect the bat tery ground cabl e.
Refer t o: Specificati ons (414-00 Bat tery and Charging Sys tem -
General Informat ion, Specificati ons).
2.
Remove t he camshaft bearing housi ng.
Refer t o: Val ve Cover (303-01A Engine - I6 3.2L Pet rol , Removal and
Inst all at ion).
3. Us ing t he s peci al t ools , posi ti on and s ecure the
exhaus t cams haft.
Speci al Tool (s ): 303-1235 4.
Us ing t he original bol t, i nst all t he camshaft sprocket and li ght ley
t ighten.
5.
For val ve cl earance dat a, refer t o s peci fi cat ions .
Refer t o: Specificati ons (303-01A Engine - I6 3.2L Petrol ,
Speci fi cat ions ).
6.
Page 655 of 3229
Us ing a feeler gauge, meas ure the cl earance bet weent he camshaft and the valve s him.7.
Remove t he camshaft sprocket.8.
Remove t he s pecial t ool s.9.
Inst all t he camshaft bearing housi ng.
Refer t o: Val ve Cover (303-01A Engine - I6 3.2L Pet rol , Removal andInst all at ion).
10.
Connect t he batt ery ground cable and ins tall t he cover.
Refer t o: Specificati ons (414-00 Bat tery and Charging Sys tem -General Informat ion, Specificati ons).
11.
Page 657 of 3229
Publi s hed: 11-May-2011
Engine - I6 3.2L Petrol - Intake Manifold
Removal and Inst all ati on
Removal
Di sconnect t he bat t ery ground cable.
Refer t o: Specificati ons (414-00 Bat tery and Charging Sys tem -General Informat ion, Specificati ons).
1.
Remove t he engi ne cover.
Refer t o: Engi ne Cover - I6 3.2L Pet rol (501-05 Int eri or Trim andOrnament ati on, Removal and Ins tal lat ion).
2.
Remove t he air cleaner as s embly.
Refer t o: Air Cleaner (303-12B Intake Ai r Dis tribut ion and Fil tering -TD4 2.2L Dies el, Removal and Inst all ati on).
3.
4. W ARNING: Do not work on or under a vehi cle s upported onl yby a jack. Al ways support t he vehi cl e on s afet y s tands .
Rais e and s upport t he vehi cl e.
4.
Remove t he engi ne undershi eld.
Refer t o: Engi ne Unders hi eld (501-02 Front End Body Panel s ,Removal and Ins tall ati on).
5.
6.
7.
Page 664 of 3229
T orque:
10 Nm Connect t he purge l ine.
14.
Inst all t he lower int ake manifol d bolt s .
T orque: 10 Nm 15.
Inst all t he air cleaner out let pipe.
16.
Inst all t he engi ne undershi eld.
Refer t o: Engi ne Unders hi eld (501-02 Front End Body Panel s ,
Removal and Ins tall ati on).
17.
Inst all t he front unders hiel d.
18.
Inst all t he front towing eye cover.
19.
Inst all t he air cleaner as s embly.
Refer t o: Air Cleaner (303-12B Intake Ai r Dis tribut ion and Fil tering -
TD4 2.2L Dies el, Removal and Inst all ati on).
20.
Inst all t he engi ne cover.
Refer t o: Engi ne Cover - I6 3.2L Pet rol (501-05 Int eri or Trim and
Ornament ati on, Removal and Ins tal lat ion).
21.
Connect t he batt ery ground cable.
Refer t o: Specificati ons (414-00 Bat tery and Charging Sys tem -
General Informat ion, Specificati ons).
22.
Check and top-up the coolant.
23.
Page 665 of 3229
Publi s hed: 11-May-2011
Engine - I6 3.2L Petrol - Variable Valve Timing (VVT) Unit
Removal and Inst all ati on
Removal
CAUTION: Extreme cleanli nes s mus t be exercis ed when handli ng thes e component s.
• NOTE: This procedure is t he s ame as t he t imi ng chai n and gears procedure.
Remove t he cover and dis connect the bat tery ground cabl e.
Refer t o: Specificati ons (414-00 Bat tery and Charging Sys tem -General Informat ion, Specificati ons).
1.
Remove t he variable val ve ti ming (VVT) unit .
Refer t o: Timi ng Chai n (303-01A Engi ne - I6 3.2L Pet rol, Removaland Inst all at ion).
2.
Installation
Inst all t he VVT unit .
Refer t o: Timi ng Chai n (303-01A Engi ne - I6 3.2L Pet rol, Removaland Inst all at ion).
1.
Connect t he batt ery ground cable and ins tall t he cover.
Refer t o: Specificati ons (414-00 Bat tery and Charging Sys tem -General Informat ion, Specificati ons).
2.
Page 666 of 3229

Publ ished: 11-May-2011
Engine - I6 3.2L Petrol - Valve Cover
Removal and Installation
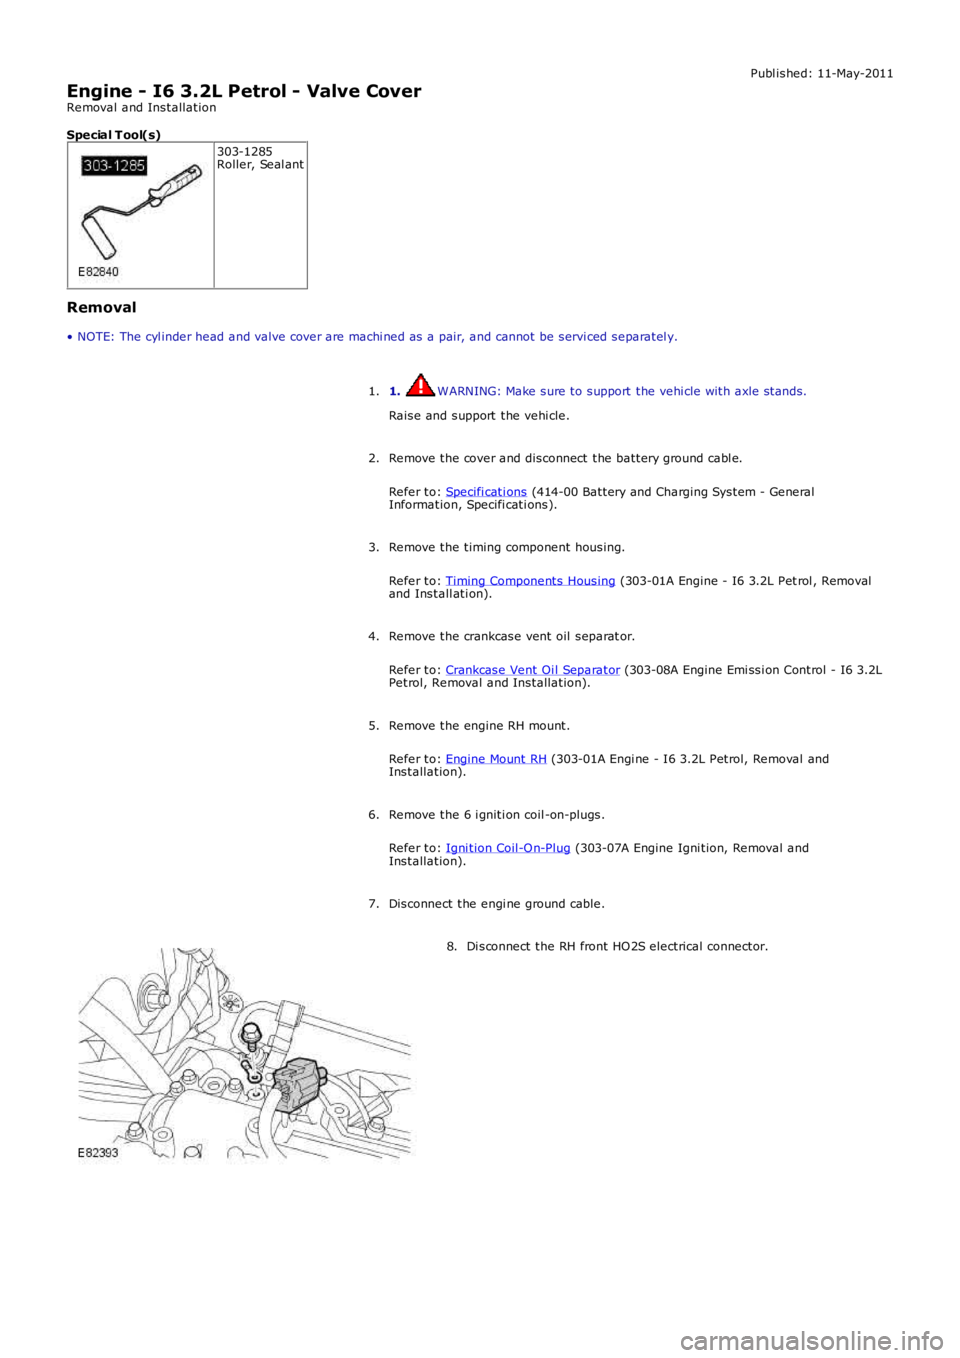
Special T ool(s) 303-1285
Roller, Seal ant
Removal
• NOTE: The cyl inder head and valve cover are machi ned as a pair, and cannot be serv i ced separatel y.
1. WARNING: Make sure to support the vehi cle with axle stands.
Raise and support the vehi cle.
1.
Remove the cover and disconnect the battery ground cabl e.
Refer to: Specifi cati ons (414-00 Battery and Charging System - General
Information, Specifi cati ons).
2.
Remove the timing component housing.
Refer to: Timing Components Housing (303-01A Engine - I6 3.2L Pet rol , Removal
and Install ati on).
3.
Remove the crankcase vent oil separat or.
Refer to: Crankcase Vent Oi l Separator (303-08A Engine Emi ssi on Control - I6 3.2L
Petrol, Removal and Installation).
4.
Remove the engine RH mount.
Refer to: Engine Mount RH (303-01A Engi ne - I6 3.2L Petrol, Removal and
Installation).
5.
Remove the 6 i gniti on coil -on-plugs.
Refer to: Igni tion Coil-On-Plug (303-07A Engine Igni tion, Removal and
Installation).
6.
Disconnect the engi ne ground cable.
7. Di sconnect the RH front HO2S electrical connector.
8.
Page 671 of 3229

Torque:
6 Nm 13.
CAUTIONS: Extreme cleanli ness must be exerci sed when handli ng this component.
A new O-ring seal is t o be instal led.
Install the CPS solenoids.
Torque: 10 Nm 13.
Connect the CPS solenoi ds.
14.
15. CAUTIONS: Apply clean engi ne oil to t he VVT sol enoid shaft.
Extreme cleanli ness must be exerci sed when handli ng this component.
A new O-ring seal is t o be instal led.
Install the VVT solenoid.
Torque: 10 Nm 15.
Connect the VVT solenoid.
16.
Install the CMP sensors.
Torque: 10 Nm 17.
Connect and secure the CMP sensor electrical connectors.
18.
Connect the fuel i nj ector electrical connectors.
19.
Connect the ground cabl e.
Torque: 6 Nm 20.
Install the engine mount.
Refer to: Engine Mount RH (303-01A Engi ne - I6 3.2L Petrol, Removal and
Installation).
21.
Install the i gniti on coil-on-pl ugs.
Refer to: Igni tion Coil-On-Plug (303-07A Engine Igni tion, Removal and
Installation).
22.
Install the crankcase vent oil separator.
Refer to: Crankcase Vent Oi l Separator (303-08A Engine Emi ssi on Control - I6 3.2L
Petrol, Removal and Installation).
23.
Install the ti ming component housi ng.
Refer to: Timing Components Housing (303-01A Engine - I6 3.2L Pet rol , Removal
and Install ati on).
24.
Connect the battery ground cable and instal l the cover.
Refer to: Specifi cati ons (414-00 Battery and Charging System - General
Information, Specifi cati ons).
25.
Page 672 of 3229

Publi s hed: 11-May-2011
Engine - I6 3.2L Petrol - Camshafts
Removal and Inst all ati on
Removal
1. W ARNING: Make sure t o s upport the vehicle wit h axles tands .
Rais e and s upport t he vehi cl e.
1.
Remove t he cover and dis connect the bat tery ground cabl e.
Refer t o: Specificati ons (414-00 Bat tery and Charging Sys tem -General Informat ion, Specificati ons).
2.
Remove t he camshaft bearing housi ng.
Refer t o: Val ve Cover (303-01A Engine - I6 3.2L Pet rol , Removal andInst all at ion).
3.
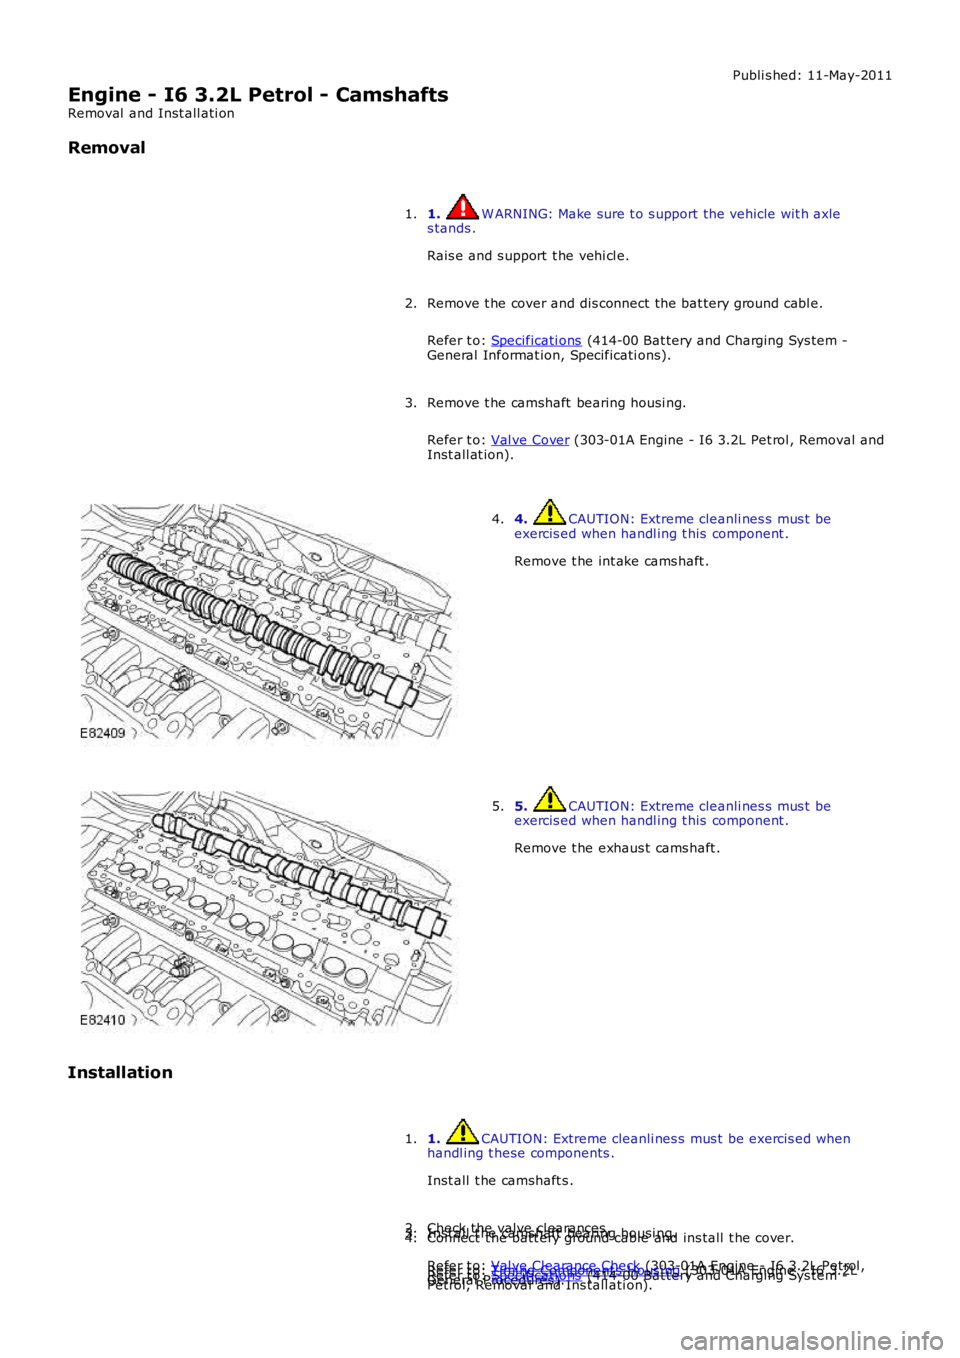
4. CAUTION: Extreme cleanli nes s mus t beexercis ed when handl ing t his component .
Remove t he int ake cams haft .
4.
5. CAUTION: Extreme cleanli nes s mus t beexercis ed when handl ing t his component .
Remove t he exhaus t cams haft .
5.
Installation
1. CAUTION: Extreme cleanli nes s mus t be exercis ed whenhandl ing t hese components .
Inst all t he camshaft s .
1.
Check the valve cl earances .
Refer t o: Val ve Clearance Check (303-01A Engine - I6 3.2L Petrol ,General Procedures).
2.Inst all t he camshaft bearing housi ng.
Refer t o: Timi ng Component s Hous i ng (303-01A Engine - I6 3.2LPetrol, Removal and Ins tall ati on).
3.Connect t he batt ery ground cable and ins tall t he cover.
Refer t o: Specificati ons (414-00 Bat tery and Charging Sys tem -
4.