Page 5103 of 5135

600A7–04
H42767
60–4– SUPPLEMENTAL RESTRAINT SYSTEMSIDE AIR BAG SENSOR ASSY LH (From February,
2004)
AVENSIS REPAIR MANUAL SUPPLEMENT
(RM1098E)
REPLACEMENT
HINT:
Use the same procedures for the RH side and LH side.
1. PRECAUTION (SEE PUB. NO. RM1018E, PAGE 60–1)
2. DISCONNECT BATTERY NEGATIVE TERMINAL
CAUTION:
After removing the terminal, wait for at least 90 seconds before starting the operation.
3. REMOVE FRONT DOOR SCUFF PLATE LH (SEE PUB. NO. RM1018E, PAGE 76–36)
4. REMOVE REAR DOOR SCUFF PLATE LH (SEE PUB. NO. RM1018E, PAGE 76–36)
5. REMOVE FRONT DOOR WEATHERSTRIP LH (SEE PUB. NO. RM1018E, PAGE 76–36)
6. REMOVE REAR DOOR WEATHERSTRIP LH (SEE PUB. NO. RM1018E, PAGE 76–36)
7. REMOVE CENTER PILLAR GARNISH LOWER LH (SEE PUB. NO. RM1018E, PAGE 76–36)
8. REMOVE FRONT SEAT OUTER BELT ASSY LH (SEE PUB. NO. RM1018E, PAGE 61–7)
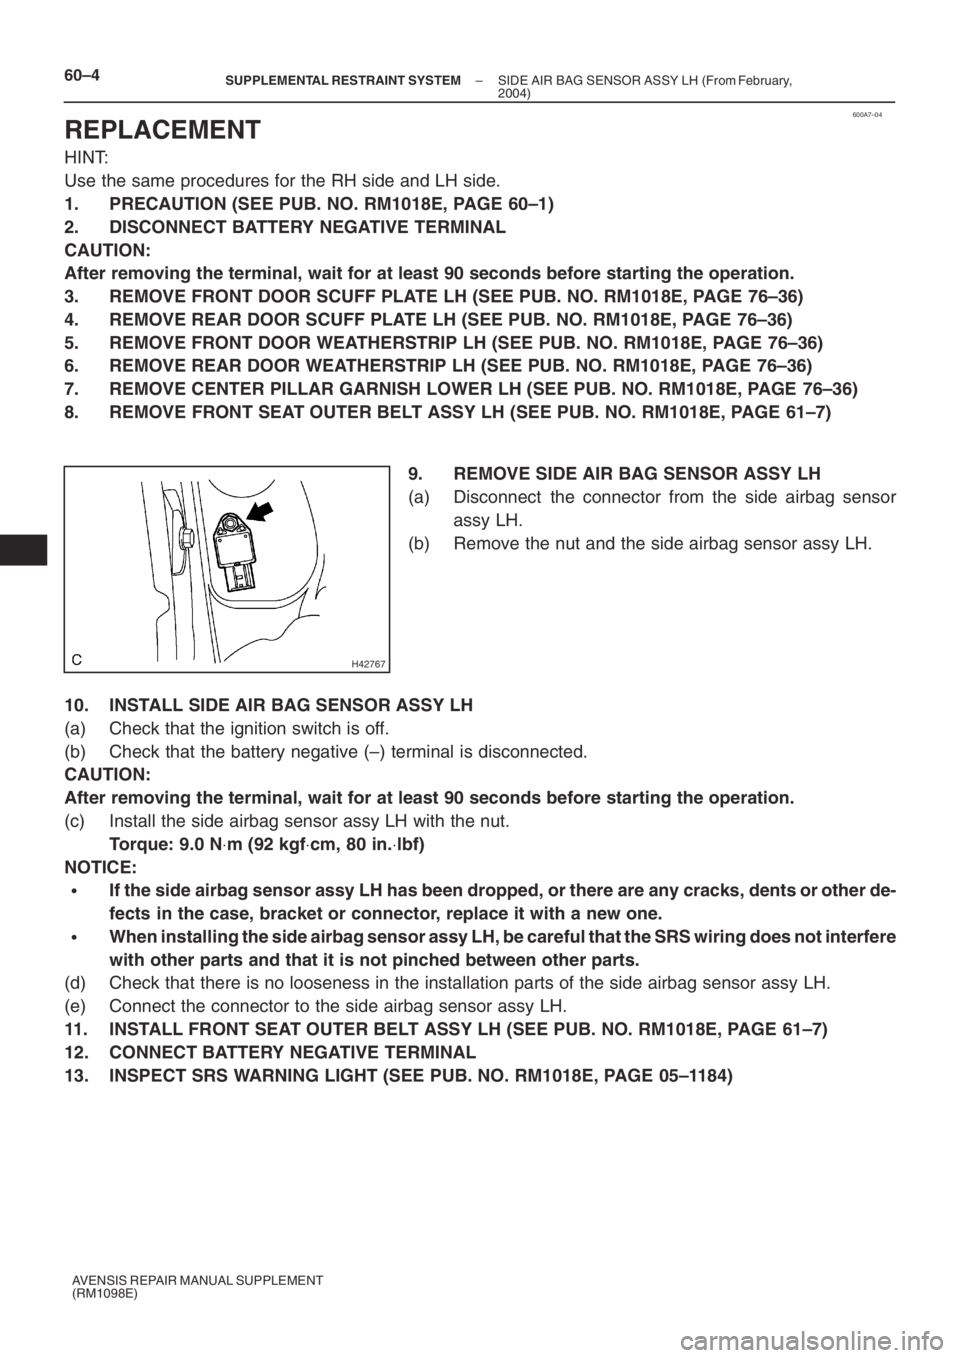
9. REMOVE SIDE AIR BAG SENSOR ASSY LH
(a) Disconnect the connector from the side airbag sensor
assy LH.
(b) Remove the nut and the side airbag sensor assy LH.
10. INSTALL SIDE AIR BAG SENSOR ASSY LH
(a) Check that the ignition switch is off.
(b) Check that the battery negative (–) terminal is disconnected.
CAUTION:
After removing the terminal, wait for at least 90 seconds before starting the operation.
(c) Install the side airbag sensor assy LH with the nut.
Torque: 9.0 N⋅m (92 kgf⋅cm, 80 in.⋅lbf)
NOTICE:
�If the side airbag sensor assy LH has been dropped, or there are any cracks, dents or other de-
fects in the case, bracket or connector, replace it with a new one.
�When installing the side airbag sensor assy LH, be careful that the SRS wiring does not interfere
with other parts and that it is not pinched between other parts.
(d) Check that there is no looseness in the installation parts of the side airbag sensor assy LH.
(e) Connect the connector to the side airbag sensor assy LH.
11. INSTALL FRONT SEAT OUTER BELT ASSY LH (SEE PUB. NO. RM1018E, PAGE 61–7)
12. CONNECT BATTERY NEGATIVE TERMINAL
13. INSPECT SRS WARNING LIGHT (SEE PUB. NO. RM1018E, PAGE 05–1184)
Page 5104 of 5135
600UO–01
H44212N⋅m (kgf⋅cm, ft⋅lbf) : Specified torque Rear Door Opening
Trim Weatherstrip LH
Rear Door Scuff
Plate LH
Center Pillar
Garnish Lower LH
Front Door Scuff
Plate LHFront Door Opening Trim
Weatherstrip LHFront Seat
Outer Belt Assy LH
9.0 (92, 80 in.⋅lbf)
Side Airbag Sensor Assy LH
42 (428, 31)
7.5 (77, 66 in.⋅lbf)
– SUPPLEMENTAL RESTRAINT SYSTEMSIDE AIR BAG SENSOR ASSY LH (From February,
2004)60–3
AVENSIS REPAIR MANUAL SUPPLEMENT
(RM1098E)
SIDE AIR BAG SENSOR ASSY LH (From February, 2004)
COMPONENTS
Page 5105 of 5135

600K6–02
H42699
60–2
– SUPPLEMENTAL RESTRAINT SYSTEMAIR BAG SENSOR FRONT LH (From February, 2004)
AVENSIS REPAIR MANUAL SUPPLEMENT
(RM1098E)
REPLACEMENT
HINT:
Use the same procedures for the RH side and LH side.
1. PRECAUTION (SEE PUB. NO. RM1018E, PAGE 60–1)
2. DISCONNECT BATTERY NEGATIVE TERMINAL
CAUTION:
After removing the terminal, wait for at least 90 seconds before starting the operation.
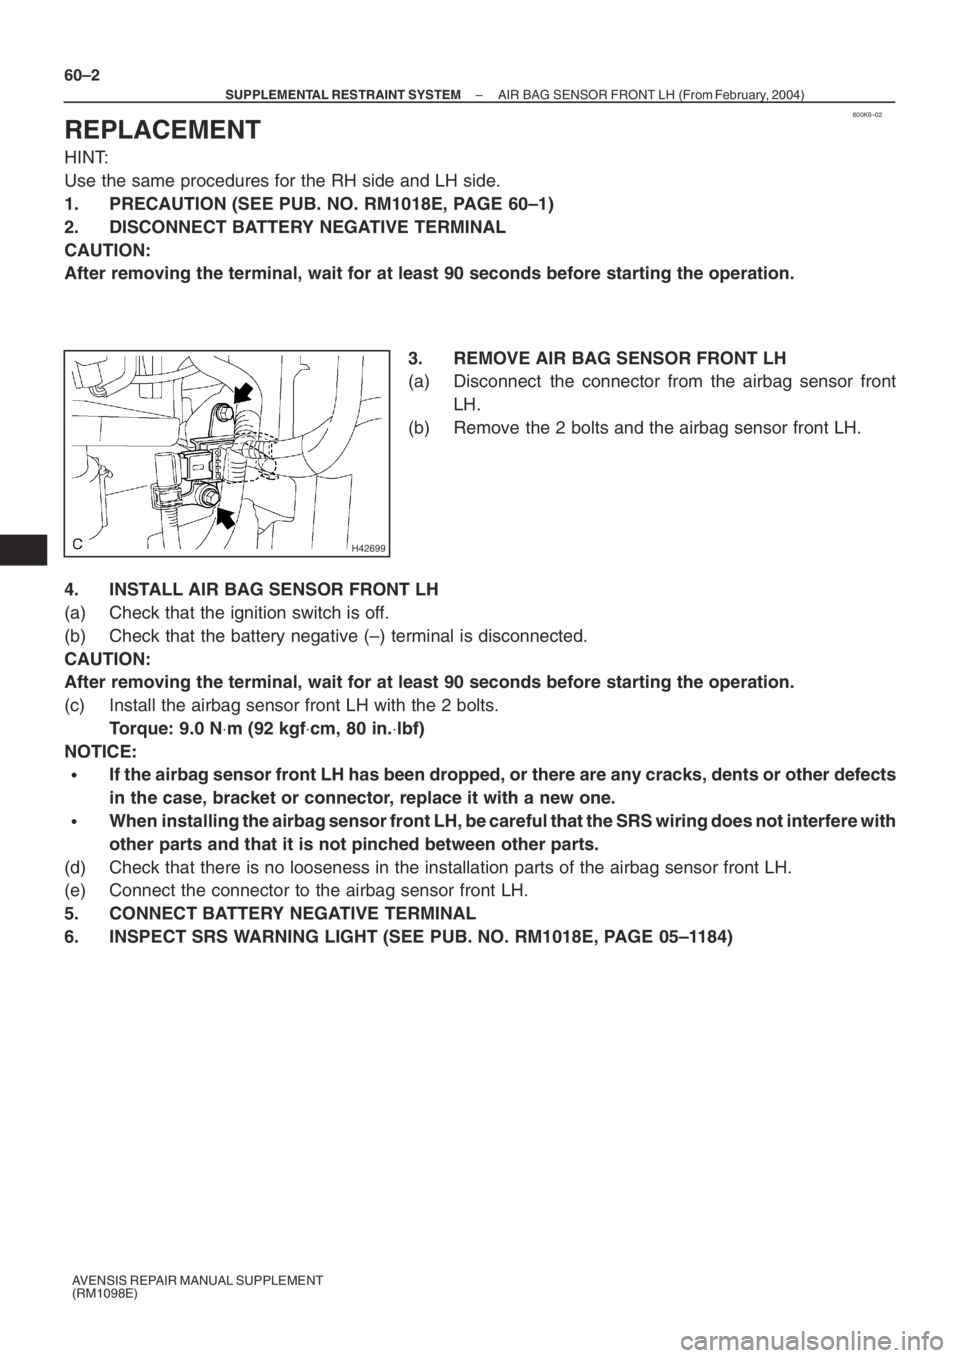
3. REMOVE AIR BAG SENSOR FRONT LH
(a) Disconnect the connector from the airbag sensor front
LH.
(b) Remove the 2 bolts and the airbag sensor front LH.
4. INSTALL AIR BAG SENSOR FRONT LH
(a) Check that the ignition switch is off.
(b) Check that the battery negative (–) terminal is disconnected.
CAUTION:
After removing the terminal, wait for at least 90 seconds before starting the operation.
(c) Install the airbag sensor front LH with the 2 bolts.
Torque: 9.0 N⋅m (92 kgf⋅cm, 80 in.⋅lbf)
NOTICE:
�If the airbag sensor front LH has been dropped, or there are any cracks, dents or other defects
in the case, bracket or connector, replace it with a new one.
�When installing the airbag sensor front LH, be careful that the SRS wiring does not interfere with
other parts and that it is not pinched between other parts.
(d) Check that there is no looseness in the installation parts of the airbag sensor front LH.
(e) Connect the connector to the airbag sensor front LH.
5. CONNECT BATTERY NEGATIVE TERMINAL
6. INSPECT SRS WARNING LIGHT (SEE PUB. NO. RM1018E, PAGE 05–1184)