Page 3129 of 5135
670S5±01
I35223
Instrument Cluster Finish Panel Garnish No.2
Radio Bracket No.2Radio Receiver Assy
Instrument Panel
Register Assy CTR
Air Conditioning Control AssyConsole Panel
Sub±assy Upper
Navigation System:Navigation Computer Cover
Instrument Panel
Support No.3 Instrument Panel
Support No.1Instrument Panel
Support No.2
Door Control Motor
Door Control Switch
Assy (TILT)
Instrument Cluster Finish Panel AssyDoor Control Switch Instrument Cluster Finish
Upper PanelMulti±display Instrument Panel Box
Door CoverRadio Bracket No.1
Instrument Panel
Register Control Gear
Control Knob
Protector No.1
Position Sensor
67±2
± AUDIO & VISUAL SYSTEMAUDIO & VISUAL SYSTEM
AVENSIS REPAIR MANUAL (RM1018E)
COMPONENTS
Page 3133 of 5135
660CT±02
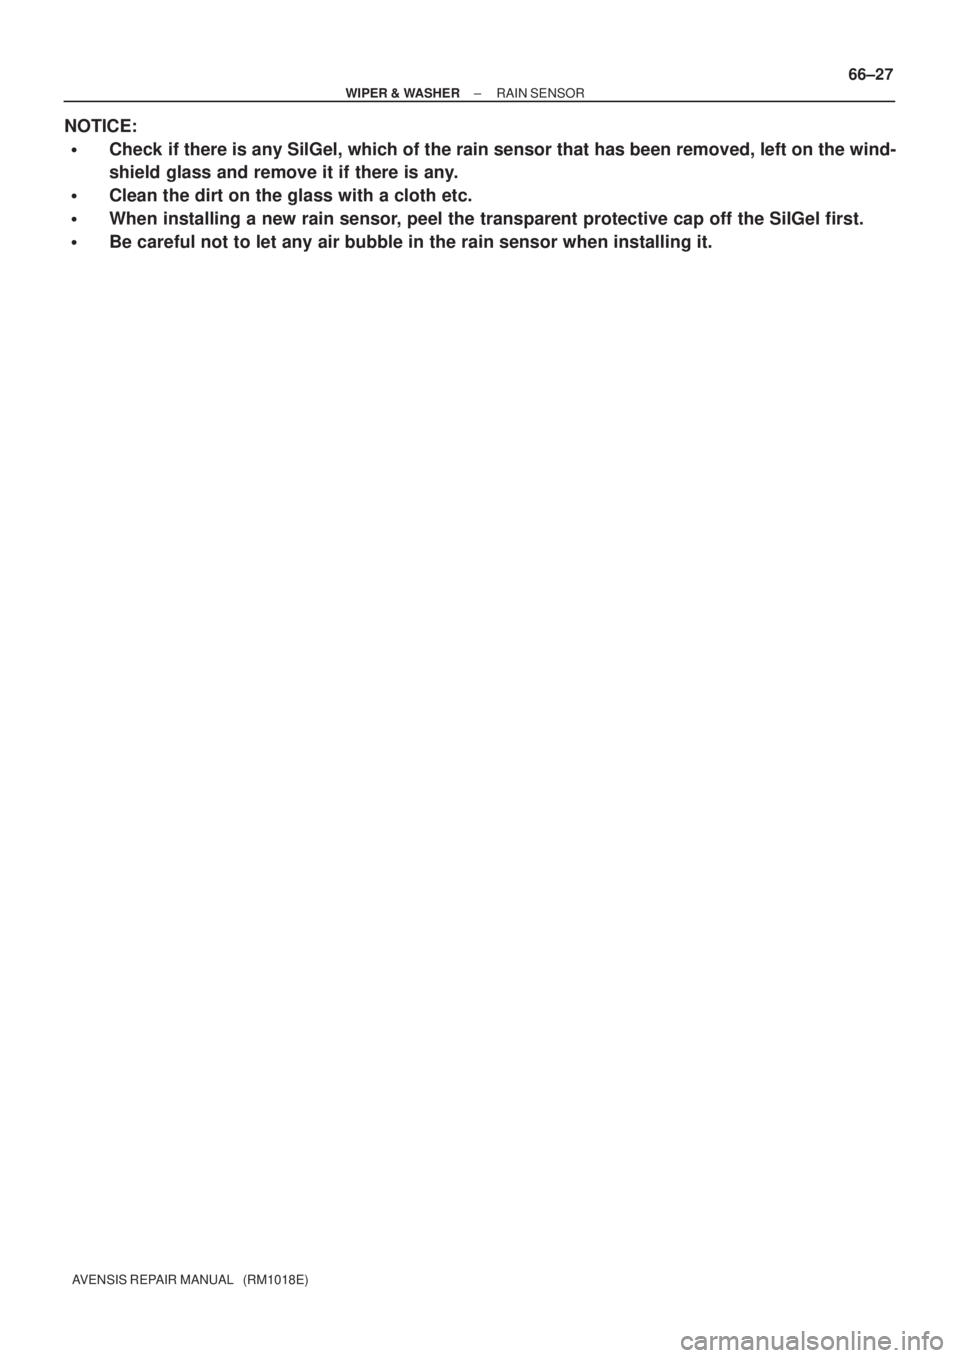
I357963 Claws
I357972 Claws
I357982 Claws
I35799
66±26
± WIPER & WASHERRAIN SENSOR
AVENSIS REPAIR MANUAL (RM1018E)
RAIN SENSOR
REPLACEMENT
1. REMOVE INNER REAR VIEW MIRROR STAY HOLDER COVER
2. REMOVE RAIN SENSOR
(a) Disengage the 3 claws and remove the mirror stay holder
cover.
(b) Disengage the 2 claws and remove the rain sensor cover.
(c) Disconnect the connector.
(d) Disengage the 2 claws and remove the rain sensor spring
cover.
(e) Remove the rain sensor.
3. INSTALL RAIN SENSOR
(a) Install the rain sensor and rain sensor spring cover.
(b) Connect the connector and install the rain sensor cover and the mirror stay holder cover.
Page 3134 of 5135
± WIPER & WASHERRAIN SENSOR
66±27
AVENSIS REPAIR MANUAL (RM1018E)
NOTICE:
�Check if there is any SilGel, which of the rain sensor that has been removed, left on the wind-
shield glass and remove it if there is any.
�Clean the dirt on the glass with a cloth etc.
�When installing a new rain sensor, peel the transparent protective cap off the SilGel first.
�Be careful not to let any air bubble in the rain sensor when installing it.
Page 3198 of 5135

REPLACEMENT
HINT:
The installation is in the reverse o")
700T2±01
B50448
CutCut
Moulding
WindshieldBody
B67281
±
WINDSHIELD/WINDOWGLASS/MIRROR WINDSHIELD GLASS
70±15
AVENSIS REPAIR MANUAL (RM1018E)
REPLACEMENT
HINT:
The installation is in the reverse order of the removal. However, when there is a special point concerning
the installation, it is indicated.
1. REMOVE ROOF HEADLINING ASSY ( See page 76±36 or 76±45 or 76±54 )
(a) Remove the front door weatherstrip LH.
(b) Remove the front door weatherstrip RH.
(c) Remove the front pillar garnish LH.
(d) Remove the front pillar garnish RH.
(e) Remove the LH visor.
(f) Remove the RH visor.
(g) Remove the assist grip.
(h) Remove the 2 visor holders.
(i) Remove the map lamp assy.
(j) Do not remove the roof headlining assy completely partially so that the \
windshield glass can be re- moved.
2 . REMOVE INNER REAR VIEW MIRROR ASSY ( See page 70±64)
3 . REMOVE RAIN SENSOR ( See page 66±26)
4 . REMOVE COWL T OP VENTIL ATOR LOUVER ( See page66±13 )
(a) Remove the 2 windshield wiper arm covers.
(b) Remove the FR wiper arm LH.
(c) Remove the FR wiper arm RH.
(d) Remove the hood to cowl top seal.
(e) Remove the cowl top ventilator louver LH.
(f) Remove the cowl top ventilator louver RH.
5. REMOVE WINDSHIELD MOULDING OUTER UPPER
(a) Using a knife, cut off the moulding, as shown in the il-lustration.
NOTICE:
Do not damage the body with the knife.
(b) Remove the remaining moulding.
HINT:
When removing, make a partial cut, then pull and remove it by
hand.
6. DISCONNECT CONNECTOR (W/ DEICER)
(a) Disconnect the deicer connector, as shown in the illustra- tion.
Page 3205 of 5135
700T1±01
B67031
Assist Grip
RH Visor Assy
LH Visor Assy
Map Lamp AssyRoof Headlining
Rain Sensor
Cover
Rain Sensor Cover Front Pillar Garnish RH
Front Door
Weatherstrip
RHWindshield Moulding
Outer Upper Visor Holder
Visor Holder
Inner Rear View Mirror Assy
� Windshield Glass Stopper No. 1
Front Door Weatherstrip LHFront Pillar Garnish LH
Windshield Wiper Arm Cover
FR Wiper Arm LH
Cowl Top Ventilator
Louver RHWindshield Glass
FR Wiper Arm RH� Windshield Glass Stopper No. 2
Hood Cowl Top Seal
Cowl Top Ventilator Louver LHRain Sensor
w/ EC Mirror
Inner Rear Vice Mirror
Assy
: Specified torqueN�m (kgf�cm, ft�lbf)
� Non±reusable part
20 (204, 15)
20 (204, 15)
� Window Glass Adhesive Dam
Windshield Wiper
Arm Cover
70±14
± WINDSHIELD/WINDOWGLASS/MIRRORWINDSHIELD GLASS
AVENSIS REPAIR MANUAL (RM1018E)
WINDSHIELD GLASS
COMPONENTS
Page 3239 of 5135

COMBINATION METER
PROBLEM SYMPTOMS TABLE
Warning Lights:
SymptomSuspect AreaSee page
Check Engine warning")
710CM±02
±
INSTRUMENT PANEL/METER COMBINATION METER
71±1
AVENSIS REPAIR MANUAL (RM1018E)
COMBINATION METER
PROBLEM SYMPTOMS TABLE
Warning Lights:
SymptomSuspect AreaSee page
Check Engine warning light does not come on.
1.Wire Harness or Connector
2.ECM
3.Combination Meter Assy±
±
±
Discharge warning light does not come on.
1.Wire Harness or Connector
2.ECM
3.Combination Meter Assy±
±
±
Brake warning light does not come on.
1.Wire Harness or Connector
2.Skid control ECU
3.Combination Meter Assy±
±
±
ABS warning light does not come on.
1.Wire Harness or Connector
2.Skid control ECU
3.Combination Meter Assy±
±
±
SRS warning light does not come on.
1.Wire Harness or Connector
2.Airbag Sensor Assy
3.Combination Meter Assy±
05±1197 ±
Open Door warning light does not come on.
1.Wire Harness or Connector
2.Front Door Courtesy Light
3.Body ECU
4.Combination Meter Assy±
±
±
±
Fuel Level warning light does not come on.
1.Wire Harness or Connector
2.Fuel Sender Gauge
3.Combination Meter Assy±
±
±
Low Oil Pressure warning light does not come on.
1.Wire Harness or Connector
2.Low Oil Pressure Warning Switch
3.Combination Meter Assy±
±
±
Engine Oil Level warning light does not come on.
1.Wire Harness or Connector
2.Oil Level Sensor
3.Combination Meter Assy±
±
±
Belt warning light does not come on.
1.Wire Harness or Connector
2.Body ECU
3.Front Inner Belt Assy
4.Combination Meter Assy±
±
05±1522
±
VSC warning light does not come on.
1.Wire Harness or Connector
2.VSC Circuit
3.Combination Meter Assy±
05±752 ±
Indicator Lights:
SymptomSuspect AreaSee page
Shift indicator light do not come on.
1. Wire Harness or Connector
2. ECM
3. Neutral Start Switch Circuit
4. Combination Meter Assy±
±
±
±
Turn indicator light does not come on.
1. Wire Harness or Connector
2. Turn Signal and Hazard Warning System
3. Combination Meter Assy±
65±9 ±
Glow indicator light does not come on.
1. Wire Harness or Connector
2. ECM
3. Combination Meter Assy±
±
±
TRC off indicator light does not come on.
1. Wire Harness or Connector
2. VSC Circuit
3. Combination Meter Assy±
05±752 ±
Page 3240 of 5135

SLIP indicator light does not come on.
1.Wire Harness or Connector
2.Skid Control ECU
3.Combination Meter Assy±
05�")
71±2
±
INSTRUMENT PANEL/METER COMBINATION METER
AVENSIS REPAIR MANUAL (RM1018E)
SLIP indicator light does not come on.
1.Wire Harness or Connector
2.Skid Control ECU
3.Combination Meter Assy±
05±752 ±
CRUISE indicator light does not come on.
1.Wire Harness or Connector
2.ECM
3.Combination Meter Assy±
±
±
High Beam indicator light does not come on.
1.Wire Harness or Connector
2.Headlight Dimmer Switch
3.Combination Meter Assy±
65±9 ±
Fr FOG indicator does not come on.
1.Wire Harness or Connector
2.Fr FOG Relay
3.Fr FOG Light Switch
4.Combination Meter Assy±
±
±
±
Rr FOG indicator does not come on.
1.Wire Harness or Connector
2.Rr FOG Relay
3.Rr FOG Light Switch
4.Combination Meter Assy±
±
±
±
TAIL indicator does not come on.
1.Wire Harness or Connector
2.TAIL Relay
3.Combination Meter Assy±
±
±
WATER LEVEL indicator does not come on (1KD±FTV).
1.Wire Harness or Connector
2.Water Level Sensor
3.Combination Meter Assy±
±
±
EMPS indicator does not come on.
1.Wire Harness or Connector
2.EMPS ECU
3.Combination Meter Assy±
±
±
A/T OIL TEMP indicator does not come on.
1.Refer to troubleshooting
2.Wire Harness or Connector
3.Combination Meter Assy05±856
±
±
ECT SNOW indicator does not come on.
1.Refer to troubleshooting
2.Wire Harness or Connector
3.Combination Meter Assy05±980±
±
AUTO LEVELING indicator does not come on.
1.Wire Harness or Connector
2.Auto Leveling ECU
3.Combination Meter Assy±
±
±
Meter Gauges:
SymptomSuspect AreaSee page
Speedometer does not operate.1.Refer to troubleshooting05±1510
Water temperature does not operate.1.Refer to troubleshooting05±1515
Tachometer does not operate.1.Refer to troubleshooting05±1513
Fuel Gauge does not operate or operates abnormally.1.Refer to troubleshooting05±1517
OTHERS:
SymptomSuspect AreaSee page
key reminder buzzer does not operate.
1. Wire Harness or Connector
2. Body ECU (KSW, DCTY)
3. Door Coutesy Switch
4. Key Unlock Warning Switch
5. Combination Meter Assy±
±
±
05±1586 ±
Light reminder buzzer does not operate.
1. Wire Harness or Connector
2. Body ECU (DCTY)
3. Combination Meter Assy±
±
±
Seat belt Warning buzzer does not operate.
1. Perform DATA LIST with hand±held tester
2. Wire Harness or Connector
3. Seat Belt Buckle Switch
4. Combination Meter Assy05±1499±
61±3
±
Page 3242 of 5135

INNER REAR VIEW MIRROR ASS")
700TJ±01
B56435
Slide
B61414
Slide
B66957
Butyl TapeMirror Base
a
b c d 70±64
± WINDSHIELD/WINDOWGLASS/MIRRORINNER REAR VIEW MIRROR ASSY
AVENSIS REPAIR MANUAL (RM1018E)
INNER REAR VIEW MIRROR ASSY
REPLACEMENT
HINT:
The installation is in the reverse order of the removal. However, when there is a special point concerning
the installation, it is indicated.
1. REMOVE INNER REAR VIEW MIRROR ASSY
(EC MIRROR)
(a) Remove the inner rear view mirror cover.
(b) Remove the rain sensor covers (See page XX±XXX).
(c) Remove the screw.
(d) Disconnect the connector.
(e) Remove the rear view inner mirror.
2. REMOVE INNER REAR VIEW MIRROR ASSY
(NORMAL MIRROR)
(a) Remove the inner rear view mirror, as shown in the il-
lustration.
3. INSTALL INNER REAR VIEW MIRROR ASSY
(NORMAL MIRROR)
(a) Prepare 2 pieces of butyl tape having the dimensions, as
shown in the illustration.
(b) While extending them until they fit the length of the mirror
base (24 mm, (0.944 in.)), apply them to both side of the
mirror base respectively.
(c) Install inner rear view mirror.
NOTICE:
If butyl tape spreads out of the inside groove when applied,
remove the excessive amount of tape so that it will not stick
to the glass.
Dimension:
a10 mm (0.393 in.)
b4 mm (0.157 in.)
c6 mm (0.236 in.)
d24 mm (0.944 in.)


RAIN SENSOR
REPLACEMENT
1. REMOVE INNER REAR VIEW MIRROR STAY HOLDER CO")