Page 1275 of 3171
GLOW CONTROL SYSTEM
EC-295
C
D
E
F
G
H
I
J
K
L
MA
EC
GLOW CONTROL SYSTEMPFP:25230
DescriptionEBS01KLM
SYSTEM DESCRIPTION
*: The output signal is sent from the ECM through CAN communication line.
When engine coolant temperature is more than approximately 80°C(176°F), the glow relay turns off.
When engine coolant temperature is lower than approximately 80°C(176°F):
lIgnition switch ON
After ignition switch has turned to ON, the glow relay turns ON for a certain period of time in relation to
engine coolant temperature, allowing current to flow through glow plug.
lCranking
The glow relay turns ON, allowing current to flow through glow plug.
lSta rti ng
After engine has started, current continues to flow through glow plug (after-glow mode) for a certain period
in relation to engine coolant temperature.
The glow indicator lamp turns ON for a certain period of time in relation to engine coolant temperature at the
time glow relay is turned ON.
COMPONENT DESCRIPTION
Glow Plug
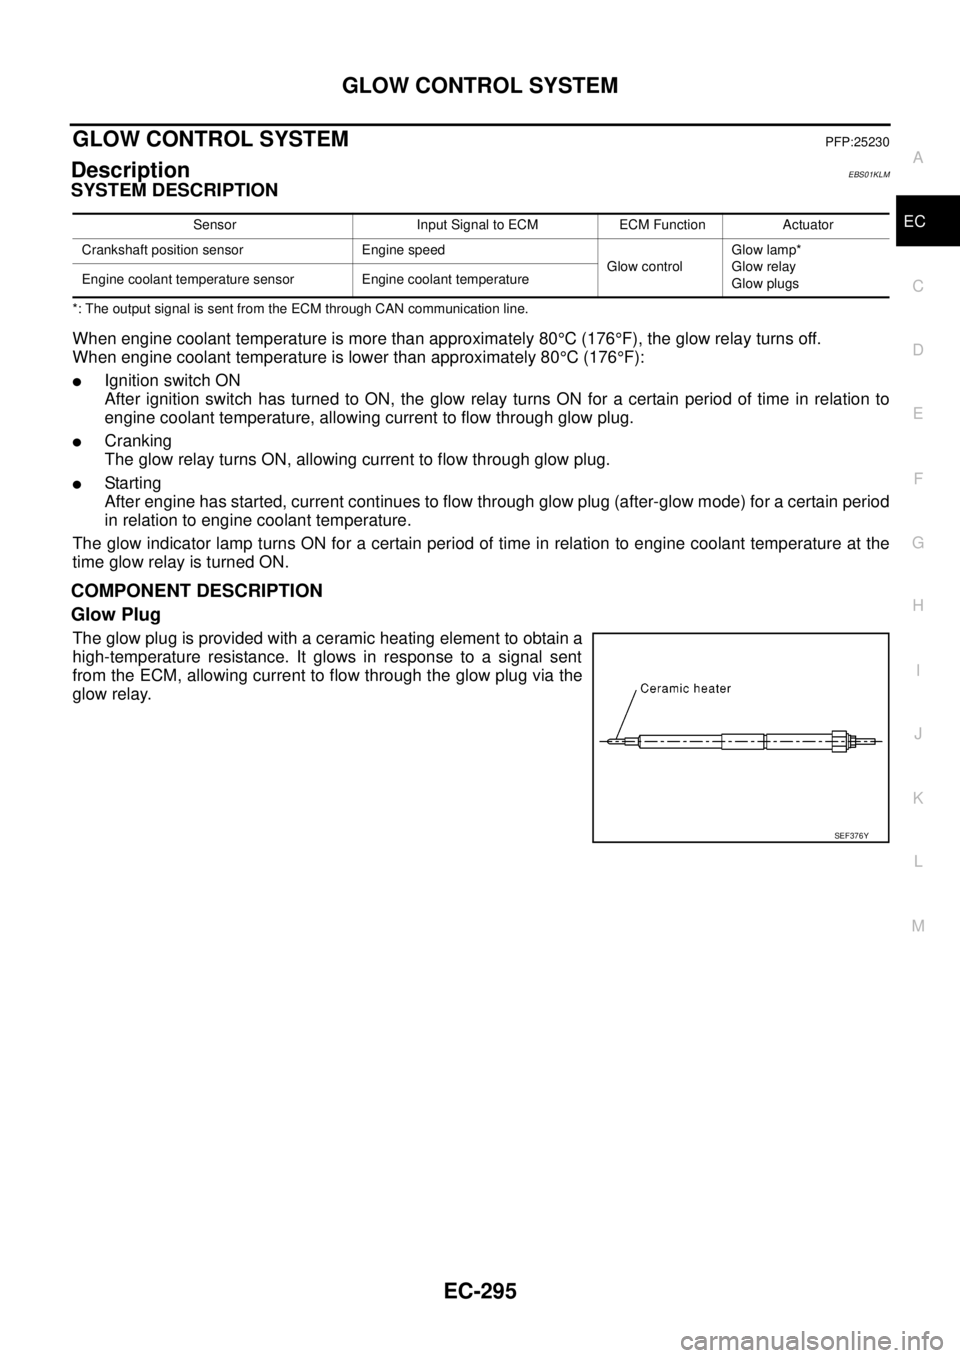
The glow plug is provided with a ceramic heating element to obtain a
high-temperature resistance. It glows in response to a signal sent
from the ECM, allowing current to flow through the glow plug via the
glow relay.
Sensor Input Signal to ECM ECM Function Actuator
Crankshaft position sensor Engine speed
Glow controlGlow lamp*
Glow relay
Glow plugs Engine coolant temperature sensor Engine coolant temperature
SEF376Y
Page 1277 of 3171
GLOW CONTROL SYSTEM
EC-297
C
D
E
F
G
H
I
J
K
L
MA
EC
Diagnostic ProcedureEBS01KLO
1.INSPECTION START
Check fuel level, fuel supplying system, starter motor, etc.
OK or NG
OK >> GO TO 2.
NG >> Correct.
2.CHECK INSTALLATION
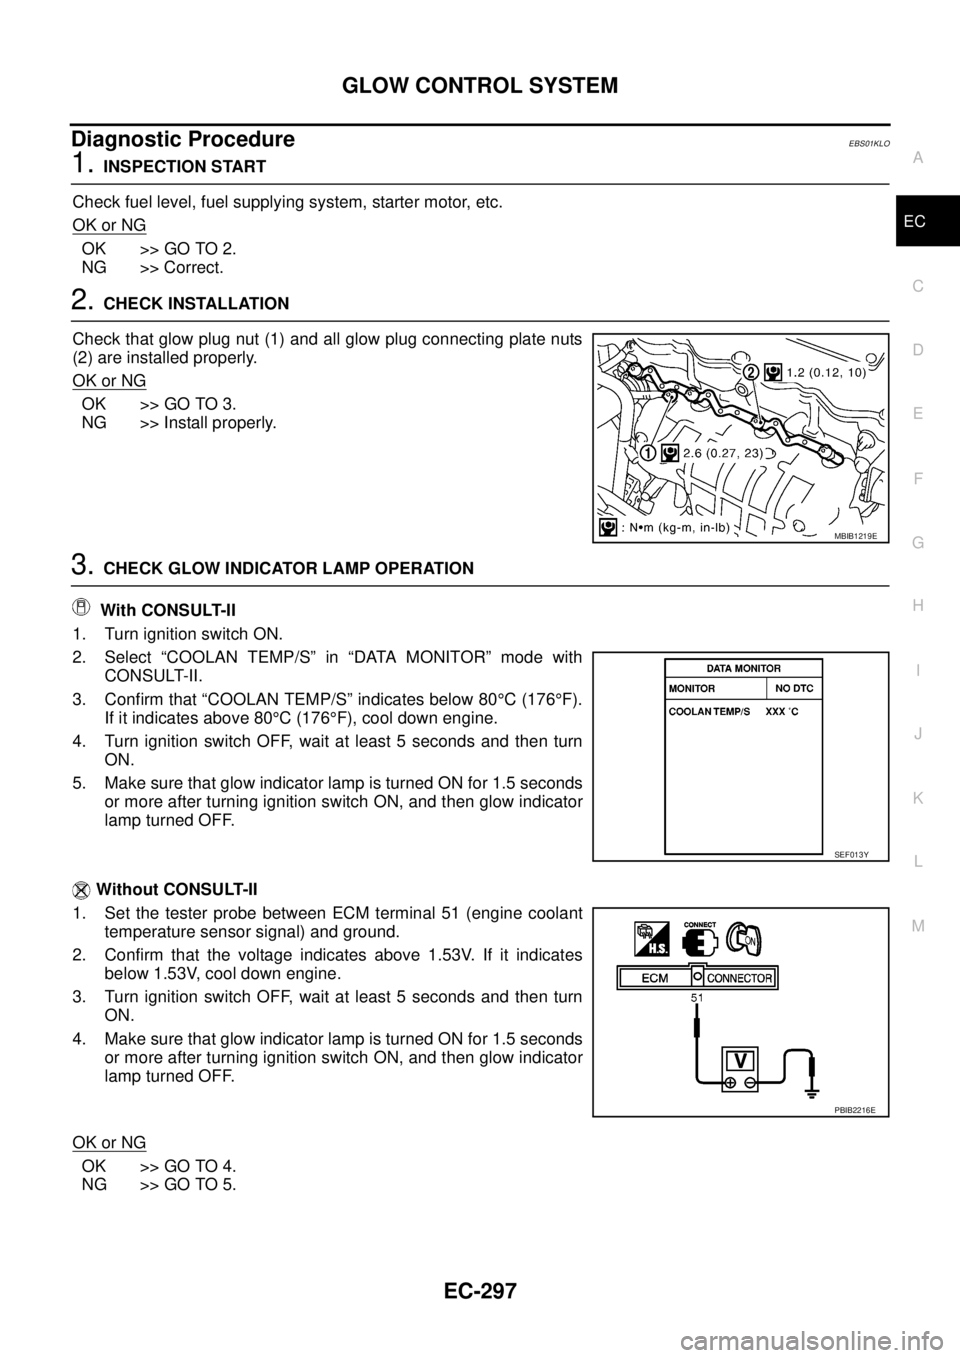
Check that glow plug nut (1) and all glow plug connecting plate nuts
(2) are installed properly.
OK or NG
OK >> GO TO 3.
NG >> Install properly.
3.CHECK GLOW INDICATOR LAMP OPERATION
With CONSULT-II
1. Turn ignition switch ON.
2. Select “COOLAN TEMP/S” in “DATA MONITOR” mode with
CONSULT-II.
3. Confirm that “COOLAN TEMP/S” indicates below 80°C(176°F).
If it indicates above 80°C(176°F), cool down engine.
4. Turn ignition switch OFF, wait at least 5 seconds and then turn
ON.
5. Make sure that glow indicator lamp is turned ON for 1.5 seconds
or more after turning ignition switch ON, and then glow indicator
lamp turned OFF.
Without CONSULT-II
1. Set the tester probe between ECM terminal 51 (engine coolant
temperature sensor signal) and ground.
2. Confirm that the voltage indicates above 1.53V. If it indicates
below 1.53V, cool down engine.
3. Turn ignition switch OFF, wait at least 5 seconds and then turn
ON.
4. Make sure that glow indicator lamp is turned ON for 1.5 seconds
or more after turning ignition switch ON, and then glow indicator
lamp turned OFF.
OK or NG
OK >> GO TO 4.
NG >> GO TO 5.
MBIB1219E
SEF013Y
PBIB2216E
Page 1278 of 3171
EC-298
GLOW CONTROL SYSTEM
4.CHECK GLOW CONTROL SYSTEM OVERALL FUNCTION
With CONSULT-II
1. Select “COOLAN TEMP/S” in “DATA MONITOR” mode with
CONSULT-II.
2. Confirm that “COOLAN TEMP/S” indicates approximately 25°C
(77°F). If NG, cool down engine.
3. Turn ignition switch OFF.
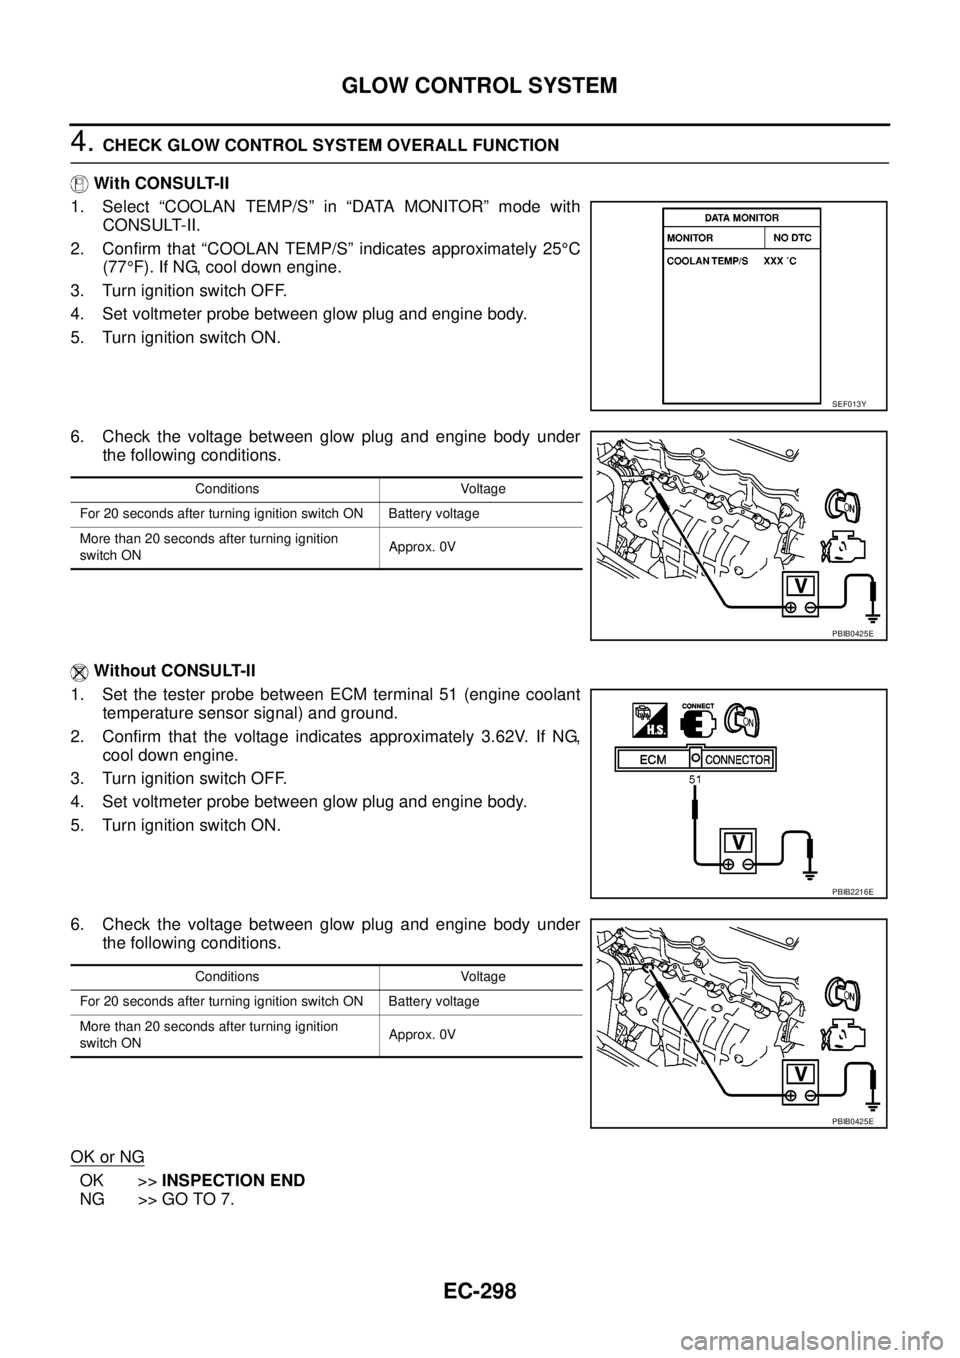
4. Set voltmeter probe between glow plug and engine body.
5. Turn ignition switch ON.
6. Check the voltage between glow plug and engine body under
the following conditions.
Without CONSULT-II
1. Set the tester probe between ECM terminal 51 (engine coolant
temperature sensor signal) and ground.
2. Confirm that the voltage indicates approximately 3.62V. If NG,
cool down engine.
3. Turn ignition switch OFF.
4. Set voltmeter probe between glow plug and engine body.
5. Turn ignition switch ON.
6. Check the voltage between glow plug and engine body under
the following conditions.
OK or NG
OK >>INSPECTION END
NG >> GO TO 7.
SEF013Y
Conditions Voltage
For 20 seconds after turning ignition switch ON Battery voltage
More than 20 seconds after turning ignition
switch ONApprox. 0V
PBIB0425E
PBIB2216E
Conditions Voltage
For 20 seconds after turning ignition switch ON Battery voltage
More than 20 seconds after turning ignition
switch ONApprox. 0V
PBIB0425E
Page 1282 of 3171
EC-302
EGR VOLUME CONTROL SYSTEM
EGR VOLUME CONTROL SYSTEM
PFP:14710
DescriptionEBS01KLR
SYSTEM DESCRIPTION
*: This signal is sent to the ECM through CAN communication line.
This system controls flow rate of EGR led from exhaust manifold to intake manifold. The opening of the EGR
by-pass passage in the EGR volume control valve changes to control the flow rate. A built-in step motor
moves the valve in steps corresponding to the ECM output pulses. The opening of the valve varies for opti-
mum engine control. The optimum value stored in the ECM is determined by considering various engine con-
ditions.
The EGR volume control valve remains close under the following conditions.
lEngine stopped
lEngine starting
lLow engine coolant temperature
lExcessively high engine coolant temperature
lHigh engine speed
lAccelerator pedal fully depressed
COMPONENT DESCRIPTION
EGR Volume Control Valve
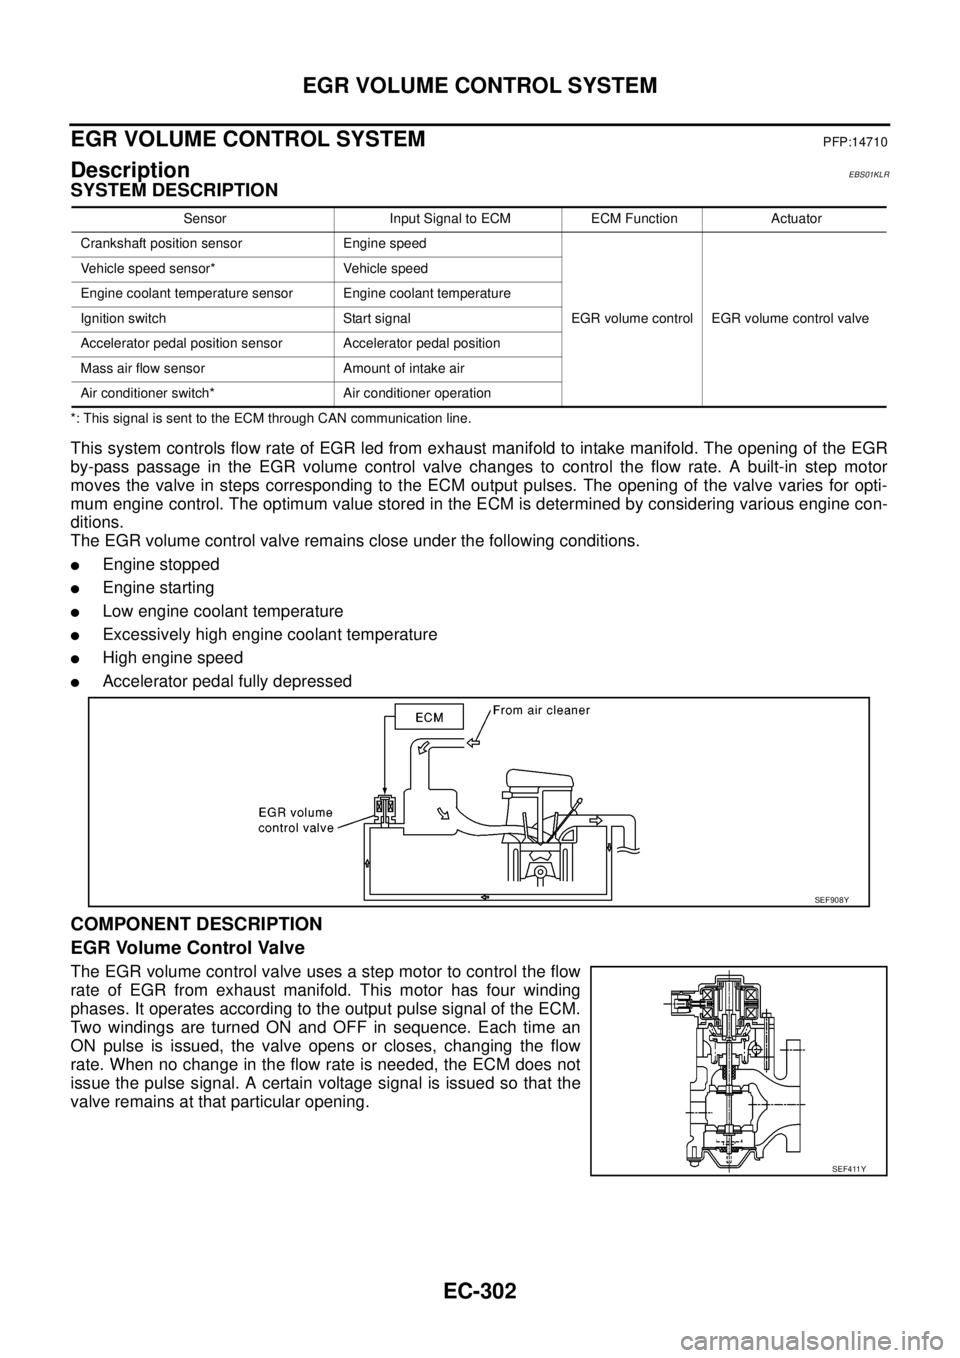
The EGR volume control valve uses a step motor to control the flow
rate of EGR from exhaust manifold. This motor has four winding
phases. It operates according to the output pulse signal of the ECM.
Two windings are turned ON and OFF in sequence. Each time an
ON pulse is issued, the valve opens or closes, changing the flow
rate. When no change in the flow rate is needed, the ECM does not
issue the pulse signal. A certain voltage signal is issued so that the
valve remains at that particular opening.
Sensor Input Signal to ECM ECM Function Actuator
Crankshaft position sensor Engine speed
EGR volume control EGR volume control valve Vehicle speed sensor* Vehicle speed
Engine coolant temperature sensor Engine coolant temperature
Ignition switch Start signal
Accelerator pedal position sensor Accelerator pedal position
Mass air flow sensor Amount of intake air
Air conditioner switch* Air conditioner operation
SEF908Y
SEF411Y
Page 1283 of 3171

EGR VOLUME CONTROL SYSTEM
EC-303
C
D
E
F
G
H
I
J
K
L
MA
EC
CONSULT-II Reference Value in Data Monitor ModeEBS01KLS
Specification data are reference values.
ECM Terminals and Reference ValueEBS01KLT
Specification data are reference values and are measured between each terminal and ground.
CAUTION:
Do not use ECM ground terminals when measuring input/output voltage. Doing so may result in dam-
age to the ECM's transistor. Use a ground other than ECM terminals, such as the ground.
MONITOR ITEM CONDITION SPECIFICATION
EGR VOL CON/V
lEngine: After warming up
lAir conditioner switch: OFF
lShift lever: P or N (A/T), Neutral (M/T)
lNo loadAfter 1 minute at idle More than 10 steps
Revving engine from idle to 3,200
rpm0step
TERMI-
NAL
NO.WIRE
COLORITEM CONDITIONDATA
(DC Voltage)
25
26
27
28Y
O
GR
VEGR volume control valve[Engine is running]
lWarm-up condition
lIdle speed0.1 - 14V
(Voltage signals of each ECM ter-
minals differ according to the con-
trol position of EGR volume
control valve.)
105
11 3BR
BRECM relay (self shut-off)[Ignition switch ON]
[Ignition switch OFF]
lFor a few seconds after turning ignition switch
OFFApproximately 1.0V
[Ignition switch OFF]
lMore than a few seconds passed after turning
ignition switch OFFBATTERY VOLTAGE
(11 - 14V)
11 9
120R
GPower supply for ECM[Ignition switch ON]BATTERY VOLTAGE
(11 - 14V)
Page 1285 of 3171
EGR VOLUME CONTROL SYSTEM
EC-305
C
D
E
F
G
H
I
J
K
L
MA
EC
Diagnostic ProcedureEBS01KLV
1.CHECK EGR VOLUME CONTROL SYSTEM OVERALL FUNCTION
1. Turn ignition switch OFF.
2. Set the oscilloscope probe between ECM terminals 25, 26, 27, 28 and ground.
3. Start engine and let it idle.
4. Check the oscilloscope screen when revving engine up to 3,200 rpm and return to idle.
OK or NG
OK >>INSPECTION END
NG >> GO TO 2.
2.CHECK EGR VOLUME CONTROL VALVE POWER SUPPLY CIRCUIT
1. Turn ignition switch OFF.
2. Disconnect EGR volume control valve (1) harness connector.
–: Vehicle front
3. Turn ignition switch ON.
4. Check voltage between EGR volume control valve terminals 2, 5
and ground with CONSULT-II or tester.
OK or NG
OK >> GO TO 4.
NG >> GO TO 3.The pulse signal as shown in the figure should appear.
MBIB0617E
MBIB1227E
Voltage: Battery voltage
PBIB0431E
Page 1290 of 3171
EC-310
TC BOOST CONTROL SOLENOID VALVE
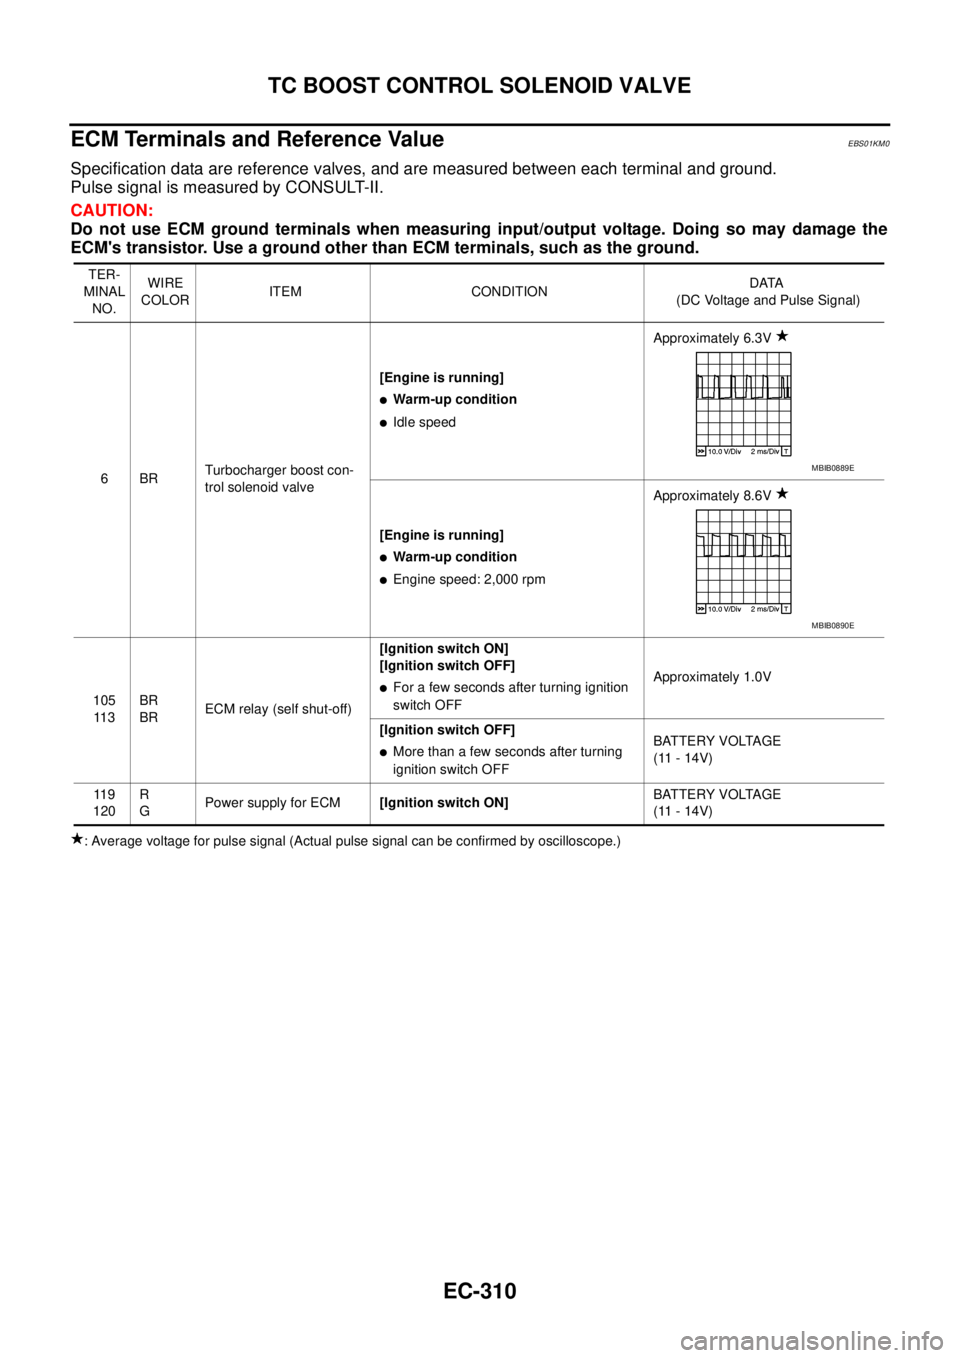
ECM Terminals and Reference Value
EBS01KM0
Specification data are reference valves, and are measured between each terminal and ground.
Pulse signal is measured by CONSULT-II.
CAUTION:
Do not use ECM ground terminals when measuring input/output voltage. Doing so may damage the
ECM's transistor. Use a ground other than ECM terminals, such as the ground.
: Average voltage for pulse signal (Actual pulse signal can be confirmed by oscilloscope.)TER-
MINAL
NO.WIRE
COLORITEM CONDITIONDATA
(DC Voltage and Pulse Signal)
6BRTurbocharger boost con-
trol solenoid valve[Engine is running]
lWarm-up condition
lIdle speedApproximately 6.3V
[Engine is running]
lWarm-up condition
lEngine speed: 2,000 rpmApproximately 8.6V
105
11 3BR
BRECM relay (self shut-off)[Ignition switch ON]
[Ignition switch OFF]
lFor a few seconds after turning ignition
switch OFFApproximately 1.0V
[Ignition switch OFF]
lMore than a few seconds after turning
ignition switch OFFBATTERY VOLTAGE
(11 - 14V)
11 9
120R
GPower supply for ECM[Ignition switch ON]BATTERY VOLTAGE
(11 - 14V)
MBIB0889E
MBIB0890E
Page 1292 of 3171
EC-312
TC BOOST CONTROL SOLENOID VALVE
Diagnostic Procedure
EBS01KM2
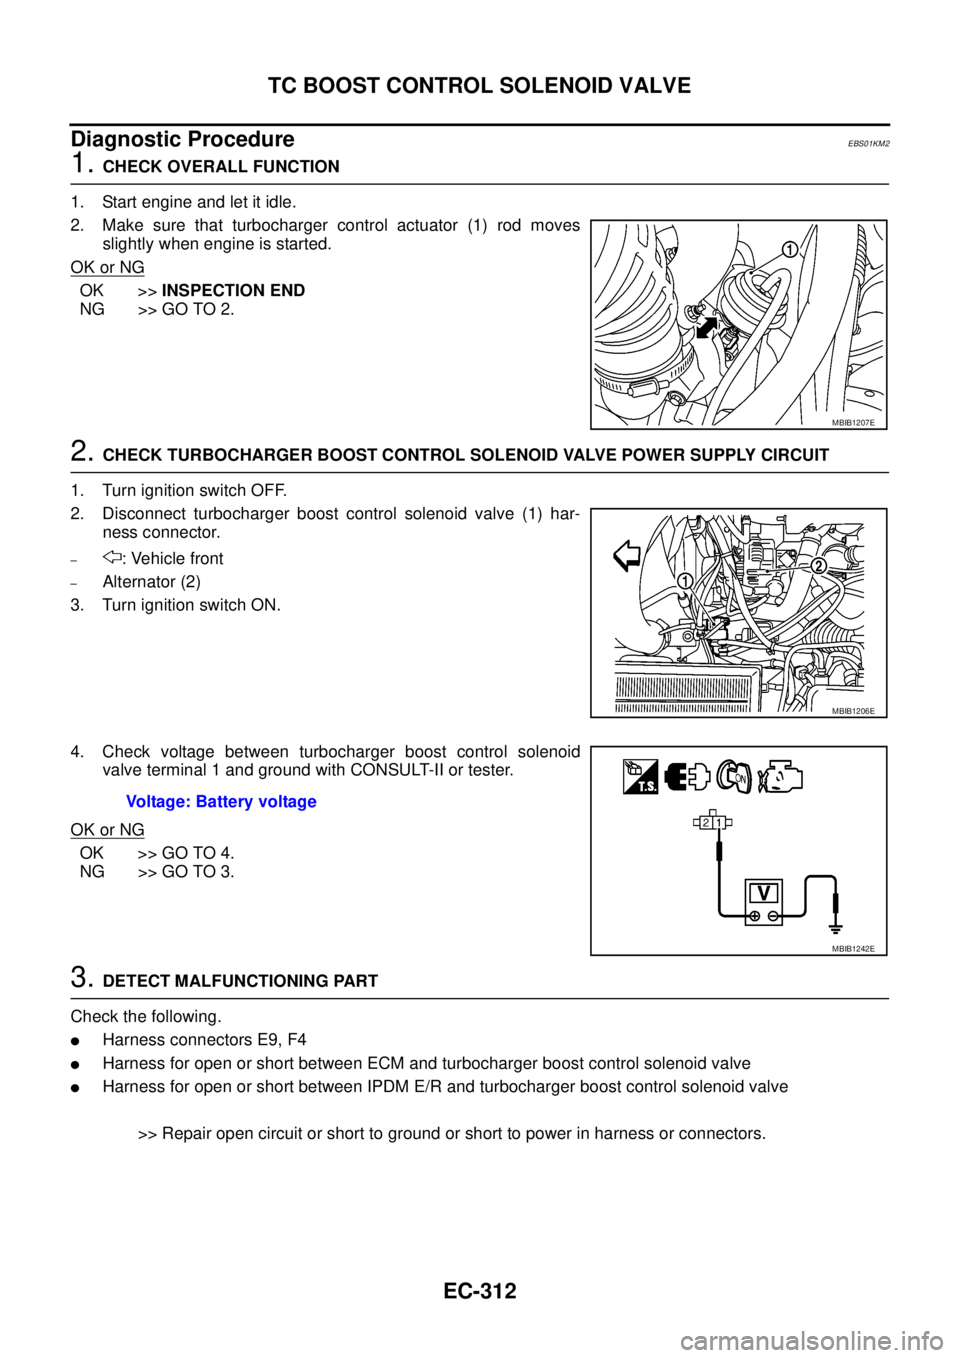
1.CHECK OVERALL FUNCTION
1. Start engine and let it idle.
2. Make sure that turbocharger control actuator (1) rod moves
slightly when engine is started.
OK or NG
OK >>INSPECTION END
NG >> GO TO 2.
2.CHECK TURBOCHARGER BOOST CONTROL SOLENOID VALVE POWER SUPPLY CIRCUIT
1. Turn ignition switch OFF.
2. Disconnect turbocharger boost control solenoid valve (1) har-
ness connector.
–: Vehicle front
–Alternator (2)
3. Turn ignition switch ON.
4. Check voltage between turbocharger boost control solenoid
valve terminal 1 and ground with CONSULT-II or tester.
OK or NG
OK >> GO TO 4.
NG >> GO TO 3.
3.DETECT MALFUNCTIONING PART
Check the following.
lHarness connectors E9, F4
lHarness for open or short between ECM and turbocharger boost control solenoid valve
lHarness for open or short between IPDM E/R and turbocharger boost control solenoid valve
>> Repair open circuit or short to ground or short to power in harness or connectors.
MBIB1207E
MBIB1206E
Voltage: Battery voltage
MBIB1242E