Page 1146 of 3171

EC-166
DTC P0336 CKP SENSOR
On Board Diagnosis Logic
EBS01KGV
NOTE:
If DTC P0336 is displayed with DTC P0652 or P0653, first perform the trouble diagnosis for DTC P0652
or P0653. Refer toEC-227, "
DTC P0652, P0653 SENSOR POWER SUPPLY".
DTC Confirmation ProcedureEBS01KGW
NOTE:
If DTC Confirmation Procedure has been previously conducted, always turn ignition switch OFF and wait at
least 10 seconds before conducting the next test.
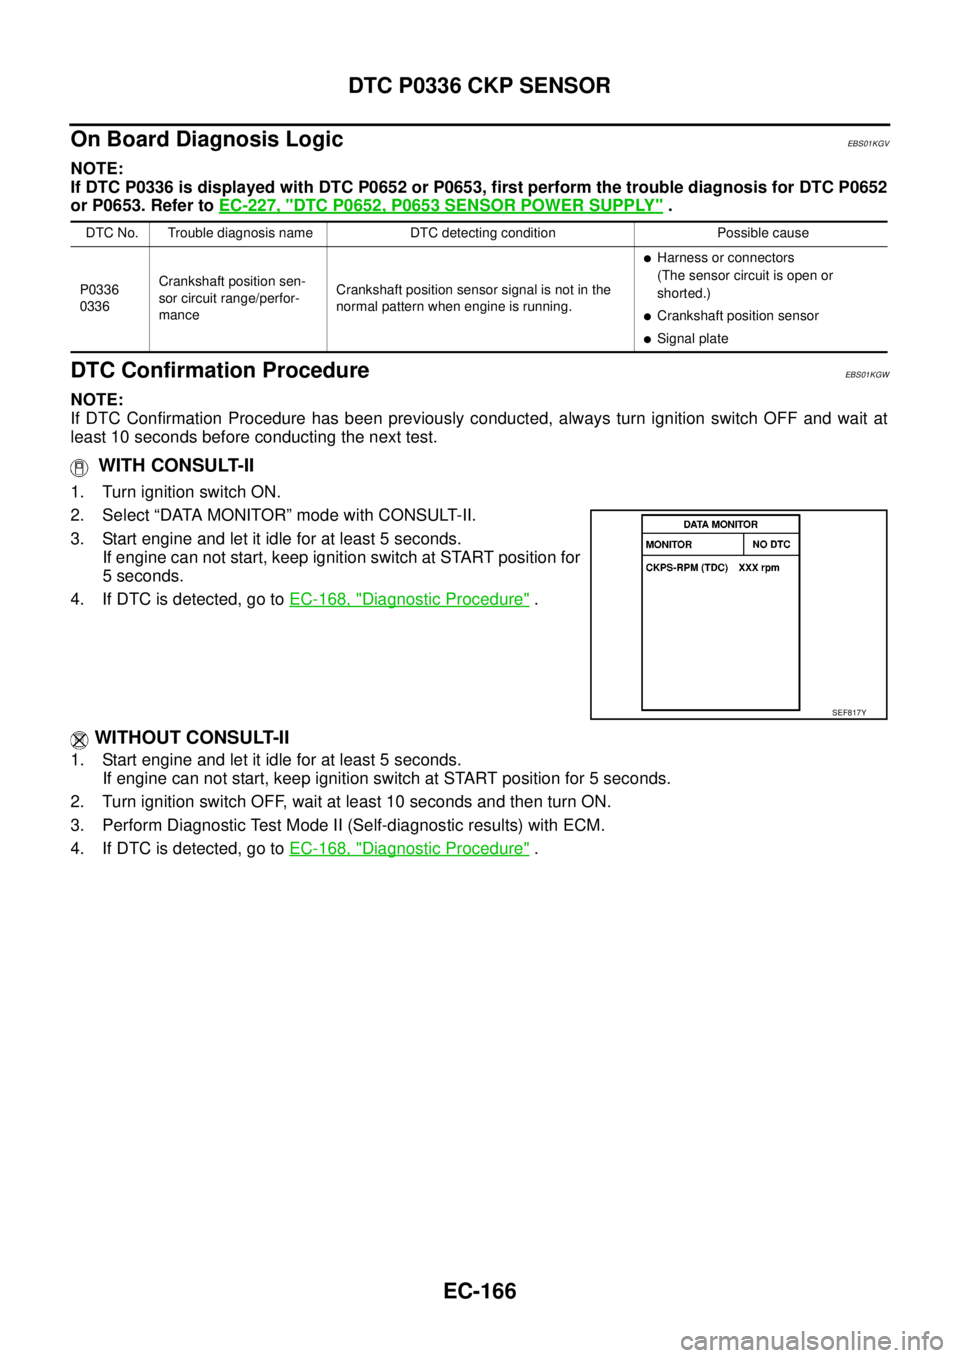
WITH CONSULT-II
1. Turn ignition switch ON.
2. Select “DATA MONITOR” mode with CONSULT-II.
3. Start engine and let it idle for at least 5 seconds.
If engine can not start, keep ignition switch at START position for
5 seconds.
4. If DTC is detected, go toEC-168, "
Diagnostic Procedure".
WITHOUT CONSULT-II
1. Start engine and let it idle for at least 5 seconds.
If engine can not start, keep ignition switch at START position for 5 seconds.
2. Turn ignition switch OFF, wait at least 10 seconds and then turn ON.
3. Perform Diagnostic Test Mode II (Self-diagnostic results) with ECM.
4. If DTC is detected, go toEC-168, "
Diagnostic Procedure".
DTC No. Trouble diagnosis name DTC detecting condition Possible cause
P0336
0336Crankshaft position sen-
sor circuit range/perfor-
manceCrankshaft position sensor signal is not in the
normal pattern when engine is running.
lHarness or connectors
(The sensor circuit is open or
shorted.)
lCrankshaft position sensor
lSignal plate
SEF817Y
Page 1147 of 3171
DTC P0336 CKP SENSOR
EC-167
C
D
E
F
G
H
I
J
K
L
MA
EC
Wiring DiagramEBS01KGX
MBWA1046E
Page 1148 of 3171
EC-168
DTC P0336 CKP SENSOR
Diagnostic Procedure
EBS01KGY
1.CHECK GROUND CONNECTIONS
1. Turn ignition switch OFF.
2. Loosen and retighten three ground screws on the body.
Refer toEC-78, "
Ground Inspection".
OK or NG
OK >> GO TO 2.
NG >> Repair or replace ground connections.
2.CHECK CKP SENSOR POWER SUPPLY CIRCUIT
1. Disconnect crankshaft position sensor (1) harness connector.
–Illustration shows the view from under the vehicle
–: Vehicle front
–Starter motor (2)
2. Turn ignition switch ON.
3. Check voltage between CKP sensor terminal 3 and ground with
CONSULT-II or tester.
4. Also check harness for short to ground and short to power.
OK or NG
OK >> GO TO 3.
NG >> Repair open circuit or short to ground or short to power
in harness or connectors.
: Vehicle front
1. Body ground E21 2. ECM 3. Body ground E41
4. A/C high-pressure service valve 5. ABS actuator and electric unit
(control unit)6. Body ground E61
MBIB1218E
MBIB1211E
Voltage: Approximately 5.3V
MBIB1293E
Page 1149 of 3171

DTC P0336 CKP SENSOR
EC-169
C
D
E
F
G
H
I
J
K
L
MA
EC
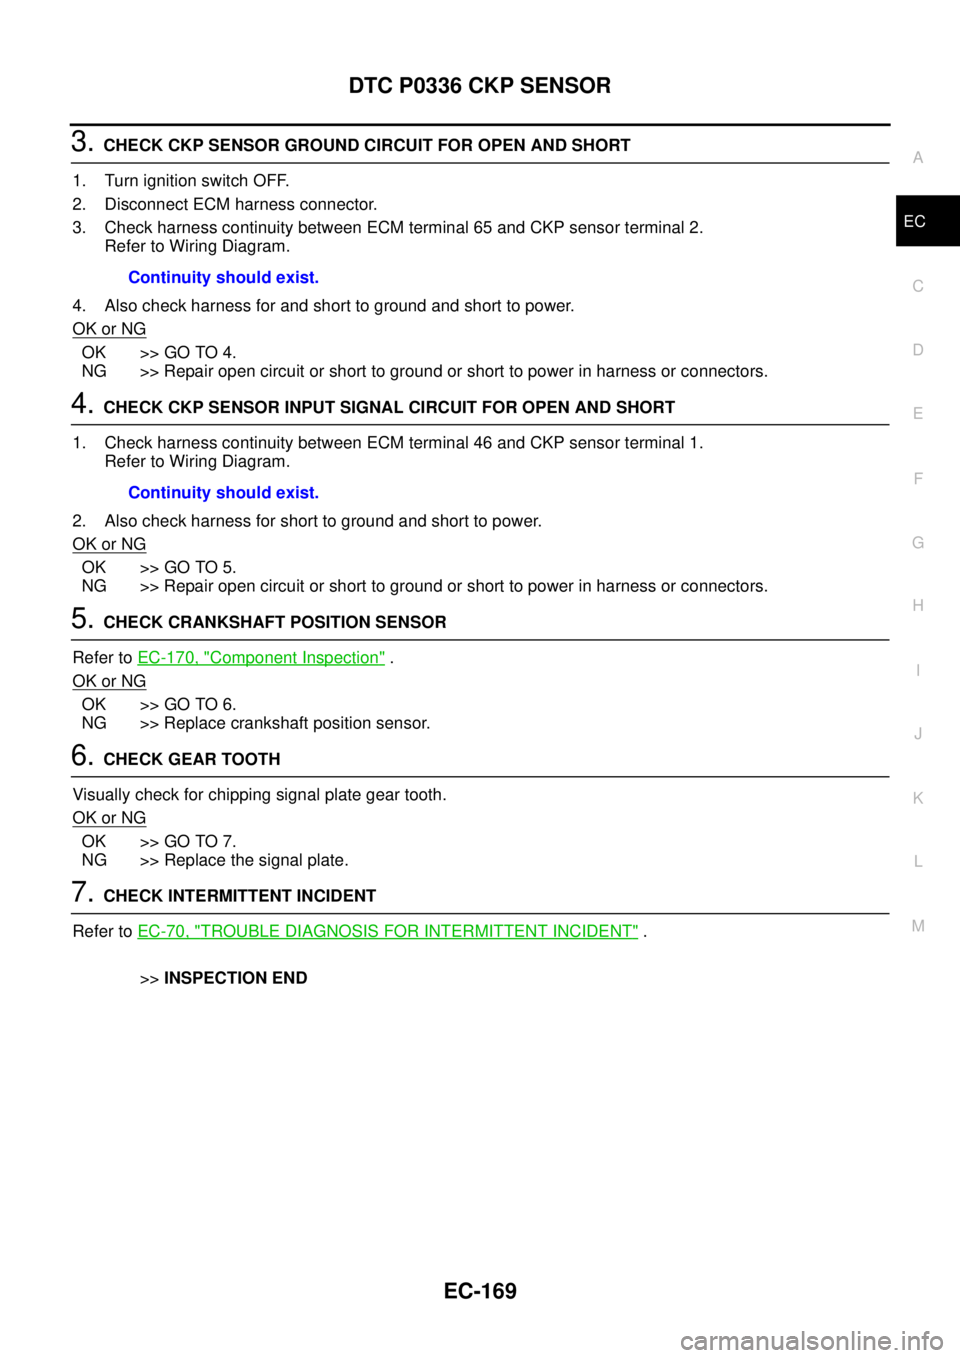
3.CHECK CKP SENSOR GROUND CIRCUIT FOR OPEN AND SHORT
1. Turn ignition switch OFF.
2. Disconnect ECM harness connector.
3. Check harness continuity between ECM terminal 65 and CKP sensor terminal 2.
Refer to Wiring Diagram.
4. Also check harness for and short to ground and short to power.
OK or NG
OK >> GO TO 4.
NG >> Repair open circuit or short to ground or short to power in harness or connectors.
4.CHECK CKP SENSOR INPUT SIGNAL CIRCUIT FOR OPEN AND SHORT
1. Check harness continuity between ECM terminal 46 and CKP sensor terminal 1.
Refer to Wiring Diagram.
2. Also check harness for short to ground and short to power.
OK or NG
OK >> GO TO 5.
NG >> Repair open circuit or short to ground or short to power in harness or connectors.
5.CHECK CRANKSHAFT POSITION SENSOR
Refer toEC-170, "
Component Inspection".
OK or NG
OK >> GO TO 6.
NG >> Replace crankshaft position sensor.
6.CHECK GEAR TOOTH
Visually check for chipping signal plate gear tooth.
OK or NG
OK >> GO TO 7.
NG >> Replace the signal plate.
7.CHECK INTERMITTENT INCIDENT
Refer toEC-70, "
TROUBLE DIAGNOSIS FOR INTERMITTENT INCIDENT".
>>INSPECTION END Continuity should exist.
Continuity should exist.
Page 1150 of 3171
EC-170
DTC P0336 CKP SENSOR
Component Inspection
EBS01KGZ
CRANKSHAFT POSITION SENSOR
1. Loosen the fixing bolt of the sensor.
2. Disconnect crankshaft position sensor harness connector.
3. Remove the sensor.
4. Visually check the sensor for chipping.
5. Check resistance as shown in the figure.
6. If NG, replace crankshaft position sensor.
Removal and InstallationEBS01KH0
CRANKSHAFT POSITION SENSOR
Refer toEM-36, "OIL PAN AND OIL STRAINER".
MBIB0647E
Terminal No. (Polarity) ResistanceW[at 25°C(77°F)]
1(+)-2(-)
Except 0 or¥ 3(+)-1(-)
3(+)-2(-)
MBIB1385E
Page 1151 of 3171

DTC P0340 CMP SENSOR
EC-171
C
D
E
F
G
H
I
J
K
L
MA
EC
DTC P0340 CMP SENSORPFP:23731
DescriptionEBS01KH1
The camshaft position (CMP) sensor senses the retraction with cam-
shaft (left side) to identify a particular cylinder. The camshaft position
(CMP) sensor senses the piston position.
When the crankshaft position (CKP) sensor system becomes inoper-
ative, the camshaft position (CMP) sensor provides various controls
of engine parts instead, utilizing timing of cylinder identification sig-
nals.
The sensor consists of a permanent magnet and Hall IC.
When engine is running, the high and low parts of the teeth cause
the gap with the sensor to change.
The changing gap causes the magnetic field near the sensor to
change.
Due to the changing magnetic field, the voltage from the sensor changes.
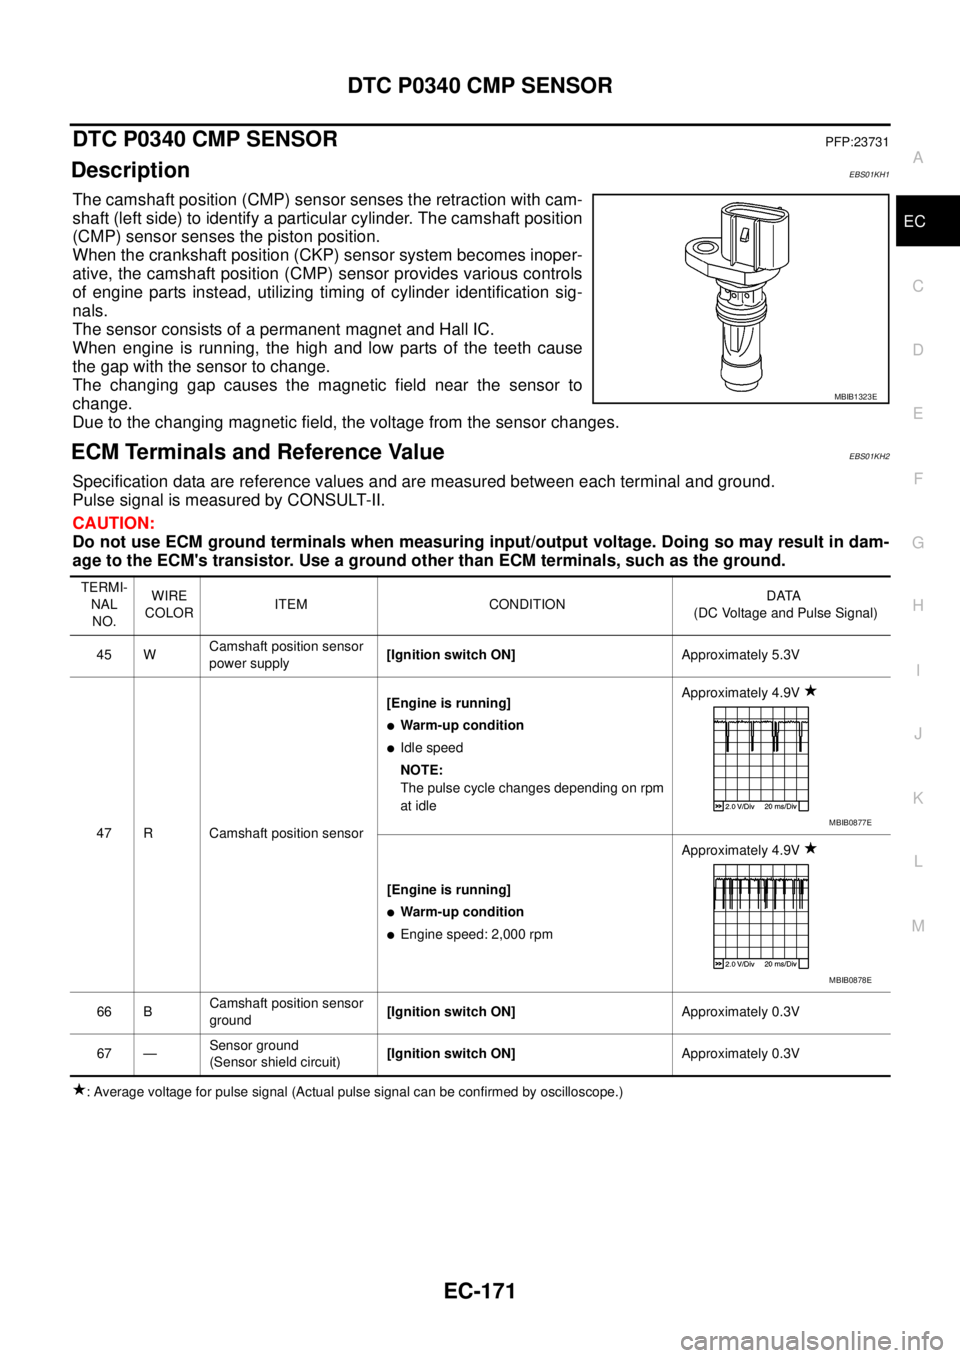
ECM Terminals and Reference ValueEBS01KH2
Specification data are reference values and are measured between each terminal and ground.
Pulse signal is measured by CONSULT-II.
CAUTION:
Do not use ECM ground terminals when measuring input/output voltage. Doing so may result in dam-
age to the ECM's transistor. Use a ground other than ECM terminals, such as the ground.
: Average voltage for pulse signal (Actual pulse signal can be confirmed by oscilloscope.)
MBIB1323E
TERMI-
NAL
NO.WIRE
COLORITEM CONDITIONDATA
(DC Voltage and Pulse Signal)
45 WCamshaft position sensor
power supply[Ignition switch ON]Approximately 5.3V
47 R Camshaft position sensor[Engine is running]
lWarm-up condition
lIdle speed
NOTE:
The pulse cycle changes depending on rpm
at idleApproximately 4.9V
[Engine is running]
lWarm-up condition
lEngine speed: 2,000 rpmApproximately 4.9V
66 BCamshaft position sensor
ground[Ignition switch ON]Approximately 0.3V
67 —Sensor ground
(Sensor shield circuit)[Ignition switch ON]Approximately 0.3V
MBIB0877E
MBIB0878E
Page 1152 of 3171

EC-172
DTC P0340 CMP SENSOR
On Board Diagnosis Logic
EBS01KH3
NOTE:
If DTC P0340 is displayed with DTC P0652 or P0653, first perform the trouble diagnosis for DTC P0652
or P0653. Refer toEC-227, "
DTC P0652, P0653 SENSOR POWER SUPPLY".
DTC Confirmation ProcedureEBS01KH4
NOTE:
If DTC Confirmation Procedure has been previously conducted, always turn ignition switch OFF and wait at
least 10 seconds before conducting the next test.
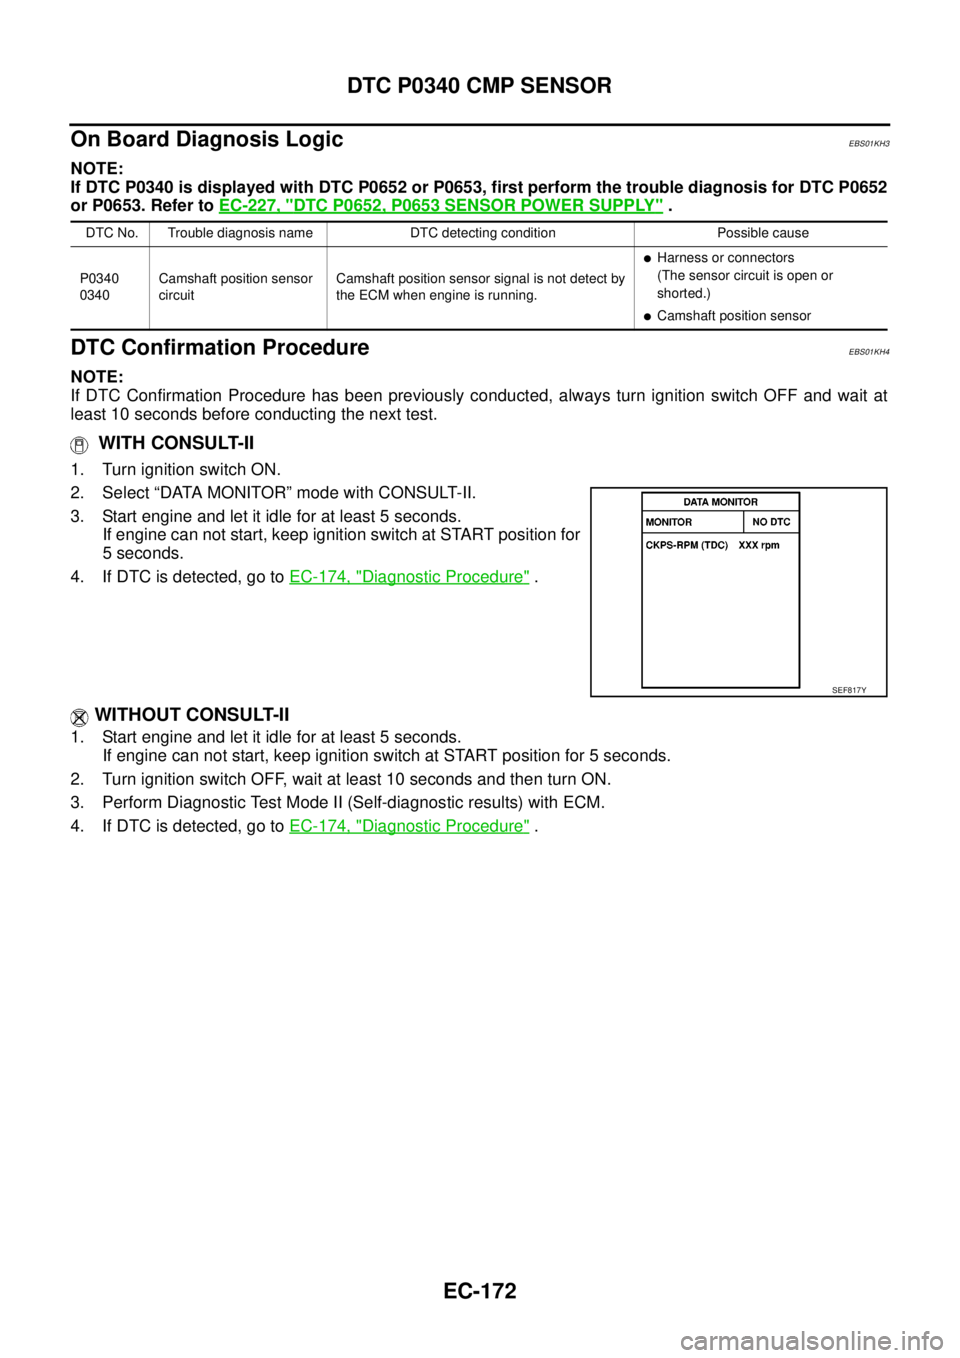
WITH CONSULT-II
1. Turn ignition switch ON.
2. Select “DATA MONITOR” mode with CONSULT-II.
3. Start engine and let it idle for at least 5 seconds.
If engine can not start, keep ignition switch at START position for
5 seconds.
4. If DTC is detected, go toEC-174, "
Diagnostic Procedure".
WITHOUT CONSULT-II
1. Start engine and let it idle for at least 5 seconds.
If engine can not start, keep ignition switch at START position for 5 seconds.
2. Turn ignition switch OFF, wait at least 10 seconds and then turn ON.
3. Perform Diagnostic Test Mode II (Self-diagnostic results) with ECM.
4. If DTC is detected, go toEC-174, "
Diagnostic Procedure".
DTC No. Trouble diagnosis name DTC detecting condition Possible cause
P0340
0340Camshaft position sensor
circuitCamshaft position sensor signal is not detect by
the ECM when engine is running.
lHarness or connectors
(The sensor circuit is open or
shorted.)
lCamshaft position sensor
SEF817Y
Page 1153 of 3171
DTC P0340 CMP SENSOR
EC-173
C
D
E
F
G
H
I
J
K
L
MA
EC
Wiring DiagramEBS01KH5
MBWA1047E