Page 1126 of 3171
EC-146
DTC P0222, P0223 APP SENSOR
3.CHECK APP SENSOR 2 GROUND CIRCUIT FOR OPEN AND SHORT
1. Turn ignition switch OFF.
2. Disconnect ECM harness connector.
3. Check harness continuity between APP sensor terminal 5 and ECM terminal 92.
Refer to Wiring Diagram.
4. Also check harness for short to ground and short to power.
OK or NG
OK >> GO TO 4.
NG >> Repair open circuit or short to ground or short to power in harness or connectors.
4.CHECK APP SENSOR 2 INPUT SIGNAL CIRCUIT FOR OPEN AND SHORT
1. Check harness continuity between ECM terminal 91 and APP sensor terminal 6.
Refer to Wiring Diagram.
2. Also check harness for short to ground and short to power.
OK or NG
OK >> GO TO 5.
NG >> Repair open circuit or short to ground or short to power in harness or connectors.
5.CHECK APP SENSOR
Refer toEC-146, "
Component Inspection".
OK or NG
OK >> GO TO 6.
NG >> Replace accelerator pedal assembly.
6.CHECK INTERMITTENT INCIDENT
Refer toEC-70, "
TROUBLE DIAGNOSIS FOR INTERMITTENT INCIDENT".
>>INSPECTION END
Component InspectionEBS01KFZ
ACCELERATOR PEDAL POSITION SENSOR
1. Reconnect all harness connectors disconnected.
2. Turn ignition switch ON.
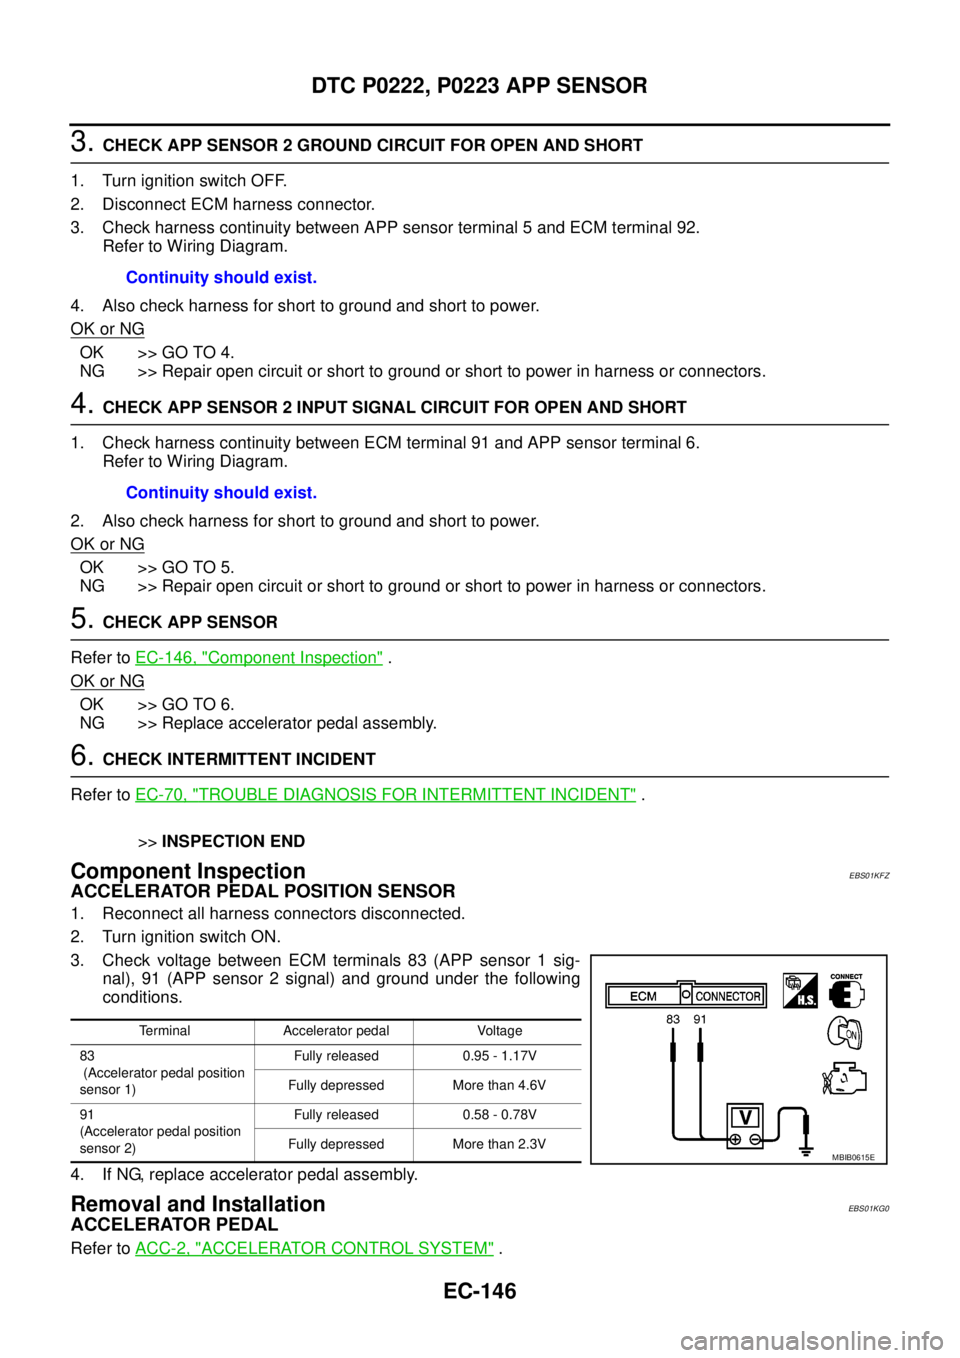
3. Check voltage between ECM terminals 83 (APP sensor 1 sig-
nal), 91 (APP sensor 2 signal) and ground under the following
conditions.
4. If NG, replace accelerator pedal assembly.
Removal and InstallationEBS01KG0
ACCELERATOR PEDAL
Refer toACC-2, "ACCELERATOR CONTROL SYSTEM". Continuity should exist.
Continuity should exist.
Terminal Accelerator pedal Voltage
83
(Accelerator pedal position
sensor 1)Fully released 0.95 - 1.17V
Fully depressed More than 4.6V
91
(Accelerator pedal position
sensor 2)Fully released 0.58 - 0.78V
Fully depressed More than 2.3V
MBIB0615E
Page 1128 of 3171
EC-148
DTC P0234 TC SYSTEM
: Average voltage for pulse signal (Actual pulse signal can be confirmed by oscilloscope.)
On Board Diagnosis LogicEBS01KG4
The MI will not light up for this self-diagnosis.
NOTE:
If DTC P0234 is displayed with DTC P0652 or P0653, first perform the trouble diagnosis for DTC P0652
or P0653. Refer toEC-227, "
DTC P0652, P0653 SENSOR POWER SUPPLY".
Overall Function CheckEBS01KG5
Use this procedure to check the overall function of the turbocharger. During this check, a DTC might not be
confirmed.
1. Start engine and let it idle.
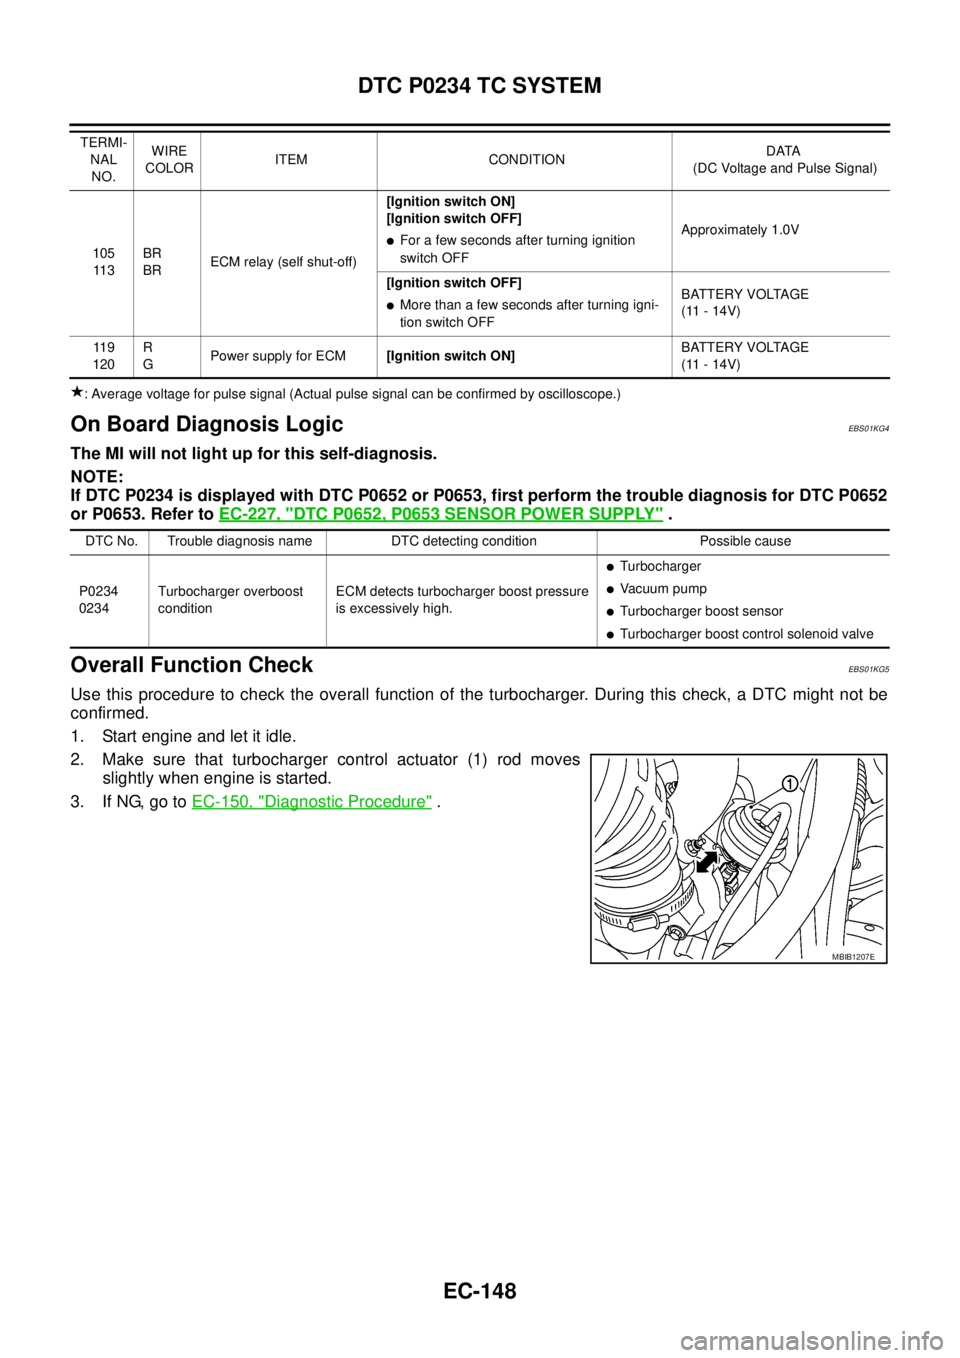
2. Make sure that turbocharger control actuator (1) rod moves
slightly when engine is started.
3. If NG, go toEC-150, "
Diagnostic Procedure".
105
11 3BR
BRECM relay (self shut-off)[Ignition switch ON]
[Ignition switch OFF]lFor a few seconds after turning ignition
switch OFFApproximately 1.0V
[Ignition switch OFF]
lMore than a few seconds after turning igni-
tion switch OFFBATTERY VOLTAGE
(11 - 14V)
11 9
120R
GPower supply for ECM[Ignition switch ON]BATTERY VOLTAGE
(11 - 14V) TERMI-
NAL
NO.WIRE
COLORITEM CONDITIONDATA
(DC Voltage and Pulse Signal)
DTC No. Trouble diagnosis name DTC detecting condition Possible cause
P0234
0234Turbocharger overboost
conditionECM detects turbocharger boost pressure
is excessively high.
lTurbocharger
lVa c u u m p u m p
lTurbocharger boost sensor
lTurbocharger boost control solenoid valve
MBIB1207E
Page 1132 of 3171
EC-152
DTC P0234 TC SYSTEM
9.CHECK TURBOCHARGER BOOST SENSOR
Refer toEC-158, "
Component Inspection".
OK or NG
OK >> GO TO 10.
NG >> Replace turbocharger boost sensor.
10.CHECK INTERMITTENT INCIDENT
Refer toEC-70, "
TROUBLE DIAGNOSIS FOR INTERMITTENT INCIDENT".
>>INSPECTION END
Component InspectionEBS01KG8
TURBOCHARGER BOOST CONTROL SOLENOID VALVE
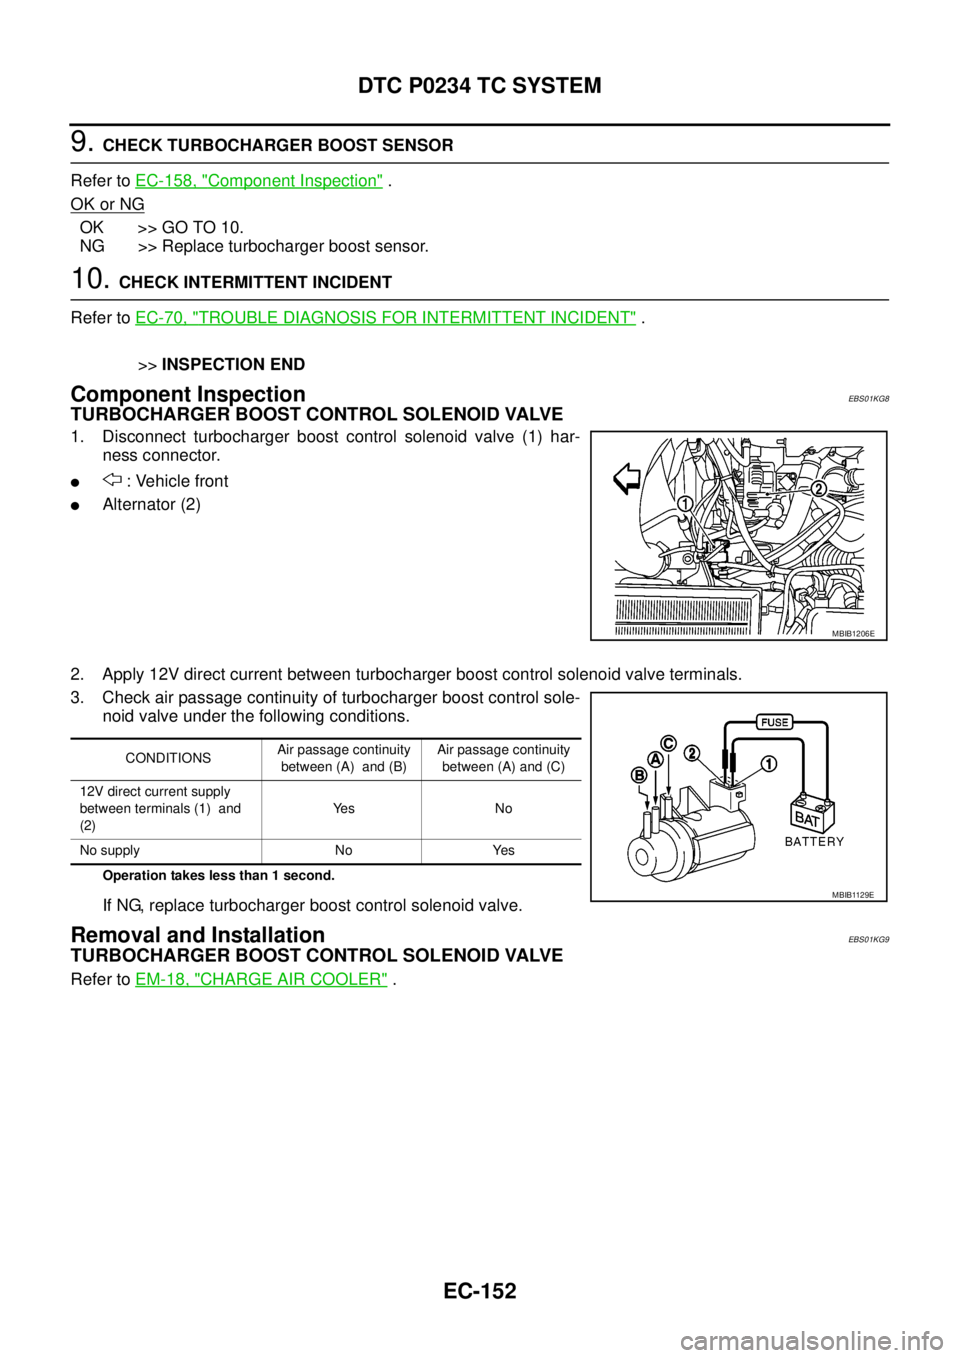
1. Disconnect turbocharger boost control solenoid valve (1) har-
ness connector.
l: Vehicle front
lAlternator (2)
2. Apply 12V direct current between turbocharger boost control solenoid valve terminals.
3. Check air passage continuity of turbocharger boost control sole-
noid valve under the following conditions.
Operation takes less than 1 second.
If NG, replace turbocharger boost control solenoid valve.
Removal and InstallationEBS01KG9
TURBOCHARGER BOOST CONTROL SOLENOID VALVE
Refer toEM-18, "CHARGE AIR COOLER".
MBIB1206E
CONDITIONSAir passage continuity
between (A) and (B)Air passage continuity
between (A) and (C)
12V direct current supply
between terminals (1) and
(2)Ye s N o
No supply No Yes
MBIB1129E
Page 1133 of 3171
DTC P0237, P0238 TC BOOST SENSOR
EC-153
C
D
E
F
G
H
I
J
K
L
MA
EC
DTC P0237, P0238 TC BOOST SENSORPFP:22365
Component DescriptionEBS01KGA
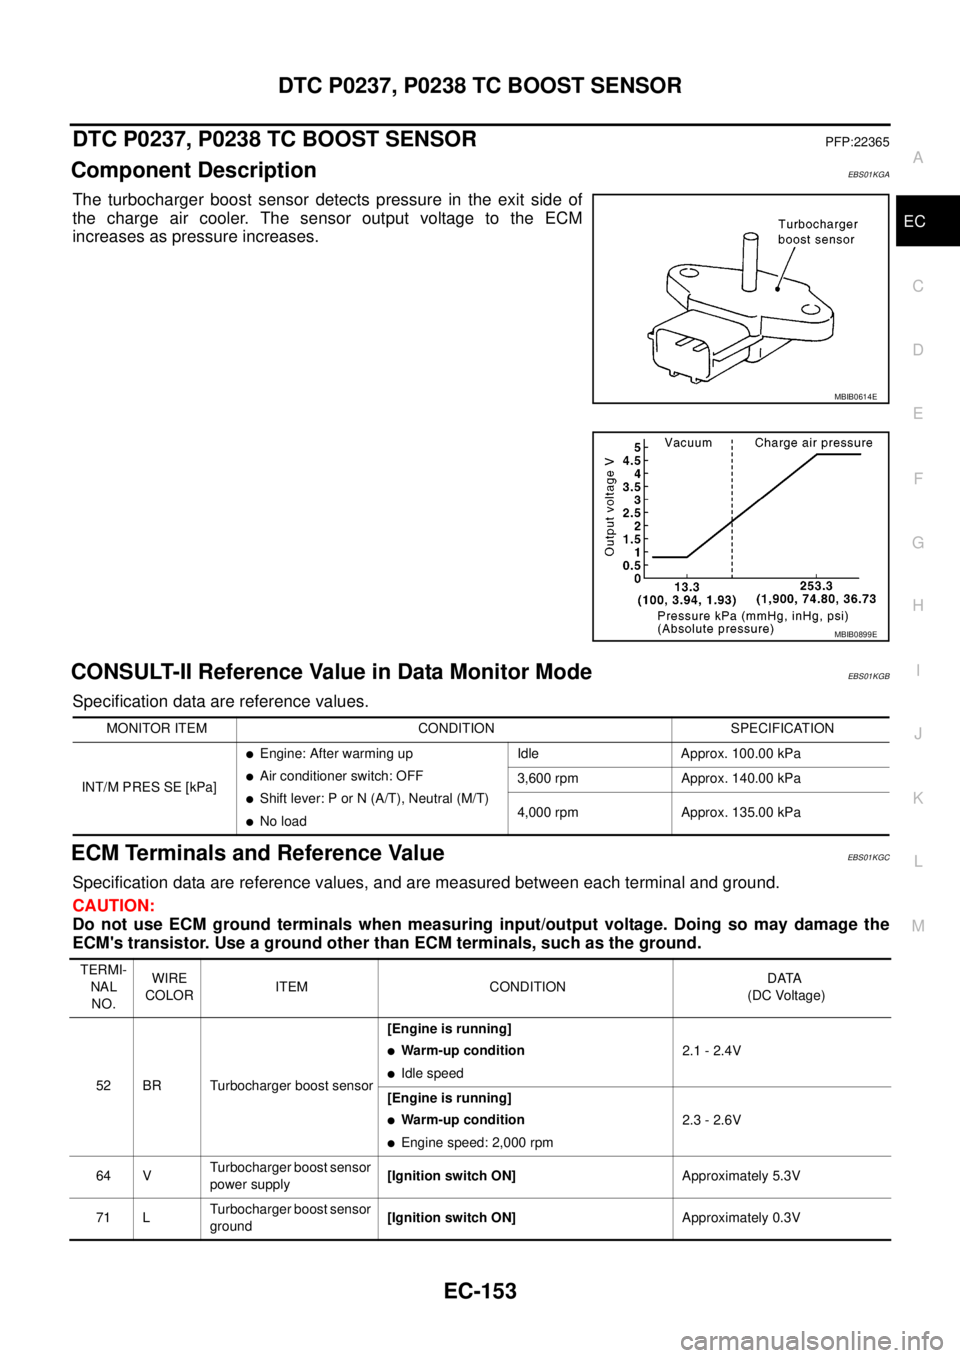
The turbocharger boost sensor detects pressure in the exit side of
the charge air cooler. The sensor output voltage to the ECM
increases as pressure increases.
CONSULT-II Reference Value in Data Monitor ModeEBS01KGB
Specification data are reference values.
ECM Terminals and Reference ValueEBS01KGC
Specification data are reference values, and are measured between each terminal and ground.
CAUTION:
Do not use ECM ground terminals when measuring input/output voltage. Doing so may damage the
ECM's transistor. Use a ground other than ECM terminals, such as the ground.
MBIB0614E
MBIB0899E
MONITOR ITEM CONDITION SPECIFICATION
INT/M PRES SE [kPa]
lEngine: After warming up
lAir conditioner switch: OFF
lShift lever: P or N (A/T), Neutral (M/T)
lNo loadIdle Approx. 100.00 kPa
3,600 rpm Approx. 140.00 kPa
4,000 rpm Approx. 135.00 kPa
TERMI-
NAL
NO.WIRE
COLORITEM CONDITIONDATA
(DC Voltage)
52 BR Turbocharger boost sensor[Engine is running]
lWarm-up condition
lIdle speed2.1 - 2.4V
[Engine is running]
lWarm-up condition
lEngine speed: 2,000 rpm2.3 - 2.6V
64 VTurbocharger boost sensor
power supply[Ignition switch ON]Approximately 5.3V
71 LTurbocharger boost sensor
ground[Ignition switch ON]Approximately 0.3V
Page 1134 of 3171
EC-154
DTC P0237, P0238 TC BOOST SENSOR
On Board Diagnosis Logic
EBS01KGD
The MI will not light up for these self-diagnoses.
NOTE:
If DTC P0237 or P0238 is displayed with DTC P0652 or P0653, first perform the trouble diagnosis for
DTC P0652 or P0653. Refer toEC-227, "
DTC P0652, P0653 SENSOR POWER SUPPLY".
DTC Confirmation ProcedureEBS01KGE
NOTE:
If DTC Confirmation Procedure has been previously conducted, always turn ignition switch OFF and wait at
least 10 seconds before conducting the next test.
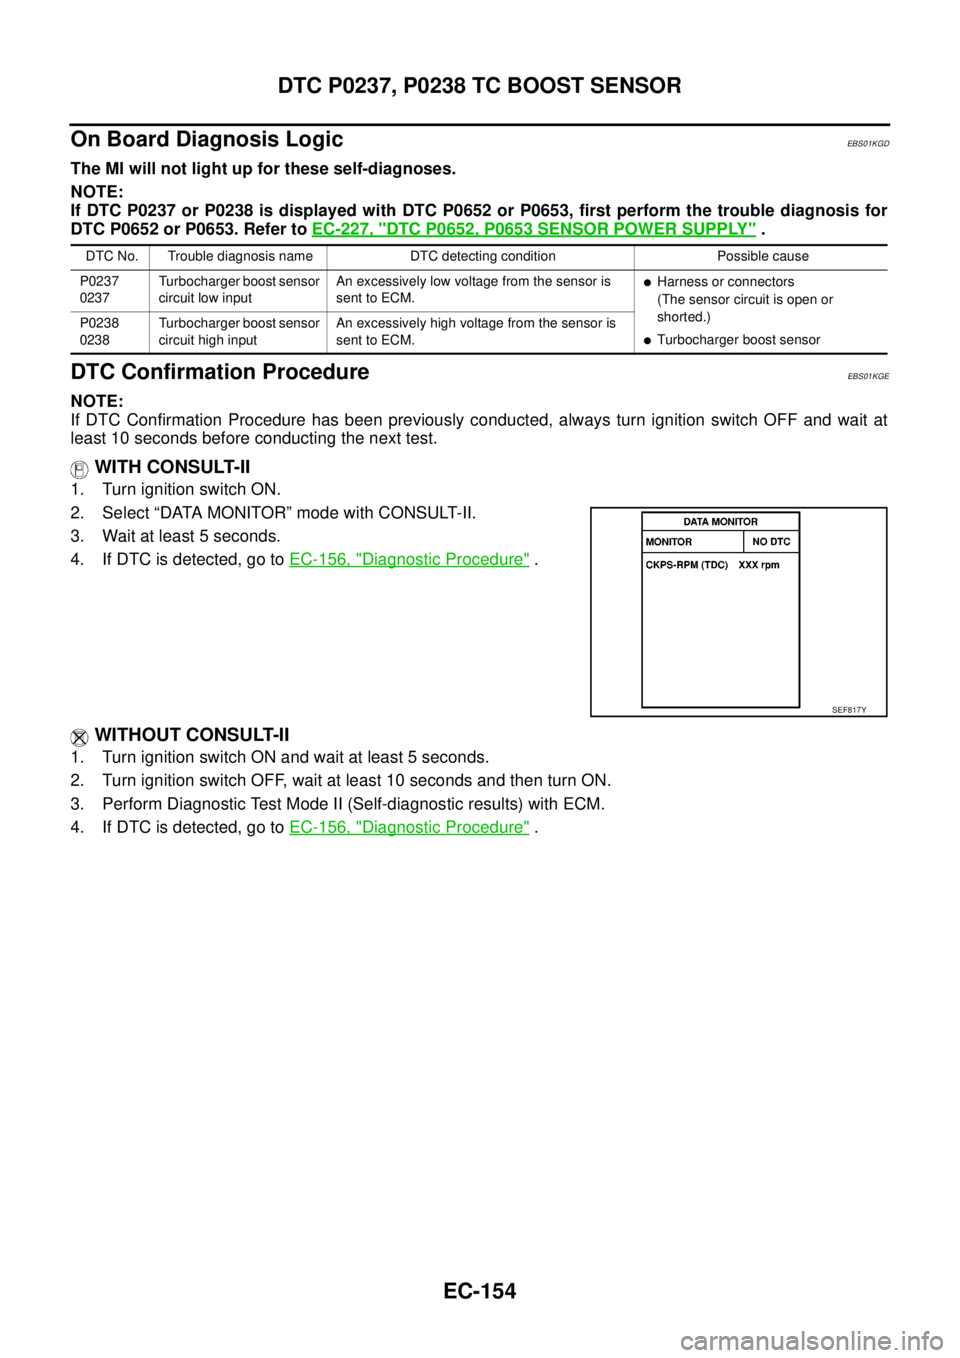
WITH CONSULT-II
1. Turn ignition switch ON.
2. Select “DATA MONITOR” mode with CONSULT-II.
3. Wait at least 5 seconds.
4. If DTC is detected, go toEC-156, "
Diagnostic Procedure".
WITHOUT CONSULT-II
1. Turn ignition switch ON and wait at least 5 seconds.
2. Turn ignition switch OFF, wait at least 10 seconds and then turn ON.
3. Perform Diagnostic Test Mode II (Self-diagnostic results) with ECM.
4. If DTC is detected, go toEC-156, "
Diagnostic Procedure".
DTC No. Trouble diagnosis name DTC detecting condition Possible cause
P0237
0237Turbocharger boost sensor
circuit low inputAn excessively low voltage from the sensor is
sent to ECM.
lHarness or connectors
(The sensor circuit is open or
shorted.)
lTurbocharger boost sensor P0238
0238Turbocharger boost sensor
circuit high inputAn excessively high voltage from the sensor is
sent to ECM.
SEF817Y
Page 1135 of 3171
DTC P0237, P0238 TC BOOST SENSOR
EC-155
C
D
E
F
G
H
I
J
K
L
MA
EC
Wiring DiagramEBS01KGF
MBWA1045E
Page 1136 of 3171
EC-156
DTC P0237, P0238 TC BOOST SENSOR
Diagnostic Procedure
EBS01KGG
1.CHECK GROUND CONNECTIONS
1. Turn ignition switch OFF.
2. Loosen and retighten three ground screws on the body.
Refer toEC-78, "
Ground Inspection".
OK or NG
OK >> GO TO 2.
NG >> Repair or replace ground connections.
2.CHECK TURBOCHARGER BOOST SENSOR POWER SUPPLY CIRCUIT
1. Disconnect turbocharge boost sensor (1) harness connector.
2. Turn ignition switch ON.
3. Check voltage between turbocharge boost sensor terminal 3
and ground with CONSULT-II or tester.
OK or NG
OK >> GO TO 3.
NG >> Repair open circuit or short to ground or short to power
in harness or connectors.
: Vehicle front
1. Body ground E21 2. ECM 3. Body ground E41
4. A/C high-pressure service valve 5. ABS actuator and electric unit
(control unit)6. Body ground E61
MBIB1218E
MBIB1210E
Voltage: Approximately 5.3V
PBIB0138E
Page 1137 of 3171
DTC P0237, P0238 TC BOOST SENSOR
EC-157
C
D
E
F
G
H
I
J
K
L
MA
EC
3.CHECK TURBOCHAGER BOOST SENSOR GROUND CIRCUIT FOR OPEN AND SHORT
1. Turn ignition switch OFF.
2. Disconnect ECM harness connector.
3. Check harness continuity between turbocharger boost sensor terminal 1 and ECM terminal 71.
Refer to Wiring Diagram.
4. Also check harness for short to ground and short to power.
OK or NG
OK >> GO TO 4.
NG >> Repair open circuit or short to ground or short to power in harness or connectors.
4.CHECK TURBOCHAGER BOOST SENSOR INPUT SIGNAL CIRCUIT FOR OPEN AND SHORT
1. Check harness continuity between ECM terminal 52 and turbocharger boost sensor terminal 2. Refer to
Wiring Diagram.
2. Also check harness for short to ground and short to power.
OK or NG
OK >> GO TO 5.
NG >> Repair open circuit or short to ground or short to power in harness connectors.
5.CHECK TURBOCHARGER BOOST SENSOR
Refer toEC-158, "
Component Inspection".
OK or NG
OK >> GO TO 6.
NG >> Replace turbocharger boost sensor.
6.CHECK INTERMITTENT INCIDENT
Refer toEC-70, "
TROUBLE DIAGNOSIS FOR INTERMITTENT INCIDENT".
>>INSPECTION END Continuity should exist.
Continuity should exist.