Page 1296 of 3870
Fig. 18: Exploded View Of Disassembly & Assembly Procedures
Courtesy of MITSUBISHI MOTOR SALES OF AMERICA.
Disassembly Service Points
A) Front Bracket Assembly Removal -Insert a fla
t-tipped screwdriver
CAUTION: DO NOT insert a screwdriver too deep. The stator
coil will be damaged.
2004 Mitsubishi Endeavor Limited
2004 STARTING & CHARGING SYSTEMS Generators & Regulators - Endeavor
Page 1298 of 3870
Fig. 19: Removing Front Bracket Assembly
Courtesy of MITSUBISHI MOTOR SALES OF AMERICA.
Fig. 20: Locating Solder Points
Courtesy of MITSUBISHI MOTOR SALES OF AMERICA.
Assembly Service Points
A) Regulator Assembly Installation - After installing the regulator assembly,
insert a wire through the hold provided on the rear bracket while pressing down
on the brush, and secure the brush. See Fig. 21
.
B) Rotor Assembly Installation - After installing the rotor, remove the wire
used to secure the brush. NOTE: By inserting a wire, the brush will be secured in place,
and the installation of the rotor will be easier.
2004 Mitsubishi Endeavor Limited
2004 STARTING & CHARGING SYSTEMS Generators & Regulators - Endeavor
Page 1302 of 3870

cleaned regularly and kept separate from personal clothing. Where there is a risk of eye contact, eye protection should be worn i.e.
chemical goggles or face shields. In addition, an eye wash facility should be
provided. Obtain First Aid treatment immediately for open cuts and wounds. Wash regularly with soap and water to ensure all oil is removed, especially
before meals (skin cleansers and nail brushes will help). After cleaning, apply
lotion, etc., containing lanolin to replace natural skin oils is advised. Do not use gasoline, kerosene, diesel fuel, gas oil, thinner or solvents for
cleaning skin. Apply barrier creams before each work period to help clean the skin after
work. If skin disorders develop, obtain medical advice immediately.
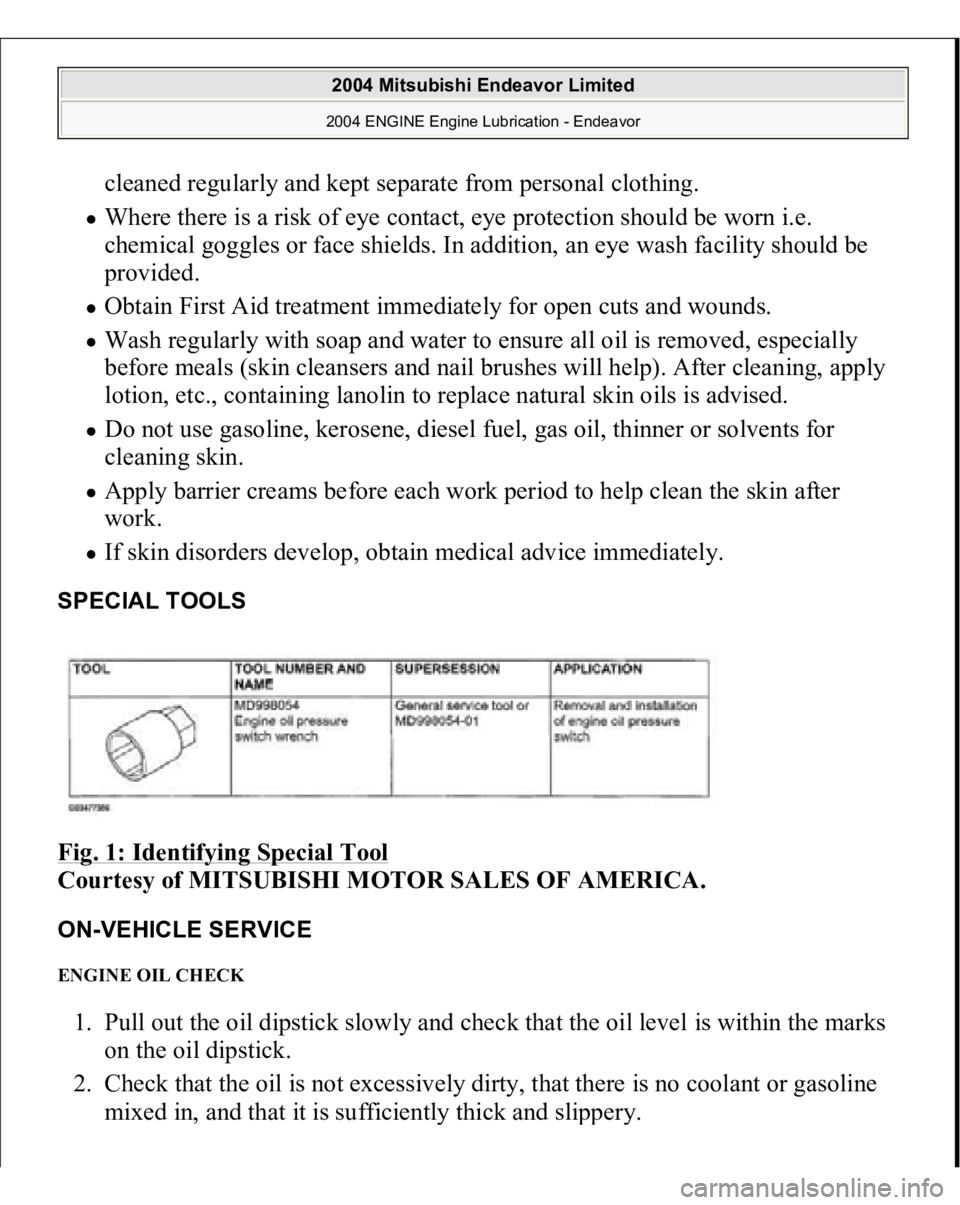
SPECIAL TOOLS Fig. 1: Identifying Special Tool
Courtesy of MITSUBISHI MOTOR SALES OF AMERICA.
ON-VEHICLE SERVICE ENGINE OIL CHECK 1. Pull out the oil dipstick slowly and check that the oil level is within the marks
on the oil dipstick.
2. Check that the oil is not excessively dirty, that there is no coolant or gasoline
mixed in, and that it is sufficientl
y thick and sli
ppery.
2004 Mitsubishi Endeavor Limited 2004 ENGINE Engine Lubrication - Endeavor
Page 1313 of 3870

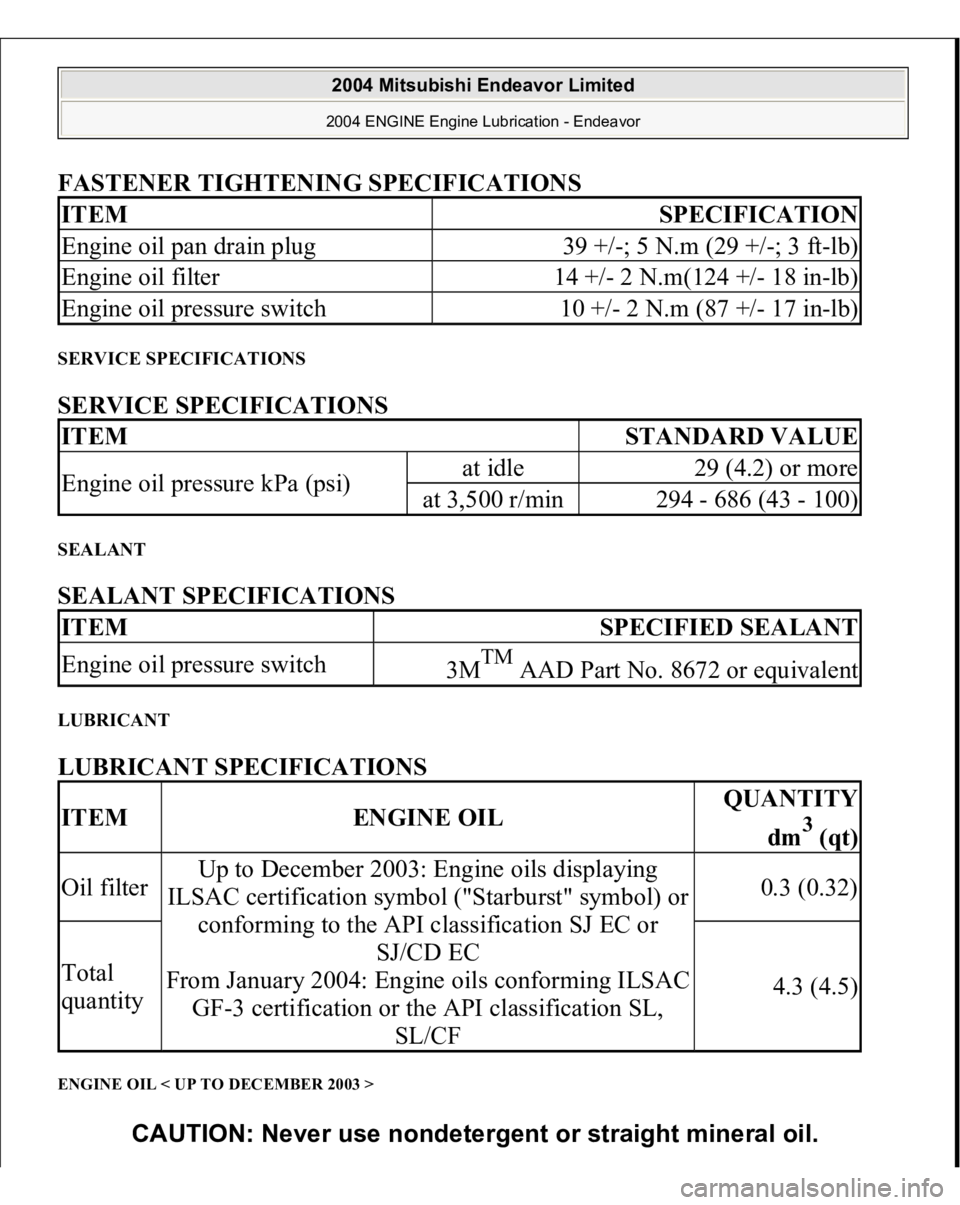
FASTENER TIGHTENING SPECIFICATIONS SERVICE SPECIFICATIONS SERVICE SPECIFICATIONS SEALANT SEALANT SPECIFICATIONS LUBRICANT LUBRICANT SPECIFICATIONS ENGINE OIL < UP TO DECEMBER 2003 > ITEM
SPECIFICATION
Engine oil pan drain plug
39 +/-; 5 N.m (29 +/-; 3 ft-lb)
Engine oil filter
14 +/- 2 N.m(124 +/- 18 in-lb)
Engine oil pressure switch
10 +/- 2 N.m (87 +/- 17 in-lb)
ITEM
STANDARD VALUE
Engine oil pressure kPa (psi)
at idle
29 (4.2) or more
at 3,500 r/min
294 - 686 (43 - 100)
ITEM
SPECIFIED SEALANT
Engine oil pressure switch
3M
TM
AAD Part No. 8672 or equivalent
ITEM
ENGINE OIL
QUANTITY
dm
3 (qt)
Oil filter
Up to December 2003: Engine oils displaying
ILSAC certification symbol ("Starburst" symbol) or
conforming to the API classification SJ EC or
SJ/CD EC
From January 2004: Engine oils conforming ILSAC
GF-3 certification or the API classification SL,
SL/CF
0.3 (0.32)
Total
quantity
4.3 (4.5)
CAUTION: Never use nondetergent or straight mineral oil.
2004 Mitsubishi Endeavor Limited 2004 ENGINE Engine Lubrication - Endeavor
Page 1315 of 3870
Fig. 13: Identifying API Service Symbol (Up To December 2003)
Courtesy of MITSUBISHI MOTOR SALES OF AMERICA.
ENGINE OIL < FROM JANUARY 2004 > Use onl
y en
gine oils conformin
g to the ILSAC G
F-3 certification.
CAUTION: Never use nondetergent or straight mineral oil.
2004 Mitsubishi Endeavor Limited 2004 ENGINE Engine Lubrication - Endeavor
Page 1317 of 3870
Fig. 15: Identifying API Service Symbol (From January 2004)
Courtesy of MITSUBISHI MOTOR SALES OF AMERICA.
2004 Mitsubishi Endeavor Limited 2004 ENGINE Engine Lubrication - Endeavor
Page 1321 of 3870
Fig. 3: Removing/Installing Generator And Drive Belt Component
Courtesy of MITSUBISHI MOTOR SALES OF AMERICA.
REQUIRED SPECIAL TOOL:
MD998781: Flywheel Stopper
REMOVAL SERVICE POINT << A >> CRANKSHAFT BOLT LOOSENING
2004 Mitsubishi Endeavor Limited 2004 ENGINE Engine Overhaul - Endeavor
Page 1322 of 3870
1. Using special tool MD998781, hold the drive plate or flywheel.
2. Remove the crankshaft bolt.
Fig. 4: Removing Crankshaft Bolt Using Special Tool
Courtesy of MITSUBISHI MOTOR SALES OF AMERICA.
INSTALLATION SERVICE POINT >>A<< CRANKSHAFT BOLT TIGHTENING 1. Usin
g special tool MD998781, hold the drive
plate or fl
ywheel.
2004 Mitsubishi Endeavor Limited 2004 ENGINE Engine Overhaul - Endeavor