Page 165 of 4500

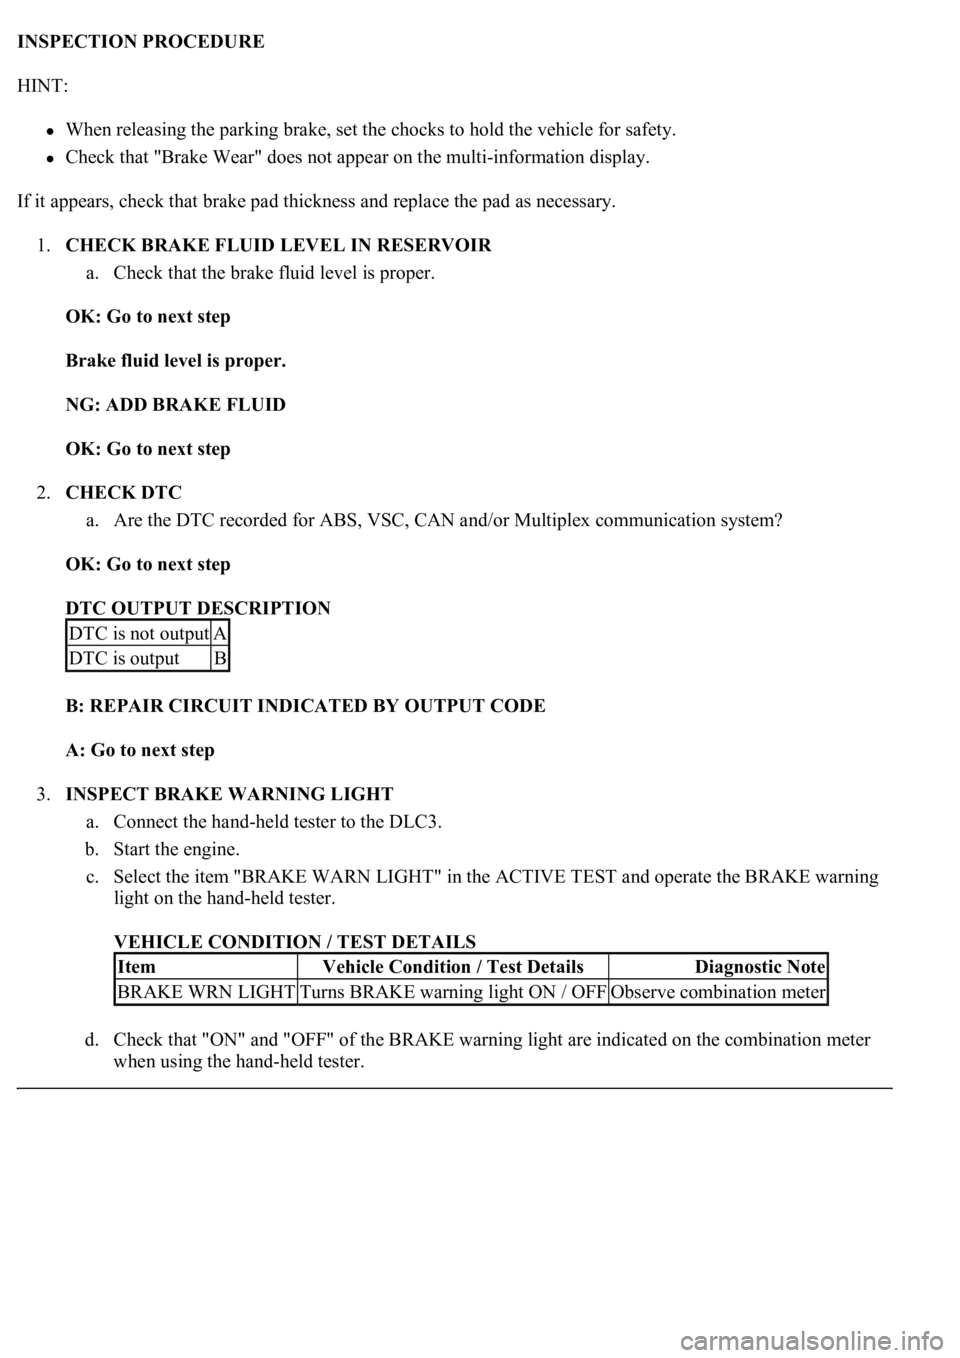
INSPECTION PROCEDURE
HINT:
When releasing the parking brake, set the chocks to hold the vehicle for safety.
Check that "Brake Wear" does not appear on the multi-information display.
If it appears, check that brake pad thickness and replace the pad as necessary.
1.CHECK BRAKE FLUID LEVEL IN RESERVOIR
a. Check that the brake fluid level is proper.
OK: Go to next step
Brake fluid level is proper.
NG: ADD BRAKE FLUID
OK: Go to next step
2.CHECK DTC
a. Are the DTC recorded for ABS, VSC, CAN and/or Multiplex communication system?
OK: Go to next step
DTC OUTPUT DESCRIPTION
B: REPAIR CIRCUIT INDICATED BY OUTPUT CODE
A: Go to next step
3.INSPECT BRAKE WARNING LIGHT
a. Connect the hand-held tester to the DLC3.
b. Start the engine.
c. Select the item "BRAKE WARN LIGHT" in the ACTIVE TEST and operate the BRAKE warning
light on the hand-held tester.
VEHICLE CONDITION / TEST DETAILS
d. Check that "ON" and "OFF" of the BRAKE warning light are indicated on the combination meter
when usin
g the hand-held tester.
DTC is not outputA
DTC is outputB
ItemVehicle Condition / Test DetailsDiagnostic Note
BRAKE WRN LIGHTTurns BRAKE warning light ON / OFFObserve combination meter
Page 166 of 4500
OK: Go to next step
Turn the BRAKE warning light on or off in accordance with the hand-held tester.
NG: Go to step 4
OK: REPLACE ABS & TRACTION ACTUATOR ASSY (SEE REPLACEMENT
)
4.INSPECT PARKING BRAKE SWITCH ASSY
a. Remove the parking brake switch connector.
b. Measure the resistance according to the value (s) in the table below.
Standard:
TESTER CONNECTION SPECIFIED CONDITION
NG: REPLACE PARKING BRAKE SWITCH ASSY
Tester ConnectionSwitch ConditionSpecified Condition
P3-1 - Ground partReleasedBelow 1 ohms
P3-1 - Ground partPushed in1M ohms or higher
Page 174 of 4500

Fig. 126: Inspecting Pad Wear Indicator Wire Assy
Courtesy of TOYOTA MOTOR SALES, U.S.A., INC.
Standard:
TESTER CONNECTION SPECIFIED CONDITION
REAR:
HINT:
Check that there are no scratches or cracks on the pad wear indicator.
a. Remove the rear wheel RH.
b. Disconnect the pad wear indicator connector.
c. Measure the resistance according to the value (s) in the table below.
Standard:
TESTER CONNECTION SPECIFIED CONDITION
NG: REPLACE PAD WEAR INDICATOR WIRE ASSY
OK: REPLACE ABS & TRACTION ACTUATOR ASSY (SEE REPLACEMENT
)
CIRCUIT DESCRIPTION
The skid control ECU detects the TRAC control main switch ON/OFF signal and turns the TRAC OFF light
on/off.
When the TRAC control switch is pressed, the TRAC control does not operate and the TRAC OFF light comes
on.
The skid control ECU connected to the combination meter via CAN and MPX communications.
Tester ConnectionSpecified Condition
Terminal a - Terminal bBelow 1 ohms
Terminal a - Body ground1 Mohms or higher
Tester ConnectionSpecified Condition
Terminal a - Terminal bBelow 1 ohms
Terminal a - Body ground1 Mohms or higher
Page 175 of 4500
WIRING DIAGRAM
Fig. 127: TRAC Off Indicator Light, TRAC Off Switch Wiring Diagram
Courtesy of TOYOTA MOTOR SALES, U.S.A., INC.
INSPECTION PROCEDURE
Page 176 of 4500

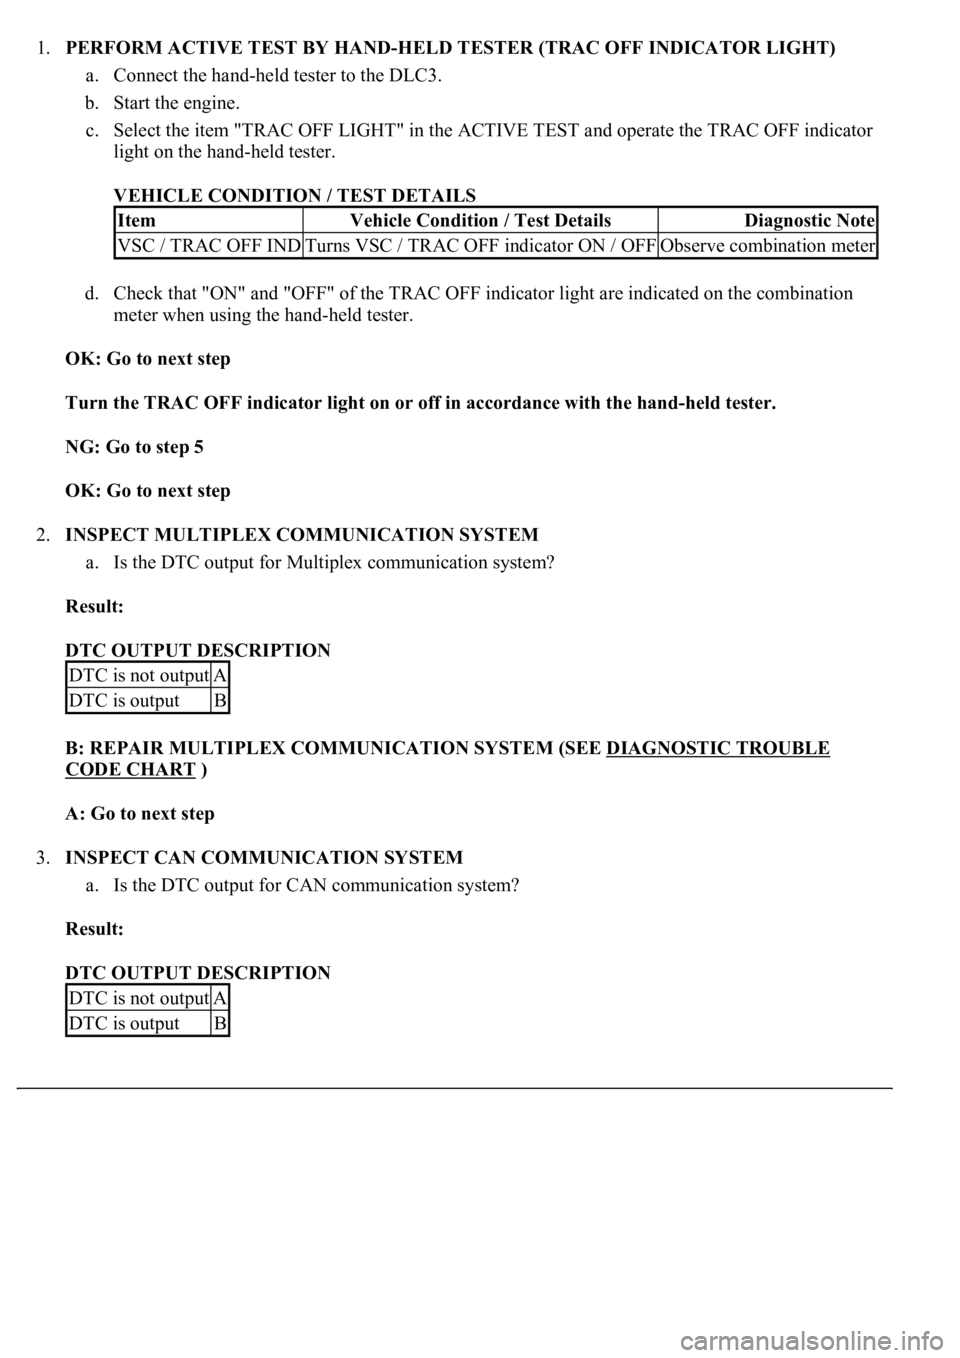
1.PERFORM ACTIVE TEST BY HAND-HELD TESTER (TRAC OFF INDICATOR LIGHT)
a. Connect the hand-held tester to the DLC3.
b. Start the engine.
c. Select the item "TRAC OFF LIGHT" in the ACTIVE TEST and operate the TRAC OFF indicator
light on the hand-held tester.
VEHICLE CONDITION / TEST DETAILS
d. Check that "ON" and "OFF" of the TRAC OFF indicator light are indicated on the combination
meter when using the hand-held tester.
OK: Go to next step
Turn the TRAC OFF indicator light on or off in accordance with the hand-held tester.
NG: Go to step 5
OK: Go to next step
2.INSPECT MULTIPLEX COMMUNICATION SYSTEM
a. Is the DTC output for Multiplex communication system?
Result:
DTC OUTPUT DESCRIPTION
B: REPAIR MULTIPLEX COMMUNICATION SYSTEM (SEE DIAGNOSTIC TROUBLE
CODE CHART )
A: Go to next step
3.INSPECT CAN COMMUNICATION SYSTEM
a. Is the DTC output for CAN communication system?
Result:
DTC OUTPUT DESCRIPTION
ItemVehicle Condition / Test DetailsDiagnostic Note
VSC / TRAC OFF INDTurns VSC / TRAC OFF indicator ON / OFFObserve combination meter
DTC is not outputA
DTC is outputB
DTC is not outputA
DTC is outputB
Page 182 of 4500
Fig. 130: Slip Indicator Light Wiring Diagram
Courtesy of TOYOTA MOTOR SALES, U.S.A., INC.
INSPECTION PROCEDURE
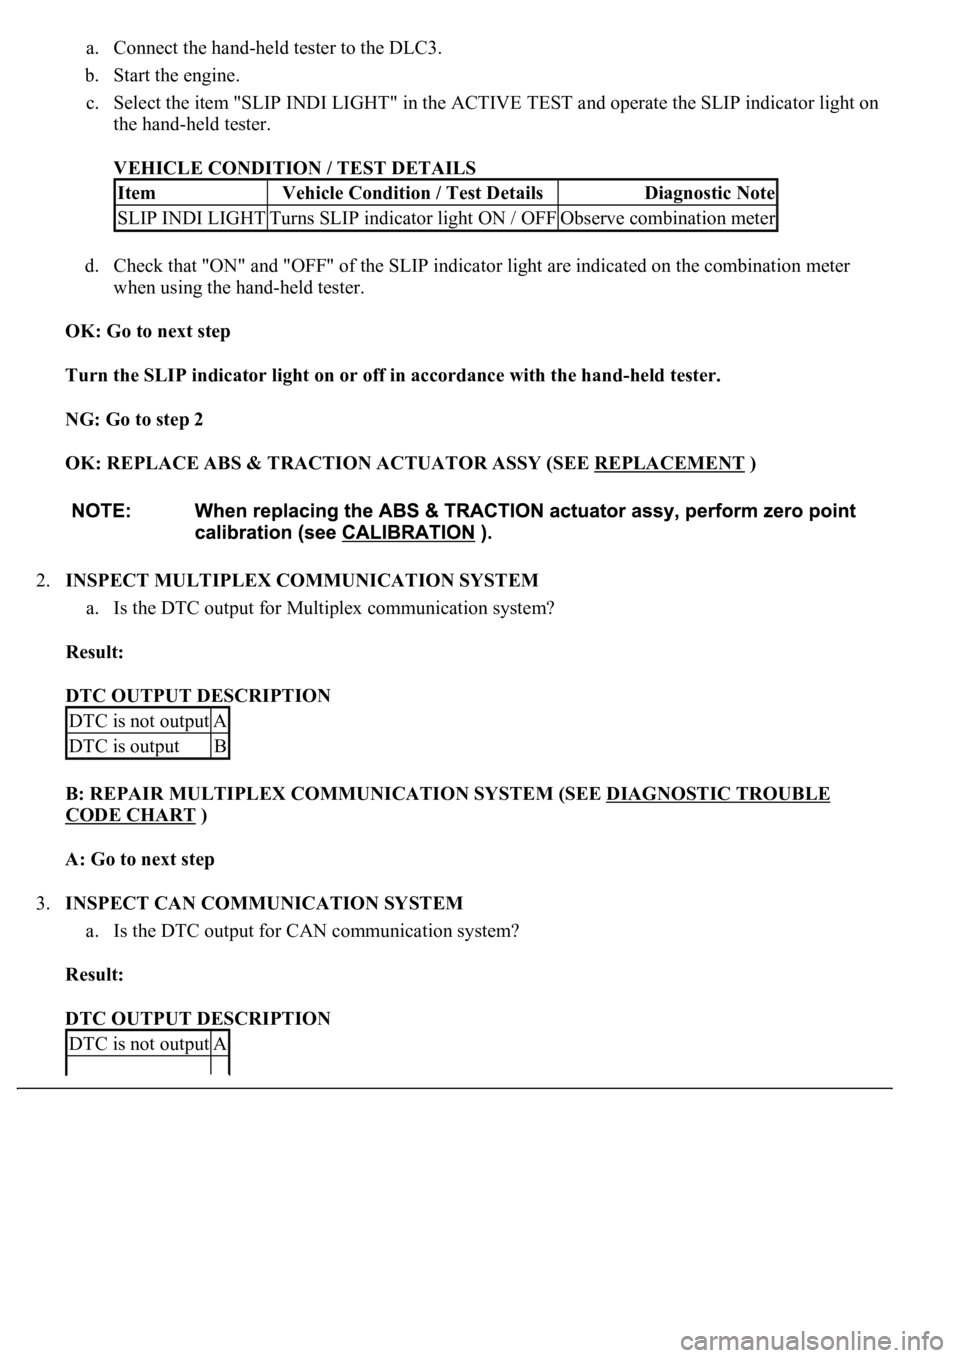
1.PERFORM ACTIVE TEST BY HAND-HELD TESTER (SLIP INDICATOR LIGHT)
Page 183 of 4500

a. Connect the hand-held tester to the DLC3.
b. Start the engine.
c. Select the item "SLIP INDI LIGHT" in the ACTIVE TEST and operate the SLIP indicator light on
the hand-held tester.
VEHICLE CONDITION / TEST DETAILS
d. Check that "ON" and "OFF" of the SLIP indicator light are indicated on the combination meter
when using the hand-held tester.
OK: Go to next step
Turn the SLIP indicator light on or off in accordance with the hand-held tester.
NG: Go to step 2
OK: REPLACE ABS & TRACTION ACTUATOR ASSY (SEE REPLACEMENT
)
2.INSPECT MULTIPLEX COMMUNICATION SYSTEM
a. Is the DTC output for Multiplex communication system?
Result:
DTC OUTPUT DESCRIPTION
B: REPAIR MULTIPLEX COMMUNICATION SYSTEM (SEE DIAGNOSTIC TROUBLE
CODE CHART )
A: Go to next step
3.INSPECT CAN COMMUNICATION SYSTEM
a. Is the DTC output for CAN communication system?
Result:
DTC OUTPUT DESCRIPTION
ItemVehicle Condition / Test DetailsDiagnostic Note
SLIP INDI LIGHTTurns SLIP indicator light ON / OFFObserve combination meter
DTC is not outputA
DTC is outputB
DTC is not outputA
Page 184 of 4500
B: REPAIR CAN COMMUNICATION SYSTEM (SEE PRECAUTION )
A: Go to next step
4.INSPECT COMBINATION METER ASSEMBLY (SLIP INDICATOR LIGHT) (SEE PROBLEM
SYMPTOMS TABLE )
NG: REPAIR OR REPLACE COMBINATION METER ASSEMBLY
OK: REPLACE ABS & TRACTION ACTUATOR ASSY (SEE REPLACEMENT
)
CIRCUIT DESCRIPTION
The skid control buzzer sounds and VSC warning (Multi-information display) comes ON during VSC
operation.
WIRING DIAGRAM
DTC is outputB