Page 3063 of 4500
Fig. 76: Installing Front Door Glass Sub-Assy LH
Courtesy of TOYOTA MOTOR SALES, U.S.A., INC.
b. Install the door glass to the window regulator with the 2 bolts.
Torque: 5.5 N.m (56 kgf.cm, 49 in..lbf)
Page 3068 of 4500
Fig. 81: Connecting Speaker Connector
Courtesy of TOYOTA MOTOR SALES, U.S.A., INC.
36.INSTALL OUTER REAR VIEW MIRROR ASSY LH
a. Install the mirror with the 3 bolts.
Torque: 5.5 N.m (56 kgf.cm, 49 in..lbf)
b. Connect the mirror connector.
Page 3072 of 4500

Before adjusting the door position for vehicles equipped with side airbags and curtain shield airbags, be
sure to disconnect the battery. After adjustment, inspect the SRS warning lamp, the side airbag system
and the curtain shield airbag system for normal operation (see DIAGNOSIS SYSTEM
). Then initialize
both systems (see INITIALIZATION
).
<00380056004800030057004b0048000300560044005000480003005300550052004600480047005800550048000300490052005500030057004b004800030035002b00030056004c0047004800030044005100470003002f002b00030056004c0047004800
1100030003[
The procedures listed below are for the LH side.
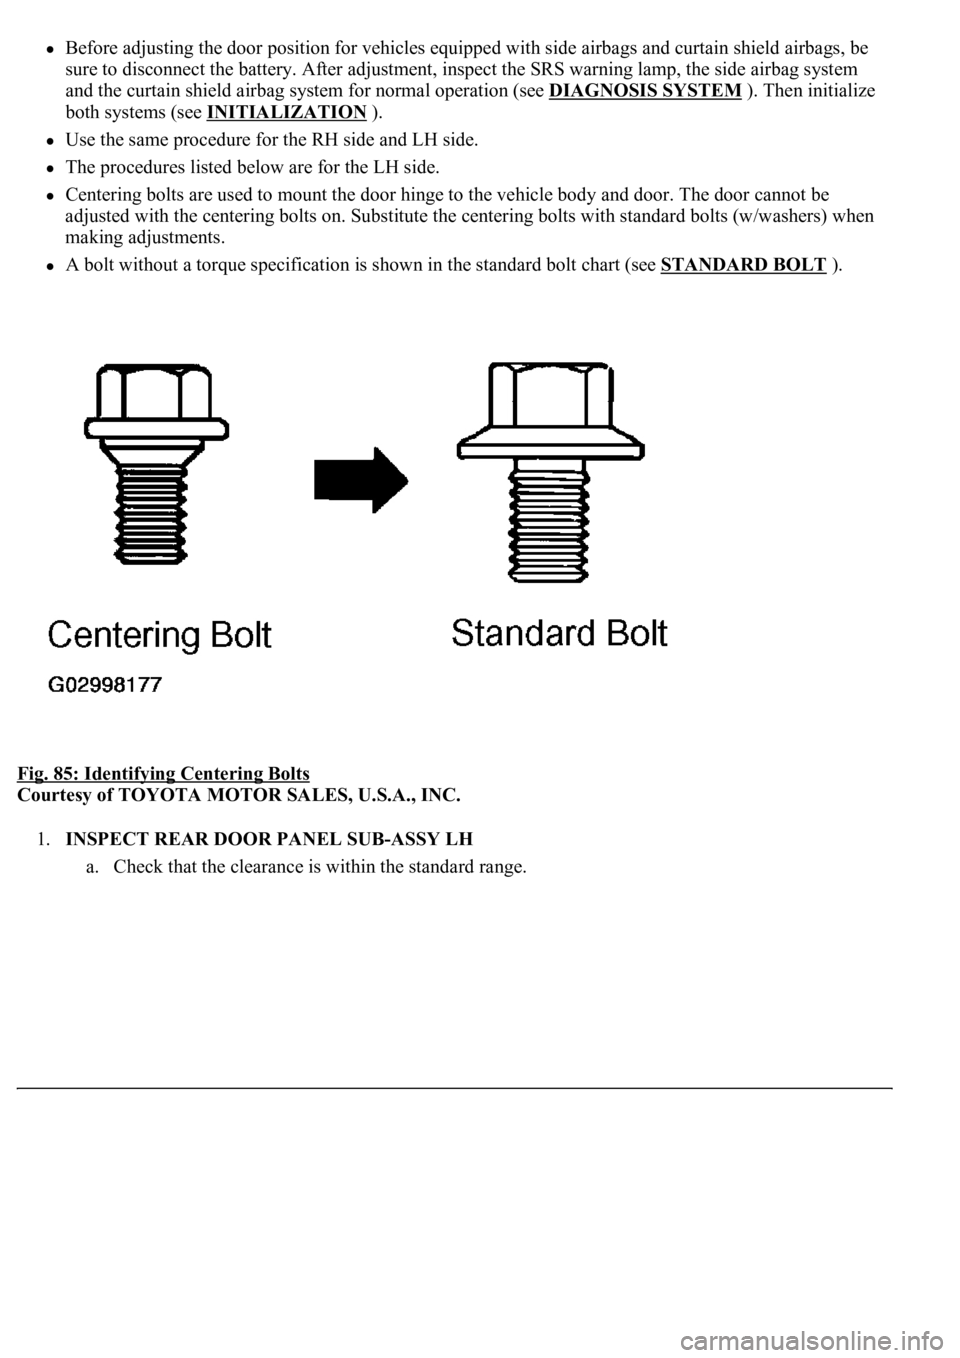
Centering bolts are used to mount the door hinge to the vehicle body and door. The door cannot be
adjusted with the centering bolts on. Substitute the centering bolts with standard bolts (w/washers) when
making adjustments.
A bolt without a torque specification is shown in the standard bolt chart (see STANDARD BOLT ).
Fig. 85: Identifying Centering Bolts
Courtesy of TOYOTA MOTOR SALES, U.S.A., INC.
1.INSPECT REAR DOOR PANEL SUB-ASSY LH
a. Check that the clearance is within the standard ran
ge.
Page 3074 of 4500
Fig. 87: Removing Front Door Inside Scuff Plate
Courtesy of TOYOTA MOTOR SALES, U.S.A., INC.
f. As shown in the illustration, horizontally and vertically adjust the door by loosening the body side
hinge nuts.
g. Tighten the body side hinge nuts after the adjustment.
Torque: 32.5 N.m (332 kgf.cm, 24 ft.lbf)
Page 3075 of 4500
Fig. 88: Tightening Body Side Hinge Nuts
Courtesy of TOYOTA MOTOR SALES, U.S.A., INC.
h. Horizontally and vertically adjust the door by loosening the door side hinge bolts.
i. Tighten the door side hinge bolts after the adjustment.
Torque: 30 N.m (306 kgf.cm. 22 ft.lbf
Page 3077 of 4500
Fig. 90: Removing Cover
Courtesy of TOYOTA MOTOR SALES, U.S.A., INC.
k. Adjust the striker position by slightly loosening the striker mounting screws and hitting the striker
with a plastic-faced hammer.
l. Tighten the striker mounting screws after the adjustment.
Torque: 23 N.m (235 kgf.cm, 17 ft.lbf)
m. Connect the negative (-) terminal cable to the battery.
n. Initialize both systems (see INITIALIZATION
).
o. Inspect the SRS warning lamp (see DIAGNOSIS SYSTEM
).
Page 3078 of 4500
Fig. 91: Inspecting SRS Warning Lamp
Courtesy of TOYOTA MOTOR SALES, U.S.A., INC.
OVERHAUL
HINT:
The installation procedures are the removal procedures in reverse order. However, only installation
procedures requiring additional information are included.
Use the same procedures for the RH side and LH side.
The procedures listed below are for the LH side.
A bolt without a torque specification is shown in the standard bolt chart (see STANDARD BOLT ).
1.REMOVE REAR DOOR INSIDE HANDLE BEZEL LH
a. Using a screwdriver, disengage the 3 claws and remove the bezel.
HINT:
Tape the screwdriver tip before use.
Page 3105 of 4500
If clips are damaged during removal, replace them.
27.INSTALL REAR DOOR CHECK ASSY LH
a. Apply MP grease to the sliding areas of the door check.
b. Install the door check to the door panel with the 2 nuts.
Torque: 8.0 N.m (82 kgf.cm, 71 in..lbf)
c. Apply adhesive to the threads of the bolt.
Adhesive:
Part No. 08833-00070, THREE BOND 1324 or equivalent
d. Install the door check to the body panel with the bolt.
Torque: 27 N.m (275 kgf.cm, 20 ft.lbf)
e. Install the cover.
Fig. 118: Installing Door Check To Body Panel With Bolt
Courtesy of TOYOTA MOTOR SALES, U.S.A., INC.
28.INSTALL REAR DOOR OUTSIDE HANDLE FRAME SUB-ASSY LH
a. Apply MP grease to the sliding areas of the frame.
b. Install the frame with the nut.