Page 2912 of 4500
c. Warm up the heated oxygen sensor with the engine speed at 2,500 rpm for approximately 2
minutes.
d. Check that the voltage changes between 0 and 1 V with the engine speed at 2,500 rpm.
OK: The voltage has changed more than 8 times in 10 seconds.
Fig. 6: Inspecting A/F Compensation System
Courtesy of TOYOTA MOTOR SALES, U.S.A., INC.
2.INSPECT FUEL CUT OFF RPM
a. Increase the engine speed to at least 3,000 rpm.
b. Use a sound scope to check the injector operation noise.
OK: When the throttle lever is released, the injector operation noise stops momentarily but
starts again soon after.
Page 2913 of 4500

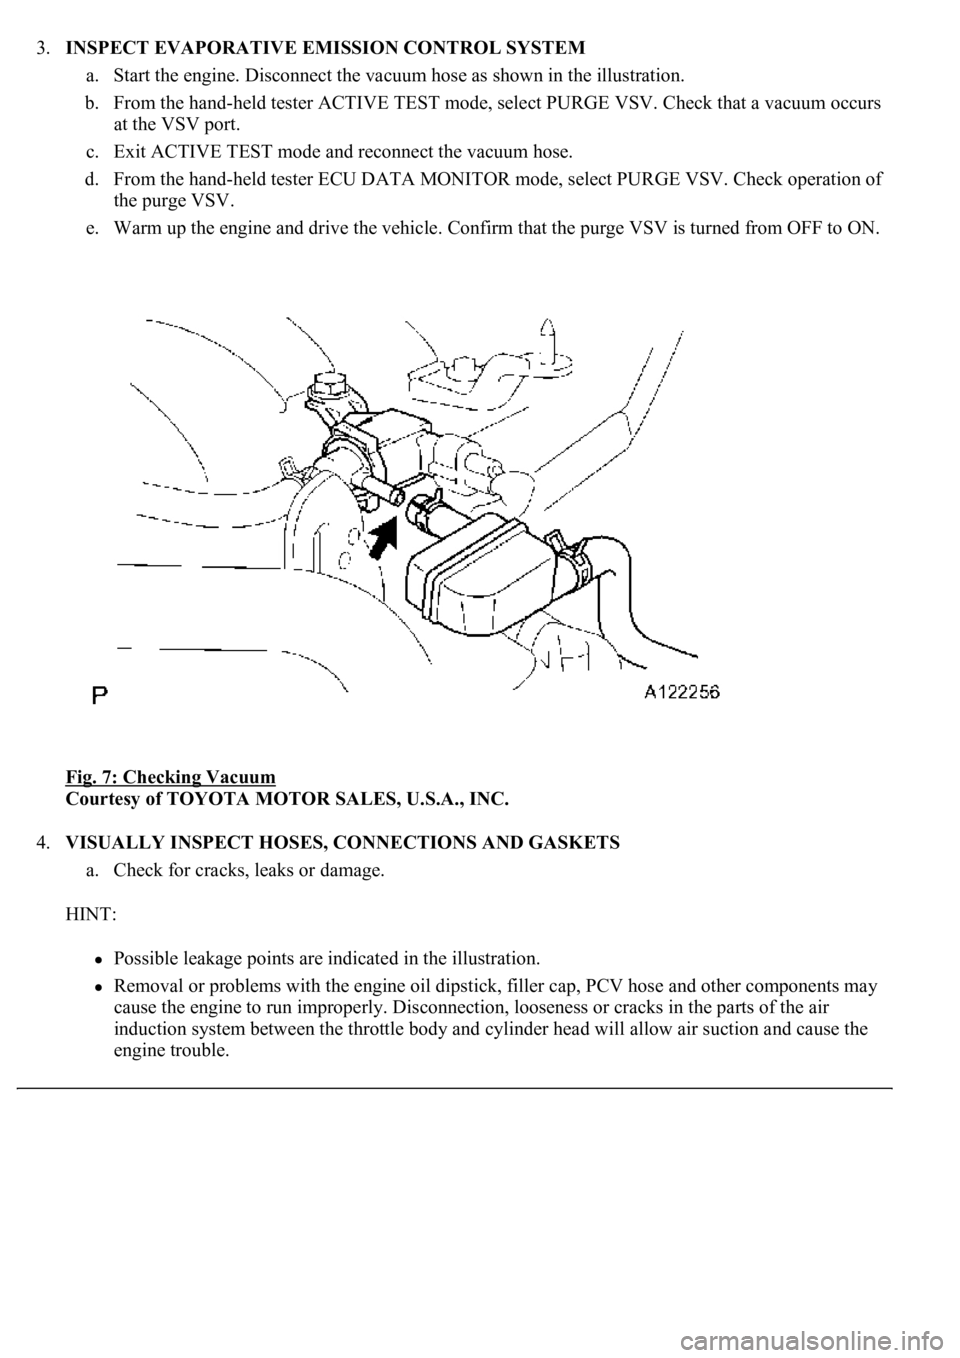
3.INSPECT EVAPORATIVE EMISSION CONTROL SYSTEM
a. Start the engine. Disconnect the vacuum hose as shown in the illustration.
b. From the hand-held tester ACTIVE TEST mode, select PURGE VSV. Check that a vacuum occurs
at the VSV port.
c. Exit ACTIVE TEST mode and reconnect the vacuum hose.
d. From the hand-held tester ECU DATA MONITOR mode, select PURGE VSV. Check operation of
the purge VSV.
e. Warm up the engine and drive the vehicle. Confirm that the purge VSV is turned from OFF to ON.
Fig. 7: Checking Vacuum
Courtesy of TOYOTA MOTOR SALES, U.S.A., INC.
4.VISUALLY INSPECT HOSES, CONNECTIONS AND GASKETS
a. Check for cracks, leaks or damage.
HINT:
Possible leakage points are indicated in the illustration.
Removal or problems with the engine oil dipstick, filler cap, PCV hose and other components may
cause the engine to run improperly. Disconnection, looseness or cracks in the parts of the air
induction system between the throttle body and cylinder head will allow air suction and cause the
engine trouble.
Page 2925 of 4500
Fig. 19: Applying Battery Positive Voltage Across Terminals
Courtesy of TOYOTA MOTOR SALES, U.S.A., INC.
3.INSPECT VENTILATION VALVE SUB-ASSY
a. Install a clean hose to the ventilation valve.
b. Inspect ventilation valve operation.
1. Blow air from the cylinder head side of the engine, and check that air passes through easily.
Page 2926 of 4500
Fig. 20: Inspecting Ventilation Valve Sub-Assy
Courtesy of TOYOTA MOTOR SALES, U.S.A., INC.
2. Blow air from the intake manifold side of the engine, and check that air passes through with
difficulty.
If the result is not as specified, replace the ventilation valve.
c. Remove the clean hose from the ventilation valve.
Page 2927 of 4500
Fig. 21: Blowing Air From Intake Manifold Side Of Engine
Courtesy of TOYOTA MOTOR SALES, U.S.A., INC.
4.INSPECT FUEL TANK CAP ASSY
a. Visually check if cap and/or gasket are deformed or damaged.
If necessar
y, repair or replace the cap.
Page 2945 of 4500
Standard: 0.6 to 1.0 V
If the result is not as specified, replace the accelerator pedal position sensor.
3.INSPECT CAMSHAFT TIMING OIL CONTROL VALVE ASSY
Fig. 5: Connecting Hand
-Held Tester DLC3 (2 Of 2)
Courtesy of TOYOTA MOTOR SALES, U.S.A., INC.
a. Connect the hand-held tester (with CAN VIM) to the DLC3.
b. Turn the ignition switch ON.
c. Start and warm up the engine.
d. Connect the hand-held tester and select VVT from the ACTIVE TEST menu.
e. Check the engine speed when the OCV is operated by the hand-held tester.
OK:
ConditionSpecified Condition
VVT system is OFF (OCV is OFF)Normal engine speed
VVT system is ON (OCV is ON)Rough idle or engine stalled
Page 2957 of 4500
Fig. 17: Installing Bolts, Nuts And Throttle Body And Gasket
Courtesy of TOYOTA MOTOR SALES, U.S.A., INC.
a. Install a new gasket and the throttle body with the 2 bolts and 2 nuts.
Torque: 18 N.m (185 kgf.cm, 13 ft.lbf)
b. Connect the water bypass hose and water bypass hose No. 7.
c. Connect the connector.
7.INSTALL INTAKE AIR CONNECTOR PIPE
a. Install the intake air connector pipe with the bolt and 2 hose clamps.
Torque:
4.0 N.m (41 kgf.cm, 35 in..lbf) for hose clamp
5.0 N.m (51 kgf.cm, 44 in..lbf) for bolt
b. Connect the air hose and ventilation hose.
8.INSTALL AIR CLEANER INLET NO.1
9.INSTALL V-BANK COVER
Torque: 5.0 N.m (51 kgf.cm, 44 in..lbf)
10.REFILL ENGINE COOLANT (See ENGINE COOLANT
)
11.CHECK FOR ENGINE COOLANT LEAKS (See ON
-VEHICLE INSPECTION )
Page 2972 of 4500
16.REFILL ENGINE COOLANT (See ENGINE COOLANT )
17.CHECK FOR ENGINE COOLANT LEAKS (See ON
-VEHICLE INSPECTION )
COMPONENTS