Page 3152 of 4323
SA17D±01
SA±148
± SUSPENSION AND AXLEREAR UPPER AND LOWER CONTROL ARM
3144 Author�: Date�:
2005 SEQUOIA (RM1146U)
INSTALLATION
Installation is in the reverse order of removal (See page SA±147).
Page 3156 of 4323
SA17G±03
SA±152
± SUSPENSION AND AXLEREAR STABILIZER BAR
3148 Author�: Date�:
2005 SEQUOIA (RM1146U)
INSTALLATION
Installation is in the reverse order of removal (See page SA±150).
Page 3160 of 4323

SA2D0±01
F16824
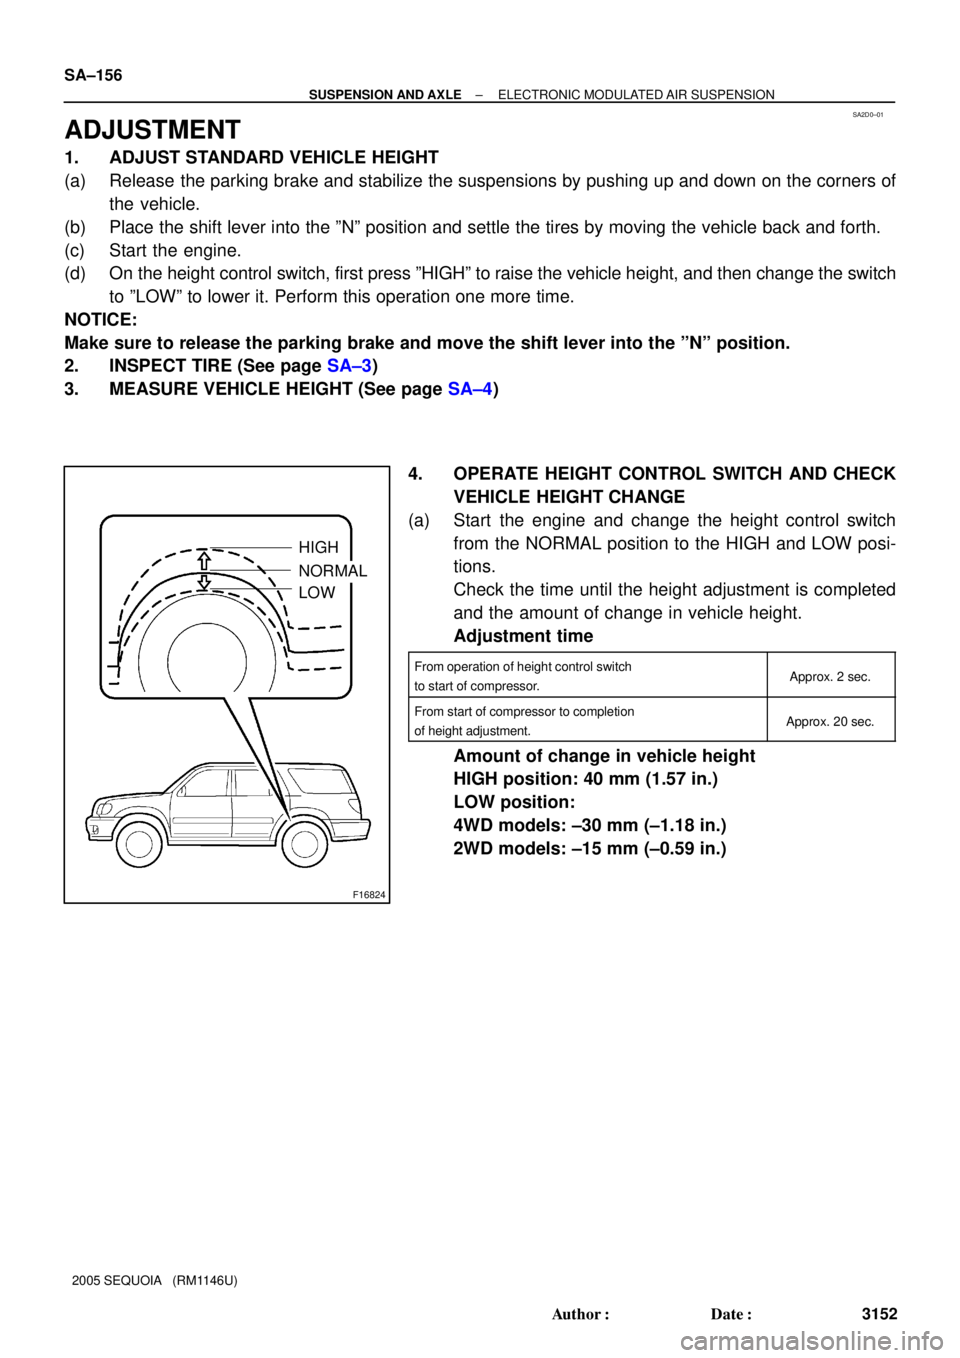
HIGH
NORMAL
LOW SA±156
± SUSPENSION AND AXLEELECTRONIC MODULATED AIR SUSPENSION
3152 Author�: Date�:
2005 SEQUOIA (RM1146U)
ADJUSTMENT
1. ADJUST STANDARD VEHICLE HEIGHT
(a) Release the parking brake and stabilize the suspensions by pushing up and down on the corners of
the vehicle.
(b) Place the shift lever into the ºNº position and settle the tires by moving the vehicle back and forth.
(c) Start the engine.
(d) On the height control switch, first press ºHIGHº to raise the vehicle height, and then change the switch
to ºLOWº to lower it. Perform this operation one more time.
NOTICE:
Make sure to release the parking brake and move the shift lever into the ºNº position.
2. INSPECT TIRE (See page SA±3)
3. MEASURE VEHICLE HEIGHT (See page SA±4)
4. OPERATE HEIGHT CONTROL SWITCH AND CHECK
VEHICLE HEIGHT CHANGE
(a) Start the engine and change the height control switch
from the NORMAL position to the HIGH and LOW posi-
tions.
Check the time until the height adjustment is completed
and the amount of change in vehicle height.
Adjustment time
From operation of height control switch
to start of compressor.Approx. 2 sec.
From start of compressor to completion
of height adjustment.Approx. 20 sec.
Amount of change in vehicle height
HIGH position: 40 mm (1.57 in.)
LOW position:
4WD models: ±30 mm (±1.18 in.)
2WD models: ±15 mm (±0.59 in.)
Page 3163 of 4323

F19904
C
D
F16848
F16826Lock Nut
± SUSPENSION AND AXLEELECTRONIC MODULATED AIR SUSPENSION
SA±159
3155 Author�: Date�:
2005 SEQUOIA (RM1146U)
(c) Measure the vehicle height (C ± D measurement) on the
right side and left side.
Standard vehicle height value: See page SA±4
(d) If the value in (c) differs from the vehicle height (C ± D
measurement), adjust it by following the procedures be-
low:
(1) Loosen the nut.
(2) Move the height control sensor link back and forth
along the slotted hole of the bracket.
HINT:
Move the link toward the front of the vehicle to raise vehicle
height. Move the link toward the rear of the vehicle to lower ve-
hicle height. Every 1 mm (0.039 in.) change in the installation
position of the link causes vehicle height to change by approxi-
mately 2 mm (0.079 in.).
(3) Tighten the nut.
Torque: 5.4 N´m (55 kgf´cm, 48 in.´lbf)
(e) If the vehicle height cannot be adjusted by performing (d),
adjust it again by following the procedures below.
(1) Loosen the 2 lock nuts of the height control sensor
link.
(2) Adjust the vehicle height to the vehicle height (C ±
D measurement) by turning the link.
HINT:
Extend the link to raise vehicle height. Shorten the link to lower
vehicle height. Every 1 turn of the link causes vehicle height to
change by approximately 4 mm (0.157 in.).
(3) Tighten the 2 lock nuts.
Torque: 5.4 N´m (55 kgf´cm, 48 in.´lbf)
Page 3166 of 4323

SA2D1±01
F16829
F16830
SA±162
± SUSPENSION AND AXLEHEIGHT CONTROL COMPRESSOR AND DRYER
3158 Author�: Date�:
2005 SEQUOIA (RM1146U)
REMOVAL
1. REMOVE REAR BUMPER (See page BO±6)
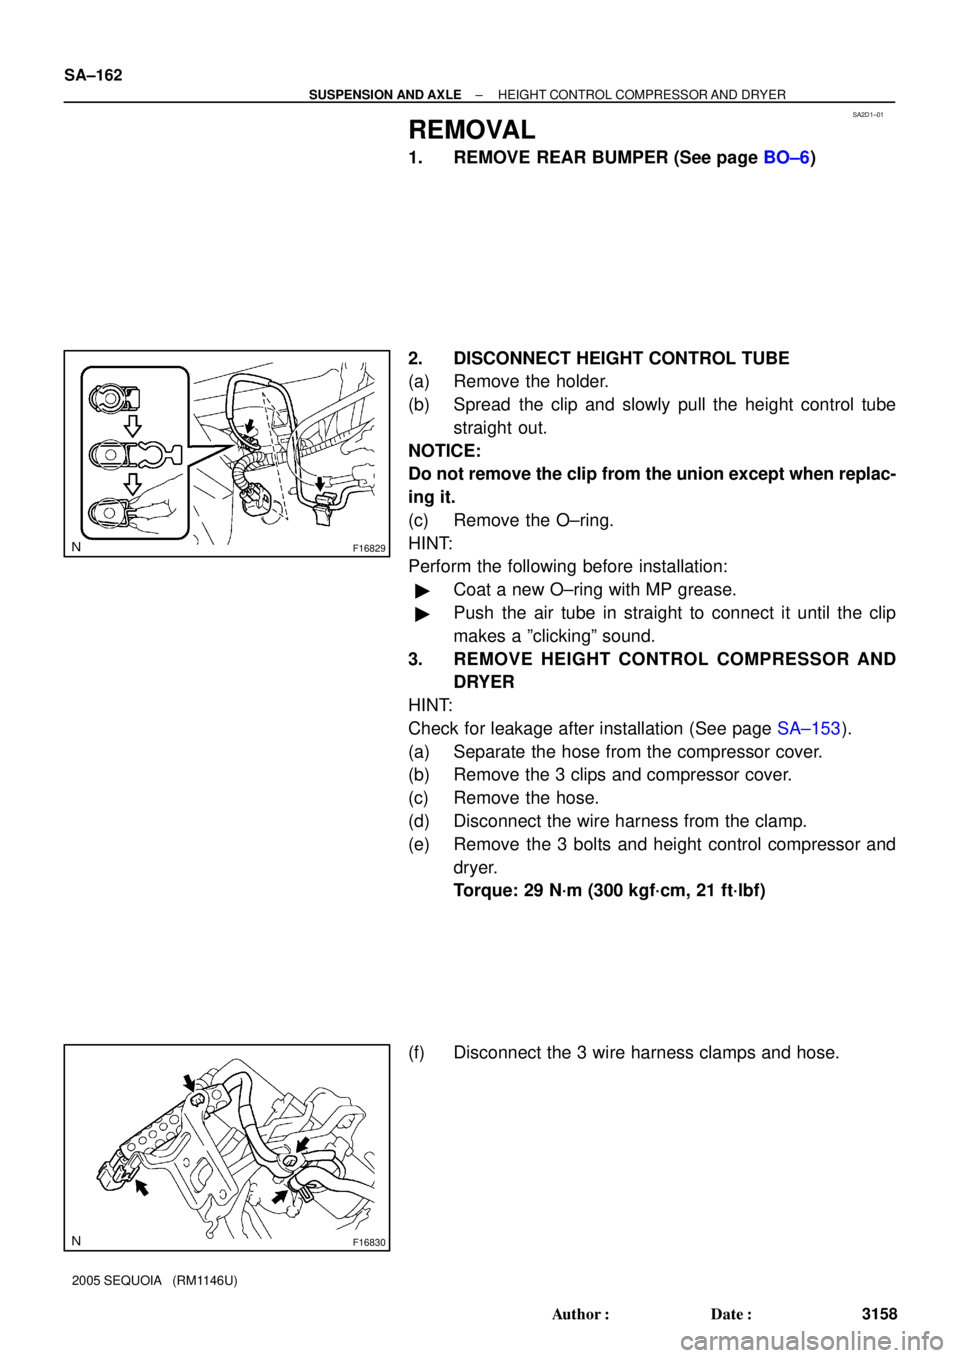
2. DISCONNECT HEIGHT CONTROL TUBE
(a) Remove the holder.
(b) Spread the clip and slowly pull the height control tube
straight out.
NOTICE:
Do not remove the clip from the union except when replac-
ing it.
(c) Remove the O±ring.
HINT:
Perform the following before installation:
�Coat a new O±ring with MP grease.
�Push the air tube in straight to connect it until the clip
makes a ºclickingº sound.
3. REMOVE HEIGHT CONTROL COMPRESSOR AND
DRYER
HINT:
Check for leakage after installation (See page SA±153).
(a) Separate the hose from the compressor cover.
(b) Remove the 3 clips and compressor cover.
(c) Remove the hose.
(d) Disconnect the wire harness from the clamp.
(e) Remove the 3 bolts and height control compressor and
dryer.
Torque: 29 N´m (300 kgf´cm, 21 ft´lbf)
(f) Disconnect the 3 wire harness clamps and hose.
Page 3168 of 4323
SA0L3±03
SA±164
± SUSPENSION AND AXLEHEIGHT CONTROL COMPRESSOR AND DRYER
3160 Author�: Date�:
2005 SEQUOIA (RM1146U)
INSTALLATION
Installation is in the reverse order of removal (See page SA±162).
Page 3171 of 4323
SA0L6±03
± SUSPENSION AND AXLEHEIGHT CONTROL VALVE
SA±167
3163 Author�: Date�:
2005 SEQUOIA (RM1146U)
INSTALLATION
Installation is in the reverse order of removal (See page SA±166).
Page 3174 of 4323
SA1IB±03
SA±170
± SUSPENSION AND AXLEREAR HEIGHT CONTROL SENSOR
3166 Author�: Date�:
2005 SEQUOIA (RM1146U)
INSTALLATION
Installation is in the reverse order of removal (See page SA±169).