Page 367 of 1306

8 CHECK HEATED OXYGEN SENSOR 2
Without CONSULT-II
1. Reconnect all harness connectors disconnected.
2. Start engine and drive vehicle at a speed of more than 70 km/h (43 MPH) for 2 consecutive minutes.
3. Stop vehicle with engine running.
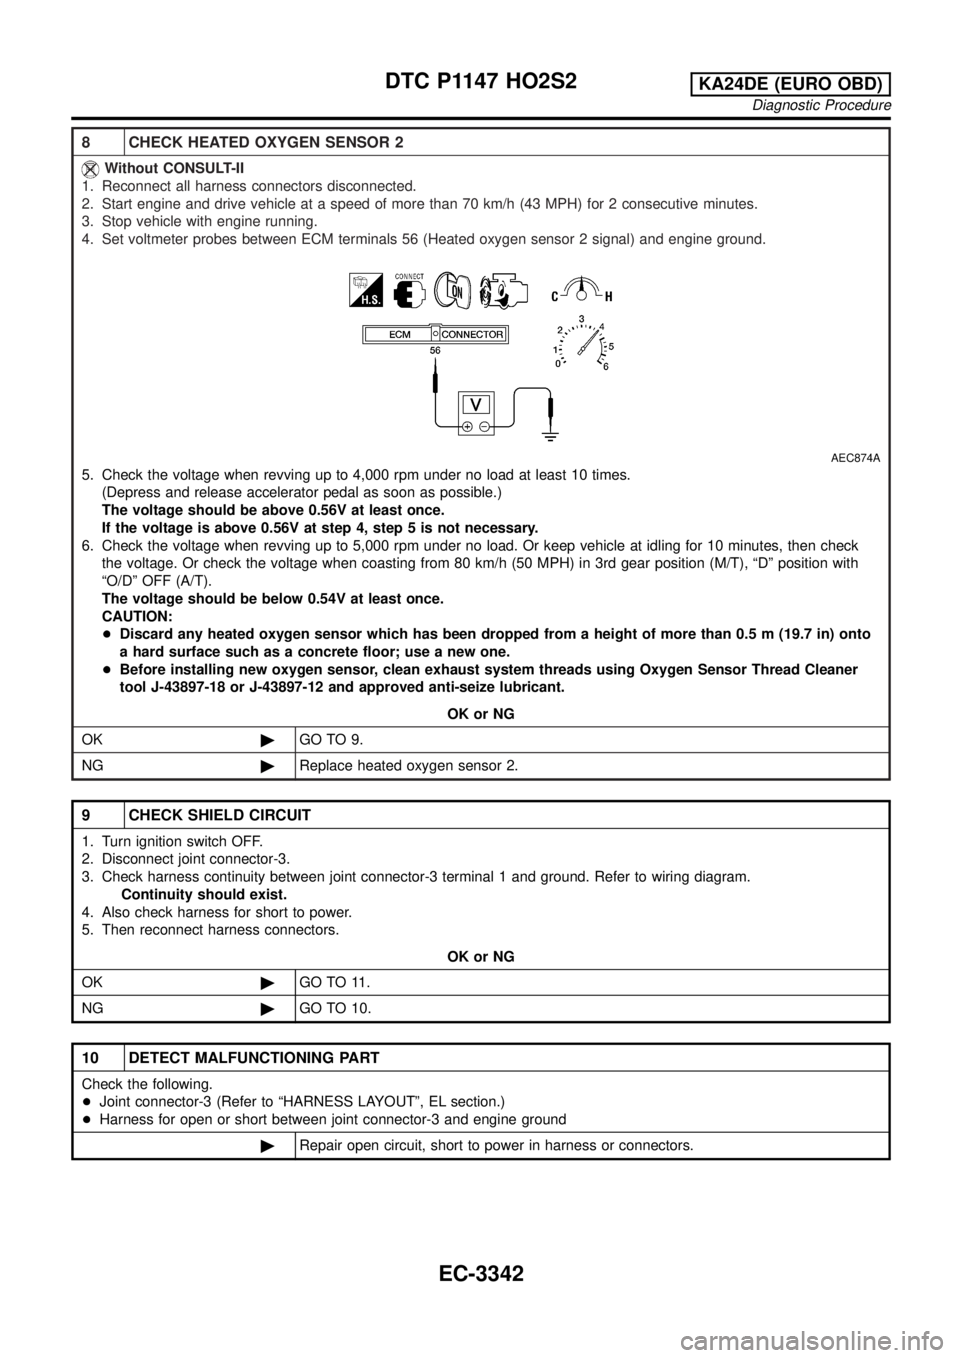
4. Set voltmeter probes between ECM terminals 56 (Heated oxygen sensor 2 signal) and engine ground.
AEC874A
5. Check the voltage when revving up to 4,000 rpm under no load at least 10 times.
(Depress and release accelerator pedal as soon as possible.)
The voltage should be above 0.56V at least once.
If the voltage is above 0.56V at step 4, step 5 is not necessary.
6. Check the voltage when revving up to 5,000 rpm under no load. Or keep vehicle at idling for 10 minutes, then check
the voltage. Or check the voltage when coasting from 80 km/h (50 MPH) in 3rd gear position (M/T), ªDº position with
ªO/Dº OFF (A/T).
The voltage should be below 0.54V at least once.
CAUTION:
+Discard any heated oxygen sensor which has been dropped from a height of more than 0.5 m (19.7 in) onto
a hard surface such as a concrete floor; use a new one.
+Before installing new oxygen sensor, clean exhaust system threads using Oxygen Sensor Thread Cleaner
tool J-43897-18 or J-43897-12 and approved anti-seize lubricant.
OK or NG
OK©GO TO 9.
NG©Replace heated oxygen sensor 2.
9 CHECK SHIELD CIRCUIT
1. Turn ignition switch OFF.
2. Disconnect joint connector-3.
3. Check harness continuity between joint connector-3 terminal 1 and ground. Refer to wiring diagram.
Continuity should exist.
4. Also check harness for short to power.
5. Then reconnect harness connectors.
OK or NG
OK©GO TO 11.
NG©GO TO 10.
10 DETECT MALFUNCTIONING PART
Check the following.
+Joint connector-3 (Refer to ªHARNESS LAYOUTº, EL section.)
+Harness for open or short between joint connector-3 and engine ground
©Repair open circuit, short to power in harness or connectors.
DTC P1147 HO2S2KA24DE (EURO OBD)
Diagnostic Procedure
EC-3342
Page 377 of 1306

Diagnostic ProcedureNEEC0332
1 RETIGHTEN GROUND SCREWS
1. Turn ignition switch OFF.
2. Loosen and retighten engine ground screws.
©GO TO 2.
2 CHECK INPUT SIGNAL CIRCUIT
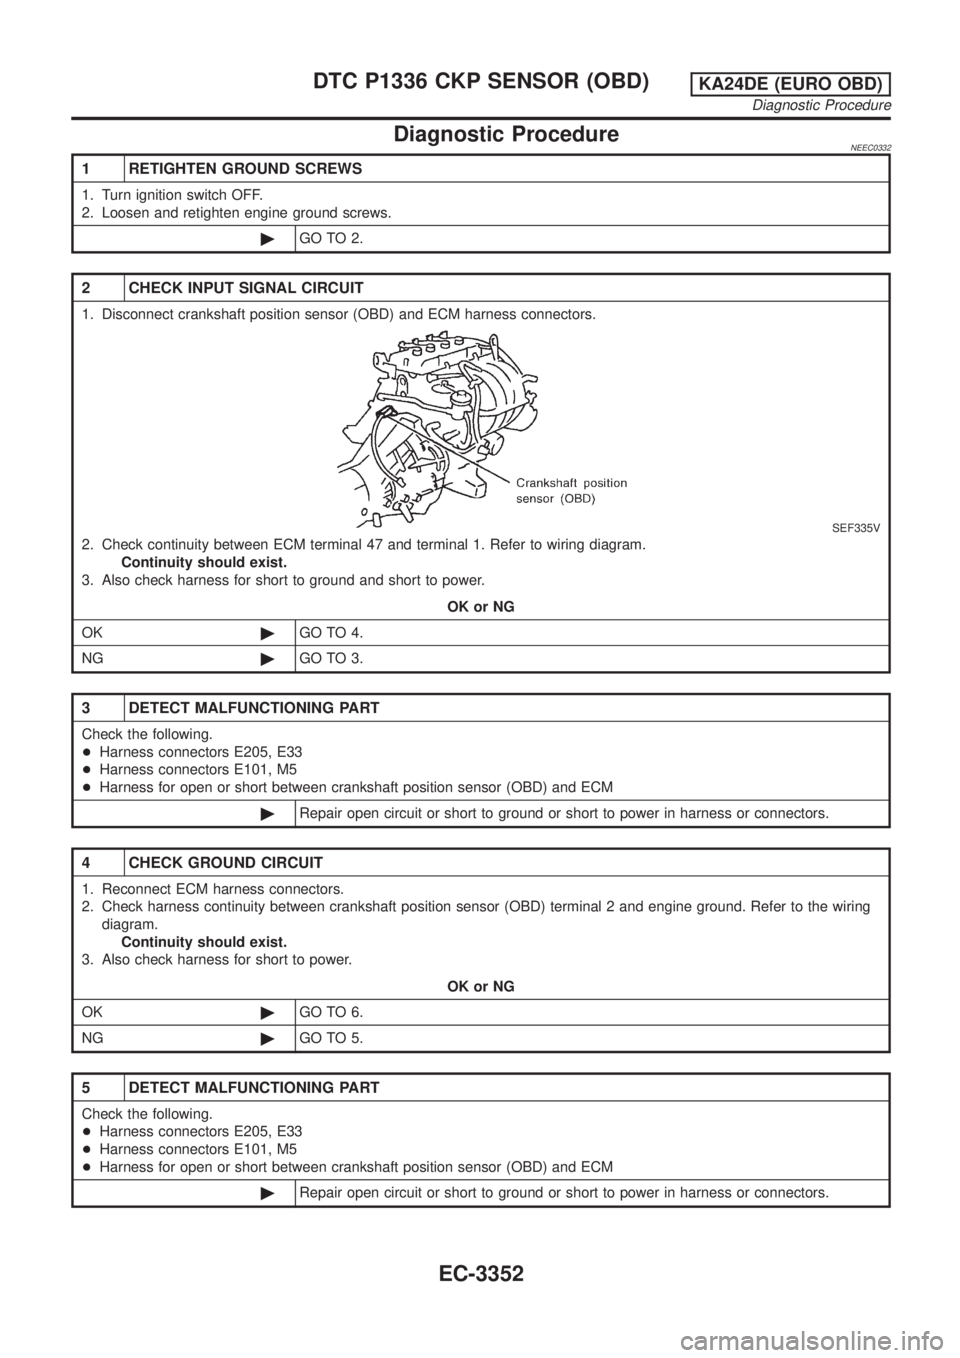
1. Disconnect crankshaft position sensor (OBD) and ECM harness connectors.
SEF335V
2. Check continuity between ECM terminal 47 and terminal 1. Refer to wiring diagram.
Continuity should exist.
3. Also check harness for short to ground and short to power.
OK or NG
OK©GO TO 4.
NG©GO TO 3.
3 DETECT MALFUNCTIONING PART
Check the following.
+Harness connectors E205, E33
+Harness connectors E101, M5
+Harness for open or short between crankshaft position sensor (OBD) and ECM
©Repair open circuit or short to ground or short to power in harness or connectors.
4 CHECK GROUND CIRCUIT
1. Reconnect ECM harness connectors.
2. Check harness continuity between crankshaft position sensor (OBD) terminal 2 and engine ground. Refer to the wiring
diagram.
Continuity should exist.
3. Also check harness for short to power.
OK or NG
OK©GO TO 6.
NG©GO TO 5.
5 DETECT MALFUNCTIONING PART
Check the following.
+Harness connectors E205, E33
+Harness connectors E101, M5
+Harness for open or short between crankshaft position sensor (OBD) and ECM
©Repair open circuit or short to ground or short to power in harness or connectors.
DTC P1336 CKP SENSOR (OBD)KA24DE (EURO OBD)
Diagnostic Procedure
EC-3352
Page 381 of 1306

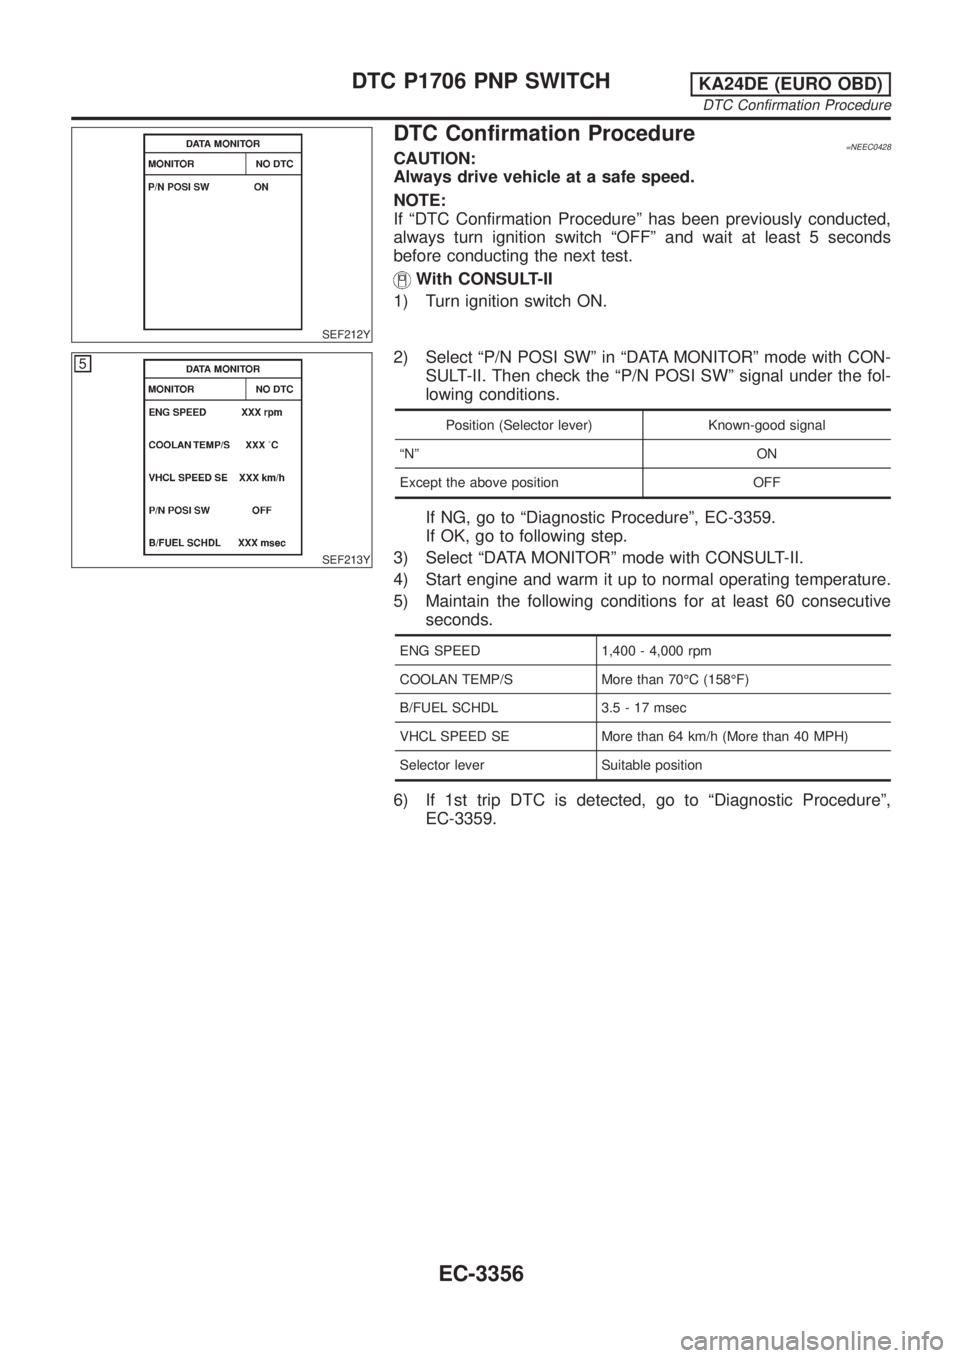
SEF212Y
DTC Confirmation Procedure=NEEC0428CAUTION:
Always drive vehicle at a safe speed.
NOTE:
If ªDTC Confirmation Procedureº has been previously conducted,
always turn ignition switch ªOFFº and wait at least 5 seconds
before conducting the next test.
With CONSULT-II
1) Turn ignition switch ON.
SEF213Y
2) Select ªP/N POSI SWº in ªDATA MONITORº mode with CON-
SULT-II. Then check the ªP/N POSI SWº signal under the fol-
lowing conditions.
Position (Selector lever) Known-good signal
ªNº ON
Except the above position OFF
If NG, go to ªDiagnostic Procedureº, EC-3359.
If OK, go to following step.
3) Select ªDATA MONITORº mode with CONSULT-II.
4) Start engine and warm it up to normal operating temperature.
5) Maintain the following conditions for at least 60 consecutive
seconds.
ENG SPEED 1,400 - 4,000 rpm
COOLAN TEMP/S More than 70ÉC (158ÉF)
B/FUEL SCHDL 3.5 - 17 msec
VHCL SPEED SE More than 64 km/h (More than 40 MPH)
Selector lever Suitable position
6) If 1st trip DTC is detected, go to ªDiagnostic Procedureº,
EC-3359.
DTC P1706 PNP SWITCHKA24DE (EURO OBD)
DTC Confirmation Procedure
EC-3356
Page 382 of 1306
SEF964N
Overall Function Check=NEEC0429Use this procedure to check the overall function of the park/neutral
position switch circuit. During this check, a 1st trip DTC might not
be confirmed.
Without CONSULT-II
1) Turn ignition switch ON.
2) Check voltage between ECM terminal 22 (PNP switch signal)
and body ground under the following conditions.
Condition (Gear position) Voltage (V) (Known-good data)
ªNº position Approx. 0
Except the above position Approx. 5
3) If NG, go to ªDiagnostic Procedureº, EC-3359.
DTC P1706 PNP SWITCHKA24DE (EURO OBD)
Overall Function Check
EC-3357
Page 386 of 1306
SEF928V
Component DescriptionNEEC0319IGNITION COIL & POWER TRANSISTORNEEC0319S01The ignition signal from the ECM is sent to the power transistor.
The power transistor switches the ignition coil primary circuit on
and off. As the primary circuit is turned on and off, the proper high
voltage is induced in the coil secondary circuit.
The distributor is not repairable and must be replaced as an
assembly except distributor cap and rotor head.
NOTE:
The rotor screw which secures the distributor rotor head to the
distributor shaft must be tightened properly.
: 3.3 - 3.9 N´m (0.34 - 0.40 kg-m, 29.5 - 34.7 in-lb)
CONSULT-II Reference Value in Data Monitor
Mode
NEEC0320
MONITOR ITEM CONDITION SPECIFICATION
IGN TIMING+Engine: After warming up
+Air conditioner switch: OFF
+Shift lever: ªNº
+No-loadIdle Approx. 15É BTDC
2,000 rpm More than 30É BTDC
IGNITION SIGNALKA24DE (EURO OBD)
Component Description
EC-3361
Page 390 of 1306
Diagnostic ProcedureNEEC0325
1 INSPECTION START
Turn ignition switch ªOFFº, and restart engine.
Is engine running?
YesorNo
Yes (With CONSULT-II)©GO TO 2.
Yes (Without CONSULT-
II)©GO TO 3.
No©GO TO 4.
2 CHECK OVERALL FUNCTION
With CONSULT-II
1. Perform ªPOWER BALANCEº in ªACTIVE TESTº mode with CONSULT-II.
2. Make sure that all circuits do not produce a momentary engine speed drop.
SEF981Z
OK or NG
OK©INSPECTION END
NG©GO TO 7.
3 CHECK OVERALL FUNCTION
Without CONSULT-II
1. Let engine idle.
2. Read the voltage signal between ECM terminal 1 and ground with an oscilloscope.
3. Verify that the oscilloscope screen shows the signal wave as shown below.
SEF984Z
OK or NG
OK©INSPECTION END
NG©GO TO 7.
IGNITION SIGNALKA24DE (EURO OBD)
Diagnostic Procedure
EC-3365
Page 391 of 1306
4 CHECK POWER SUPPLY
1. Turn ignition switch OFF.
2. Disconnect ignition coil harness connector.
SEC276D
3. Turn ignition switch ON.
4. Check voltage between terminal 7 and ground with CONSULT-II or tester.
AEC698
Voltage: Battery voltage
OK or NG
OK©GO TO 6.
NG©GO TO 5.
5 DETECT MALFUNCTIONING PART
Check the following.
+Harness connectors E101, M5
+Harness for open or short between ignition coil and ECM relay
+Harness for open or short between ECM relay and fuse
©Repair harness or connectors.
6 CHECK GROUND CIRCUIT
1. Turn ignition switch OFF.
2. Disconnect power transistor harness connector.
3. Check harness continuity between power transistor terminal 2 and engine ground. Refer to Wiring Diagram.
Continuity should exist.
4. Also check harness for short to power.
OK or NG
OK©GO TO 7.
NG©Repair open circuit or short to power in harness or connectors.
IGNITION SIGNALKA24DE (EURO OBD)
Diagnostic Procedure
EC-3366
Page 397 of 1306
2 CHECK POWER SUPPLY
1. Stop engine.
2. Disconnect injector harness connector.
3. Turn ignition switch ON.
4. Check voltage between injector terminal 2 and ground with CONSULT-II or tester.
SEC277D
Voltage: Battery voltage
OK or NG
OK©GO TO 4.
NG©GO TO 3.
3 DETECT MALFUNCTIONING PART
Check the following.
+10A fuse
+Harness for open or short between injector and fuse
©Repair harness or connectors.
4 CHECK OUTPUT SIGNAL CIRCUIT
1. Turn ignition switch OFF.
2. Disconnect ECM harness connector.
3. Check harness continuity between injector terminal 1 and ECM terminals 102, 104, 109, 111. Refer to Wiring Diagram.
Continuity should exist.
4. Also check harness for short to ground and short to power.
OK or NG
OK©GO TO 6.
NG©GO TO 5.
5 DETECT MALFUNCTIONING PART
Check the harness for open or short between ECM and injector.
©Repair open circuit or short to ground or short to power in harness or connectors.
INJECTORKA24DE (EURO OBD)
Diagnostic Procedure
EC-3372