Page 3824 of 4770

MX055±01
MX±22
± MANUAL TRANSAXLE (E153)MANUAL TRANSAXLE ASSEMBLY
1823 Author�: Date�:
REASSEMBLY
Reassembly is in the reverse order of disassembly.
HINT:
�Before reassembly, select a shim by adjusting output
shaft preload.
�Coat all of the sliding and rotating surfaces with gear oil
before reassembly.
ADJUST OUTPUT SHAFT PRELOAD
(a) Install the output shaft assembly to the transaxle case.
(b) Install the transmission case to the transaxle case.
HINT:
If necessary, tap on the case with a plastic hammer.
(c) Install and torque the 17 bolts.
Torque: 29 N´m (300 kgf´cm, 22 ft´lbf)
(d) Install the output shaft rear taper roller bearing outer race.
(e) Install the adjusting shim.
HINT:
When reusing the output shaft bearing, first install a shim of the
same thickness as before. If installing a new taper roller bear-
ing, first select and install a shim of lesser thickness than be-
fore.
(f) Install the rear bearing retainer.
(g) Using a torx wrench (T45), install and torque the 7 torx
screws.
Torque: 42 N´m (430 kgf´cm, 31 ft´lbf)
(h) Install a new lock nut to the output shaft.
(i) Turn the output shaft right and left 2 or 3 times to allow the
bearing to settle.
Page 3825 of 4770
Z12593
± MANUAL TRANSAXLE (E153)MANUAL TRANSAXLE ASSEMBLY
MX±23
1824 Author�: Date�:
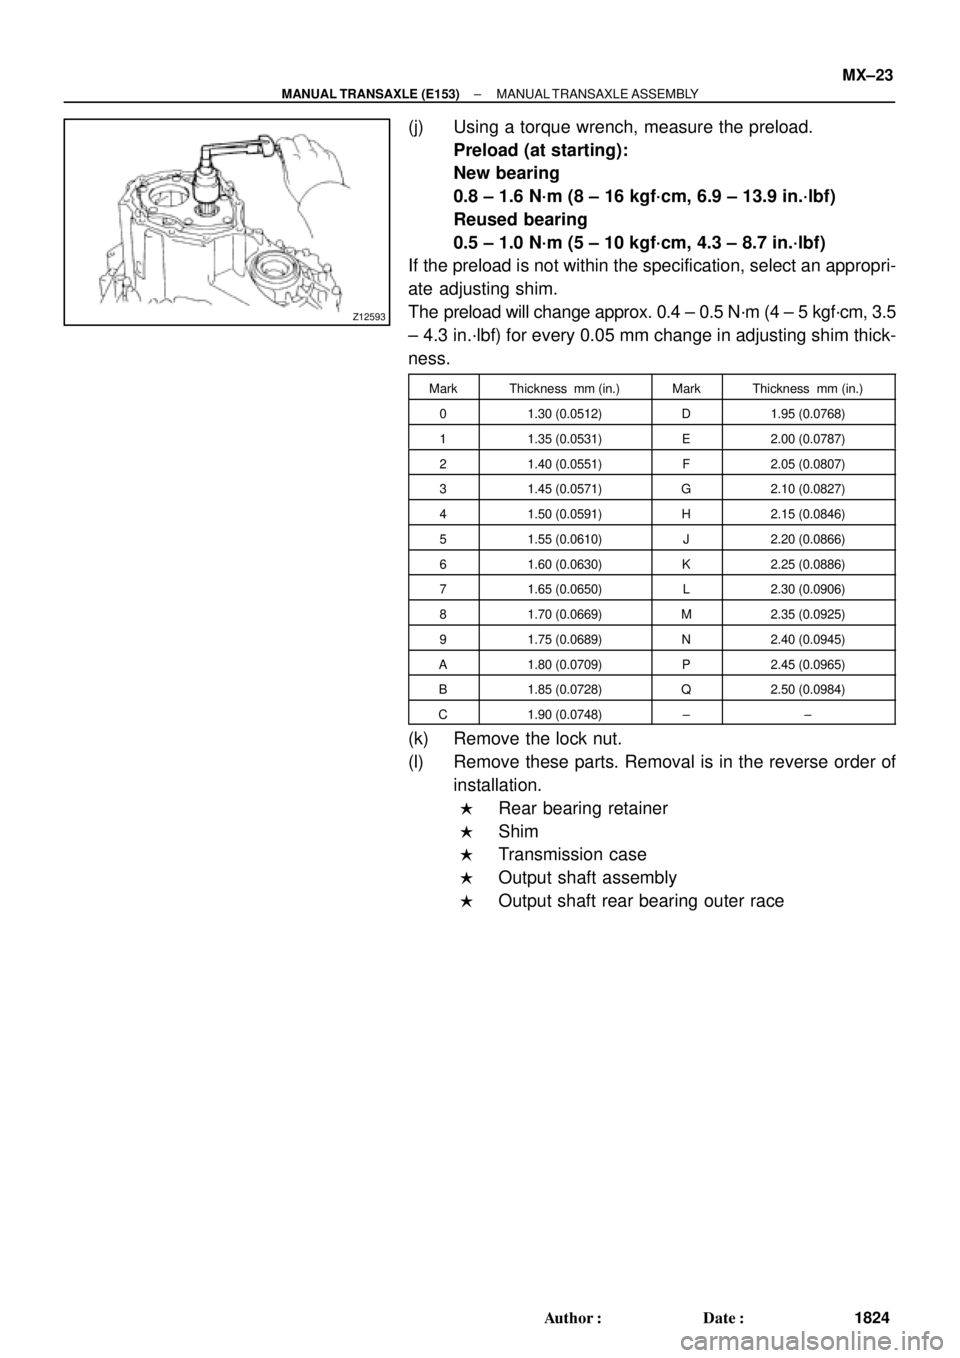
(j) Using a torque wrench, measure the preload.
Preload (at starting):
New bearing
0.8 ± 1.6 N´m (8 ± 16 kgf´cm, 6.9 ± 13.9 in.´lbf)
Reused bearing
0.5 ± 1.0 N´m (5 ± 10 kgf´cm, 4.3 ± 8.7 in.´lbf)
If the preload is not within the specification, select an appropri-
ate adjusting shim.
The preload will change approx. 0.4 ± 0.5 N´m (4 ± 5 kgf´cm, 3.5
± 4.3 in.´lbf) for every 0.05 mm change in adjusting shim thick-
ness.
MarkThickness mm (in.)MarkThickness mm (in.)
01.30 (0.0512)D1.95 (0.0768)
11.35 (0.0531)E2.00 (0.0787)
21.40 (0.0551)F2.05 (0.0807)
31.45 (0.0571)G2.10 (0.0827)
41.50 (0.0591)H2.15 (0.0846)
51.55 (0.0610)J2.20 (0.0866)
61.60 (0.0630)K2.25 (0.0886)
71.65 (0.0650)L2.30 (0.0906)
81.70 (0.0669)M2.35 (0.0925)
91.75 (0.0689)N2.40 (0.0945)
A1.80 (0.0709)P2.45 (0.0965)
B1.85 (0.0728)Q2.50 (0.0984)
C1.90 (0.0748)±±
(k) Remove the lock nut.
(l) Remove these parts. Removal is in the reverse order of
installation.
�Rear bearing retainer
�Shim
�Transmission case
�Output shaft assembly
�Output shaft rear bearing outer race
Page 3831 of 4770
MX059±02
Q00383
Front
MT0790
Q00183SST
Q00116
± MANUAL TRANSAXLE (E153)INPUT SHAFT
MX±29
1830 Author�: Date�:
REASSEMBLY
HINT:
Coat all of the sliding and rotating surfaces with gear oil before
reassembly.
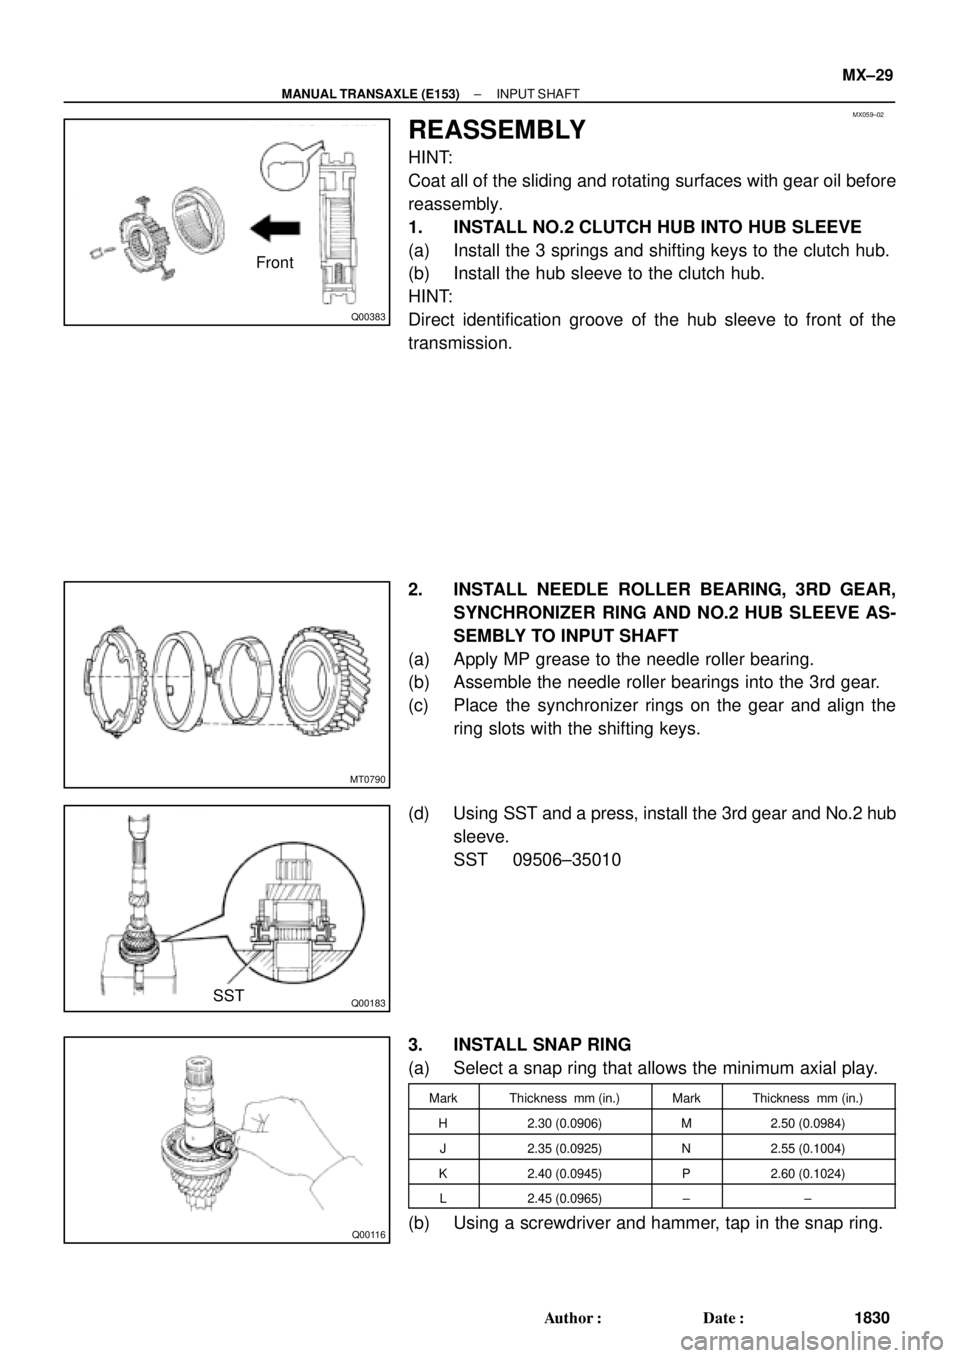
1. INSTALL NO.2 CLUTCH HUB INTO HUB SLEEVE
(a) Install the 3 springs and shifting keys to the clutch hub.
(b) Install the hub sleeve to the clutch hub.
HINT:
Direct identification groove of the hub sleeve to front of the
transmission.
2. INSTALL NEEDLE ROLLER BEARING, 3RD GEAR,
SYNCHRONIZER RING AND NO.2 HUB SLEEVE AS-
SEMBLY TO INPUT SHAFT
(a) Apply MP grease to the needle roller bearing.
(b) Assemble the needle roller bearings into the 3rd gear.
(c) Place the synchronizer rings on the gear and align the
ring slots with the shifting keys.
(d) Using SST and a press, install the 3rd gear and No.2 hub
sleeve.
SST 09506±35010
3. INSTALL SNAP RING
(a) Select a snap ring that allows the minimum axial play.
MarkThickness mm (in.)MarkThickness mm (in.)
H2.30 (0.0906)M2.50 (0.0984)
J2.35 (0.0925)N2.55 (0.1004)
K2.40 (0.0945)P2.60 (0.1024)
L2.45 (0.0965)±±
(b) Using a screwdriver and hammer, tap in the snap ring.
Page 3841 of 4770
MX05E±01
Z17558
�Gasket�O±Ring
Transmission Oil
Pump Case
Relief Valve
Ball
Spring
Spring Holder
Oil Pump CoverOil Pump Drive Gear Oil Strainer
Oil Pump Driven Rotor
Oil Pump Drive Rotor
10 (105, 8)
10 (105, 8)N´m (kgf´cm, ft´lbf) : Specified torque
�Non±reusable part
± MANUAL TRANSAXLE (E153)OIL PUMP
MX±39
1840 Author�: Date�:
OIL PUMP
COMPONENTS
Page 3845 of 4770
MX05I±03
Q05166
SST
Z00281
Matchmarks
Z00284
Z00286
± MANUAL TRANSAXLE (E153)DIFFERENTIAL CASE
MX±43
1844 Author�: Date�:
DISASSEMBLY
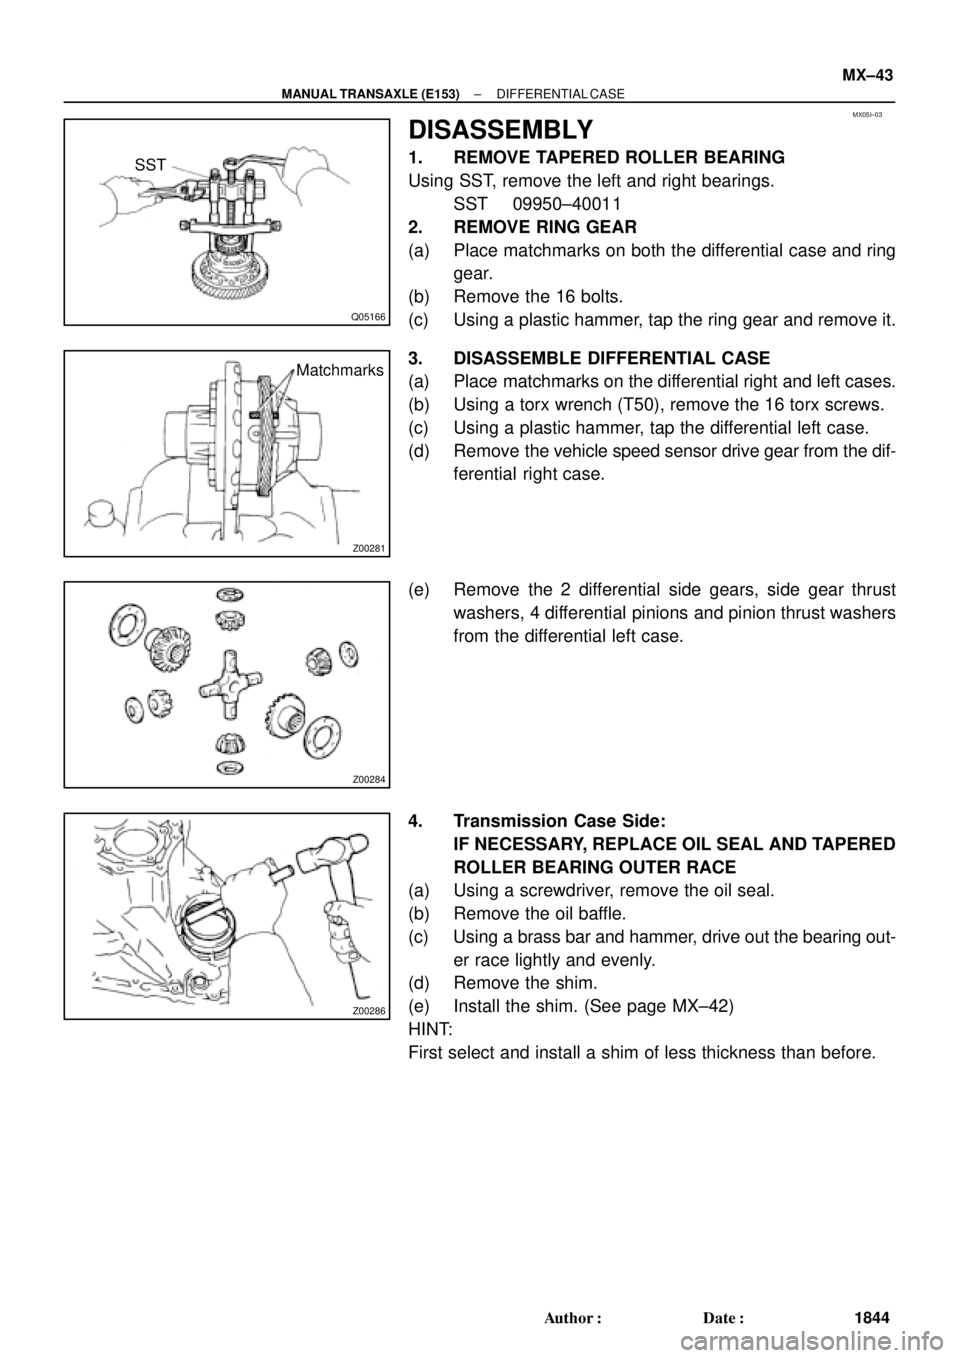
1. REMOVE TAPERED ROLLER BEARING
Using SST, remove the left and right bearings.
SST 09950±40011
2. REMOVE RING GEAR
(a) Place matchmarks on both the differential case and ring
gear.
(b) Remove the 16 bolts.
(c) Using a plastic hammer, tap the ring gear and remove it.
3. DISASSEMBLE DIFFERENTIAL CASE
(a) Place matchmarks on the differential right and left cases.
(b) Using a torx wrench (T50), remove the 16 torx screws.
(c) Using a plastic hammer, tap the differential left case.
(d) Remove the vehicle speed sensor drive gear from the dif-
ferential right case.
(e) Remove the 2 differential side gears, side gear thrust
washers, 4 differential pinions and pinion thrust washers
from the differential left case.
4. Transmission Case Side:
IF NECESSARY, REPLACE OIL SEAL AND TAPERED
ROLLER BEARING OUTER RACE
(a) Using a screwdriver, remove the oil seal.
(b) Remove the oil baffle.
(c) Using a brass bar and hammer, drive out the bearing out-
er race lightly and evenly.
(d) Remove the shim.
(e) Install the shim. (See page MX±42)
HINT:
First select and install a shim of less thickness than before.
Page 3849 of 4770
Z00299
Matchmarks
Z00303
Driven Gear
Side
Q06410
SST
SST
± MANUAL TRANSAXLE (E153)DIFFERENTIAL CASE
MX±47
1848 Author�: Date�:
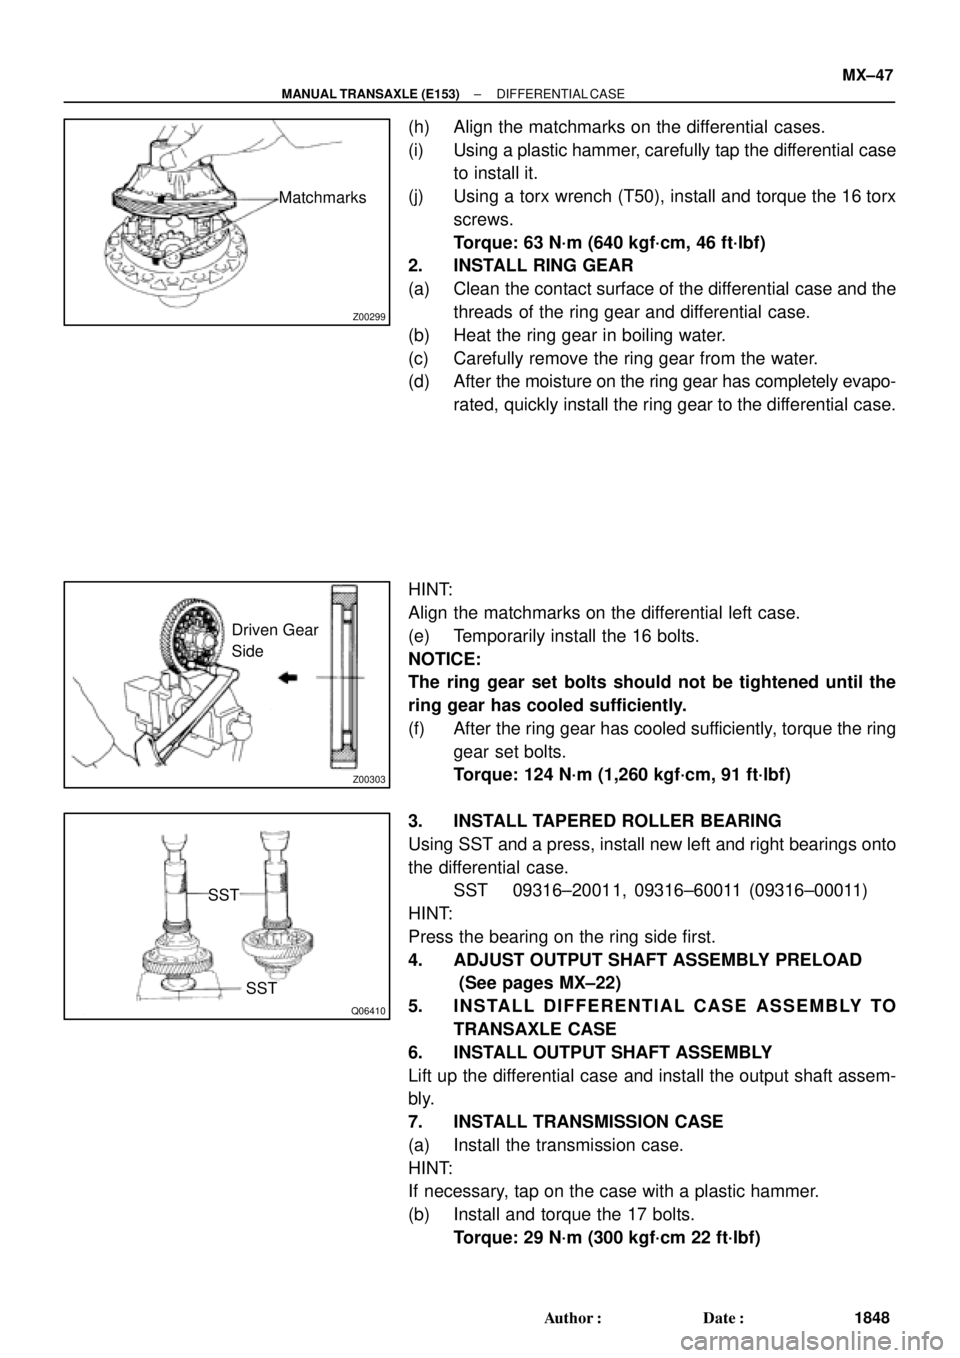
(h) Align the matchmarks on the differential cases.
(i) Using a plastic hammer, carefully tap the differential case
to install it.
(j) Using a torx wrench (T50), install and torque the 16 torx
screws.
Torque: 63 N´m (640 kgf´cm, 46 ft´lbf)
2. INSTALL RING GEAR
(a) Clean the contact surface of the differential case and the
threads of the ring gear and differential case.
(b) Heat the ring gear in boiling water.
(c) Carefully remove the ring gear from the water.
(d) After the moisture on the ring gear has completely evapo-
rated, quickly install the ring gear to the differential case.
HINT:
Align the matchmarks on the differential left case.
(e) Temporarily install the 16 bolts.
NOTICE:
The ring gear set bolts should not be tightened until the
ring gear has cooled sufficiently.
(f) After the ring gear has cooled sufficiently, torque the ring
gear set bolts.
Torque: 124 N´m (1,260 kgf´cm, 91 ft´lbf)
3. INSTALL TAPERED ROLLER BEARING
Using SST and a press, install new left and right bearings onto
the differential case.
SST 09316±20011, 09316±60011 (09316±00011)
HINT:
Press the bearing on the ring side first.
4. ADJUST OUTPUT SHAFT ASSEMBLY PRELOAD
(See pages MX±22)
5. INSTALL DIFFERENTIAL CASE ASSEMBLY TO
TRANSAXLE CASE
6. INSTALL OUTPUT SHAFT ASSEMBLY
Lift up the differential case and install the output shaft assem-
bly.
7. INSTALL TRANSMISSION CASE
(a) Install the transmission case.
HINT:
If necessary, tap on the case with a plastic hammer.
(b) Install and torque the 17 bolts.
Torque: 29 N´m (300 kgf´cm 22 ft´lbf)
Page 3850 of 4770
Q00036
Z00309
MX±48
± MANUAL TRANSAXLE (E153)DIFFERENTIAL CASE
1849 Author�: Date�:
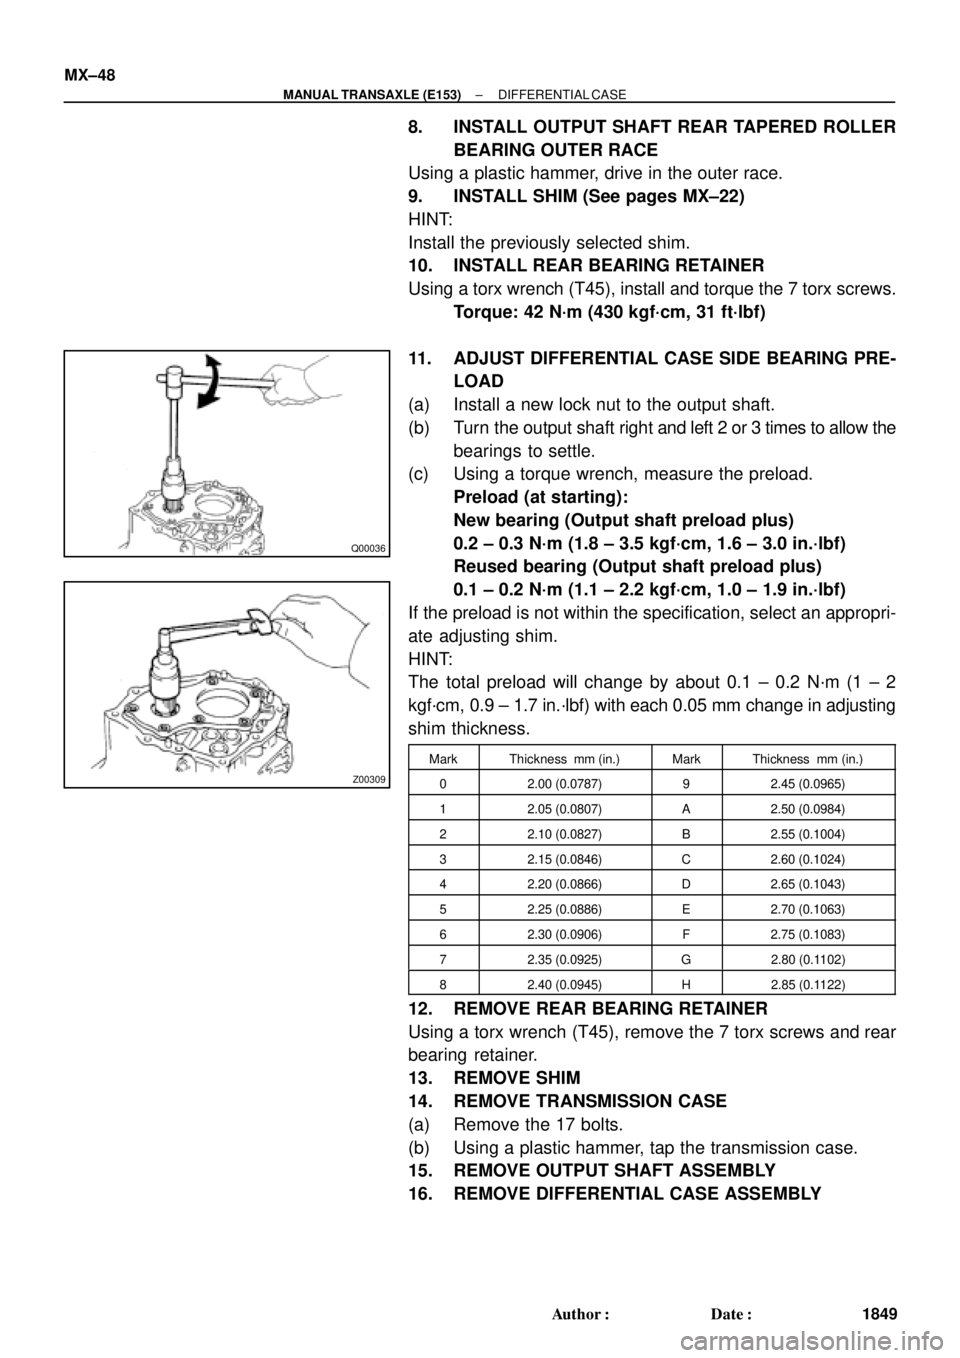
8. INSTALL OUTPUT SHAFT REAR TAPERED ROLLER
BEARING OUTER RACE
Using a plastic hammer, drive in the outer race.
9. INSTALL SHIM (See pages MX±22)
HINT:
Install the previously selected shim.
10. INSTALL REAR BEARING RETAINER
Using a torx wrench (T45), install and torque the 7 torx screws.
Torque: 42 N´m (430 kgf´cm, 31 ft´lbf)
11. ADJUST DIFFERENTIAL CASE SIDE BEARING PRE-
LOAD
(a) Install a new lock nut to the output shaft.
(b) Turn the output shaft right and left 2 or 3 times to allow the
bearings to settle.
(c) Using a torque wrench, measure the preload.
Preload (at starting):
New bearing (Output shaft preload plus)
0.2 ± 0.3 N´m (1.8 ± 3.5 kgf´cm, 1.6 ± 3.0 in.´lbf)
Reused bearing (Output shaft preload plus)
0.1 ± 0.2 N´m (1.1 ± 2.2 kgf´cm, 1.0 ± 1.9 in.´lbf)
If the preload is not within the specification, select an appropri-
ate adjusting shim.
HINT:
The total preload will change by about 0.1 ± 0.2 N´m (1 ± 2
kgf´cm, 0.9 ± 1.7 in.´lbf) with each 0.05 mm change in adjusting
shim thickness.
MarkThickness mm (in.)MarkThickness mm (in.)
02.00 (0.0787)92.45 (0.0965)
12.05 (0.0807)A2.50 (0.0984)
22.10 (0.0827)B2.55 (0.1004)
32.15 (0.0846)C2.60 (0.1024)
42.20 (0.0866)D2.65 (0.1043)
52.25 (0.0886)E2.70 (0.1063)
62.30 (0.0906)F2.75 (0.1083)
72.35 (0.0925)G2.80 (0.1102)
82.40 (0.0945)H2.85 (0.1122)
12. REMOVE REAR BEARING RETAINER
Using a torx wrench (T45), remove the 7 torx screws and rear
bearing retainer.
13. REMOVE SHIM
14. REMOVE TRANSMISSION CASE
(a) Remove the 17 bolts.
(b) Using a plastic hammer, tap the transmission case.
15. REMOVE OUTPUT SHAFT ASSEMBLY
16. REMOVE DIFFERENTIAL CASE ASSEMBLY
Page 3912 of 4770
PP0H7±03
± PREPARATIONMANUAL TRANSAXLE (E153)
PP±61
11 3 Author�: Date�:
MANUAL TRANSAXLE (E153)
SST (Special Service Tools)
09223±15020Oil Seal & Bearing ReplacerDifferential case oil seal
09308±00010Oil Seal PullerOutput shaft front bearing outer
race
09316±20011Transfer Bearing ReplacerDifferential case tapered roller
bearing
09316±60011Transmission & Transfer Bearing
Replacer
(09316±00011)Replacer Pipe
(09316±00021)Replacer ºAº
(09316±00041)Replacer ºCº1st gear
No.1 hub sleeve
Differential case tapered roller
bearing outer race
(09316±00071)Replacer ºFºOutput shaft front bearing
09506±30012Differential Drive Pinion Rear
Bearing Cone ReplacerOutput shaft rear bearing
09506±35010Differential Drive Pinion Rear
Bearing ReplacerNo.2 hub sleeve
3rd gear
Input shaft rear bearing
09608±00081Differential Side Bearing Cone
ReplacerInput shaft oil seal
09612±65014Steering Worm Bearing PullerInput shaft bearing
Differential case tapered roller
bearing outer race