Page 1062 of 2543
7. CHECK CLUTCH START SYSTEM
(a) Check that the engine does not start when the clutch pedal
is released.
(b) Check that the engine starts when the clutch pedal is fully
depressed.
If necessary, adjust or replace the clutch start switch.
8. INSPECT CONTINUITY OF CLUTCH START SWITCH
(a) Check that there is continuity between terminals when the
switch is ON (pushed).
(b) Check that there is no continuity between terminals when the
switch is OFF (free).
If continuity is not as specified, replace the switch.
± CLUTCHCLUTCH PEDALCL±5
Page 1068 of 2543
CLUTCH UNIT (2JZ±GTE)
COMPONENTS
CLUTCH UNIT REMOVAL
1. REMOVE TRANSMISSION FROM ENGINE
(See page MT2±5)
HINT: Do not drain the transmission oil.
2. REMOVE RELEASE FORK ASSEMBLY
(a) Remove the release fork assembly from the left side of clutch
housing service hole.
(b) Remove the E±ring from the release fork.
(c) Remove the pin and wave washer from the release fork.
± CLUTCHCLUTCH RELEASE CYLINDER(2JZ±GTE)CL±11
Page 1074 of 2543
8. INSTALL CLUTCH COVER ASSEMBLY
9. INSTALL CLUTCH DISC
NOTICE: Install the clutch disc in the correct direction.
10. INSTALL RELEASE FORK ASSEMBLY
Install the release bearing assembly to the release fork as-
sembly, and then install them to the transmission.
11. INSTALL TRANSMISSION TO ENGINE
(See page MT2±5)
CLUTCH UNIT (2JZ±GE)
COMPONENTS
± CLUTCHCLUTCH UNIT (2JZ±GTE, 2JZ±GE)CL±17
Page 1075 of 2543

CLUTCH UNIT REMOVAL
1. REMOVE TRANSMISSION FROM ENGINE
(See page MT1±8)
HINT: Do not drain the transmission oil.
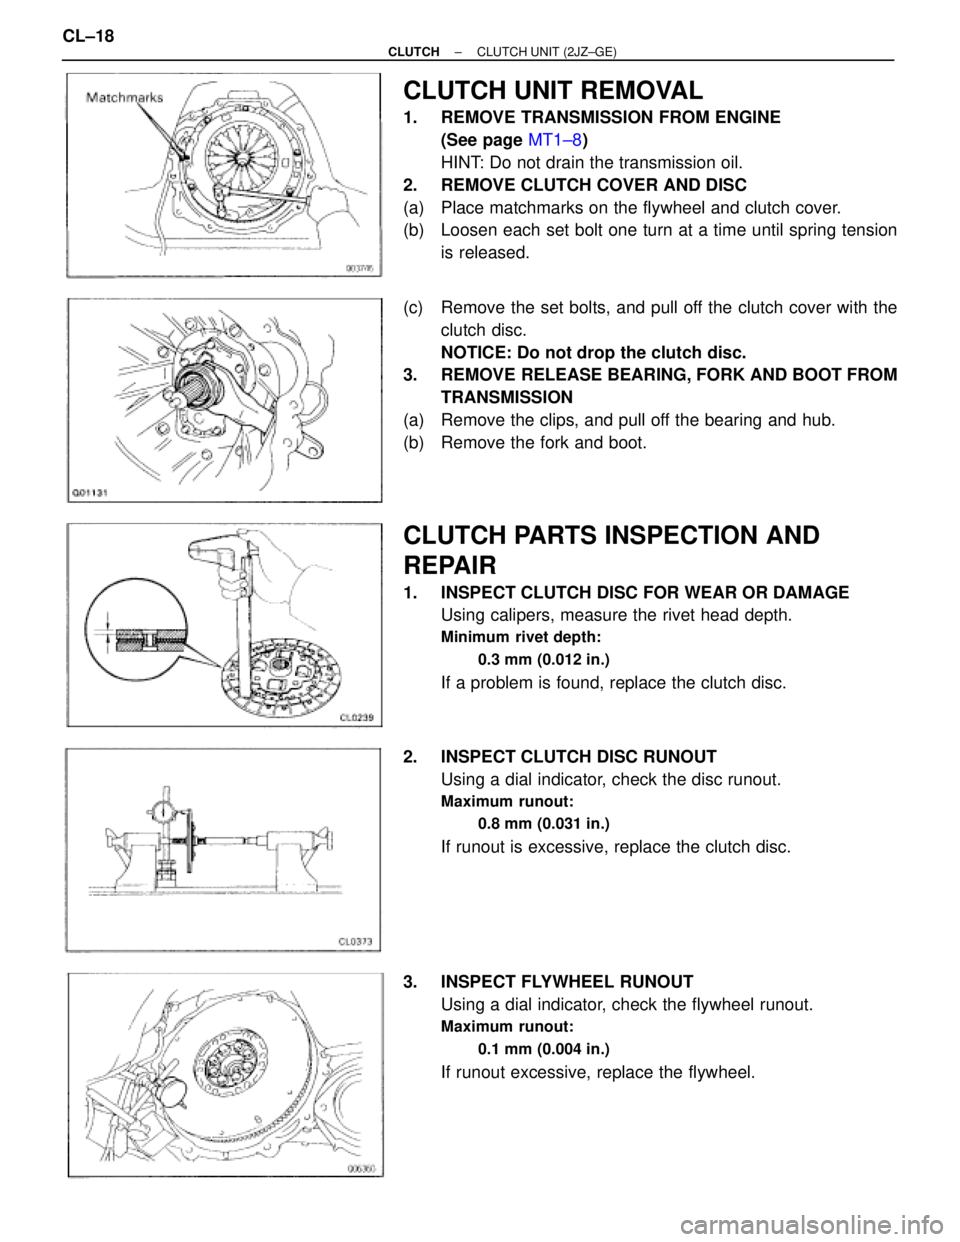
2. REMOVE CLUTCH COVER AND DISC
(a) Place matchmarks on the flywheel and clutch cover.
(b) Loosen each set bolt one turn at a time until spring tension
is released.
(c) Remove the set bolts, and pull off the clutch cover with the
clutch disc.
NOTICE: Do not drop the clutch disc.
3. REMOVE RELEASE BEARING, FORK AND BOOT FROM
TRANSMISSION
(a) Remove the clips, and pull off the bearing and hub.
(b) Remove the fork and boot.
CLUTCH PARTS INSPECTION AND
REPAIR
1. INSPECT CLUTCH DISC FOR WEAR OR DAMAGE
Using calipers, measure the rivet head depth.
Minimum rivet depth:
0.3 mm (0.012 in.)
If a problem is found, replace the clutch disc.
2. INSPECT CLUTCH DISC RUNOUT
Using a dial indicator, check the disc runout.
Maximum runout:
0.8 mm (0.031 in.)
If runout is excessive, replace the clutch disc.
3. INSPECT FLYWHEEL RUNOUT
Using a dial indicator, check the flywheel runout.
Maximum runout:
0.1 mm (0.004 in.)
If runout excessive, replace the flywheel. CL±18
± CLUTCHCLUTCH UNIT (2JZ±GE)
Page 1078 of 2543
3. APPLY MOLYBDENUM DISULPHIDE LITHIUM BASE
GREASE (NLGI NO.2)
(a) Apply release hub grease to these parts:
wRelease fork and hub contact point
wRelease fork and push rod contact point
wRelease fork pivot point
(b) Apply clutch spline grease.
wClutch disc spline
HINT: Recommended grease part number 08887±01706.
4. INSTALL RELEASE BEARING, FORK AND BOOT TO
TRANSMISSION
(a) Install the bearing assembly to the fork, and then install them
to the transmission.
(b) Install the boot.
5. INSTALL TRANSMISSION TO ENGINE
(See page MT1±8)
± CLUTCHCLUTCH UNIT (2JZ±GE)CL±21
Page 1080 of 2543

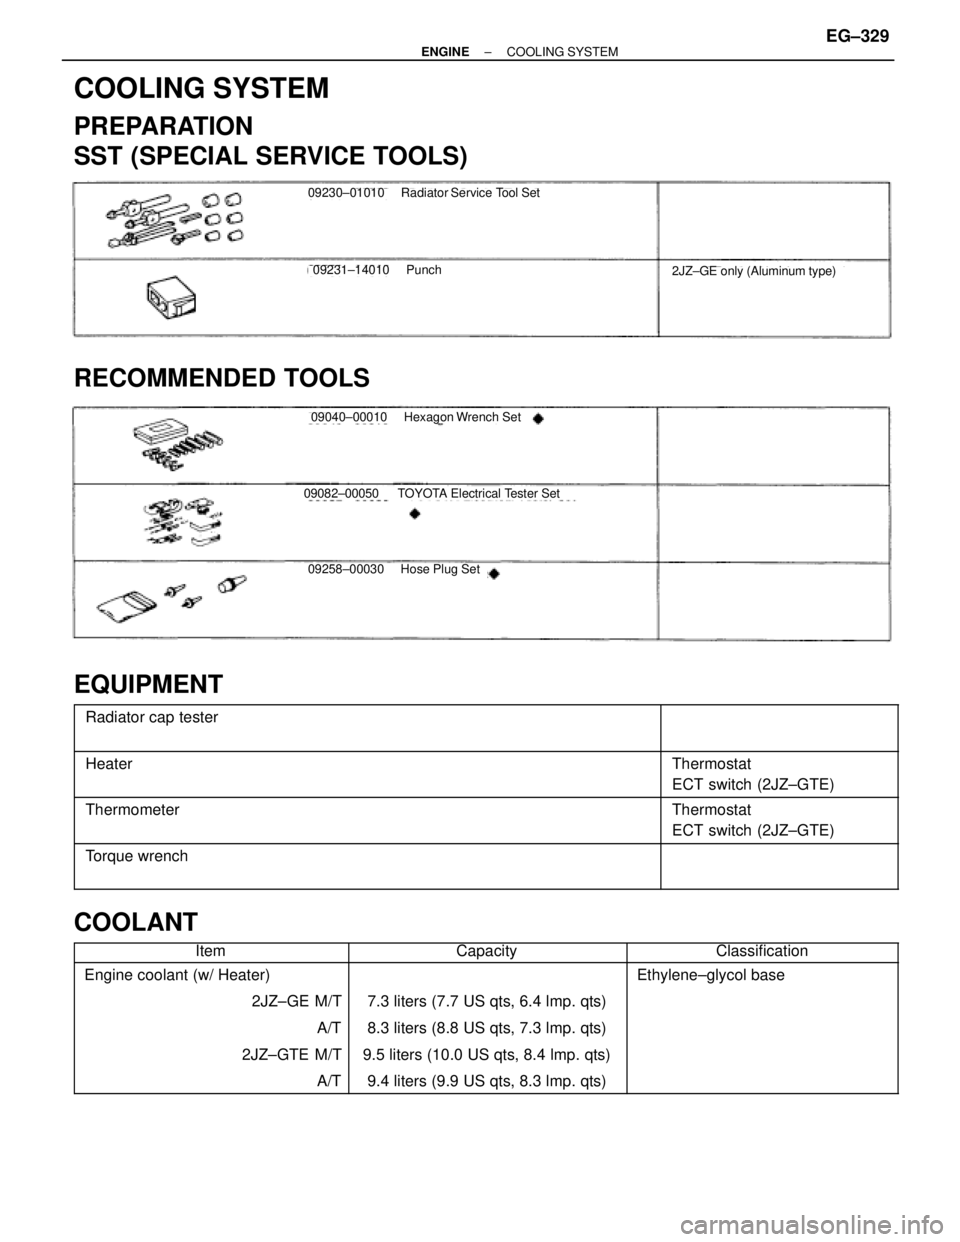
COOLING SYSTEM
PREPARATION
SST (SPECIAL SERVICE TOOLS)
09230±01010 Radiator Service Tool Set
09231±14010 Punch2JZ±GE only (Aluminum type)
RECOMMENDED TOOLS
09040±00010 Hexagon Wrench Set
09082±00050 TOYOTA Electrical Tester Set
09258±00030 Hose Plug Set
EQUIPMENT
������������������������� �
������������������������ �������������������������
Radiator cap tester����������� �
���������� �����������
������������������������� �
������������������������ �������������������������
Heater����������� �
���������� �����������
Thermostat
ECT switch (2JZ±GTE)
������������������������� �
������������������������
Thermometer����������� �
����������
Thermostat
ECT switch (2JZ±GTE)
������������������������� �
������������������������ �������������������������Torque wrench
����������� �
���������� �����������
COOLANT
������������Item������������Capacity������������Classification������������ �
����������� �
����������� �
����������� �
����������� �
����������� ������������
Engine coolant (w/ Heater)
2JZ±GE M/T
A/T
2JZ±GTE M/T
A/T
������������ �
�����������
������������
������������
������������
������������
������������
7.3 liters (7.7 US qts, 6.4 lmp. qts)
8.3 liters (8.8 US qts, 7.3 lmp. qts)
9.5 liters (10.0 US qts, 8.4 lmp. qts)
9.4 liters (9.9 US qts, 8.3 lmp. qts)
������������
������������
������������
������������
������������
������������ ������������
Ethylene±glycol base
± ENGINECOOLING SYSTEMEG±329
Page 1081 of 2543
COOLANT CHECK
1. CHECK ENGINE COOLANT LEVEL AT RADIATOR
RESERVOIR
The engine coolant level should be between the ºLOWº and
ºFULLº lines.
If low, check for leaks and add engine coolant up to the
ºFULLº line.
2. CHECK ENGINE COOLANT QUALITY
(a) Remove the radiator cap.
CAUTION: To avoid the danger of being burned, do not remove
the radiator cap while the engine and radiator are still hot, as
fluid and steam can be blown out under pressure.
(b) There should not be any excessive deposits of rust or scale
around the radiator cap or radiator filler hole, and the coolant
should be free from oil.
If excessively dirty, replace the coolant.
(c) Reinstall the radiator cap. EG±330
± ENGINECOOLING SYSTEM
Page 1082 of 2543

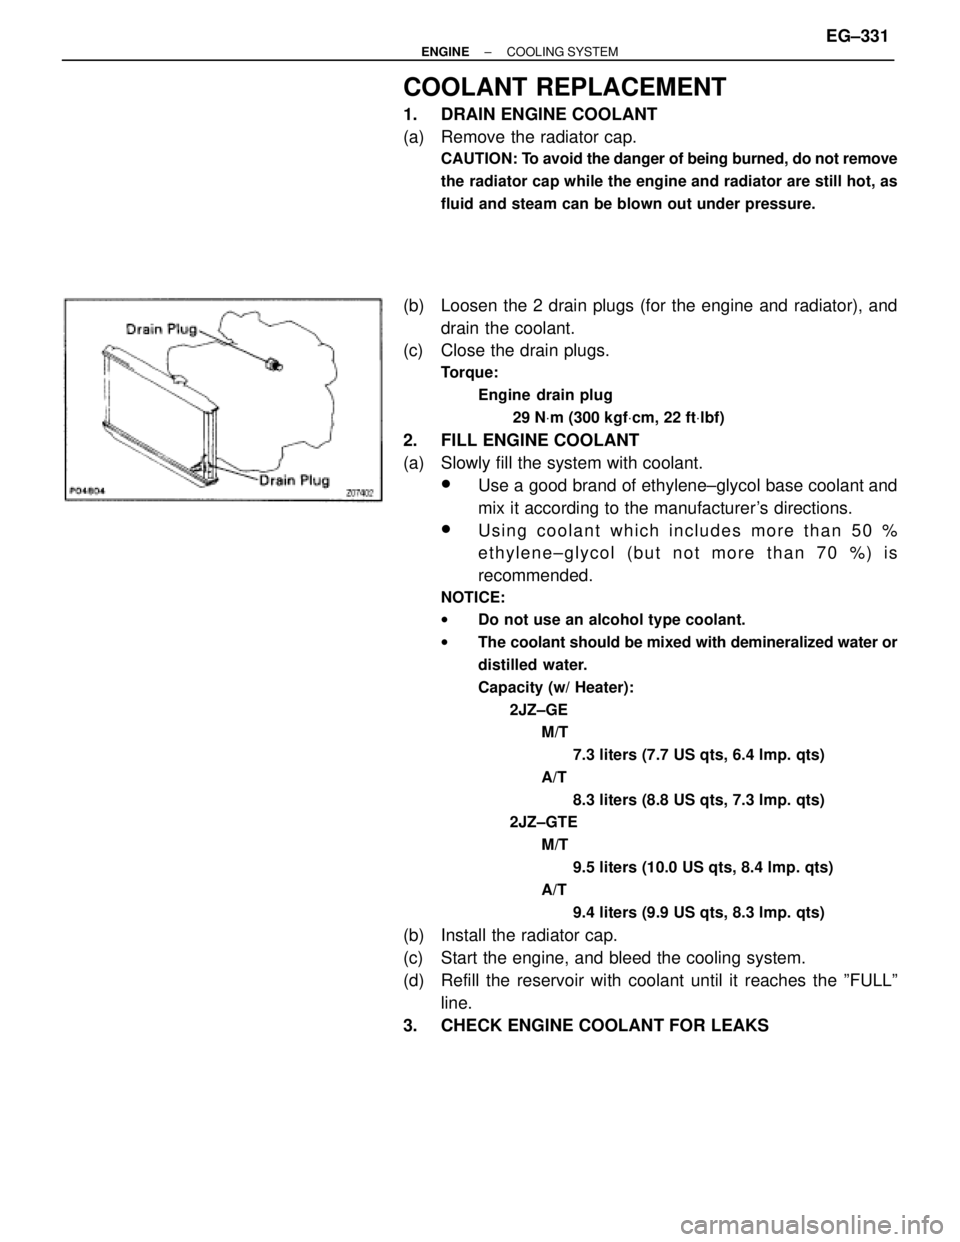
COOLANT REPLACEMENT
1. DRAIN ENGINE COOLANT
(a) Remove the radiator cap.
CAUTION: To avoid the danger of being burned, do not remove
the radiator cap while the engine and radiator are still hot, as
fluid and steam can be blown out under pressure.
(b) Loosen the 2 drain plugs (for the engine and radiator), and
drain the coolant.
(c) Close the drain plugs.
Torque:
Engine drain plug
29 NVm (300 kgfVcm, 22 ftVlbf)
2. FILL ENGINE COOLANT
(a) Slowly fill the system with coolant.
wUse a good brand of ethylene±glycol base coolant and
mix it according to the manufacturer's directions.
wUsing coolant which includes more than 50 %
ethylene±glycol (but not more than 70 %) is
recommended.
NOTICE:
wDo not use an alcohol type coolant.
wThe coolant should be mixed with demineralized water or
distilled water.
Capacity (w/ Heater):
2JZ±GE
M/T
7.3 liters (7.7 US qts, 6.4 lmp. qts)
A/T
8.3 liters (8.8 US qts, 7.3 lmp. qts)
2JZ±GTE
M/T
9.5 liters (10.0 US qts, 8.4 lmp. qts)
A/T
9.4 liters (9.9 US qts, 8.3 lmp. qts)
(b) Install the radiator cap.
(c) Start the engine, and bleed the cooling system.
(d) Refill the reservoir with coolant until it reaches the ºFULLº
line.
3. CHECK ENGINE COOLANT FOR LEAKS
± ENGINECOOLING SYSTEMEG±331