Page 105 of 525

wax-based underbody protective coating, it is
a good idea to have the whole of the
underframe of the vehicle steam cleaned,
engine compartment included, so that a
thorough inspection can be carried out to see
what minor repairs and renovations are
necessary. Steam cleaning is available at
many garages and is necessary for removal of
the accumulation of oily grime that sometimes
is allowed to become thick in certain areas.
The dirt can then be simply hosed off. Note
that these methods should not be used on
vehicles with wax-based underbody
protective coating or the coating will be
removed. Such vehicles should be inspected
annually, preferably just before winter, when
the underbody should be washed down and
any damage to the wax coating repaired.
Ideally, a completely fresh coat should be
applied. It would also be worth considering
the use of such wax-based protection for
injection into door panels, sills, box sections,
etc., as an additional safeguard against rust
damage where such protection is not
provided by the vehicle manufacturer.
After washing paintwork, wipe off with a
chamois leather to give an unspotted clear
finish. A coat of clear protective wax polish,
will give added protection against chemical
pollutants in the air. If the paintwork sheen
has dulled or oxidised, use a cleaner/polisher
combination to restore the brilliance of the
shine. This requires a little effort, but such
dulling is usually caused because regular
washing has been neglected. Care needs to
be taken with metallic paintwork, as special
non-abrasive cleaner/polisher is required to
avoid damage to the finish.
Always check that the door and ventilator
opening drain holes and pipes are completely
clear so that water can be drained out. Bright
work should be treated in the same way as
paint work. Windscreens and windows can be
kept clear of the smeary film that often
appears, by using a glass cleaner. Never use
any form of wax or other body or chromium
polish on glass.
3Upholstery and carpets -
maintenance
1
Mats and carpets should be brushed or
vacuum cleaned regularly to keep them free of
grit. If they are badly stained remove them
from the vehicle for scrubbing or sponging
and make quite sure they are dry before
refitting. Seats and interior trim panels can be
kept clean by wiping with a damp cloth. If they
do become stained (which can be more
apparent on light coloured upholstery) use a
little liquid detergent and a soft nail brush to
scour the grime out of the grain of the
material. Do not forget to keep the headlining
clean in the same way as the upholstery.
When using liquid cleaners inside the vehicle
do not over-wet the surfaces being cleaned.Excessive damp could get into the seams and
padded interior causing stains, offensive
odours or even rot. If the inside of the vehicle
gets wet accidentally it is worthwhile taking
some trouble to dry it out properly, particularly
where carpets are involved. Do not leave oil or
electric heaters inside the vehicle for this
purpose.
4Minor body damage - repair
3
Repairs of minor scratches in
bodywork
If the scratch is very superficial, and does
not penetrate to the metal of the bodywork,
repair is very simple. Lightly rub the area of
the scratch with a paintwork renovator, to
remove loose paint from the scratch and to
clear the surrounding bodywork of wax polish.
Rinse the area with clean water.
Apply touch-up paint to the scratch using a
fine paint brush; continue to apply fine layers
of paint until the surface of the paint in the
scratch is level with the surrounding
paintwork. Allow the new paint at least two
weeks to harden: then blend it into the
surrounding paintwork by rubbing the scratch
area with a paintwork renovator or a very fine
cutting paste and apply wax polish.
Where the scratch has penetrated right
through to the metal of the bodywork, causing
the metal to rust, a different repair technique
is required. Remove any loose rust from the
bottom of the scratch with a penknife, then
apply rust inhibiting paint, to prevent the
formation of rust in the future. Using a rubber
or nylon applicator fill the scratch with
bodystopper paste. If required, this paste can
be mixed with cellulose thinners to provide a
very thin paste that is ideal for filling narrow
scratches. Before the stopper-paste in the
scratch hardens, wrap a piece of smooth
cotton rag around the top of a finger. Dip the
finger in cellulose thinners and then quickly
sweep it across the surface of the
stopper-paste in the scratch; this will ensure
that the surface of the stopper-paste is
slightly hollowed. The scratch can now be
painted over as described earlier in this
Section.
Repair of dents in bodywork
When deep denting of the vehicle’s
bodywork has taken place, the first task is to
pull the dent out, until the affected bodywork
almost attains its original shape. There is little
point in trying to restore the original shape
completely, as the metal in the damaged area
will have stretched on impact and cannot be
reshaped fully to its original contour. It is
better to bring the level of the dent up to a
point that is about 8 in (3 mm) below the level
of the surrounding bodywork. In cases where
the dent is very shallow anyway, it is not worthtrying to pull it out at all. If the underside of the
dent is accessible, it can be hammered out
gently from behind, using a mallet with a
wooden or plastic head. Whilst doing this,
hold a block of wood firmly against the
outside of the panel to absorb the impact
from the hammer blows and thus prevent a
large area of the bodywork from being
“belled-out”.
Should the dent be in a section of the
bodywork that has a double skin or some
other factor making it inaccessible from
behind, a different technique is called for. Drill
several small holes through the metal inside
the area particularly in the deeper section.
Then screw long self-tapping screws into the
holes just sufficiently for them to gain a good
purchase in the metal. Now the dent can be
pulled out by pulling on the protruding heads
of the screws with a pair of pliers.
The next stage of the repair is the removal
of the paint from the damaged area, and from
an inch or so of the surrounding “sound”
bodywork. This is accomplished most easily
by using a wire brush or abrasive pad on a
power drill, although it can be done just as
effectively by hand using sheets of abrasive
paper. To complete the preparation for filling,
score the surface of the bare metal with a
screwdriver or the tang of a file, or
alternatively, drill small holes in the affected
area. This will provide a good “key” for the
filler paste.
To complete the repair see the Section on
filling and re-spraying.
Repair of rust holes or gashes in
bodywork
Remove all paint from the affected area and
from an inch or so of the surrounding “sound”
bodywork, using an abrasive pad or a wire
brush on a power drill. If these are not
available a few sheets of abrasive paper will
do the job just as effectively. With the paint
removed you will be able to gauge the severity
of the corrosion and therefore decide whether
to renew the whole panel (if this is possible) or
to repair the affected area. New body panels
are not as expensive as most people think
and it is often quicker and more satisfactory
to fit a new panel than to attempt to repair
large areas of corrosion.
Remove all fittings from the affected area
except those which will act as a guide to the
original shape of the damaged bodywork (e.g.
headlamp shells, etc.). Then, using tin snips or
a hacksaw blade, remove all loose metal and
any other metal badly affected by corrosion.
Hammer the edges of the hole inwards to
create a slight depression for the filler paste.
Wire brush the affected area to remove the
powdery rust from the surface of the
remaining metal. Paint the affected area with
rust inhibiting paint. If the back of the rusted
area is accessible treat this also.
Before filling can take place it will be
necessary to block the hole in some way. This
can be achieved by using aluminium or plastic
mesh, or aluminium tape.
11•2Bodywork and fittings
Page 106 of 525

Aluminium or plastic mesh, or glass fibre
matting, is probably the best material to use
for a large hole. Cut a piece to the
approximate size and shape of the hole to be
filled, then position it in the hole so that its
edges are below the level of the surrounding
bodywork. It can be retained in position by
several blobs of filler paste around its
periphery.
Aluminium tape should be used for small or
very narrow holes. Pull a piece off the roll and
trim it to the approximate size and shape
required. Then pull off the backing paper (if
used) and stick the tape over the hole. It can
be overlapped if the thickness of one piece is
insufficient. Burnish down the edges of the
tape with the handle of a screwdriver or
similar, to ensure that the tape is securely
attached to the metal underneath.
Bodywork repairs filling and
re-spraying
Before using this Section, see the Sections
on dent, deep scratch, rust holes and gash
repairs.
Many types of bodyfiller are available, but
generally those proprietary kits that contain a
tin of filler paste and a tube of resin hardener
are best for this type of repair. These can be
used directly from the tube. A wide, flexible
plastic or nylon applicator will be found
invaluable for imparting a smooth and well-
contoured finish to the surface of the filler.
Mix up a little filler on a clean piece of card
or board - measure the hardener carefully
(follow the maker’s instructions on the pack)
otherwise the filler will set too rapidly or too
slowly. Using the applicator apply the filler
paste to the prepared area; draw the
applicator across the surface of the filler to
achieve the correct contour and to level the
filler surface. When a contour that
approximates to the correct one is achieved,
stop working the paste - if you carry on too
long the paste will become sticky and begin to
“pick up” on the applicator. Continue to add
thin layers of filler paste at twenty-minute
intervals until the level of the filler is just proud
of the surrounding bodywork.
Once the filler has hardened, excess can be
removed using a metal plane or file. From then
on, progressively finer grades of abrasive
paper should be used, starting with a 40
grade production paper and finishing with 400
grade wet-and-dry paper. Always wrap the
abrasive paper around a flat rubber, cork, or
wooden block otherwise the surface of the
filler will not be completely flat. During the
smoothing of the filler surface the wet-and-dry
paper should be periodically rinsed in water.
This will ensure that a very smooth finish is
imparted to the filler at the final stage.
At this stage the “dent” should be
surrounded by a ring of bare metal, which in
turn should be encircled by the finely
“feathered” edge of the good paintwork.
Rinse the repair area with clean water, until all
the dust produced by the rubbing-down
operation has gone.Spray the whole repair area with a light coat
of primer. This will show up any imperfections
in the surface of the filler. Repair these
imperfections with fresh filler paste or
bodystopper, and again smooth the surface
with abrasive paper. If bodystopper is used, it
can be mixed with cellulose thinners to form a
thin paste that is ideal for filling small holes.
Repeat this spray and repair procedure until
you are satisfied that the surface of the filler,
and the feathered edge of the paintwork are
perfect. Clean the repair area with clean water
and allow to dry fully.
The repair area is now ready for final
spraying. Paint spraying must be carried out
in a warm, dry, windless and dust free
atmosphere. This condition can be created
artificially if you have access to a large indoor
working area, but if you are forced to work in
the open, you will have to pick your day very
carefully. If you are working indoors, dousing
the floor in the work area with water will help
to settle the dust that would otherwise be in
the atmosphere. If the repair area is confined
to one body panel, mask off the surrounding
panels; this will help to minimise the effects of
a slight miss-match in paint colours.
Bodywork fittings (e.g. chrome strips, door
handles, etc.), will also need to be masked off.
Use genuine masking tape and several
thicknesses of newspaper for the masking
operations.
Before beginning to spray, agitate the
aerosol can thoroughly, then spray a test area
(an old tin, or similar) until the technique is
mastered. Cover the repair area with a thick
coat of primer; the thickness should be built
up using several thin layers of paint rather
than one thick one. Using 400 grade
wet-and-dry paper, rub down the surface of
the primer until it is smooth. While doing this,
the work area should be thoroughly doused
with water, and the wet-and-dry paper
periodically rinsed in water. Allow to dry
before spraying on more paint.
Spray on the top coat, again building up the
thickness by using several thin layers of paint.
Start spraying in the centre of the repair area
and then work outwards, with a side-to-side
motion, until the whole repair area and about
2 inches of the surrounding original paintwork
is covered. Remove all masking material 10 to
15 minutes after spraying on the final coat of
paint.
Allow the new paint at least two weeks to
harden, then using a paintwork renovator or a
very fine cutting paste, blend the edges of the
paint into the existing paintwork. Finally, apply
wax polish.
Plastic components
With the use of more and more plastic body
components (e.g. bumpers, spoilers, and in
some cases major body panels), repair of
more serious damage to such items has
become a matter of either entrusting repair
work to a specialist in this field, or renewing
complete components. Repair of suchdamage by the DIY owner is not feasible
owing to the cost of the equipment and
materials required for effecting such repairs.
The basic technique involves making a groove
along the line of the crack in the plastic using
a rotary burr in a power drill. The damaged
part is then welded back together by using a
hot air gun to heat up and fuse a plastic filler
rod into the groove. Any excess plastic is then
removed and the area rubbed down to a
smooth finish. It is important that a filler rod of
the correct plastic is used, as body
components can be made of a variety of
different types (e.g. polycarbonate, ABS,
polypropylene).
Damage of a less serious nature (abrasions,
minor cracks, etc.), can be repaired by the DIY
owner using a two-part epoxy filler repair
material. Once mixed in equal proportions this
is used in similar fashion to the bodywork filler
used on metal panels. The filler is usually
cured in twenty to thirty minutes, ready for
sanding and painting.
If the owner is renewing a complete
component himself, or if he has repaired it
with epoxy filler, he will have a problem of
finding a paint for finishing which is
compatible with the type of plastic used. At
one time the use of a universal paint was not
possible owing to the complex range of
plastics come across in body component
applications. Standard paints, generally, will
not bond to plastic or rubber satisfactorily, but
special paints are available to match any
plastic or rubber finish can be obtained from
dealers. However, it is now possible to obtain
a plastic body parts finishing kit that consists
of a pre-primer treatment, a primer and
coloured top coat. Full instructions are
normally supplied with a kit, but the method of
use is to first apply the pre-primer to the
component concerned and allow it to dry for
up to 30 minutes. Then the primer is applied
and left to dry for about an hour before finally
applying the special coloured top coat. The
result is a correctly coloured component
where the paint will flex with the plastic or
rubber, a property that standard paint does
not normally possess.
5Major body damage - repair
5
Major impact or rust damage should only
be repaired by a Vauxhall dealer or other
competent specialist. Alignment jigs are
needed for successful completion of such
work, superficially effective repairs may leave
dangerous weaknesses in the structure.
Distorted components can also impose
severe stresses on steering and suspension
components with consequent premature
failure.
Bodywork and fittings 11•3
11
Page 107 of 525

6Bonnet - removal and refitting
2
Removal
1Open the bonnet, and support it in the fully
open position.
2On models fitted with an underbonnet lamp,
disconnect the battery negative lead, then
prise the lamp from the bonnet and disconnect
the wiring. If the bonnet is to be refitted, to aid
routing of the wiring on refitting, tie a length of
string to the end of the wiring. Then withdraw
the wiring through the bonnet and untie the
string, leaving it in position in the bonnet.
3Similarly, disconnect the windscreen
washer fluid hose from the connector in the
bonnet, but tie the string to the connector, to
prevent it from slipping into an inaccessible
position in the bonnet.
4Mark the position of the hinges on the
bonnet.
5With the help of an assistant, support the
weight of the bonnet, then unscrew the
securing bolts from the hinges, and lift the
bonnet from the vehicle (see illustration). If the
bonnet is to be refitted, rest it carefully on rags
or cardboard, to avoid damaging the paint.
6If a new bonnet is to be fitted, transfer all
the serviceable fittings (rubber buffers, lock
striker, etc.), to it.
7If desired, the bonnet hinges can be
removed from the vehicle, after unscrewing
the three bolts in each case securing them to
the upper flanges of the front wings.
Refitting
8Refitting is a reversal of removal,
remembering the following points.
9Align the hinges with the previously made
marks on the bonnet.10If the original bonnet is being refitted,
draw the windscreen washer fluid hose, and
where applicable, the underbonnet lamp
wiring, through the bonnet using the string.
11If the lock striker has been disturbed,
adjust it to the dimension shown (see
illustration), then tighten the locknut.
12If necessary, adjust the hinge bolts and
the front rubber buffers until a good fit is
obtained with the bonnet shut.
7Bonnet lock components -
removal and refitting
2
Removal
1Open the bonnet, and support it in the fully
open position.
2The bonnet lock hook is riveted to the
bonnet, and removal involves drilling out the
rivet. Secure the hook assembly with a new
rivet when refitting.
3To remove the bonnet lock striker from the
bonnet, loosen the locknut, then unscrew the
striker and recover the washers and spring.
When refitting, adjust the striker dimension as
described in Section 6, paragraph 11, before
tightening the locknut.
4To remove the locking spring, disconnect
the end of the bonnet release cable from the
spring. Then unhook the end of the spring
from the slot in the front body panel, and
manipulate the spring out through the top of
the panel, taking care not to damage the paint.
Refitting
5Refitting is a reversal of removal.
6On completion, close the bonnet and check
that the lock and the bonnet release
mechanism operate satisfactorily.
8Bonnet lock release cable -
removal and refitting
2
Removal
1Open the bonnet, and support it in the fully
open position.
2Unscrew the release cable clip from the
front body panel.
3Disconnect the end of the release cable
from the locking spring under the front body
panel.
4Disconnect the release cable from the
release handle in the driver’s footwell. If
necessary, remove the release handle from its
retainer for access to the cable end.
5Pull the cable assembly through the
grommet in the engine compartment
bulkhead into the engine compartment.
6Release the cable from any remaining clips
and cable-ties, and withdraw it from the
engine compartment.
Refitting
7Refitting is a reversal of removal, but ensure
that the cable is correctly routed, and on
completion check the release mechanism for
satisfactory operation.
9Boot lid (Saloon models) -
removal and refitting
2
Removal
1Open the bonnet lid fully.
2On models with central locking, disconnect
the battery negative lead then disconnect the
wiring from the lock solenoid. If the boot lid is
11•4Bodywork and fittings
6.5 Lifting the bonnet from the vehicle
6.11 Bonnet lock striker adjustment
X = 40.0 to 45.0 mm (1.57 to 1.77 in) measured from bonnet panel to washer (9)
7 Locknut8 Spring9 Washer10 Striker pinTo aid refitting mark the
position of the bonnet
before removal.
Page 108 of 525

to be refitted, tie a length of string to the end
of the wiring. Then feed the wiring through the
boot lid and untie the string, leaving it in
position in the boot lid to assist refitting.
3Mark the position of the hinges on the boot
lid.
4With the help of an assistant, support the
weight of the boot lid, then unscrew the
securing bolts from the hinges, and lift the
boot lid from the vehicle. If the boot lid is to be
refitted, rest it carefully on rags or cardboard,
to avoid damaging the paint.
5If a new boot lid is to be fitted, transfer all
the serviceable fittings (rubber buffers, lock
mechanism, etc.), to it.
6If desired, the boot lid hinge counter-
balance springs can be removed, but before
unhooking them from the vehicle body, note
their position so that they can be refitted in
their original positions (see illustration). Use
a lever to unhook the springs.
Refitting
7Refitting is a reversal of removal,
remembering the following points.
8Align the hinges with the precisely made
marks on the boot lid.
9Where applicable, draw the central locking
solenoid wiring through the boot lid, using the
string.
10If necessary, adjust the hinge bolts and
the rubber buffer until a good fit is obtained
with the boot lid shut.
11If necessary, adjust the position of the
lock striker on the body, to achieve
satisfactory lock operation.
10Boot lid lock (Saloon
models) - removal and
refitting
2
Removal
1Open the boot lid fully.
2Unscrew the two securing screws, then
withdraw the lock and disconnect the
operating rod.
Refitting
3Refitting is a reversal of removal, but if
necessary adjust the position of the lock
striker on the body, to achieve satisfactory
lock operation.
11Boot lid lock cylinder
(Saloon models) - removal
and refitting
2
Removal
1Open the boot lid fully.
2Unscrew the two securing nuts, then
withdraw the lock cylinder complete with the
housing, and disconnect the operating rods(s).
3To remove the lock cylinder from the
housing, insert the key into the lock, then
extract the circlip and the operating lever
assembly from the end of the lock cylinder,
and withdraw the cylinder from the housing.
Refitting
4Refitting is a reversal of removal, but check
the operations of the lock on completion (see
illustration).
12Tailgate (Hatchback models)
-removal and refitting
2
Removal
1Open the tailgate fully.
2Disconnect the battery negative lead.
3Remove the securing screws, and withdraw
the tailgate trim panels.
4Disconnect all the relevant wiring now
exposed, and disconnect the washer fluid
hose.5If the original tailgate is to be refitted, tie
string to the ends of all the relevant wires, and
if necessary the washer fluid hose, then feed
the wiring and the hose through the top edge
of the tailgate. Untie the string, leaving it in
position in the tailgate to assist refitting.
6Prise off the rear roof trim panel, taking care
not to break the securing clips, and lower the
rear of the headlining slightly for access to the
tailgate hinge securing screws (see
illustrations). Mark the hinge positions on the
body.
7Have an assistant support the weight of the
tailgate, then disconnect the tailgate struts
from their mounting balljoints, with reference
to Section 15.
8Ensure that the tailgate is adequately
supported, then remove the hinge securing
screws and withdraw the tailgate from the
vehicle. If the tailgate is to be refitted, rest it
carefully on rags or cardboard, to avoid
damaging the paint.
9If desired, the hinges can be removed from
the tailgate by driving out the hinge pins.
10If the tailgate can be moved up and down
on its hinges due to wear in the hinge pins or
their holes, it may be possible to drill out the
holes and fit slightly oversize pins. Consult a
Vauxhall dealer for further advice.
11If a new tailgate is to be fitted, transfer all
serviceable components to it.
Refitting
12Refitting is a reversal of removal,
remembering the following points.
13Align the hinges with the previously made
marks on the body.
Bodywork and fittings 11•5
12.6B . . . for access to the tailgate hinge
screws12.6A Prise off the rear roof trim panel . . .
11.4 Boot lid/tailgate lock cylinder
components
1 Lock cylinder
2 Housing
3 Operating lever assembly
4 Circlip
9.6 Boot lid hinge counterbalance spring
locations - Saloon models
1 Position for basic boot lid
2 Position for boot lid with outer plastic
trim panel or spoiler
3 Position for boot lid with outer plastic
trim panel and spoiler
11
Page 109 of 525
 through the tailgate, using the
string.
15If necessary, adjust the hinge bolts and
the rubber buf")
14If the original tailgate is being refitted,
draw the wiring and washer fluid hose (where
applicable) through the tailgate, using the
string.
15If necessary, adjust the hinge bolts and
the rubber buffers, to obtain a good fit when
the tailgate is shut.
16If necessary, adjust the position of the
lock striker on the body, to achieve
satisfactory lock operation.
13Tailgate lock (Hatchback
models) - removal and
refitting
2
Proceed as described in Section 10, but
note that for access to the lock, the rear
tailgate trim panel must be removed, after
unscrewing the securing screws. Note also
that the lock is secured by three screws (see
illustration).
14Tailgate lock cylinder
(Hatchback models) -
removal and refitting
2
Proceed as described in Section 11, but
note that for access to the lock cylinder, the
rear tailgate trim panel must be removed after
unscrewing the securing screws (see
illustration).
15Tailgate strut (Hatchback
models) - removal and
refitting
2
Removal
1Open the tailgate fully, and have an
assistant support it.
2Release the strut from its mounting
balljoints by prising the spring clips a little way
out (see illustration), and pulling the strut off
the balljoints. If the strut is to be re-used, do
not remove the spring clips completely, and
do not prise them out further than 6.0 mm
(0.24 in).
Refitting
3Refitting is a reversal of removal.
16Door - removal and refitting
3
Front door
Removal
1The door hinges are welded onto the door-
frame and the body pillar, so that there is no
provision for adjustment or alignment.
2To remove a door, open it fully and support
it under its lower edge on blocks covered with
pads of rag.
3Where applicable, disconnect the battery
negative lead, and disconnect the wiring
connector from the front edge of the door. To
release the connector, twist the locking collar,
then pull the connector from the socket in the
door (see illustration).
4Using a punch, drive the large roll pin from
the door check arm pivot.
5Remove the plastic covers from the hinge
pins, then drive out the pins using a punch.
Have an assistant support the door as the
pins are driven out, then withdraw the door
from the vehicle.
Refitting
6Refitting is a reversal of removal, using a
new check link roll pin.
7If the door can be moved up and down on
its hinges due to wear in the hinge pins or
their holes, it may be possible to drill out the
holes and fit slightly oversize pins. Consult a
Vauxhall dealer for further advice.8Door closure may be adjusted by altering
the position of the lock striker on the body
pillar, using an Allen key or hexagon bit.
Rear door
9The removal and refitting procedure for
rear doors is as described for front doors.
Note that on models with central locking or
electric windows, it will be necessary to
remove the door inner trim panel, as
described in Section 17, disconnect the
wiring harness and feed it through the front
edge of the door.
17Door inner trim panel -
removal and refitting
2
Front door
Removal
1Prise the trim plate from the door lock
button in the top rear edge of the door, then
pull the lock button from the lock operating
rod.
2On models with manually operated
windows, release the securing clip and
remove the window regulator handle. To
release the securing clip, insert a length of
wire with a hooked end between the handle
and the trim bezel on the door trim panel, and
manipulate it to free the securing clip from the
handle (see illustration). Take care not to
damage the door trim panel.
3Prise the plastic surround from the door
interior handle (see illustration).
11•6Bodywork and fittings
15.2 Prising the spring clip from a tailgate
strut balljoint
17.2 Window regulator handle securing
clip16.3 Disconnect the wiring connector
from the front edge of the door
14.1 Tailgate lock cylinder housing - with
central locking (trim panel removed)13.1 Tailgate lock (trim panel removed)
Page 110 of 525

4Remove the seven trim panel securing
screws that are located along the bottom
edge of the door, and around the bottom
edge of the armrest/hand grip. Release the
door pocket clip, which is located below and
to the rear of the door pocket, out of view.
5The remaining nine plastic clips securing
the trim panel to the door must now be
released. This can be done using a
screwdriver, but it is preferable to use a
forked tool, to minimise the possibility of
damage to the trim panel and the clips. The
clips are located around the outer edge of the
trim panel.
6Once the clips have been released, pull the
trim panel away from the door, and push the
large clip at the rear of the door pocket
rearwards to allow the trim panel to be
withdrawn.
7When working on the driver’s door of
models with electric door mirrors, it will be
necessary to disconnect the mirror switch
wiring connectors as the trim panel is
withdrawn. Disconnect the battery negative
lead before disconnecting the connector, and
note the position of the connector in the
bracket at the top of the door (see
illustration).
8Similarly on models with door-mounted
kerb lights, prise out the lamp and disconnect
the wiring.
9The plastic insulating sheet can be removed
from the door after removing the loudspeaker
(referring to Chapter 12 if necessary), and the
door trim panel rear securing clip, which is
attached to the door by a single screw. Take
care not to damage the sheet.10The door pocket can be removed from the
door trim panel by the three securing screws
that are accessible from the rear of the trim
panel, and releasing the single clip.
11If desired, the door assist handle can be
prised free from the door trim panel. Take
care not to damage the securing clips.
Refitting
12Refitting is a reversal of removal,
remembering the following points.
13If the plastic insulating sheet has been
removed from the door make sure that it is
refitted intact, and securely glued to the door.
If the sheet is damaged or detached,
rainwater may leak into the vehicle or damage
the door trim.
14Where applicable, ensure that the door
mirror switch wiring connector is correctly
positioned in its bracket before refitting the
trim panel.
15Ensure that all the trim panel securing
clips engage as the panel is refitted, and if any
of the clips were broken during removal,
renew them on refitting.
Rear door
Removal
16Proceed as described in paragraphs 1 to 3
inclusive.
17On models with a door-mounted electric
window operating switch, disconnect the
battery negative lead, then carefully prise the
switch from the door trim panel and
disconnect the wiring plug.
18Remove the three trim panel securing
screws. Two are located under the interior
handle surround, and the third is situated at
the base of the door assist handle.
19Proceed as described in paragraph 5.
20Once the securing clips have been
released, pull the trim panel away from the
door (see illustration).
21If desired, the plastic insulating sheet can
be removed from the door by peeling it back
from the door skin. Take care not to damage
the sheet.
22If desired, the door assist handle can be
prised free from the door trim panel. Take
care not to damage the securing clips.
Refitting
23Refitting is a reversal of removal,
remembering the following points.24If the plastic insulating sheet has been
removed from the door, make sure that it is
refitted intact, and securely glued to the door.
If the sheet is damaged or detached,
rainwater may leak into the vehicle or damage
the door trim.
25Where applicable, ensure that the electric
window switch wiring is routed so that it does
not foul the window regulator mechanism.
26Ensure that all the trim panel securing
clips engage as the panel is refitted, and if any
of the clips were broken during removal,
renew them on refitting.
18Door interior handle -
removal and refitting
2
Removal
1Remove the door inner trim panel, as
described in Section 17.
2Slide the handle assembly rearwards to free
it from the door, then unhook the operating
rod, and withdraw the assembly.
Refitting
3Refitting is a reversal of removal, but
check the mechanism for satisfactory
operation before refitting the door inner trim
panel, then refit the trim panel with reference
to Section 17.
19Door exterior handle -
removal and refitting
3
Front door
Removal
1Remove the door inner trim panel, as
described in Section 17.
2Peel back the plastic insulating sheet
sufficiently to gain access to the exterior
handle.
3Unscrew the two nuts securing the exterior
handle to the door.
4When working on the driver’s door of
models with central locking, unclip the
microswitch from the rear edge of the exterior
handle assembly.
5Release the two lower retaining clips, then
manipulate the exterior handle assembly
through the outside of the door, and
disconnect the operating rods.
Refitting
6Refitting is a reversal of removal, but check
the operation of the mechanism before
refitting the door inner trim panel, and refit the
trim panel with reference to Section 17.
Rear door
Removal
7Fully lower the window, then continue as
described in paragraphs 1 and 2.
Bodywork and fittings 11•7
17.20 Removing a rear door inner trim
panel17.7 Mirror switch wiring connector in
bracket at top of door
17.3 Remove the plastic surround from the
door interior handle
11
Page 111 of 525

8Pull the weatherstrip from the rear edge of
the window aperture, then unscrew the now
exposed window rear guide rail securing
screw. Note that the screw is of the Torx type.
9Unscrew the remaining window rear guide
rail securing screw (Torx type) which is
accessible through the inner door skin, then
withdraw the guide rail from the door. The
weatherstrip can be left attached to the guide
rail, in which case position the guide rail to
one side out of the way, taking care not to
damage the vehicle paintwork.
10Reach in through the aperture in the rear
of the door, and unclip the plastic shield from
the door lock.
11Unscrew the three Torx type lock securing
bolts from the rear edge of the door, and
lower the lock assembly inside the door.
12Unscrew the two nuts securing the
exterior handle to the door.
13Release the two lower retaining clips, then
manipulate the exterior handle through the
outside of the door, and disconnect the
operating rods.
Refitting
14Refitting is a reversal of removal, but
check the operation of the door lock, handle
and window regulator mechanisms before
refitting the door trim panel, and refit the trim
panel with reference to Section 17.
20Door lock barrel - removal
and refitting
3
Removal
1Remove the door exterior handle, as
described in Section 19.
2Insert the key into the lock, then extract the
circlip from the end of the lock cylinder (see
illustration).
3Withdraw the lock cylinder using the key,
and recover the lever assembly (see
illustrations).
Refitting
4 Refitting is a reversal of removal, but check
the operation of the door lock, handle and
window regulator mechanisms before refitting
the door trim panel, and refit the trim panel
with reference to Section 17.
21Door lock -removal and
refitting
3
Front door
Removal
1Remove the door inner trim panel, as
described in Section 17.
2Unscrew the door trim panel rear securing
clip, and peel the plastic insulating sheet back
from the rear end of the door. Take care not to
damage the sheet.
3Working through the apertures in the door,
disconnect the operating rods from the
interior and exterior handles, and release the
clips on the door, where applicable (see
illustration).
4Reach in through the lower door aperture
and unclip the plastic shield from the lock.
5On models with central locking, lower the
window half way. Disconnect the battery
negative lead and working through the lower
aperture in the door, disconnect the wiring
plug from the central locking motor. Note that
a clip must be depressed to release the wiring
plug.
6Unscrew the three Torx bolts securing the
lock assembly to the rear edge of the door.
Then manipulate the lock assembly (complete
with central locking motor, where applicable,
and operating rods), around the window
regulator mechanism and out through the
lower door aperture (see illustration).
Refitting
7Refitting is a reversal of removal, but check
the operation of the door lock, handle, and
window regulator mechanisms before refitting
the door trim panel, and refit the trim panel
with reference to Section 17. If the lock
operation is not satisfactory, note that the
exterior handle operating rod can be adjusted
by turning the knurled plastic adjuster wheel
at the end of the rod (see illustration).
Rear door
Removal
8Fully lower the window, then remove the
door inner trim panel and the plastic insulating
sheet, as described in Section 17.
9Working through the apertures in the door,
disconnect the operating rods from the
interior and exterior handles, and from the
lock button bellcrank.
11•8Bodywork and fittings
20.2 Extract the circlip from the end of the
lock cylinder . . .20.3B . . . and recover the lever assembly
21.7 Exterior handle operating rod
adjuster wheel (arrowed) at lock end of rod21.6 Removing the lock assembly - model
with central locking
21.3 View of removed door lock and
exterior handle assembly, showing
operating rod attachments
20.3A . . . then withdraw the lock cylinder
using the key . . .
Page 112 of 525

10Pull the weatherstrips from the rear edge
of the window aperture, then unscrew the
now-exposed window rear guide rail securing
screw. Note that the screw is of the Torx type.
11Unscrew the remaining window rear guide
rail securing screw (Torx type), which is
accessible through the inner door skin, then
withdraw the guide rail from the door. The
weatherstrip can be left attached to the guide
rail, in which case position the guide rail to
one side out of the way, taking care not to
damage the vehicle paintwork.
12Reach in through the aperture in the rear
of the door, and unclip the plastic shield from
the lock (see illustration).
13On models with central locking,
disconnect the battery negative lead (if not
already done) and disconnect the wiring plug
from the central locking motor. Note that a
clip must be depressed to release the wiring
plug.
14Unscrew the three Torx bolts securing the
lock assembly to the rear edge of the door.
Then manipulate the lock assembly (complete
with central locking motor, where applicable,
and operating rods), around the window
regulator mechanism and out through the
lower door aperture.
Refitting
15Proceed as described in paragraph 7.
22Door check arm -removal
and refitting
3
Removal
1Open the door fully, then using a punch,
drive the roll pin from the door check arm
pivot.
2Remove the door inner trim panel, as
described in Section 17.
3Working at the front edge of the door,
unscrew the two bolts securing the check arm
to the door, then withdraw the check arm
through the inside of the door.
Refitting
4Refitting is a reversal of removal, but use a
new roll pin to secure the check arm to the
pivot.
23Windscreen and rear
window - removal and refitting
5
1Except for the rear quarter windows, all
fixed glass is bonded in position, using a
special adhesive.
2Special tools, adhesives and expertise are
required for successful removal and refitting
of glass fixed by this method. Such work must
therefore be entrusted to a Vauxhall dealer or
a windscreen specialist.
3The same remarks apply if sealing of the
windscreen or other glass surround is
necessary.
24Rear quarter windows -
removal and refitting
3
Removal
1Remove the upper rear quarter trim panel,
as described in Section 36.
2Have an assistant support the quarter
window from outside the vehicle, then
unscrew the plastic securing nuts, and push
the window from the body (see illustration).
Refitting
3Refitting is a reversal of removal, but ensure
that the seal on the rear of the glass is seated
correctly against the body as the window is
fitted.
25Door window - removal and
refitting
3
Front door
Removal
1Fully lower the window, then remove the
door inner trim panel and the plastic insulating
sheet, as described in Section 17.
2Unscrew the window rear guide rail
securing bolt from the rear edge of the door,
then manipulate the guide rail out through the
lower aperture in the door.
3Pull the weatherstrips from the inside and
outside lower edge of the window aperture.
4Pull the plastic end stop from the window
upper guide rail (see illustration).
5Remove the two screws securing the lower
guide rail to the door, and lower the guide rail
(see illustration).
6Manipulate the window regulator
mechanism as necessary, and tilt the window
glass forwards until it can be withdrawn from
outside the door through the window
aperture.
Refitting
7Refitting is a reversal of removal, but adjust
the angle of the lower guide rail by means of
the two securing screws until smooth
operation of the window is achieved. Refit the
door inner trim panel with reference to
Section 17.
8On models with electric windows, on
completion, the electronic control system
must be programmed as follows.
9Close all the doors, and switch on the
ignition.
10Close each window in turn, using the
relevant switch, and when each window has
fully closed, continue to keep the switch
depressed for at least five seconds.
Rear door
Removal
11Fully lower the window, then remove the
door inner trim panel and the plastic insulating
sheet, as described in Section 17.
Bodywork and fittings 11•9
25.4 Window upper guide rail plastic end
stop (arrowed)25.5 Window lower guide rail securing
screws (arrowed)
24.2 Upper rear quarter trim panel
removed, exposing rear quarter window
securing nut (arrowed)21.12 Unclip the plastic shield from the
lock
11
 1
1 2
2 3
3 4
4 5
5 6
6 7
7 8
8 9
9 10
10 11
11 12
12 13
13 14
14 15
15 16
16 17
17 18
18 19
19 20
20 21
21 22
22 23
23 24
24 25
25 26
26 27
27 28
28 29
29 30
30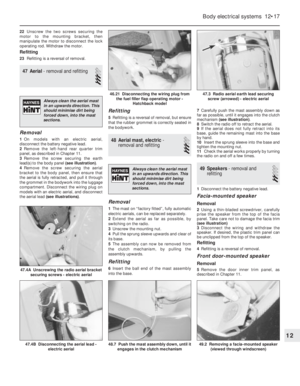 31
31 32
32 33
33 34
34 35
35 36
36 37
37 38
38 39
39 40
40 41
41 42
42 43
43 44
44 45
45 46
46 47
47 48
48 49
49 50
50 51
51 52
52 53
53 54
54 55
55 56
56 57
57 58
58 59
59 60
60 61
61 62
62 63
63 64
64 65
65 66
66 67
67 68
68 69
69 70
70 71
71 72
72 73
73 74
74 75
75 76
76 77
77 78
78 79
79 80
80 81
81 82
82 83
83 84
84 85
85 86
86 87
87 88
88 89
89 90
90 91
91 92
92 93
93 94
94 95
95 96
96 97
97 98
98 99
99 100
100 101
101 102
102 103
103 104
104 105
105 106
106 107
107 108
108 109
109 110
110 111
111 112
112 113
113 114
114 115
115 116
116 117
117 118
118 119
119 120
120 121
121 122
122 123
123 124
124 125
125 126
126 127
127 128
128 129
129 130
130 131
131 132
132 133
133 134
134 135
135 136
136 137
137 138
138 139
139 140
140 141
141 142
142 143
143 144
144 145
145 146
146 147
147 148
148 149
149 150
150 151
151 152
152 153
153 154
154 155
155 156
156 157
157 158
158 159
159 160
160 161
161 162
162 163
163 164
164 165
165 166
166 167
167 168
168 169
169 170
170 171
171 172
172 173
173 174
174 175
175 176
176 177
177 178
178 179
179 180
180 181
181 182
182 183
183 184
184 185
185 186
186 187
187 188
188 189
189 190
190 191
191 192
192 193
193 194
194 195
195 196
196 197
197 198
198 199
199 200
200 201
201 202
202 203
203 204
204 205
205 206
206 207
207 208
208 209
209 210
210 211
211 212
212 213
213 214
214 215
215 216
216 217
217 218
218 219
219 220
220 221
221 222
222 223
223 224
224 225
225 226
226 227
227 228
228 229
229 230
230 231
231 232
232 233
233 234
234 235
235 236
236 237
237 238
238 239
239 240
240 241
241 242
242 243
243 244
244 245
245 246
246 247
247 248
248 249
249 250
250 251
251 252
252 253
253 254
254 255
255 256
256 257
257 258
258 259
259 260
260 261
261 262
262 263
263 264
264 265
265 266
266 267
267 268
268 269
269 270
270 271
271 272
272 273
273 274
274 275
275 276
276 277
277 278
278 279
279 280
280 281
281 282
282 283
283 284
284 285
285 286
286 287
287 288
288 289
289 290
290 291
291 292
292 293
293 294
294 295
295 296
296 297
297 298
298 299
299 300
300 301
301 302
302 303
303 304
304 305
305 306
306 307
307 308
308 309
309 310
310 311
311 312
312 313
313 314
314 315
315 316
316 317
317 318
318 319
319 320
320 321
321 322
322 323
323 324
324 325
325 326
326 327
327 328
328 329
329 330
330 331
331 332
332 333
333 334
334 335
335 336
336 337
337 338
338 339
339 340
340 341
341 342
342 343
343 344
344 345
345 346
346 347
347 348
348 349
349 350
350 351
351 352
352 353
353 354
354 355
355 356
356 357
357 358
358 359
359 360
360 361
361 362
362 363
363 364
364 365
365 366
366 367
367 368
368 369
369 370
370 371
371 372
372 373
373 374
374 375
375 376
376 377
377 378
378 379
379 380
380 381
381 382
382 383
383 384
384 385
385 386
386 387
387 388
388 389
389 390
390 391
391 392
392 393
393 394
394 395
395 396
396 397
397 398
398 399
399 400
400 401
401 402
402 403
403 404
404 405
405 406
406 407
407 408
408 409
409 410
410 411
411 412
412 413
413 414
414 415
415 416
416 417
417 418
418 419
419 420
420 421
421 422
422 423
423 424
424 425
425 426
426 427
427 428
428 429
429 430
430 431
431 432
432 433
433 434
434 435
435 436
436 437
437 438
438 439
439 440
440 441
441 442
442 443
443 444
444 445
445 446
446 447
447 448
448 449
449 450
450 451
451 452
452 453
453 454
454 455
455 456
456 457
457 458
458 459
459 460
460 461
461 462
462 463
463 464
464 465
465 466
466 467
467 468
468 469
469 470
470 471
471 472
472 473
473 474
474 475
475 476
476 477
477 478
478 479
479 480
480 481
481 482
482 483
483 484
484 485
485 486
486 487
487 488
488 489
489 490
490 491
491 492
492 493
493 494
494 495
495 496
496 497
497 498
498 499
499 500
500 501
501 502
502 503
503 504
504 505
505 506
506 507
507 508
508 509
509 510
510 511
511 512
512 513
513 514
514 515
515 516
516 517
517 518
518 519
519 520
520 521
521 522
522 523
523 524
524