Page 2024 of 2389
2. INSTALL RING GEAR
(a) Clean the contact surface of the differential case.
(b) Heat the ring gear to about 100
°C (212°F) in an oil bath.
NOTICE: Do not heat the ring gear above 110°C (230°F).
(c) Clean the contact surface of the ring gear with cleaning
solvent.
(d) Quickly install the ring gear on the differential case.
Install the sixteen bolts.
HINT: Align the matchmarks on the differential left case
and contact the ring gear.
(e) Tighten the set bolts uniformly and a little at a time.
Torque the bolts.
Torque: 1,260 kg±cm (91 ft±Ib, 124 N±m)
(j) Using a torx wrench, install and ,torque the sixteen
torx screws.
Torx wrench T50 09042±00040
Torque: 640 k9±cm (46 ft±Ib, 63 N±m)
Using a plastic hammer, carefully tap the differen-
tial case. (h) Align the matchmarks on the differential cases.
± MANUAL TRANSAXLEComponent PartsMT±92
Page 2025 of 2389
7. INSTALL TRANSMISSION CASE
(a) Install the transmission case.
HINT: If necessary, tap on the case with a plastic ham-
mer.
(b) Install and torque the seventeen bolts.
Torque: 300 kg±cm (22 ft±lb, 29 N±m)
3. INSTALL SIDE BEARING '
Using SST and a press, install the side bearings onto
the differential case.
SST 09316±20011, 09506±35010
HINT: Press the bearing on the ring gear side first.
5. INSTALL DIFFERENTIAL CASE ASSEMBLY
Install the differential case assembly to the transaxle
case.
6. INSTALL OUTPUT SHAFT ASSEMBLY
Lift up the differential case, install the output shaft as-
sembly. 4. ADJUST OUTPUT SHAFT ASSEMBLY PRELOAD
(See pages MT±96 to 98)
± MANUAL TRANSAXLEComponent PartsMT±93
Page 2026 of 2389

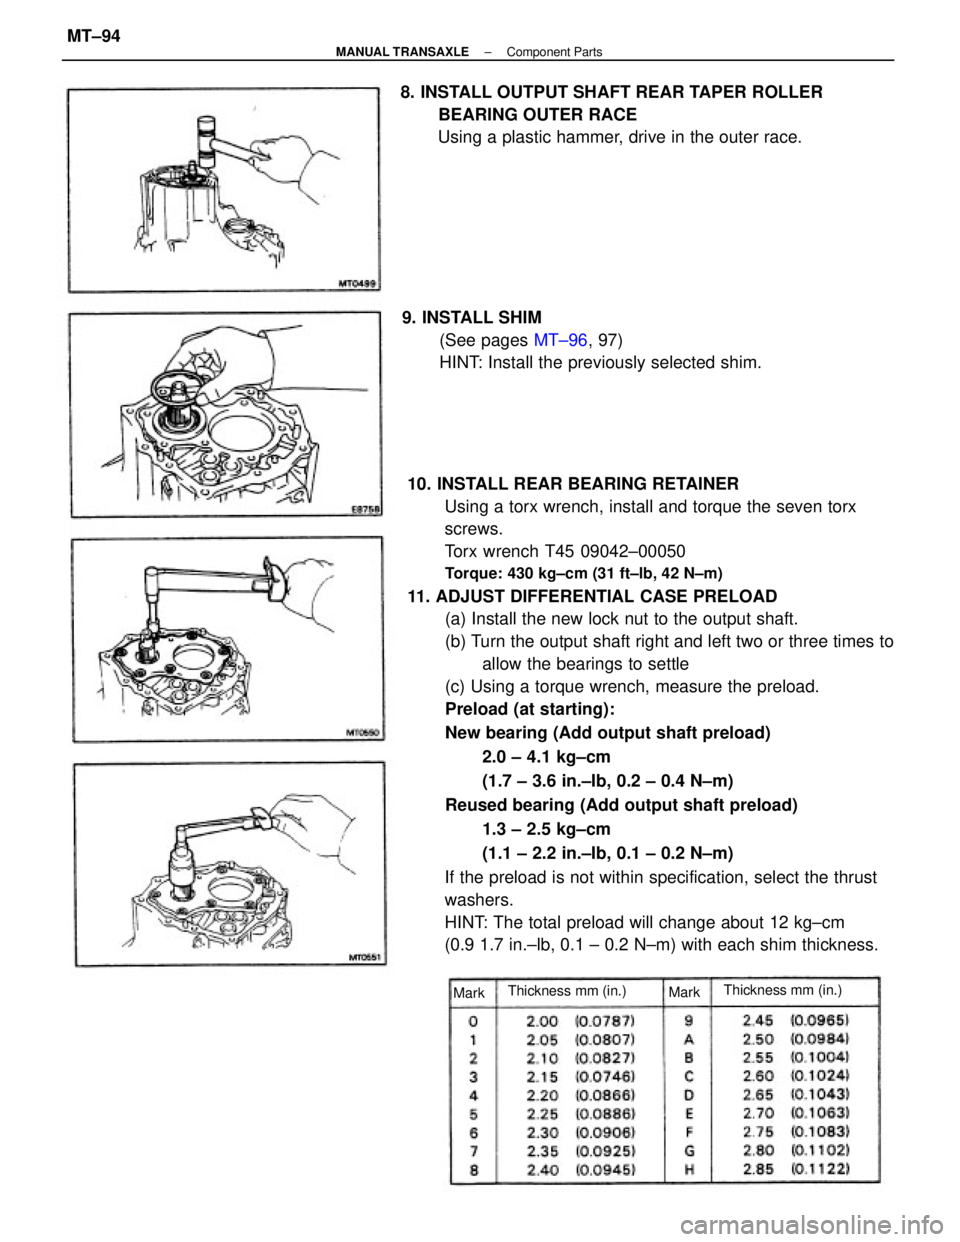
10. INSTALL REAR BEARING RETAINER
Using a torx wrench, install and torque the seven torx
screws.
Torx wrench T45 09042±00050
Torque: 430 kg±cm (31 ft±lb, 42 N±m)
11. ADJUST DIFFERENTIAL CASE PRELOAD
(a) Install the new lock nut to the output shaft.
(b) Turn the output shaft right and left two or three times to
allow the bearings to settle
(c) Using a torque wrench, measure the preload.
Preload (at starting):
New bearing (Add output shaft preload)
2.0 ± 4.1 kg±cm
(1.7 ± 3.6 in.±Ib, 0.2 ± 0.4 N±m)
Reused bearing (Add output shaft preload)
1.3 ± 2.5 kg±cm
(1.1 ± 2.2 in.±Ib, 0.1 ± 0.2 N±m)
If the preload is not within specification, select the thrust
washers.
HINT: The total preload will change about 12 kg±cm
(0.9 1.7 in.±lb, 0.1 ± 0.2 N±m) with each shim thickness. 8. INSTALL OUTPUT SHAFT REAR TAPER ROLLER
BEARING OUTER RACE
Using a plastic hammer, drive in the outer race.
9. INSTALL SHIM
(See pages MT±96, 97)
HINT: Install the previously selected shim.
Thickness mm (in.)Thickness mm (in.)
MarkMark
± MANUAL TRANSAXLEComponent PartsMT±94
Page 2027 of 2389
12. REMOVE REAR BEARING RETAINER
Using torx wrench, remove the seven torx screws and
rear bearing retainer.
Torx wrench T45 09042±00050
13. REMOVE SHIM
14. REMOVE TRANSMISSION CASE
Remove the seventeen bolts and tap off the case with a
plastic hammer.
15. REMOVE OUTPUT SHAFT ASSEMBLY
16. REMOVE DIFFERENTIAL CASE ASSEMBLY
± MANUAL TRANSAXLEComponent PartsMT±95
Page 2030 of 2389
(k) Remove the lock nut.
(I) Using a torx wrench, remove the seven torx screws
and rear bearing retainer.
Torx wrench T45 09042±00050
6. INSTALL OUTPUT SHAFT ASSEMBLY
(a) Lift up the differential case, install the output shaft as-
sembly. (m)) Remove the shim.
(n) Remove the seventeen bolts and transmission
case.
(o) Remove the output shaft assembly.
4. INSTALL DIFFERENTIAL CASE ASSEMBLY
5. INSTALL OIL PUMP DRIVE GEAR
± MANUAL TRANSAXLEComponent PartsMT±98
Page 2031 of 2389
8. INSTALL NO.2 SHIFT FORK AND NO.3 SHIFT FORK
SHAFT WITH REVERSE SHIFT FORK
(a) Install the No.2 shift fork to the No.2 hub sleeve. 7. INSTALL SNAP RINGS
(a) Using a plastic hammer, install the snap rings to the
No±1, No±2 and No±3 shift fork shafts. (b) Leaning the output shaft to the differential side, install
the input shaft assembly.
(b) Using a plastic hammer, install the reverse shift
fork and snap ring to the No.3 shift fork shaft.
(b) Install the No.3 shift fork shaft with reverse shift
fork.
± MANUAL TRANSAXLEComponent PartsMT±99
Page 2040 of 2389

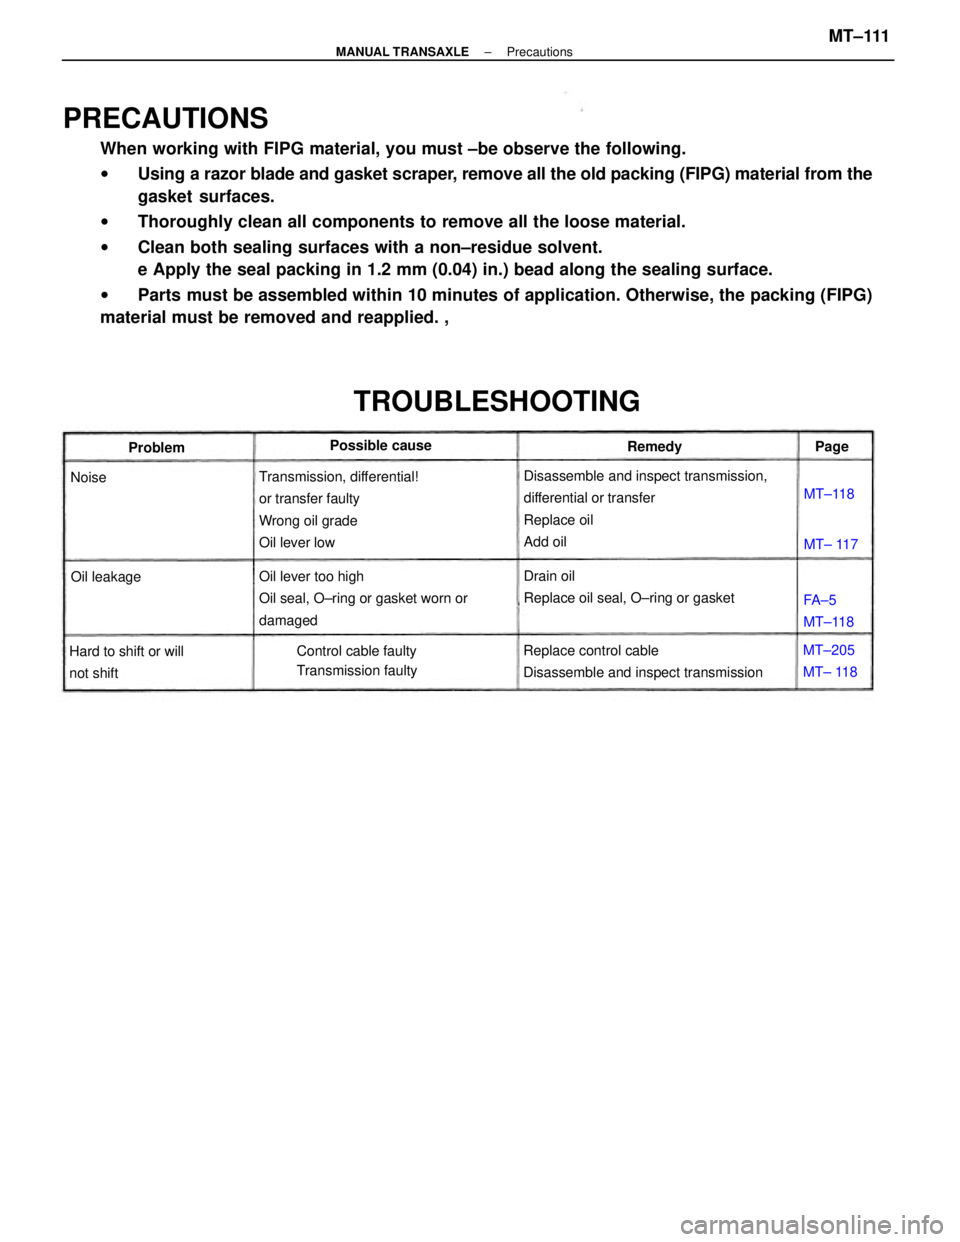
PRECAUTIONS
When working with FIPG material, you must ±be observe the following.
wUsing a razor blade and gasket scraper, remove all the old packing (FIPG) material from the
gasket surfaces.
wThoroughly clean all components to remove all the loose material.
wClean both sealing surfaces with a non±residue solvent.
e Apply the seal packing in 1.2 mm (0.04) in.) bead along the sealing surface.
wParts must be assembled within 10 minutes of application. Otherwise, the packing (FIPG)
material must be removed and reapplied. ,
Disassemble and inspect transmission,
differential or transfer
Replace oil
Add oil Transmission, differential!
or transfer faulty
Wrong oil grade
Oil lever low
Oil lever too high
Oil seal, O±ring or gasket worn or
damaged
Replace control cable
Disassemble and inspect transmissionDrain oil
Replace oil seal, O±ring or gasket
TROUBLESHOOTING
Control cable faulty
Transmission faulty Hard to shift or will
not shiftPossible cause
MT±205
MT± 118FA±5
MT±118 Oil leakageProblemRemedy
MT±118
MT± 117 NoisePage
± MANUAL TRANSAXLEPrecautionsMT±111
Page 2041 of 2389

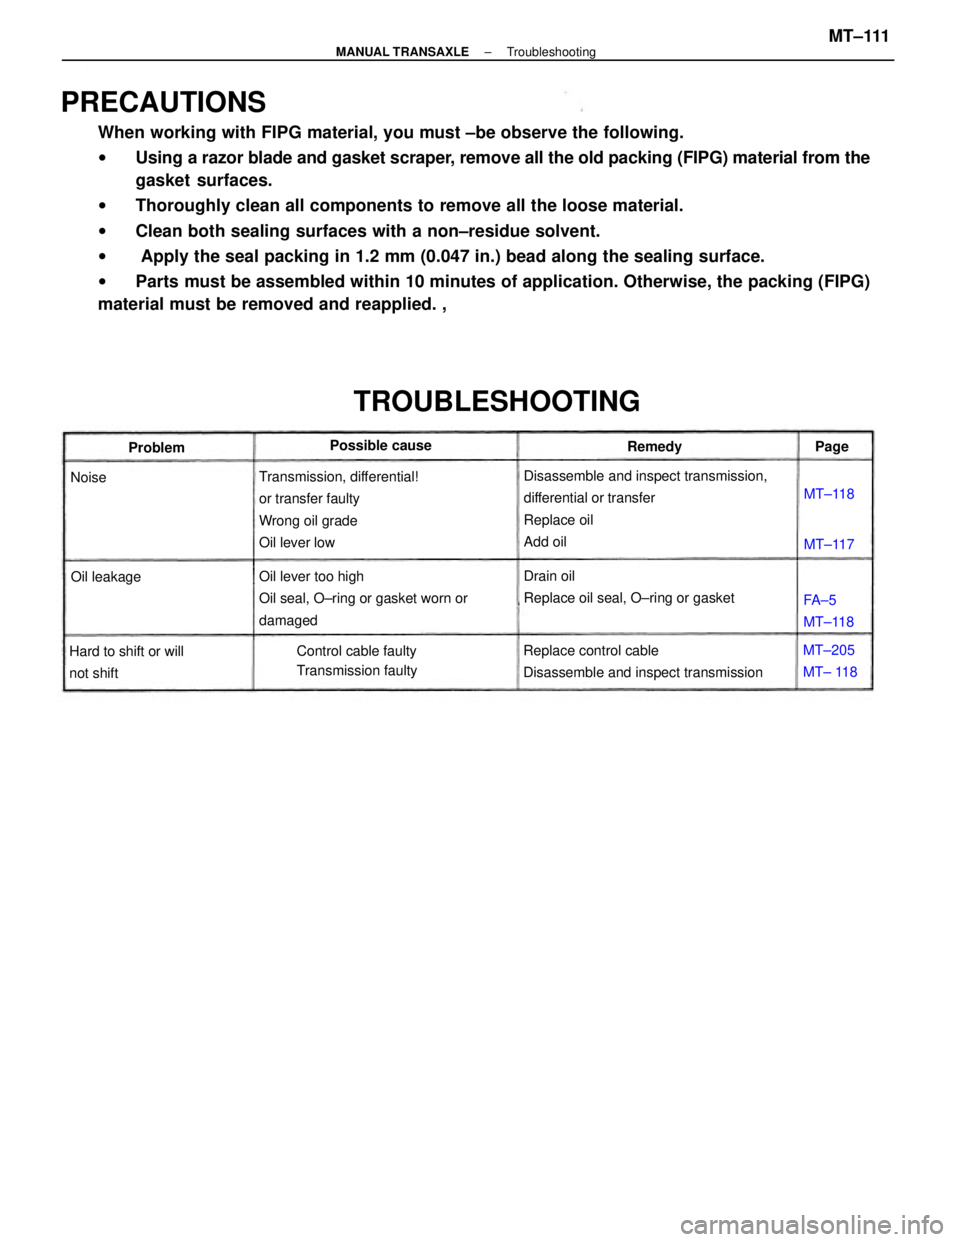
PRECAUTIONS
When working with FIPG material, you must ±be observe the following.
wUsing a razor blade and gasket scraper, remove all the old packing (FIPG) material from the
gasket surfaces.
wThoroughly clean all components to remove all the loose material.
wClean both sealing surfaces with a non±residue solvent.
w Apply the seal packing in 1.2 mm (0.047 in.) bead along the sealing surface.
wParts must be assembled within 10 minutes of application. Otherwise, the packing (FIPG)
material must be removed and reapplied. ,
Disassemble and inspect transmission,
differential or transfer
Replace oil
Add oil Transmission, differential!
or transfer faulty
Wrong oil grade
Oil lever low
Oil lever too high
Oil seal, O±ring or gasket worn or
damaged
Replace control cable
Disassemble and inspect transmissionDrain oil
Replace oil seal, O±ring or gasket
TROUBLESHOOTING
Control cable faulty
Transmission faulty Hard to shift or will
not shiftPossible cause
MT±205
MT± 118FA±5
MT±118 Oil leakageProblemRemedy
MT±118
MT±117 NoisePage
± MANUAL TRANSAXLETroubleshootingMT±111