2014 MITSUBISHI OUTLANDER SPORT stop start
[x] Cancel search: stop startPage 230 of 388
Rear-view camera*
Starting and driving 7-67
7
onds. Even after the buzzer and display hasstopped warning, the indicator lamp (A) on“SONAR” switch will continue blinking untilthe system reverts to the normal state. Havethe vehicle inspected at a MITSUBISHIMOTORS Authorised Service Point.
E00618401603
The rear-view camera is a system that showsthe view behind the vehicle on a screen of theMitsubishi Multi Communication System(MMCS) or the DISPLAY AUDIO.
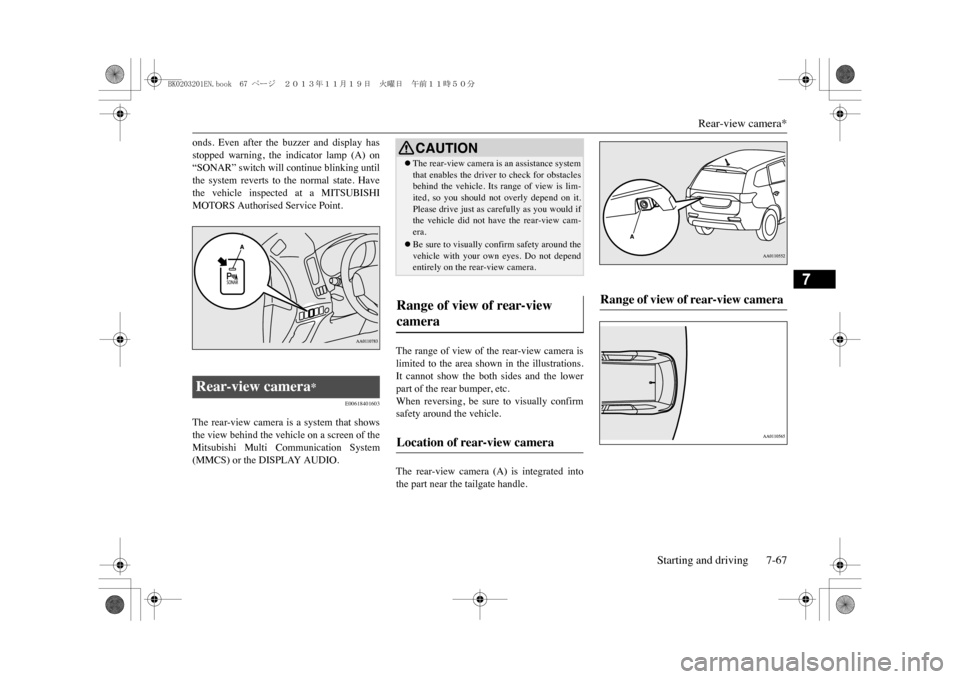
The range of view of the rear-view camera islimited to the area shown in the illustrations.It cannot show the both sides and the lowerpart of the rear bumper, etc.When reversing, be sure to visually confirmsafety around the vehicle.The rear-view camera (A) is integrated intothe part near the tailgate handle.
Rear-view camera
*
CAUTION�zThe rear-view camera is an assistance systemthat enables the driver
to check for obstacles
behind the vehicle. Its
range of view is lim-
ited, so you should not overly depend on it.Please drive just as car
efully as you would if
the vehicle did not have the rear-view cam-era.�zBe sure to visually confirm safety around thevehicle with your own
eyes. Do not depend
entirely on the rear-view camera.
Range of view of rear-view camera
Location of rear-view camera
Range of view of rear-view camera
BK0203201EN.book 67 ページ 2013年11月19日 火曜日 午前11時50分
Page 234 of 388
Towing caravans and trailersStarting and driving 7-71
7
E00610401405
Yo u r v e h i c l e h a s q u a l i t i e s w h i c h m a k e i t w e l lsuited for normal towing operations provideda few recommendations are observed. Theseare primarily concerne
d with the prevention
of overloading of the vehicle and with theselection of the proper equipment. If theseprecautions are taken and driving habits areregulated accordingly, the effects of towingtrailers and caravans can be minimized.It should be noted that damage to the vehiclecaused directly or indirectly by operatingunder conditions outside the limits set out onthis page will void the warranty, relative tosuch damage.
The legal authorities require that a trailer orcaravan be fitted with stop, tail and turn sig-nal lamps. An electrical kit can be fitted byyour authorized MITSUBISHI MOTORSdealer which meets legal requirements andcan be left on your vehicle permanently. Itmay be necessary to fit additional rear visionmirrors to both sides of your vehicle to giveclear vision past your trailer or caravan.Ensure that your trailer or caravan complieswith the regulations of the particular State inwhich you are travelling, e. g. lighting, safetychains, brakes, mass, etc. Check that yourtowbar tongue does not obscure your vehi-cle’s number plate when the trailer or caravanis disconnected. If it does, remove the tongueensuring that it is refitted securely when refit-ted.
The maximum payload of the towing vehicledoes not exceed the requirements of eachmaximum mass described in the “Vehiclemass”. See “Specifications” for the payloadinformation.Having established compliance with the Stateregulations for permissible towing loads and
To w i n g c a r a v a n s a n d t r a i l -ers
WA R N I N G�zWhen connecting the trailer with ElectricTr a i l e r B r a k e ( E T B )
, use MITSUBISHI
MOTORS GENUINE ETB harness.�zIf using an ETB harness other than MIT-SUBISHI MOTORS GENUINE parts, anunexpected reduction in drive force mayoccur when using the manual trailerbrake override which co
uld lead to insta-
bility and increase the risk of an accident.
CAUTION�zMITSUBISHI MOTORS recommends theuse of MITSUBISHI MOTORS towingequipment where it is available. No recom-mendation is made as to the make of equip-ment which may be used if MITSUBISHIMOTORS equipment is not available.�zThe loads specified apply only if a MITSUB-ISHI MOTORS GENUINE Parts Tow Barand other specified equipment is used.
State re gulations
Permissible towing load and requirements
CAUTION�zThe trailer brake and towing hitch require-ments as specified are minimum require-ments only and MITSUBISHI MOTORSrecommend that a trailer brake and a loaddistributing hitch is used whenever you aretowing, to improve
stopping distance and
towing stability.When using a load distributing hitch the loadon the trailer tyres increases. Do not exceedthe trailer tyre load rating.With all towing operations it is important tolimit the towing vehicle payload as noted.Failure to do so may result in exceeding themaximum load rating of the tyres. This rat-ing is marked on the tyre placard and mayalso be displayed on
the tyre sidewall.
Setting up for towing
BK0203201EN.book 71 ページ 2013年11月19日 火曜日 午前11時50分
Page 235 of 388
Towing caravans and trailers7-72 Starting and driving
7
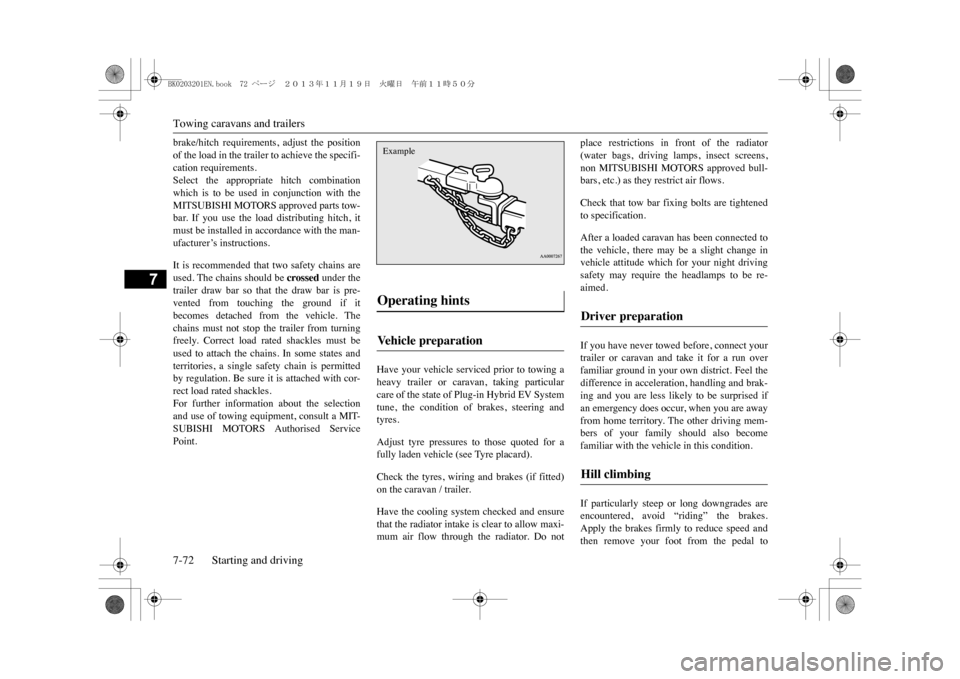
brake/hitch requirements, adjust the positionof the load in the trailer to achieve the specifi-cation requirements.Select the appropriate hitch combinationwhich is to be used in conjunction with theMITSUBISHI MOTORS approved parts tow-bar. If you use the load distributing hitch, itmust be installed in accordance with the man-ufacturer’s instructions.It is recommended that two safety chains areused. The chains should be
crossed
under the
trailer draw bar so that the draw bar is pre-vented from touching the ground if itbecomes detached from the vehicle. Thechains must not stop the trailer from turningfreely. Correct load rated shackles must beused to attach the chains. In some states andterritories, a single safety chain is permittedby regulation. Be sure it is attached with cor-rect load rated shackles.For further information about the selectionand use of towing equipment, consult a MIT-SUBISHI MOTORS Authorised ServicePoint.
Have your vehicle serviced prior to towing aheavy trailer or caravan, taking particularcare of the state of Plug-in Hybrid EV Systemtune, the condition of brakes, steering andtyres.Adjust tyre pressures to those quoted for afully laden vehicle (see Tyre placard).Check the tyres, wiring and brakes (if fitted)on the caravan / trailer.Have the cooling system checked and ensurethat the radiator intake is clear to allow maxi-mum air flow through the radiator. Do not
place restrictions in front of the radiator(water bags, driving lamps, insect screens,non MITSUBISHI MOTORS approved bull-bars, etc.) as they restrict air flows.Check that tow bar fixing bolts are tightenedto specification.After a loaded caravan has been connected tothe vehicle, there may be a slight change invehicle attitude which for your night drivingsafety may require the headlamps to be re-aimed.If you have never towed before, connect yourtrailer or caravan and take it for a run overfamiliar ground in your own district. Feel thedifference in acceleration, handling and brak-ing and you are less likely to be surprised ifan emergency does occur, when you are awayfrom home territory. The other driving mem-bers of your family should also becomefamiliar with the vehicle in this condition.If particularly steep or long downgrades areencountered, avoid “riding” the brakes.Apply the brakes firmly to reduce speed andthen remove your foot from the pedal to
Operating hints Ve h i c l e p r e p a r a t i o n Example
Driver preparation Hill climbing
BK0203201EN.book 72 ページ 2013年11月19日 火曜日 午前11時50分
Page 236 of 388
Towing caravans and trailersStarting and driving 7-73
7
allow air to cool the brakes between applica-tions.Furthermore, it might be able to reduce theload of the brakes by using the regenerativebrake force.Leave plenty of room between the front ofyour vehicle and the preceding vehicle.If the caravan begins to sway or becomes dif-ficult to handle, gently slow down or applythe independent trailer brakes (if fitted) NOTthe vehicle brakes. Stop the vehicle andtrailer in a safe location. Examine the tyres ofthe trailer closely for damage. If you find thedamage of tyre, it is recommended that tyresbe inspected by a MITSUBISHI MOTORSAuthorised Service Point or a tyre retailerbefore proceeding further. Note that treadseparation [separation of the tread band fromthe body of the tyre] of trailer tyres which areaged, and/or loaded near their load limit, canbe difficult to detect, especially on caravanswhere tyres are covered.One cause of swaying is poor trailer balanceand until this has been overcome the swayingwill recur. Relocate the load in your trailer orcaravan and re-assess the problem.If the wheels of your vehicle, the trailer orcaravan leave the road surface and enter the
unsealed edge of the road, resist the urge topull it back quickly. Wait for a section wherethe levels of the road and unsealed edge arecomparable and then ease back onto thesealed section of the road with as little swayas possible.Try to maximise the distance between yourcaravan and passing or overtaking semi-trail-ers or other heavy vehicles. This will reducethe suction forces between the two and mini-mise disturbance of the caravan.Do not apply the brakes severely, be alert andanticipate trouble far enough ahead to enableyou to apply the brakes smoothly and evenly.Do not make any manoeuvres before ensuringthat the road behind and in front of your vehi-cle is clear.This will normally occur as a result of somemechanical failure. If your vehicle shouldoverheat, stop and check for a loose or brokenwater pump drive belt/ oil pump/cooling oil, ablocked radiator air intake or a low coolantlevel. If these items are satisfactory the over-heating could be caused by a number of
mechanical causes that would have to bechecked at a MITSUBISHI MOTORSAuthorised Service Point.If your vehicle is in good mechanical condi-tion and it overheats due to heavy traffic con-ditions or high air temperatures, additionalcooling may be obtained by the followingmethods:�zReduce your speed by 15 km/h if towingat high speeds.
Normal cruising
Braking Overheating
CAUTION�zIf the engine overheats,
reference should be
made to “Engine overheating” section of“For emergencies” prior to taking any cor-rective action.
BK0203201EN.book 73 ページ 2013年11月19日 火曜日 午前11時50分
Page 243 of 388
Automatic climate control air conditioner8-6 For pleasant driving
8
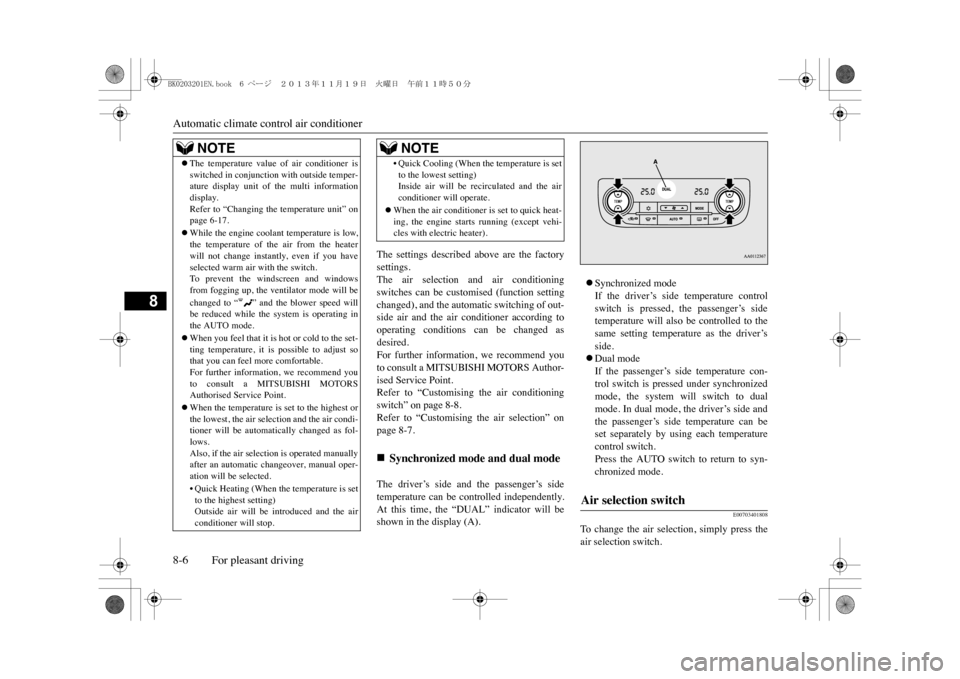
The settings described above are the factorysettings.The air selection and air conditioningswitches can be customised (function settingchanged), and the automatic switching of out-side air and the air conditioner according tooperating conditions can be changed asdesired.For further information, we recommend youto consult a MITSUBISHI MOTORS Author-ised Service Point.Refer to “Customising the air conditioningswitch” on page 8-8.Refer to “Customising the air selection” onpage 8-7.The driver’s side and the passenger’s sidetemperature can be controlled independently.At this time, the “DUAL” indicator will beshown in the display (A).
�zSynchronized modeIf the driver’s side temperature controlswitch is pressed, the passenger’s sidetemperature will also be controlled to thesame setting temperature as the driver’sside.�zDual modeIf the passenger’s side temperature con-trol switch is pressed under synchronizedmode, the system will switch to dualmode. In dual mode, the driver’s side andthe passenger’s side temperature can beset separately by using each temperaturecontrol switch.Press the AUTO switch to return to syn-chronized mode.
E00703401808
To change the air selection, simply press theair selection switch.
NOTE
�zThe temperature value of air conditioner isswitched in conjunction
with outside temper-
ature display unit of the multi informationdisplay.Refer to “Changing the temperature unit” onpage 6-17.�zWhile the engine coolant temperature is low,the temperature of th
e air from the heater
will not change instantly, even if you haveselected warm air with the switch.To p r e v e n t t h e w i n d s c r e e n a n d w i n d o w sfrom fogging up, the ventilator mode will bechanged to “ ” and the blower speed willbe reduced while the system is operating inthe AUTO mode.�zWhen you feel that it is hot or cold to the set-ting temperature, it is possible to adjust sothat you can feel more comfortable.For further information, we recommend youto consult a MITSUBISHI MOTORSAuthorised Service Point.�zWhen the temperature is set to the highest orthe lowest, the air selection and the air condi-tioner will be automatically changed as fol-lows.Also, if the air selec
tion is operated manually
after an automatic changeover, manual oper-ation will be selected.•Quick Heating (When the temperature is setto the highest setting)Outside air will be introduced and the airconditioner will stop.
•Quick Cooling (When the temperature is setto the lowest setting)Inside air will be r
ecirculated and the air
conditioner will operate.
�zWhen the air conditioner is set to quick heat-ing, the engine starts
running (except vehi-
cles with electric heater).
�
Page 259 of 388
Operation Keys8-22 For pleasant driving
8
E00737100023E00737200024
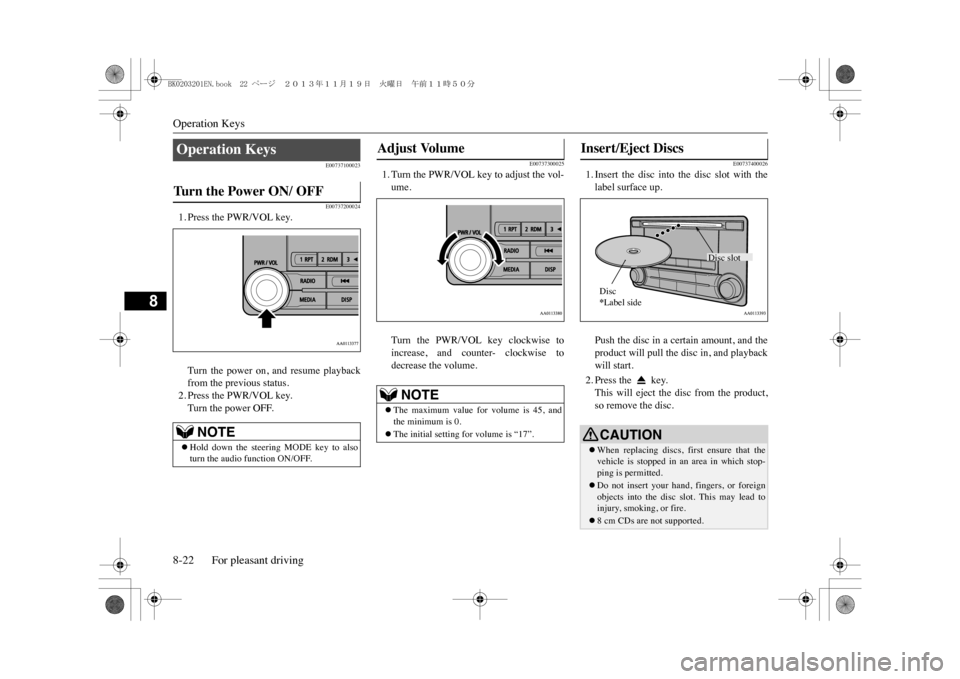
1. Press the PWR/VOL key.Turn the power on, and resume playbackfrom the previous status.2. Press the PWR/VOL key.Turn the power OFF.
E00737300025
1. Turn the PWR/VOL key to adjust the vol-ume.Turn the PWR/VOL key clockwise toincrease, and counter- clockwise todecrease the volume.
E00737400026
1. Insert the disc into the disc slot with thelabel surface up.Push the disc in a certain amount, and theproduct will pull the disc in, and playbackwill start.2. Press the key.This will eject the disc from the product,so remove the disc.
Operation Keys Tu r n t h e P o w e r O N / O F F
NOTE
�zHold down the steering MODE key to alsoturn the audio
function ON/OFF.
Adjust Volume
NOTE
�zThe maximum value for volume is 45, andthe minimum is 0.�zThe initial setting for volume is “17”.
Insert/Eject Discs
CAUTION�zWhen replacing discs, first ensure that thevehicle is stopped in an area in which stop-ping is permitted.�zDo not insert your hand, fingers, or foreignobjects into the disc slot. This may lead toinjury, smoking, or fire.�z8 cm CDs are not supported.
Disc slot
Disc*Label side
BK0203201EN.book 22 ページ 2013年11月19日 火曜日 午前11時50分
Page 262 of 388
Listen to Radio
For pleasant driving 8-25
8
Turn the /SEL key to the frequency to lis-ten to.Collective search for stations that can bereceived.Press the SCAN key.When a station is received, this is played for 5seconds, then the product searches for thenext station.
Register the broadcast station in advance, andselect this at a later time.1. Tune in to the frequency to register.2. Hold down any of the keys from the 1RPTkey to the 6 key.A “Beep” sounds, and the preset key isregistered.
The top 6 stations with a strong signal can beautomatically registered in order with presetkeys in the AUTO-P mode.Hold down the AUTO-P key.Switch to the AUTO-P mode, and start auto-matic station selection.After completion of operations, the productwill receive the station registered in the presetkey [1].
Manual/Seek Station Selection
/SEL key(counter-clockwise)
Reduces the frequency being received.
/SEL key(clockwise)
Increases the frequency being received.
key
(hold down)
Release the button to start seek station selection, and when a station is received, scanning stops.
key
(hold down)Scan Station Selection
NOTE
�zPress this button again while receiving thestation to return to normal reception.
Preset Memory
NOTE
�zThe preset memory can register a maximumof 6 stations for each band.�zIf a preset key that al
ready has a station reg-
istered is selected, then this is overwrittenwith the new preset.�zPressing the preset key will select the previ-ously registered frequency.
Auto Preset
CAUTION�zPlease be aware that the formerly-registeredfrequency in the memory will be overwrit-ten.NOTE
�zSeparate to normal re
ception preset keys,
this registers in preset keys in the AUTO-Pmode.�zPressing the preset key will select the previ-ously registered frequency.�zEach time the AUTO-P key is pressed, thisswitches between normal reception andAUTO-P mode.�zIn the AUTO-P mode, manual/seek stationselection, as well as scan operation is alsopossible.
BK0203201EN.book 25 ページ 2013年11月19日 火曜日 午前11時50分
Page 265 of 388
Listen to an iPod8-28 For pleasant driving
8
2. Press the /SEL key.Files within the selected folder are dis-played.3. Turn the /SEL key to select the file.4. Press the /SEL key.This plays the selected file (track).
E00738001071
By connecting commercially-availableiPod/iPhone devices to this product, you canplay back tracks on these through the product.
NOTE
�zWhile the folder is selected, press the 6key to cancel track search mode.�zIf there is no operation for 10 seconds afterselecting the folder, th
en track search mode
will be cancelled.�zSelect the folder, and hold down the
/SEL key to start playback from the first
track in that folder.�zWhile the file is selected, press the 6 keyto return to the previous operation.�zWhile the file is selected, hold down the6 key to cancel track search mode.�zIf there is no operation for five seconds afterselecting the file, that file is played back.�zDisc operations such as selecting a track willcancel track search mode.
Listen to an iPod
CAUTION�zDo not leave the iP
od/iPhone unattended in
the vehicle.�zNever hold these devices in your hand tooperate while driving,
as this is dangerous.
�zNo indemnification for data loss resultingwhen the iPod/iPhone is
connected to the
product will be possible.�zDepending on how the devices are handled,audio files being damaged or lost, thereforeit is recommended that data be backed up.NOTE
�zDepending on the generati
on, model, or soft-
ware version of th
e iPod/iPhone, playback
on this product may not be possible.(�mP. 8 - 1 3 ) A d d i t i o n a l l y, p l a y b a c k a s
explained in this docum
ent may not be possi-
ble.�zRegarding details such as types ofiPod/iPhone that can be connected to equip-ment by type, and types of files that can beplayed back, refer to “Types of connectabledevices and supported f
ile specifications” on
page 8-63.
�zUsage of iPod/iPhone hardware with the lat-est software version is recommended.�zRegarding how to connect the iPod/iPhone,refer to “How to connect an iPod” on page8-62.�zWhen connecting the iPod/iPhone, use acommercially-available iPod connectioncable.�zSet up the device in order that no unsafeactions, such as plugging in the connectioncable are taken while driving.�zWhen inserting and removing theiPod/iPhone, for safety’s sake first stop thevehicle.�zDepending on the status of the iPod/iPhone,it may take some time until the device is rec-ognized, or playback starts.�zDepending on the iPod/iPhone, the buttonfunctions on the product may not operatewhile the iPod/iPhone is connected.�ziPod/iPhone specifications and settings maymean that connection is not possible, orresult in differences in operation or display.�zDepending on audio data in the iPod/iPhone,track information may not be displayed cor-rectly.�zDepending on the status of the vehicle anddevice, the iPod/iPhone may not play backafter starting the Plug-in Hybrid EV system.�zData containing copyri
ght information may
not play back.�zIt is recommended
that the iPod/iPhone
equaliser settings be set to flat.NOTE
BK0203201EN.book 28 ページ 2013年11月19日 火曜日 午前11時50分