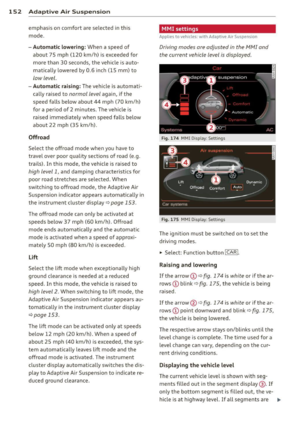
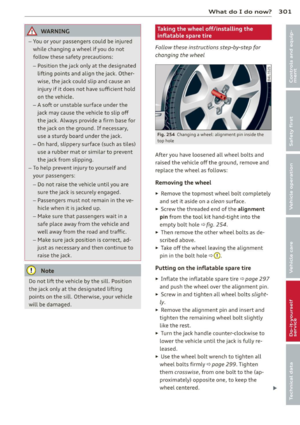
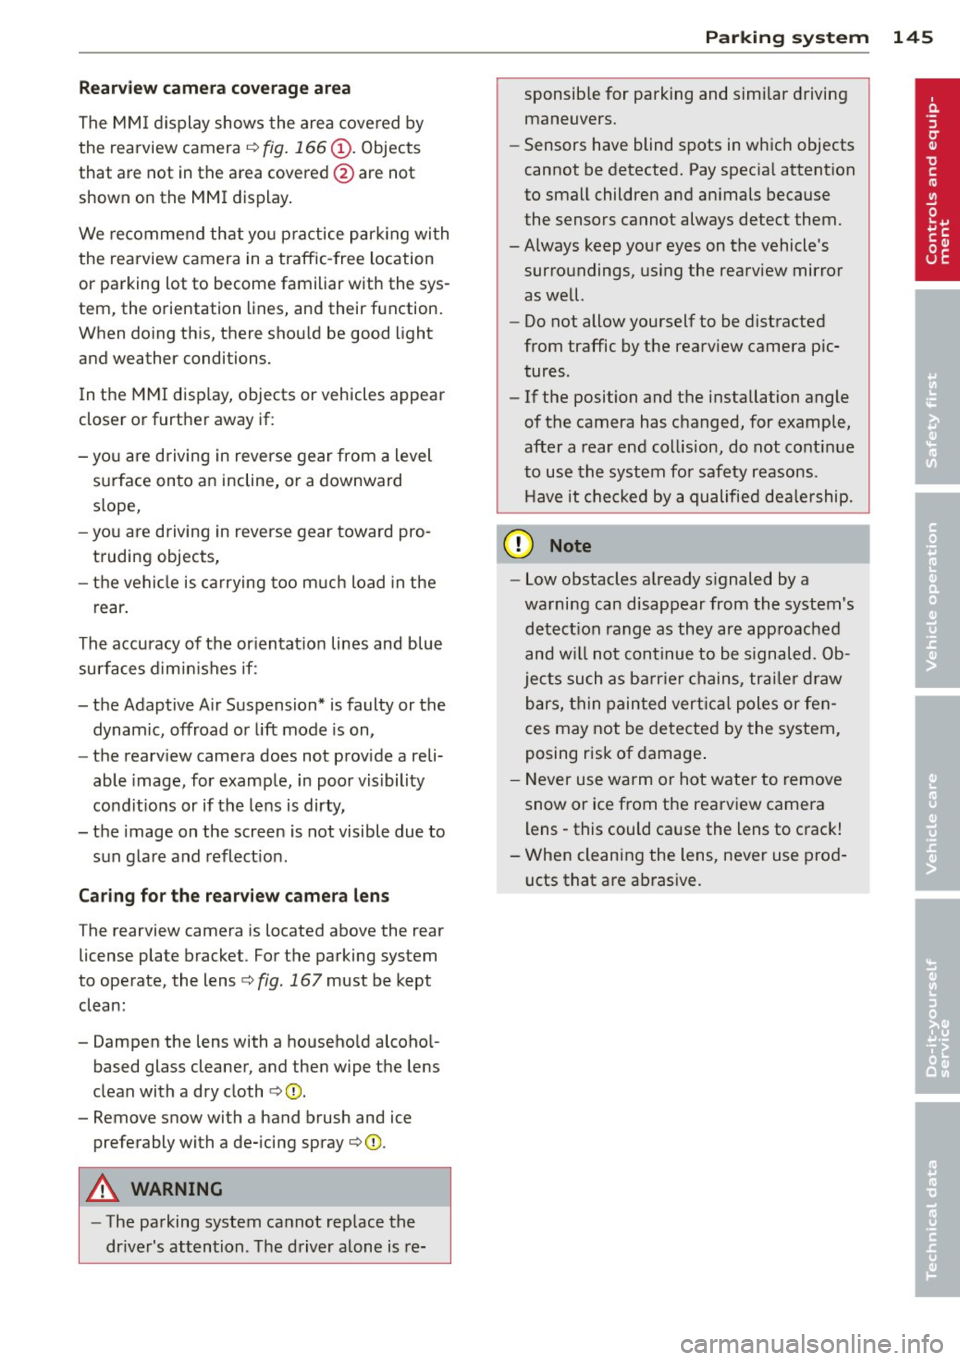
Page 145 of 342

Parking system
General information
App lies to vehicles: with rea r park assis t/Audi park ing sys
tem plus w ith rearview camera
There are two different park assist systems
avai lab le depending on your vehicle's equip
ment leve l.
The
r ea r p ark ass is t is an acoustic park assist
system that will give you a sound warning to let you know there is something
behind the
veh icle
¢ page 143.
The Aud i p arki ng sys te m p lus with rea rvie w
ca mera
audibly and visually tells you there is
something
in front of and behind the veh icle.
A rearview camera also shows you what is be
hind the veh icle. This image he lps you when
parallel parking or reverse parking
¢ page 144.
@ Tips
The sensors must be kept clean and free of
snow and ice for the park assist to operate.
Rear park assist
Description
App lies to vehicles: with rear park assist
The rear pork assist is on audible system.
Sensors are located in the rear bumpers. If
these detect an obstacle, audible signals warn
you. The range at which the sensors begin to measure is approximately:
side 2 ft (0.60 m)
rear center
5.2 ft (1.60 m)
T he closer you get to the obstacle, the shorter
the interval between the audible signals. A continuous tone sounds when the obstacle is
less than approximately 1 foot (0 .30 meters)
away . Do not cont inue driving farther .
If the d istance to an obstacle remains con
stant, the volume of the d istance warning
gradually drops after about four seconds (th is
does not apply in the continuous tone range) .
Parking system 143
The park assist is activated automatica lly
when reverse gear is engaged. A short confir
mation tone sounds.
_& WARNING
- The parking system cannot replace the driver's attention. The driver alone is re
sponsible for parking and similar driving maneuvers .
- Sensors have blind spots in wh ich objects
cannot be detected. Pay spec ial attent ion
to small children and an imals because
the sensors cannot always detect them.
- Always keep your eyes on the vehicle 's
surroundings, us ing the rea r view mirror
as well.
(D) Note
Low obstacles already signaled by a warn
i ng can d isappear from the system's detec
tion range as they are approached and w ill
not cont inue to be signaled. Objects such
as barrier chains, trailer d raw bars, th in
painted vertica l poles or fences may not be
detected by the system, posing risk of
damage.
(D Tips
- Please follow the instructions for tow ing
a trailer
¢page 149.
-Yo u can change the vo lume and pi tch of
the signals
¢ page 148.
-
Page 146 of 342

144 Parking system
Audi parking system
plus with rearview
camera
Introduction
Appl ies to vehicles: with Audi parking system plus w ith
rearview camera
Fig. 164 Pa rking mo de 1 : Backing into a parkin g space
Fig. 165 Parking mode 2: parallel parking
Vehicles with the Audi park ing system plus
with rearview camera a re equipped w ith a
r ea rvie w ca mera in addition to the acoust ic
and v isual park ing system.
You can chooses between park ing modes to
he lp you when parking your vehicle. Use
"park ing mode
1" when parking in a parking
space or garage
r=;, fig. 164. If you are going to
be paralle l parking, use "park ing mode 2"
r::;:, fig. 165.
General Information
Applies to vehicles: w ith Audi park ing system plus with
rearview camera
F ig . 1 66 Area covered © and area not covered @by
the rea rview came ra.
F ig. 167 Rea r lid : Location of the rearview camera
Sen so rs in the bumper
Sensors are located in the front and rear
bumpers. If these detect an obstacle, audible
and visual signals warn you. The range at
which the sensors begin to measure is approx
imately:
fro nt side
3 ft (0.90
m)
center 4 ft (1.20 m)
side 2 ft (0.60 m)
rea
r
center 5.2 ft (1.60 m)
The closer you get to the obstacle, the shorter
the interval between the aud ible signals. A
continuous tone sounds when the obstacle is
less than approximately 1 foot (0.30 meters)
away . Do not continue dr iv ing farther .
If the distance to an obstacle remains con
sta nt, the volume of the distance warning
gradually drops after about four seconds (this
doe s not apply in the cont inuo us tone range). .,._
Page 147 of 342

Rearv iew cam era c overage a rea
The MM I display shows the area covered by
the rearview camera c:>
fig. 166 (!). Objects
that are not in the area covered @are not
shown on the MMI display .
We recommend that yo u practice parking with
the rearview camera in a traffic-free location
or parking lot to become familiar with the sys
tem, the orientation lines, and their function.
When do ing th is, there should be good light
and weather conditions.
I n the MMI disp lay, objects or vehicles appear
closer or further away if:
- you are driving in reverse gear from a level
s u rface onto an incline, or a downward
s lope,
- you are driving in reverse gear toward pro
truding objects,
- the vehicle is carrying too much load in the
rear .
The accuracy of the or ientat ion lines and blue
surfaces dimin ishes if:
- the Adaptive A ir Suspension* is faulty or the
dynamic, offroad or lift mode is on,
- the rearv iew camera does not provide a reli
able image, for example, in poor visibility
cond it ions or if the lens is dirty,
- the image on the screen is not visible due to sun glare and reflection.
Ca ring for the rear view c amer a len s
The rearview camera is located above the rear
license plate bracket . For the parking system
to operate, the lens
c:> fig. 167 must be kept
clean:
- Dampen the lens with a househo ld alcoho l
based glass cleaner, and then wipe the lens
clean with a dry cloth c:>0 .
- Remove snow with a hand brush and ice
preferably with a de-icing spray
c:> ([).
A WARNING
-The parking system cannot rep lace the
dr iver's attention. The driver alone is re-
-
Par king system 145
sponsib le for parking and simi lar d riving
maneuvers.
- Sensors have blind spots in which objects
cannot be detected. Pay spec ia l attention
to small children and an imals because
the sensors cannot always detect them.
-Always keep your eyes on the vehicle's surroundings, us ing the rearview mirror
as well.
- Do not allow yourself to be distracted
from traffic by the rearv iew camera pic
tures .
- If the position and the installation angle
of the camera has changed, for example,
after a rear end collision, do not continue
to use the system for safety reasons.
H ave it checked by a qualified dea le rship.
(D Note
- Low obstacles a lready s ignaled by a
warning can disappear from the system's
detect ion range as they are approached
and w ill not continue to be s ignaled. Ob
jects such as ba rr ie r chains, trai le r d raw
bars, thin painted vert ica l poles or fen
ces may not be detected by the system,
posing r isk of damage .
- Never use warm or hot wate r to remove
snow or ice from the rearview camera
lens -this could cause the lens to crack!
- When cleaning the lens, never use prod
ucts that are ab rasive.
Page 148 of 342

146 Parking system
Switching on and off
Applies to vehicles: with Audi parking system plus w ith
rea rview camera
The reorview camera switches on automati
cally together with the acoustic and visual
pork assist when you put the vehicle in re verse .
Fig. 168 Ce nter console: Park ing system switc h
Fig. 169 MMI display: visual d istance d isplay
Switching on
> Switch the MMI on and se lect reverse gear.
> Switc h on the Adaptive Air Suspension*
comfort or automatic mode.
> To use the front pa rking system , press the
switch P"1t in the center console
c:> fig. 168. A
short confirmat ion tone sou nds a nd the in
di ca to r li ght in the swi tch lights up.
Switching betwe en the r earview camera
and visual display
> Press the Graphi c control button
¢
page 147, fig. 170@to see the v isua l
display.
> Press the Rea r view contro l button to see
the rearview camera image
<=:> fig. 169.
Switching off
> Drive faster than 6 mph (10 km/h), or
> press the sw itch P 1t or
> switch off the ignition.
Segm ents in the visual display
The red segments in fro nt of and behind the
vehicle
<=:> fig. 169 help you to determ ine t he
distan ce between yo u and an obstacle. As
your vehicle comes close r to the obstacle, the
segments move closer to the vehicle . The co l
lision area has been reached when the next to
l ast segment is displayed . Do not continue
driving farther ¢
& in General Information
on page
145!
A WARNING
-
- The MMI d isplay cannot show, or ca nnot
adequately show, certain objects (such as
sma ll posts or grating), recesses in the
g rou nd a nd p rot ruding pa rts on ano ther
car.
- Onl y use t he rearview camera to ass ist
you i f it shows a good, clear pic ture. For
examp le, the image may be affec ted by
the sun s hining into the lens, d irt on the
lens or if there is a defect.
- Use the rearv iew came ra only wi th the
rear lid comp lete ly closed . Make s ure any
objects you may have mounted on the
rear lid do not b lock the rearview cam
era.
(D Tips
- The sensors m ust be kept clean and free
of snow and ice for the park assist to op
erate.
- The visua l display is shown in the ill us
tration of the rearview camera. Th is dis
play shows where the sensors have de
tected an obstacle.
- You can change the volume and pitch of
the s ignals as we ll as the disp lay
c:> page 148.
- Please follow the instructions for tow ing
a trailer
c:> page 149.
- What appears in the display is time-de
layed.
Page 149 of 342

Reverse Parking
Applies to vehicles: with Audi parking system plus w ith
rea rview camera
Parking mode 1 can be used when parking in
a garage or into a parking space.
Fig. 170 MMI display: aiming at a park ing spot
Fig. 171 MMI display: aligning the vehicle
• Switch the MMI on and select reverse gear.
• Turn the steering wheel until the orange
orientation lines
(D appear in the parking
spot¢
fig. 170. Use the markings @to help
you estimate the distance from an obstacle .
Each marking represents 3
ft (1 meter). The
blue area represents an extension of the ve
hicle's outline by approximately 16
ft (5 me
ters) to the rear.
• While driving in reverse gear, adjust the
steering wheel angle to fit the parking space
with the aid of the orange orientation lines ¢ (D. @ marks the rear bumper. Stop the
vehicle when the red orientation line© bor
ders an object¢
,A.
A WARNING
-The rearv iew camera does not show the
entire area beh ind the veh icle
¢
page 144, fig. 166. Watch out espe
cially for smal l children and animals. The
Parking system 147
rearview camera cannot always detect
them, posing risk of an accident!
- Please note that objects not touching the
ground can appear to be further away
than they really are (for example, the bumper of a parked vehicle, a trailer
hitch, or the rear ofa truck). In this case,
you shou ld not use the help lines to help
with parking, which poses danger of an accident!
(D Note
In the MMI d isplay, the direction of travel
of the vehicle rear is represented depend
ing on the steering wheel angle. The vehi
cle front swings out more than the vehicle
r ear. Maintain plenty of distance so that
your outside mirror or a corner of your ve
hicle does not collide with any obstacles.
This can damage to your vehicle.
Parallel Parking
Applies to vehicles: wit h Aud i parking syste m plus with
rearv iew camera
Use parking mode 2 to help you parallel park
along the side of a street.
Fig. 172 MMI display: blue surface in the park ing spot
Fig. 173 MMI display: Blue curve on the curb
Page 150 of 342

148 Parking system
The following steps app ly only when there is
no obstacle such as a wall near the parking
spot. Otherwise, please read the informat ion
prov ided in the "Parking Next to Obstacles"
section.
.. Activate the turn signal.
.. Position your vehicle parallel to the edge of
the street, approximately 3 ft (1 meter)
from a parked vehicle.
.. Switch the MM I on and se lect reverse gear .
The parking aid turns o n and parking mode
1 appears on the disp lay .
.. Press the cont ro l butto n
(D c:> fig. 172 on
t h e M MI con trol conso le. Par kin g mode 2
appears .
.. Back up and align yo ur vehicle so the b lue
area @ borders on the rear end of the vehi
cle or on the parking spot line. The bl ue area
represents an extension of the veh icle's out
li ne by approximate ly 16 ft (5 meters) to the
rear . The long side of the blue area should
be o n the cu rb. The entire blue area must fit
into the parking spot .
.. Wi th the veh icle stopped, turn the s teer ing
wheel to the right as far as it w ill go.
.. Back into the park ing spot until the blue
c ur ve to uches the curb
i::> fig. 173. Stop the
vehicle.
.. With the veh icle stopped, turn the steer ing
wheel to the left as far as it will go.
.. Co nti nue to back in to the parking spot until
the veh icle is parked para llel to the curb .@
marks the rear bumper . Stop the vehicle
when the red orientation line@ borders an
obje ct
i::> & -Keep an eye on the front of
yo ur vehicle while doing this
i::> 0 .
Parking n ext to obstacles
When t here is an obstacle (such as a wall)
next to the pa rk ing spot, choose a spot w ith
mo re space on t he sides. Pos ition the long
side of the blue area so that there is sufficie nt
sp ace from the curb. The area m ust no t be on
the c urb. Yo u will also need to start turning
the steering wheel much earlier. There should
be a suffic ient amo unt of space between the
curb and the b lue curve, and the blue c urve
i:> fig. 173 mus t not touch the curb.
A WARNING
-The rearview camera does not show the
entire area behind the vehicle
i:> page 144, fig . 166 . Watch out espe
cially fo r small ch ild ren and anima ls . T he
rea rv iew came ra cannot a lways detec t
them, posing ris k of an acciden t!
- P lease note that objects not touching the
g round can appear to be further away
t han they really are (for examp le, the
bumper of a par ked vehicle, a trai ler
hitch, or the rea r of a truck) . In this case,
you shou ld not use the help lines to help
with parking, wh ic h poses danger of an
accident!
(D Note
In the MMI display, the direction of travel
of the vehicle rear is represented depend
i ng on the steering wheel angle . The vehi
cle front swings out more than the vehicle rear . Maintain plenty of dista nce so that
your outside mi rror or a corner of you r ve
hicle does not col lide with any obstacles.
This can damage to your ve hicle .
(D Tips
The left o r right orie ntation lines and su r
faces will be disp layed, depending on t he
tu rn s ignal being used .
Adjusting the display
and warning tones
Applies to vehicles: wi th rear park ass ist/A ud i parking sys
tem plus with rearview camera
The display* and warning tones can be ad
justed in the MMI.
.. Select: Function b utton I CAR !> Control but
t on
Sy stems * > Parking sy stem . Or
.. Sele ct: Func tion button
I CA R!> Con trol but
t on
Car sy stems * > Driver as sist > Parking
aid.
Display*
-Off -when the par king system is switched
off, only a udible s ignals a re g iven .
Page 151 of 342

-On -when the parking system is switched
on, either the visual display or the picture
from the rearview camera is disp layed .
Warning tones
- Front volume* -
front sensor vo lume
- Front frequency* -front sensor frequency
-Rear volume -rear sensor volume
-Rear frequency -rear sensor frequency
-In -ca r entertainment fader/Music volume
while parking -
when the parking system is
switched on, the volume of the active audio source is lowered.
The newly adjusted value is briefly heard from
the signal generator.
(D} Tips
- The warning tones can also be adjusted
direct ly by the v isual disp lay* or the pic
ture from the rearview camera*. Simply
press the
Settings* control button .
- Changed settings are activated when
parking system is switched on aga in.
- The settings are automatically stored
and ass igned to the remote control key.
Trailer hitch
Applies to vehicles: with rear park assist/Audi parking sys·
tem plus with rearview camera and trailer hitch
For vehicles with a factory installed trai ler
hitch, or a trai ler hitch installed according to
factory specifications, the parking system rear
sensors do not come on whenever you shift in
to reverse gear or when you press the P
11,
switch*. If you install a hitch yourself, th is
function may not work . In general the follow
limitations may come up:
Rear park assist*
There is no warning for distances to the rear.
Audi parking system plus with rearview
came ra*
There is no warning for distances to the rear .
The front sensors remain activated. The visual
display switches to the trailer towing mode.
The picture from the rearview camera will not
Parking system 149
show the orientation lines nor the blue surfa
ces.
Error messages
Applies to vehicles: with rear park assist/Audi parking sys
tem plus with rearview camera
There is an error in the system if the LED on
the
P" 1! switch* is blinking and you hear a con
tinuous alarm for a few seco nds after switch
ing on the park ing system or when the park
ing system is already activated. Have your au
thorized Audi dea ler correct the error .
(D Tips
If the error is not corrected before you
switch off the ignition, when you switch on
the parking system again, the LED in the
p,,1, switch* will blink .
Page 152 of 342

150 Adapti ve Air Susp en sion
Adaptive Air
Suspension
Air suspension and damping
Description
App lies to vehicles: with Adapt ive Air Suspe nsion
Air suspension and damping can be adjusted
separately.
Adaptive Air Suspension is an electronically
controlled springing and damping system .
This chassis system makes it easier on the
driver by adapt ing to the particular situat ion
through imperceptible control processes.
The
Ad apti ve Air Su sp ension component reg
ulates ground clearance depending on vehicle
speed and driver input. It functions independ
ently from the load condition . Accelerating to
a speed above a predetermined limit will make the vehicle lower itself . On the other
hand, driving more slowly results in the vehi
cle raising aga in at specific speeds.
The
d am ping component provides individual
control of the damping forces. For example,
with damping characterist ics set to prov ide
greater comfort, damping is set somewhat
harder for a brief per iod only as required, for
example, when going around a curve or when brak ing .
Set tings
Adapt ive A ir Suspension provides the driver
with the opportun ity to set the chassis charac
teristics also to their individual prefe rence.
W ith the dr iv ing modes
Comfort, Automatic
and Dynamic the driver has three chassis set
tings available, ranging from comfort to spor
ty. The
Offrood mode can be selected for driv
ing on poor quality stretches of road. In addi
tion,
Lift provides a fifth mode, which can be
selected when exceptionally high ground
clearance is needed
c::> page 150, Chassis con
trols.
The modes are set in MMI r:::;, poge 152.
A WARNING
The height of the parked vehicle can
change due to temperature fluctuations or
changes in load.
([) Note
- Whenever you park your vehicle, a lways
make sure there is adequate clearance
above and below the vehicle. The he ight
of the parked vehicle can change as the
result of temperature f luctuations,
changes in load cond ition and changes in
the driving mode (ground clearance).
- If the vehicle is being t ransported (e.g.
by tow truck, train, sh ip, etc.), mount the
tie-down chains/cables over the running
surface (circumference) of the tires. Nev
er secure the vehicle by the axle, the sus
pension struts or the front or rear tow
line eye. For technical reasons, the pres
sure in the suspens ion struts may change
during the transport, which could result
in the vehicle no longer be ing secured
properly .
- If you are going to tow a trailer with a trailer hitch that was
not installed ac
cording to factory specif ications, you
must activate the tra iler operation mode
manually
c;, page 154.
(D Tips
- Before you can raise your vehicle us ing
the vehicle jack (for example, when
changing a f lat t ire) or a veh icle lift, yo u
must activate the jac king mode
c::>poge 154.
-On some mode ls, the vehicle can reach
its maxim um speed only in the
Automat
ic
and Dynamic modes.
Chassis controls
Applies to vehicles: wit h Adaptive A ir Suspensio n
Five different driving modes con be set by the
driver.
The automatic control processes are speed
and t ime -dependent . Fo r example, it is not