Page 49 of 212

CAUTION
● In cold temperatures and in winter, check before the trip or before switching
on the ignition that the wiper blades are not frozen. Switching on windshield wip-
ers when the blades are frozen to the windshield may result in damage both to
the blades and the motor of the windshield wipers!
● If you switch off the ignition while the windshield wipers are on, the wipers
will sweep in the same mode the next time the ignition is switched on. At low
temperatures, the wipers may freeze to the window between switching off the ig-
nition and the next time you switch the ignition on again.
● Carefully detach frozen wiper blades from the front or rear window.
● Remove snow and ice from the window wipers before driving. Note
The content of the windshield wiper reservoir is 3.5 litres. On vehicles which are
equipped with a headlight cleaning system, the content of the reservoir is 5.4 li-
tres.
Headlight cleaning system The headlights are being cleaned after the windshield washer system has been
operated for the fifth time, the low beam or main beam are switched on as well as
the windshield wiper lever is held in the position
5
⇒
fig. 30 for about 1 second.
You should remove stubborn dirt (such as insect residues) from the headlight len-
ses at regular intervals, for example when refuelling. Please refer to the following
guidelines ⇒ page 144, The headlight lenses.
You should remove any snow from the fixtures of the washer nozzles and clear ice
in winter with a de-icing spray in order to ensure proper operation of the cleaning
system. CAUTION
Never remove the nozzles from the headlamp cleaning system by hand - risk of
damage! Replacing wiper blades for the windshield wipers Fig. 31 Wiper blade for the windshield
wiper
Removing the wiper blade
– Fold windshield wiper arm away from the windshield.
– Press the locking button, in order to unlock the wiper blade and pull off in the
direction of arrow.
Attaching the wiper blade
– Push the wiper blade until it locks up to the stop.
– Check whether the wiper blade is correctly attached.
– Fold the windshield wiper arm back onto the windshield.
Windshield wiper blades in proper condition are essential to obtain good visibility.
Wiper blades should not be allowed to become dirtied by dust, insect remains and
preserving wax.
Juddering or smearing of the wiper blades could then be due to wax residues left
on the windshield by vehicle washing in automatic vehicle wash systems. It is
therefore important to degrease the lips of the windshield wiper blades after ev-
ery pass through an automatic vehicle wash system .£ 47
Lights and Visibility Using the system Safety Driving Tips General Maintenance Breakdown assis-
tance Praktik Technical data
Page 50 of 212

WARNING
● If the windshield wipers are handled carelessly, there is a risk of damage
to the windshield.
● You should clean the wiper blades regularly with a windshield cleaner in
order to avoid any smears. Clean a wiper blade with a sponge or cloth if it is
very dirty, for example from insect residues.
● Replace the windshield wiper blades once or twice a year for safety rea-
sons. Windshield wiper blades are available at specialist garages.
Replacing the wiper blade on the rear window wiper Fig. 32 Wiper blade for the rear window
Removing the wiper blade
– Fold windshield wiper arm out from the windshield and position the wiper
blade at right angles to the wiper arm ⇒
fig. 32.
– Hold the window wiper arm at the top end with one hand.
– With the other hand unlock the locking button A in the direction of arrow and
remove the wiper blade.
Attaching the wiper blade
– Position the wiper blade onto the wiper arm and lock the locking button A .
– Check whether the wiper blade is correctly attached.
The same remarks apply here as for ⇒ page 47. Rear-view mirror
Manual dimming interior rear-view mirror Basic setting
–
Pull the lever on the bottom edge of the mirror forward.
Dimming mirror
– Pull the lever on the bottom edge of the mirror back.
Rear mirror You can adjust the exterior mirrors electrically.
Fig. 33 Inner part of door: Rotary knob
Adjust the rear mirror before commencing to drive so that there is a clear view to
the rear.
Dimming the interior mirror
– Pull the lever on the bottom edge of the mirror toward rear (the lever on the
interior mirror must point forwards in it home position).
Heating of the external mirror
– Turn the rotary knob to position ⇒
fig. 33.
Adjusting the left-hand exterior mirror
– Turn the rotary knob to position . The movement of the mirror surface is iden-
tical to the movement of the rotary knob. £48
Lights and Visibility
Page 51 of 212

Adjusting the right-hand exterior mirror
– Turn the rotary knob to position . The movement of the mirror surface is iden-
tical to the movement of the rotary knob. WARNING
● Convex (curved outward) exterior mirrors increase the field of vision. They
do, however, make objects appear smaller in the mirror. These mirrors are only
of limited use, therefore, for estimating distances to the following vehicles.
● Use whenever possible the interior rear mirror, for estimating the distan-
ces to the following vehicles. Note
● The exterior mirror heater only operates when the engine is running.
● Do not touch the surfaces of the exterior mirrors if the exterior mirror heater is
switched on.
● You can set the exterior mirrors by hand, if the power setting function fails at
any time, by pressing on the edge of the mirror surface.
● Contact your specialist garage if a fault exists with the power setting of the
exterior mirrors. 49
Lights and Visibility Using the system Safety Driving Tips General Maintenance Breakdown assis-
tance Praktik Technical data
Page 52 of 212

Seats and Stowage
Front seats
Basic information The front seats have a wide range of different settings and can thus be matched
to the physical characteristics of the driver and front passenger.
Correct adjustment of the seats is particularly important for:
● safely and quickly reaching the controls;
● a relaxed, fatigue-free body position;
● achieving the maximum protection offered by the seat belts and the airbag
system.
The chapters which follow describe the procedure which you should adopt for ad-
justing the seats. WARNING
● Never transport more occupants than the maximum seating in the vehicle.
● Each occupant must correctly fasten the seat belt belonging to the seat.
Children must be fastened ⇒
page 118, Transporting children safely with a
suitable restraint system.
● The front seats and the head restraints must always be adjusted to match
the body size of the seat occupant as well as the seat belts must always be
correctly fastened in order to provide an optimal protection for you and your
occupants.
● Always keep your feet in the footwell when the car is being driven - never
place your feet on the instrument panel, out of the window or on the surfaces
of the seats. This is particularly important for the front seat passenger. You
will be exposed to increased risk of injury if it becomes necessary to apply the
brake or in the event of an accident. If an airbag is deployed, you may suffer
fatal injuries when adopting an incorrect seated position! WARNING (Continued)
● It is important for the driver and front passenger to maintain a distance of
at least 25 cm from the steering wheel or dash panel. Not maintaining this
minimum distance will mean that the airbag system will not be able to proper-
ly protect you - hazard! The front seats and the head restraints must always
also be correctly adjusted to match the body size of the occupant.
● Ensure that there are no objects in the footwell as any objects may get be-
hind the pedals during a driving or braking manoeuvre. You would then no
longer be able to operate the clutch, to brake or accelerate.
● Do not transport any objects on the front passenger seat except objects
(e.g. child safety seat) provided for this purpose - risk of accident!
Adjusting the front seats Fig. 34 Controls at seat
Adjusting a seat in a forward/back direction
– Pull the lever 1
⇒
fig. 34 up and push the seat into the desired position.
– Release the lever 1 and push the seat further until the lock is heard to en-
gage.
Adjusting height of seat
– Lift the seat if required by pulling or pumping lever 2 upwards.
– Lower the seat if required by pushing or pumping lever 2 downwards.
£50
Seats and Stowage
Page 53 of 212
 and turn the
handwheel 3 to adjust the angle of the backrest.
The drivers seat should be adju")
Adjust the angle of the seat backrest
–
Relieve any pressure on the seat backrest (do not lean on it) and turn the
handwheel 3 to adjust the angle of the backrest.
The driver's seat should be adjusted in such a way that the pedals can be fully
pressed to the floor with slightly bent legs.
The seat backrest on the driver's seat should be adjusted in such a way that the
upper point of the steering wheel can be easily reached with slightly bent arms. WARNING
● Only adjust the driver seat when the vehicle is stationary - risk of injury!
● Take care when adjusting the seat! Adjusting the seat without care can
lead to bruises or injuries.
● The seat backrests must not be angled too far back when driving other-
wise this will affect proper operation of the seat belts and of the airbag sys-
tem - risk of injury!
Head restraints Fig. 35 Head restraint: Adjusting/pulling out
Best protection is achieved if the top edge of the head restraint is at the same
level as the upper part of your head.
Adjusting the height of a head restraint
–
Grasp the side of the head restraint with both hands and push it in upward di-
rection as desired ⇒ fig. 35 - left. –
Move the head restraint downwards if required by pressing and holding the
safety button with one hand ⇒ fig. 35 - right and by pressing with the other
hand the head restraint downwards.
Removing and installing a head restraint
– Pull the head restraint out of the seat backrest as far as the stop.
– Press the locking button in the direction of arrow ⇒ fig. 35 - right and pull the
head restraint out.
– To re-insert the head restraint, push it down into the seat backrest far enough
until you hear the locking button engage.
The position of the front, rear outer head restraints and the rear middle head re-
straint is adjustable for height.
The head restraints must be adjusted to match the size of the seat occupant. Cor-
rectly adjusted head restraints together with the seat belts offer effective protec-
tion for the occupants ⇒ page 102. WARNING
● The head restraints must be correctly adjusted in order to offer effective
protection for the occupants in the event of an accident.
● Do not drive under any circumstance with removed head restraints - risk of
injury!
● If the rear seats are occupied, the rear head restraint must not be in the
lower position.
Heating the front seats Fig. 36 Rocker switch: Front seat heat-
ing
£ 51
Seats and Stowage Using the system Safety Driving Tips General Maintenance Breakdown assis-
tance Praktik Technical data
Page 54 of 212

You can electrically heat the seat cushions and the seat backrests of the front
seats.
– By pressing the rocker switch in the position 1 or 2 switch on the front seat
heating to 25 % or 100 % of its power output ⇒ fig. 36.
– To switch off the heating shift the rocker switch into the horizontal position. WARNING
● If, as an occupant, you have a subdued pain and/or temperature sensitivi-
ty, e.g. through medication, paralysis or because of chronic illness (e.g. diabe-
tes), we recommend not to use the seat heating of the driver or front passen-
ger seat. This can lead to burns on the back, the posterior and the legs which
are difficult to heal. If the seat heating is used, we recommend to make regu-
lar breaks in your journey when driving long distances, so that the body can
recuperate from the stress of the journey. Please consult your doctor, who can
evaluate your specific condition. CAUTION
● You should not kneel on the seats or otherwise apply pressure at specific
points in order to avoid damaging the heating elements of the seat heaters.
● Do not use the seat heating if the seats are not occupied by persons or if ob-
jects are fastened or stored on them, for example a child seat, a bag etc. A fault of
the heating elements in the seat heating can occur.
● Do not clean the seats moist ⇒ page 145.Note
The seat heating should only be switched on when the engine is running. This has
a significant effect of saving on the battery capacity. Rear seats
Adjusting seats in forward/back direction Fig. 37 Releasing at the front/rear
To enlarge the luggage compartment, the outer rear seats can be pushed for-
wards, folded fully forwards or the seats can be removed.
Moving seats in forward/back direction
– Pull up the lever ⇒ fig. 37 on the left or on the release loop ⇒ fig. 37 on the
right and move the seat into the desired position. Note
Please refer to the following guidelines ⇒ page 103, Correct seated position for
the occupants on the rear seats.
Adjusting the seat backrest Fig. 38 Adjusting the seat backrest
£52
Seats and Stowage
Page 55 of 212

Adjust the angle of the seat backrest
–
Pull the lever ⇒ fig. 38 and adjust the desired angle of the seat backrest.
Folding rear seats forwards Fig. 39 Fold seat fully forwards/Secure folded forward seats
Fold seats fully forwards and secure
–
Insert the seat belt tongue into the opening of the respective read side trim
panel - safety position.
– Move the seat as far as possible to the rear ⇒ page 52.
– Pull the lever ⇒
fig. 38 and fold the seat backrest fully fowards.
– Pull the lever ⇒
fig. 39 up and then fold the seat fully forwards.
– Secure the folded forward seat with the aid of the fixing belt to a guide rod of
the head restraint for the front seat ⇒ fig. 39 on the right. WARNING
● Immediately secure the folded forward seat with the aid of the fixing belt
to a guide rod of the head restraint for the front seat - there is a risk of injury
as soon as the vehicle starts off.
● If the seat is not in the rear end position, damage can occur to the locking
bolts if the seat is unlocked. Note
Please refer to the following guidelines ⇒
page 103, Correct seated position for
the occupants on the rear seats. Removing seats
Fig. 40 Unlocking the folded forward seat/carrying handle on the seat cushion
Unlocking and removing seats
–
Unlock the folded forward seat by pressing the seat locks in the direction of
arrow ⇒ fig. 40 .
– Remove the seat with the carrying handle on the seat cushion ⇒
fig. 40 on the
right. Note
● The outer seats are not mutually interchangeable. In the rear area the left seat
is marked with the letter L and the right seat with the letter R.
● Please refer to the following guidelines ⇒ page 103.
Adjusting seats in crosswise direction Fig. 41 Locking the seat
£ 53
Seats and Stowage Using the system Safety Driving Tips General Maintenance Breakdown assis-
tance Praktik Technical data
Page 56 of 212

Moving seats in crosswise direction
–
Remove the middle seat ⇒ page 53.
– Fold the outer seat forwards ⇒ page 53 and lock it ⇒ fig. 40.
– Move the folded forward and unlocked seat on the guide towards the middle
of the vehicle up to the stop.
– Lock the seat at the end of the guide ⇒
fig. 41.
Move seats into the initial position Fig. 42 Folding the seat backrest back
into position
Locking seats and folding back into position
– If the seat is removed, first of all position it on the guide and lock the seat
⇒ fig. 41 . Check for yourself that the seat is correctly locked by pulling it up.
– Fold the seat into the horizontal position until it is heard to lock. Check for
yourself that the seat can no longer be lifted by pulling it up.
– Push the lever ⇒ fig. 42 and fold the backrest back into position. Check for
yourself that the seat backrest is engaged.
– Take the belt tongue out of the safety holder. WARNING
● The belts and the belt locks must be in their original position after folding
back the seat cushions and the seat backrests - they must be ready to use.
● The seat backrests must be securely interlocked in position so that no ob-
jects in the luggage compartment can slide into the passenger compartment if
there is sudden braking - risk of injury!
● When folding the seat backrest always make sure that it has safely locked
into position, this is confirmed by the position and a visible marking on the
cover of the lever.
Folding table on the middle seat backrest Fig. 43 Rear seats: Armrest
– The middle seat backrest can be folded ⇒
page 53, Folding rear seats forwards
forwards and used as armrest or table with cup holder ⇒ fig. 43.
– You can place two cups or beverage cans into the recesses. WARNING
● Do not place any hot beverages into the cup holder. If the vehicle moves,
they may spill - risk of scalding!
● Do not use any cups or beakers which are made of brittle material (e.g.
glass, porcelain). This could lead to injuries in the event of an accident. Note
If the middle rear seat backrest should be folded forward for lengthy periods, then
make sure that the belt locks are not located below it - this can result in perma-
nent damage to the upholstery. 54
Seats and Stowage
 1
1 2
2 3
3 4
4 5
5 6
6 7
7 8
8 9
9 10
10 11
11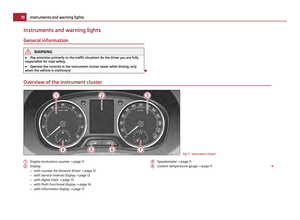 12
12 13
13 14
14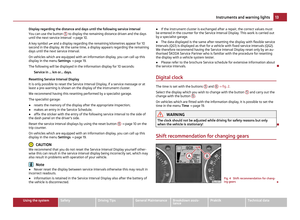 15
15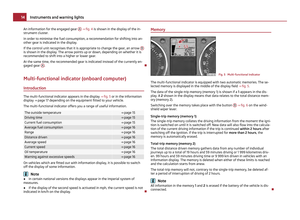 16
16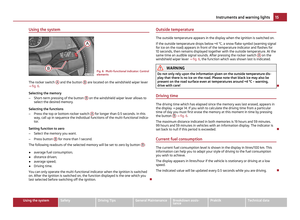 17
17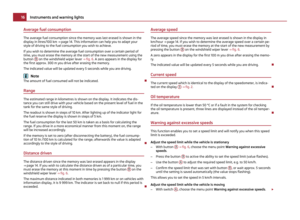 18
18 19
19 20
20 21
21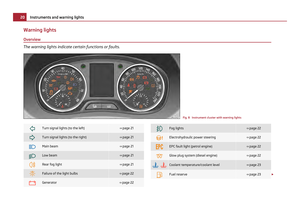 22
22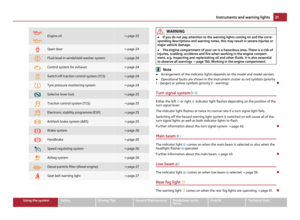 23
23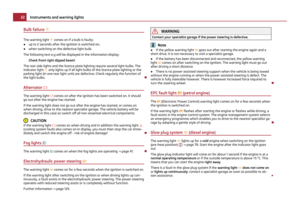 24
24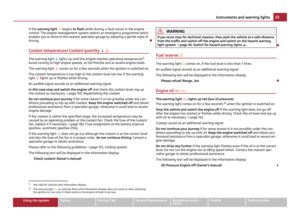 25
25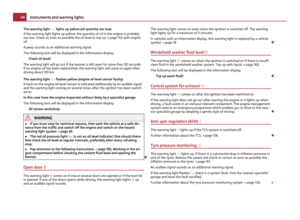 26
26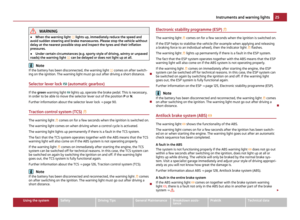 27
27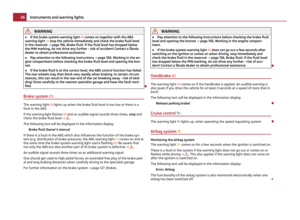 28
28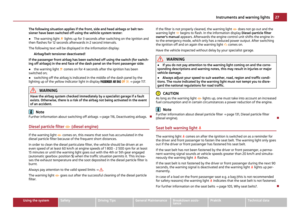 29
29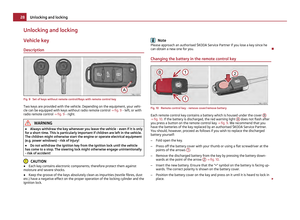 30
30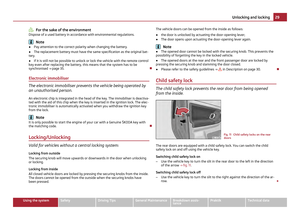 31
31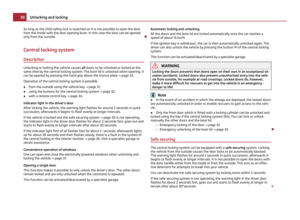 32
32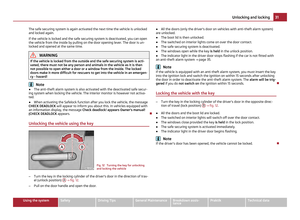 33
33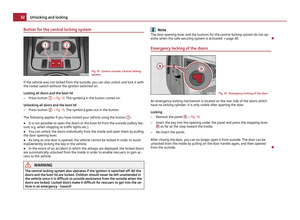 34
34 35
35 36
36 37
37 38
38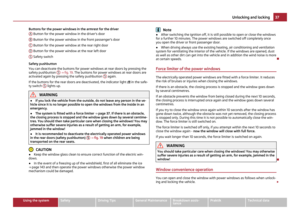 39
39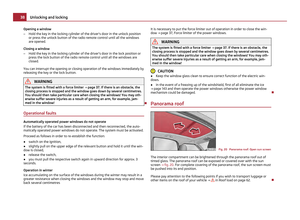 40
40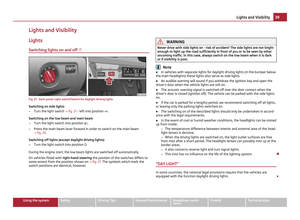 41
41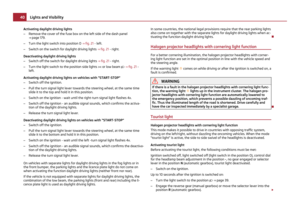 42
42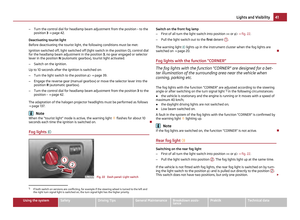 43
43 44
44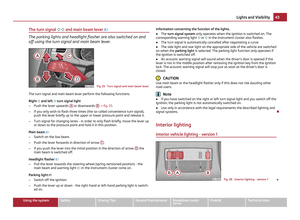 45
45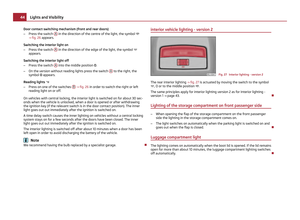 46
46 47
47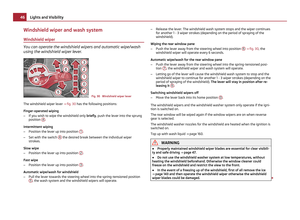 48
48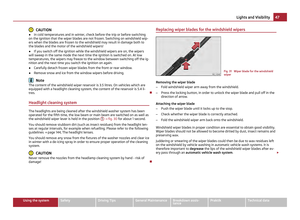 49
49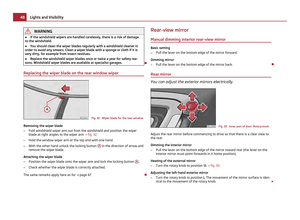 50
50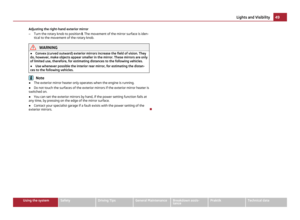 51
51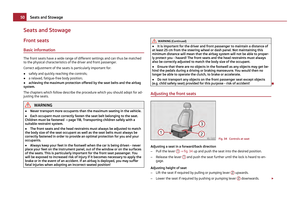 52
52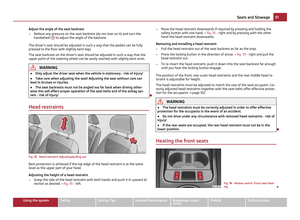 53
53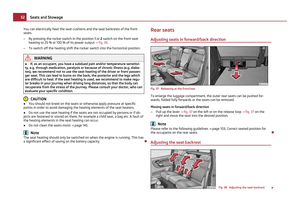 54
54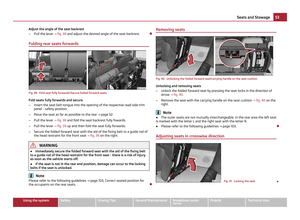 55
55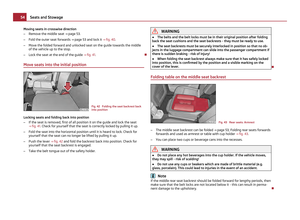 56
56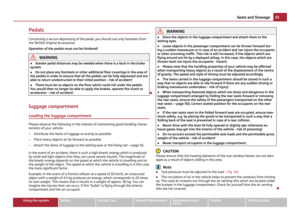 57
57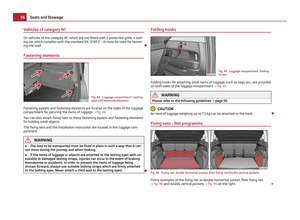 58
58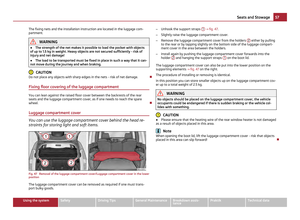 59
59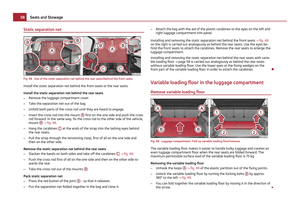 60
60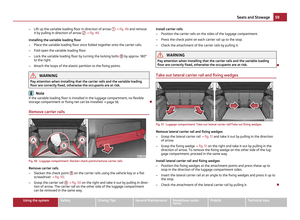 61
61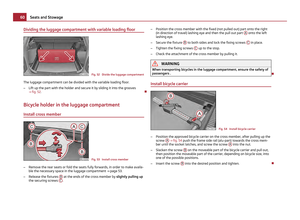 62
62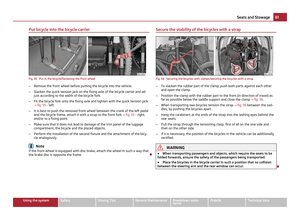 63
63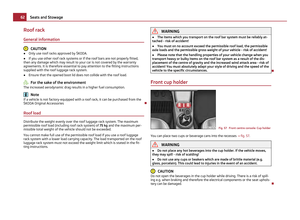 64
64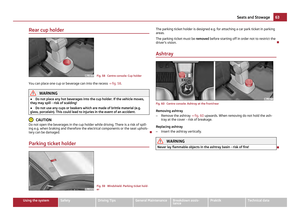 65
65 66
66 67
67 68
68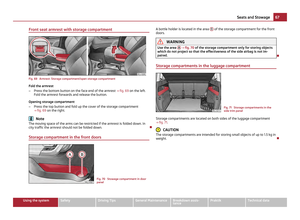 69
69 70
70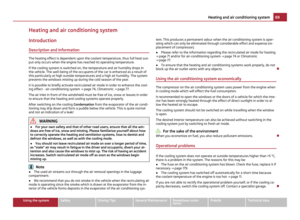 71
71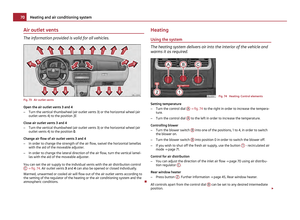 72
72 73
73 74
74 75
75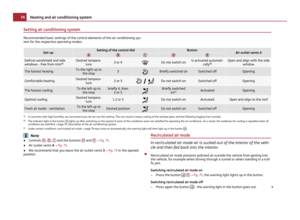 76
76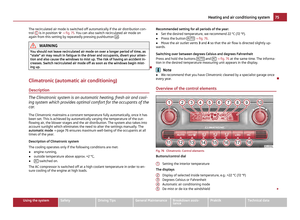 77
77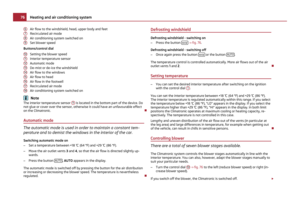 78
78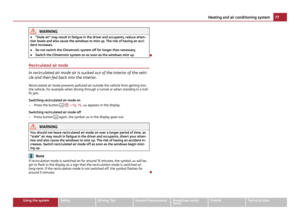 79
79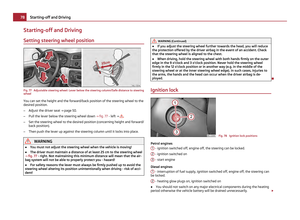 80
80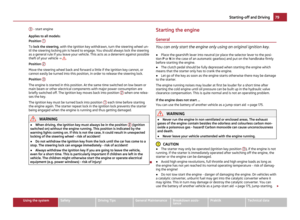 81
81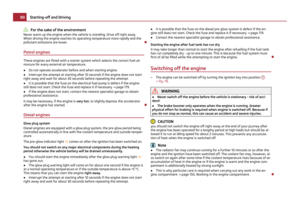 82
82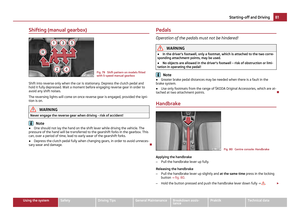 83
83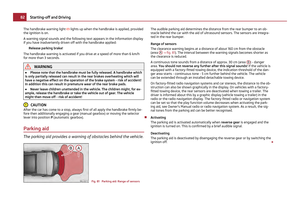 84
84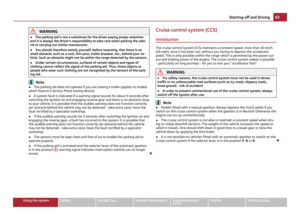 85
85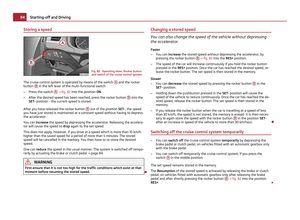 86
86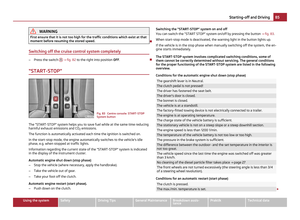 87
87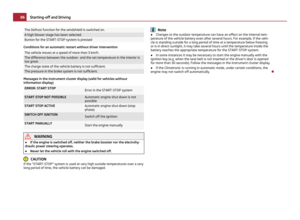 88
88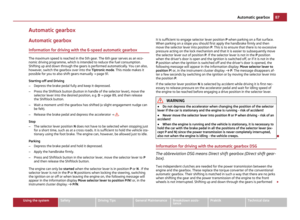 89
89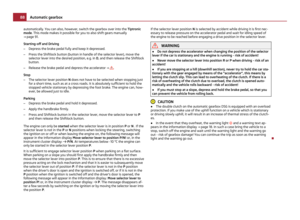 90
90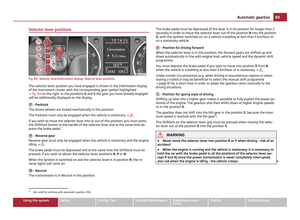 91
91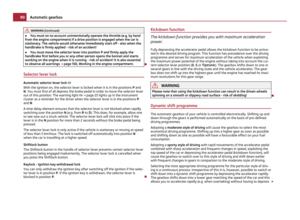 92
92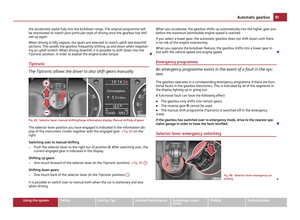 93
93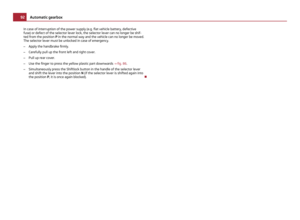 94
94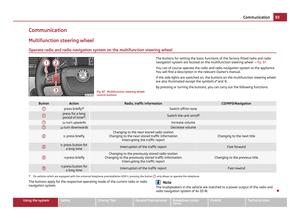 95
95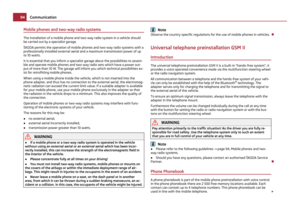 96
96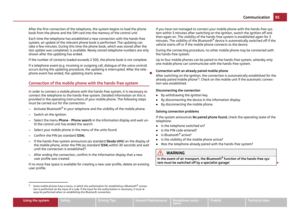 97
97 98
98 99
99 100
100 101
101 102
102 103
103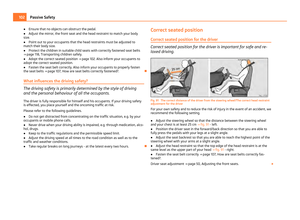 104
104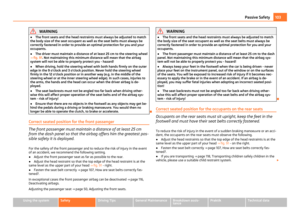 105
105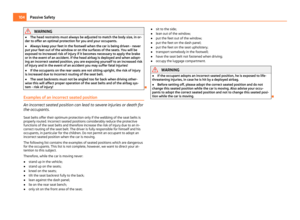 106
106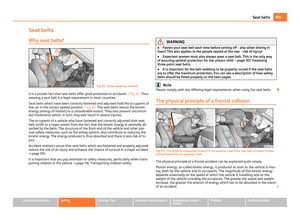 107
107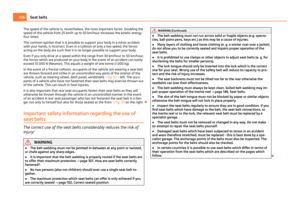 108
108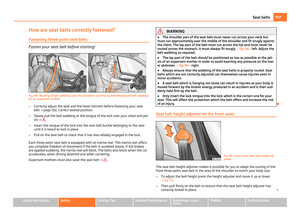 109
109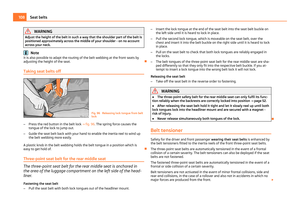 110
110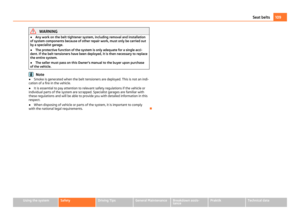 111
111 112
112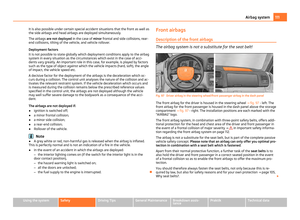 113
113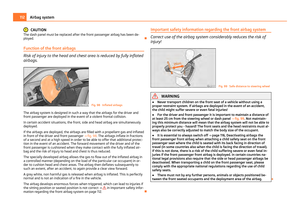 114
114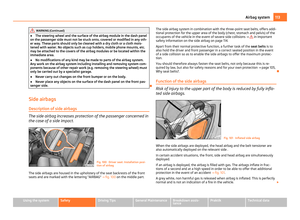 115
115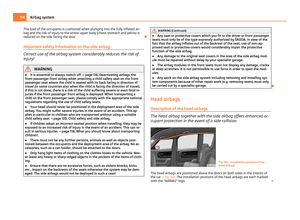 116
116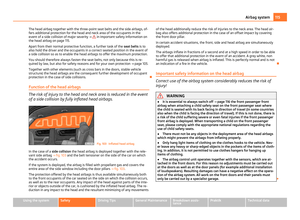 117
117 118
118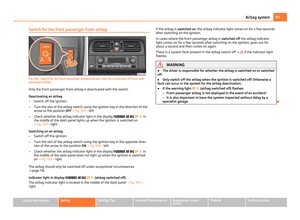 119
119 120
120 121
121 122
122 123
123 124
124 125
125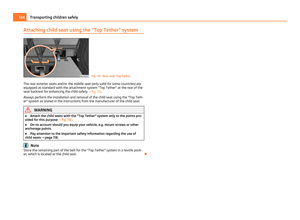 126
126 127
127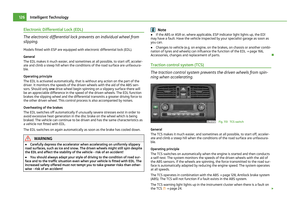 128
128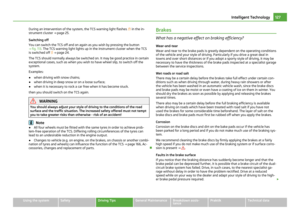 129
129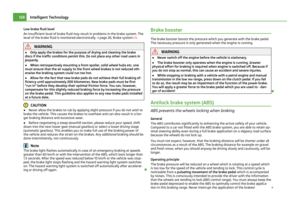 130
130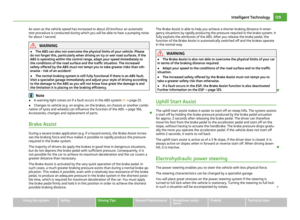 131
131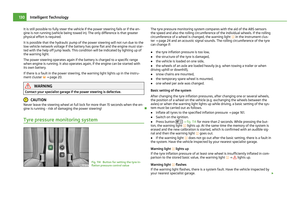 132
132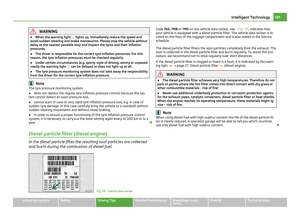 133
133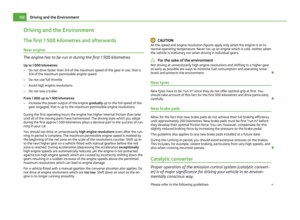 134
134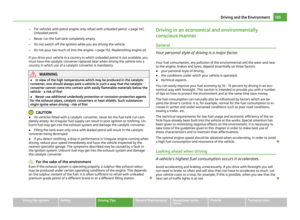 135
135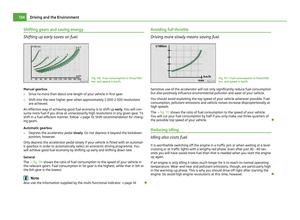 136
136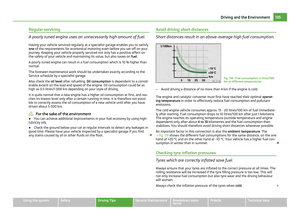 137
137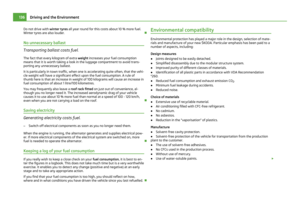 138
138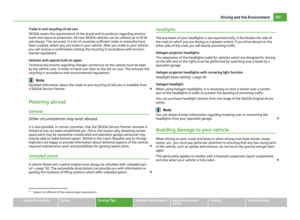 139
139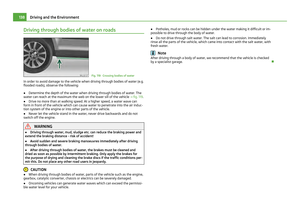 140
140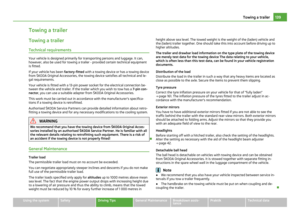 141
141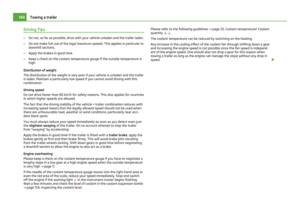 142
142 143
143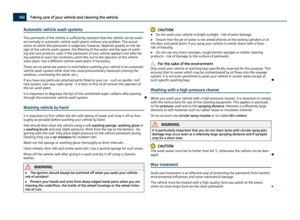 144
144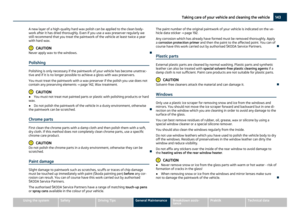 145
145 146
146 147
147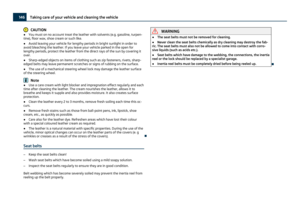 148
148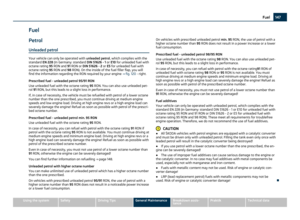 149
149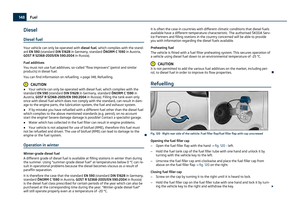 150
150 151
151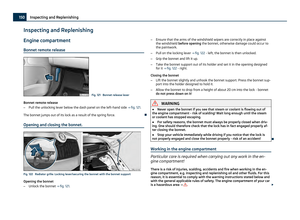 152
152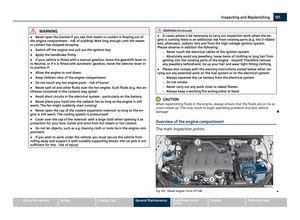 153
153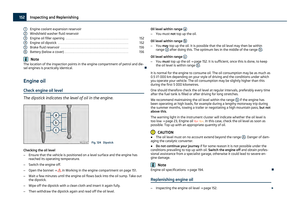 154
154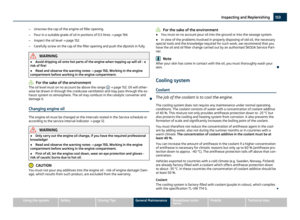 155
155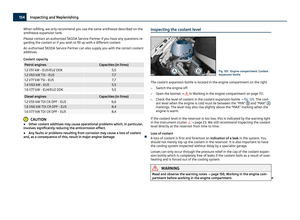 156
156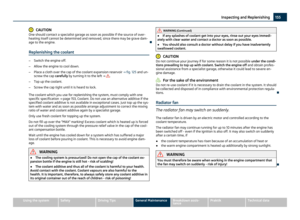 157
157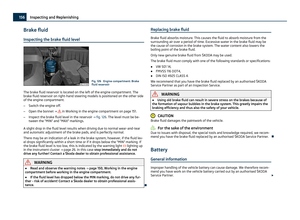 158
158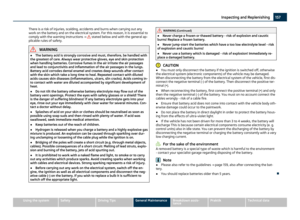 159
159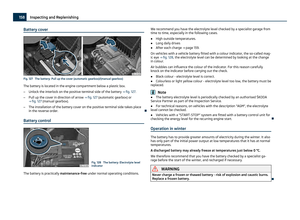 160
160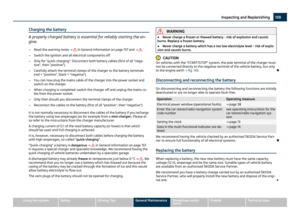 161
161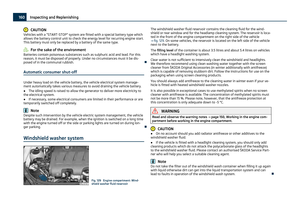 162
162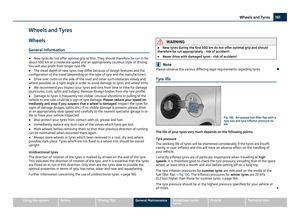 163
163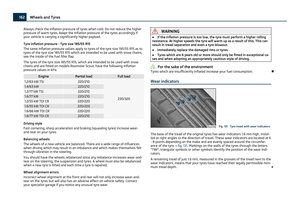 164
164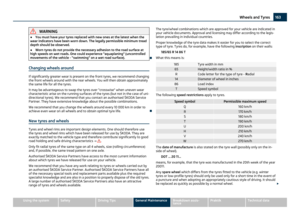 165
165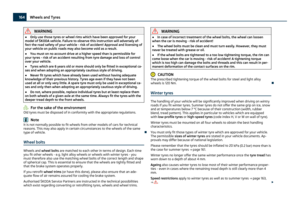 166
166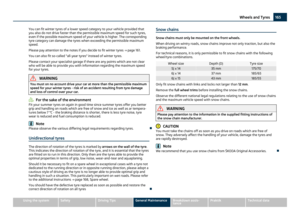 167
167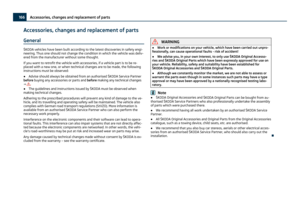 168
168 169
169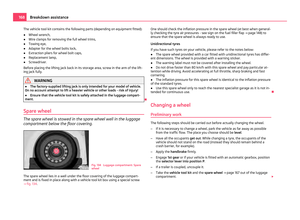 170
170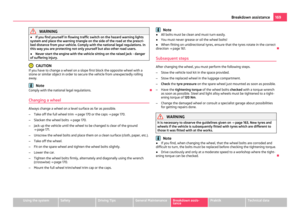 171
171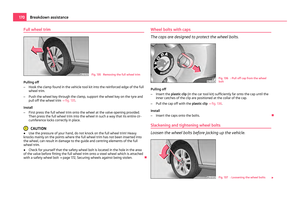 172
172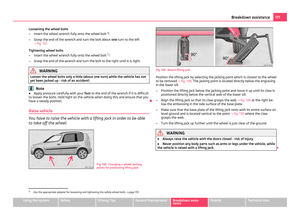 173
173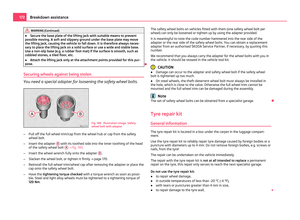 174
174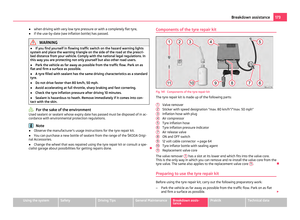 175
175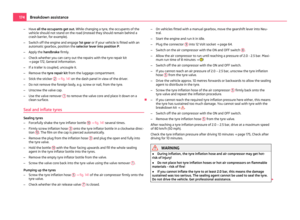 176
176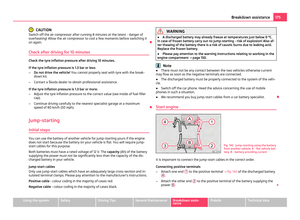 177
177 178
178 179
179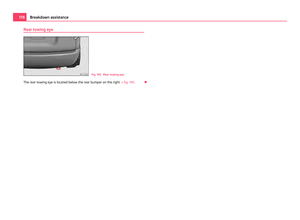 180
180 181
181 182
182 183
183 184
184 185
185 186
186 187
187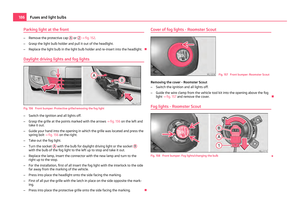 188
188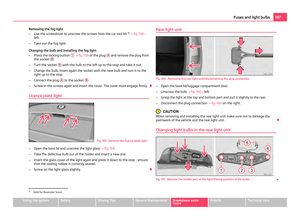 189
189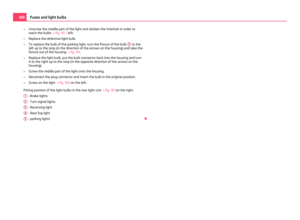 190
190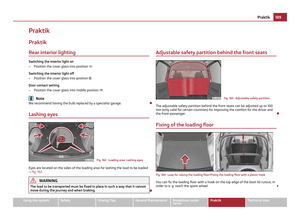 191
191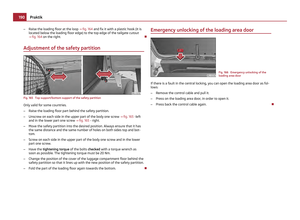 192
192 193
193 194
194 195
195 196
196 197
197 198
198 199
199 200
200 201
201 202
202 203
203 204
204 205
205 206
206 207
207 208
208 209
209 210
210 211
211