Page 145 of 274
 single CD-Rs with an adapter ring.
Full-siz")
3-63 INSTRUMENT PANEL
78J00-03E
As each new track starts to play, the track
number and song title displays.
The CD player can play the smaller 3 inch
(8 cm) single CD-Rs with an adapter ring.
Full-size CD-Rs and the smaller CD-Rs
are loaded in the same manner.
If playing a CD-R, the sound quality can be
reduced due to CD-R quality, the method
of recording, the quality of the music that
has been recorded, and the way the CD-R
has been handled. There can be an
increase in skipping, difficulty in finding
tracks, and/or difficulty in loading and
ejecting. If these problems occur, check
the bottom surface of the CD. If the surface
of the CD is damaged, such as cracked,
broken, or scratched, the CD will not play
properly. If the surface of the CD is soiled,
refer to “Care of Your CDs and DVDs” in
this section for more information.
If there is no apparent damage, try a
known good CD.Do not add any label to a CD. It could get
caught in the CD player. If a CD is
recorded on a personal computer and a
description label is needed, try labeling the
top of the recorded CD with a marking pen.
If an error displays, see “CD Messages”
later in this section.
CD (Eject):
Press and release the CD eject button to
eject the CD-R that is currently playing in
the bottom slot. A beep sounds and Eject-
ing Disc displays. Once the disc is ejected,
Remove Disc displays. The CD-R can be
removed. If the CD-R is not removed, after
several seconds, the CD-R automatically
pulls back into the player.
If loading and reading of a CD cannot be
completed, such as unknown format, etc.,
and the disc fails to eject, press and hold
the DVD eject button for more than five
seconds to force the disc to eject.
DVD (Eject):
Press and release the DVD eject button to
eject the CD-R that is currently playing in
the top slot. A beep sounds and Ejecting
Disc displays. Once the disc is ejected,
Remove Disc displays. The CD-R can be
removed. If the CD-R is not removed, after
several seconds, the CD-R automatically
pulls back into the player. If loading and
reading of a CD cannot be completed,
such as unknown format, etc., and the disc
fails to eject, press and hold the DVD ejectbutton for more than five seconds to force
the disc to eject.
(Tune):
Turn this knob to select MP3 files on the
CD-R that is currently playing.
SEEK :
Press the left SEEK arrow to go to the start
of the current MP3 file, if more than five
seconds have played. If less than five sec-
onds have played, the previous MP3 file
plays. Press the right SEEK arrow to go to
the next MP3 file. If either SEEK arrow is
held, or pressed multiple times, the player
continues moving backward or forward
through the MP3 files on the CD.
(Previous Folder):
Press the pushbutton positioned under the
Folder label to go to the first track in the
previous folder.
(Next Folder):
Press the pushbutton positioned under the
Folder label to go to the first track in the
next folder.
REV (Reverse):
Press and hold this button to reverse play-
back quickly within an MP3 file. Sound is
heard at a reduced volume. Release this
button to resume playing the file. The
elapsed time of the file displays.
FWD (Fast Forward):
Press and hold this button to advance play-
back quickly within an MP3 file. Sound is
heard at a reduced volume. Release this
CAUTION
If a label is added to a CD, or more
than one CD is inserted into the slot
at a time, or an attempt is made to
play scratched or damaged CDs, the
CD player could be damaged. While
using the CD player, use only CDs in
good condition without any label,
load one CD at a time, and keep the
CD player and the loading slot free of
foreign materials, liquids, and debris.
Page 146 of 274
:
With the random setting, MP3 files on the
CD-R can be listened to in random, rat")
3-64 INSTRUMENT PANEL
78J00-03E
button to resume playing the file. The
elapsed time of the file displays.
RDM (Random):
With the random setting, MP3 files on the
CD-R can be listened to in random, rather
than sequential order. To play MP3 files
from the CD-R you are listening to in ran-
dom order, press the pushbutton posi-
tioned under the RDM label until Random
Current Disc displays. Press the same
pushbutton again to turn off random play.
(Music Navigator):
Use the music navigator feature to play
MP3 files on the CD-R in order by artist or
album. Press the pushbutton located
below the music navigator label. The
player scans the disc to sort the files by
artist and album ID3 tag information. It
might take several minutes to scan the disc
depending on the number of MP3 files
recorded to the CD-R.
To cancel music navigator while the player
is scanning, press the pushbutton located
below the music navigator label or eject
the disc. The radio can begin playing while
it is scanning the disc in the background.
When the scan is finished, the CD-R
begins playing again.
Once the disc has been scanned, the
player defaults to playing MP3 files in order
by artist. The current artist playing is
shown on the second line of the display
between the arrows. If you want to listen to
MP3 files by another artist, press the push-button located below either arrow button.
The disc goes to the next or previous artist
in alphabetical order. Continue pressing
either button until the desired artist is dis-
played.
To change from playback by artist to play-
back by album, press the pushbutton
located below the Sort By label. From the
sort screen, push one of the buttons below
the album button. Press the pushbutton
below the back label to return to the main
music navigator screen. Now the album
name is displayed on the second line
between the arrows and songs from the
current album begin to play. Once all songs
from that album are played, the player
moves to the next album in alphabetical
order on the CD-R and begins playing MP3
files from that album.
To exit music navigator mode, press the
pushbutton below the Back label to return
to normal MP3 playback.
BAND:
Press this button to listen to the radio when
a CD or a DVD is playing. The CD or DVD
remains inside the radio for future listening
or viewing entertainment.
DVD/CD AUX (Auxiliary):
Press this button to cycle through DVD,
CD, or Auxiliary when listening to the radio.
The DVD/CD text label and a message
showing track or chapter number displays
when a disc is in either slot. Press this but-
ton again and the system automaticallysearches for an auxiliary input device,
such as a portable audio player. If a porta-
ble audio player is not connected, “No Aux
Input Device” displays. If a disc is in both
the DVD slot and the CD slot the DVD/CD
AUX button cycles between the two
sources and not indicate connected, the
DVD/CD AUX button cycles through all
available options, such as: DVD slot, CD
slot, Front Auxiliary, and Rear Auxiliary (if
available). Refer to “Using the Auxiliary
Input Jack(s)” later in this section, or
“Audio/Video (A/V) Jacks” under, “Rear
Seat Entertainment System” in this section
for more information.
If a MP3 is inserted into top DVD slot, the
rear seat operator can turn on the video
screen and use the remote control to navi-
gate the CD (tracks only) through the
remote control.
Page 147 of 274
XL on the radio display, after the
channel name, indicates content
w")
3-65 INSTRUMENT PANEL
78J00-03E
XM Radio Messages
Radio Display Message Condition Action Required
XL
(Explicit Language Channels)XL on the radio display, after the
channel name, indicates content
with explicit language.These channels, or any others, can be blocked at a cus-
tomer’s request, by calling 1-800-852-XMXM (9696).
XM Updating Updating encryption code The encryption code in the receiver is being updated, and no
action is required. This process should take no longer than 30
seconds.
No XM Signal Loss of signal The system is functioning correctly, but the vehicle is in a loca-
tion that is blocking the XM
TM signal. When you move into an
open area, the signal should return.
Loading XM Acquiring channel audio
(after four second delay)The audio system is acquiring and processing audio and text
data. No action is needed. This message should disappear
shortly.
Channel Off Air Channel not in service This channel is not currently in service. Tune to another chan-
nel.
Channel Unavail Channel no longer available This previously assigned channel is no longer assigned. Tune
to another station. If this station was one of the presets,
choose another station for that preset button.
No Artist Info Artist Name/Feature not available No artist information is available at this time on this channel.
The system is working properly.
No Title Info Song/Program Title not available No song title information is available at this time on this chan-
nel. The system is working properly.
No CAT Info Category Name not available No category information is available at this time on this chan-
nel. The system is working properly.
No Information No Text/Informational message
availableNo text or informational messages are available at this time on
this channel. The system is working properly.
Page 148 of 274

3-66 INSTRUMENT PANEL
78J00-03E
Radio Display Message Condition Action Required
CAT Not Found No channel available for the chosen
categoryThere are no channels available for the selected category.
The system is working properly.
XM Theft Locked Theft lock active The XM
TM receiver in the vehicle could have previously been
in another vehicle. For security purposes, XM
TM receivers
cannot be swapped between vehicles. If this message
appears after having your vehicle serviced, check with your
dealer.
XM Radio ID Radio ID label (channel 0) If tuned to channel 0, this message alternates with the XM
TM
Radio eight digit radio ID label. This label is needed to acti-
vate the service.
Unknown Radio ID not known
(should only be if hardware failure)If this message is received when tuned to channel 0, there
could be a receiver fault. Consult with your dealer.
Check XM Receivr Hardware failure If this message does not clear within a short period of time,
the receiver could have a fault. Consult with your dealer.
XM Not Available XM
TM Not Available If this message does not clear within a short period of time,
the receiver could have a fault. Consult with your dealer.
Page 149 of 274

3-67 INSTRUMENT PANEL
78J00-03E
Navigation/Radio SystemYour vehicle may have a navigation radio
system.
The navigation radio system has built-in
features intended to minimize driver dis-
traction. Technology alone, no matter how
advanced, can never replace your own
judgment. For complete information on
your navigation radio system, including tips
on helping to reduce distractions while
driving, see the Navigation System Man-
ual.Rear Seat Entertainment SystemYour vehicle may have a DVD Rear Seat
Entertainment (RSE) system. The RSE
system works with the vehicle's audio sys-
tem. The DVD player is part of the front
radio. The RSE system includes a radio
with a DVD player, a video display screen,
audio/video jacks, two wireless head-
phones, and a remote control. Refer to
“Radio with CD and DVD (MP3)” in this
section for more information on the vehi-
cle’s audio/DVD system.
Before You Drive
The RSE is designed for rear seat passen-
gers only. The driver cannot safely view
the video screen while driving and should
not try to do so.
In severe or extreme weather conditions
the RSE system may or may not work until
the temperature is within the operating
range. The operating range for the RSEsystem is above –4°F (–20°C) or below
140°F (60°C). If the temperature of your
vehicle is outside of this range, heat or
cool the vehicle until the temperature is
within the operating range of the RSE sys-
tem.
Parental Control
The RSE system may have a Parental
Control feature, depending on which radio
you have. The Parental Control feature will
turn off the video screen. This feature also
disables all button operations from the
remote control. This feature can be used to
gain the attention of the rear passengers
that are using headphones.
To enable Parental Control press and hold
the radio power button for more than two
seconds. If on, the radio and video screen
will turn off. If a DVD and/or CD is playing,
it will be stopped. A “padlock” icon or a text
message may be displayed on the radio
display depending on which radio you
have, while Parental Control is on. The
radio can be turned back on with a single
press of the power button and used nor-
mally, but the RSE system will remain in
Parental Control.
To turn off Parental Control, press and
hold the radio power button for more than
two seconds. The video screen will return
to the state they were in before Parental
Control was turned on. The padlock icon
will disappear from the radio display.Parental Control can also be turned off by
inserting or ejecting any disc, an ignition
cycle, or pressing the play icon on the
radio DVD display menu.
Headphones
1674951
The RSE includes two 2-channel wireless
headphones that are dedicated to this sys-
tem. These headphones are used to listen
to media such as CDs, DVDs, MP3s,
DVDAs, radio, or any auxiliary source con-
nected to the auxiliary input jack, if your
vehicle has this feature or A/V jacks. The
wireless headphones have an On/Off but-
ton, channel 1/2 switch, and a volume con-
trol.
If your vehicle has a third row video screen
display, it will have two additional head-
phones.
Page 150 of 274

3-68 INSTRUMENT PANEL
78J00-03E
Push the power button to turn on the head-
phones. An indicator light located on the
headphones will illuminate. If the light does
not illuminate, the batteries may need to be
replaced. See “Battery Replacement” later
in this section for more information. Switch
the headphones to Off when not in use.
The infrared transmitters are located at the
rear of the RSE overhead console. The
headphones will shut off automatically to
save the battery power if the RSE system
is shut off or if the headphones are out of
range of the transmitters for more than
three minutes. If you move too far forward
or step out of the vehicle, the headphones
will lose the audio signal.
The headphones will automatically turn off
after four hours of continuous use.
To adjust the volume on the headphones,
use the volume control located on the right
side.
For optimal audio performance, the head-
phones must be worn correctly. The sym-
bol L (Left) will appear on the upper left
side, above the ear pad and should be
positioned on the left ear.
The symbol R (Right) will appear on the
upper right side, above the ear pad and
should be positioned on the right ear.
If the remote control becomes lost or dam-
aged, a new universal remote control can
be purchased. If this happens, make surethe universal remote control uses a code
set of Toshiba
®.
The foam ear pads attached to the head-
phones may become worn or damaged if
they are not handled or stored properly. If
the foam ear pads do become damaged or
worn out, the pads can be replaced sepa-
rately from the headphone set. It is not
necessary to replace the complete head-
phone set. The headphone replacement
foam ear pads can be ordered in pairs.
See your dealer for more information.
Battery Replacement
To change the batteries, do the following:
1) Turn the screw with a coin or screw
driver to loosen, then slide open the
battery door located on the left side of
the headphones.
2) Replace the two batteries in the com-
partment. Make sure that they are
installed correctly, using the diagram on
the inside of the battery compartment.
3) Replace the battery door and tighten
the door screw.If the headphones are to be stored for a
long period of time, remove the batteries
and keep them in a cool, dry place.
Audio/Video (A/V) Jacks
1676611
The A/V jacks are located on the rear of
the floor console. The A/V jacks allow
audio or video signals to be connected
from an auxiliary device such as a cam-
corder or a video game unit to the RSE
system. Adapter connectors or cables may
be required to connect the auxiliary device
to the A/V jacks. Refer to the manufac-
turer’s instructions for proper usage.
The A/V jacks are color coded to match
typical home entertainment system equip-
ment. The yellow jack (A) is for the video
input. The white jack (B) is for the left audio
input. The red jack (C) is for the right audio
input.
CAUTION
Do not store the headphones in heat
or direct sunlight. This could damage
the headphones and repairs will not
be covered by your warranty. Keep
the headphones stored in a cool, dry
place.
Page 151 of 274

3-69 INSTRUMENT PANEL
78J00-03E
Power for auxiliary devices is not supplied
by the radio system.
To use the auxiliary inputs of the RSE sys-
tem, connect an external auxiliary device
to the color-coded A/V jacks and turn both
the auxiliary device and the video screen
power on. If the video screen is in the DVD
player mode, pressing the AUX button on
the remote control will switch the video
screen from the DVD player mode to the
auxiliary device. The radio can listen to the
audio of the connected auxiliary device by
sourcing to auxiliary. Refer to “Radio with
CD and DVD (MP3)” in this section for
more information.
How to Change the RSE Video Screen
Settings
The screen display mode (normal, full, and
zoom), screen brightness, and setup menu
language can be changed from the on
screen setup menu. To change any fea-
ture, perform the following:
1) Press the display menu button on the
remote control.
2) Use the remote control menu naviga-
tion arrows and the enter button to use
the setup menu.
3) Press the display menu button again to
remove the setup menu from the
screen.Audio Output
Audio from the DVD player or auxiliary
inputs may be heard through the following
possible sources:
Wireless Headphones
Vehicle Speakers
The RSE system will always transmit the
audio signal to the wireless headphones, if
there is audio available. See “Head-
phones” earlier in this section for more
information.
When a device is connected to the radio’s
auxiliary input jack, if your vehicle has this
feature, or A/V jacks, the rear seat passen-
gers will be able to hear audio from the
auxiliary device through the wireless or
wired headphones. The front seat passen-
gers will be able to listen to playback from
this device through the vehicle speakers by
selecting AUX as the source on the radio.
Video Screen
The video screen is located in the RSE
overhead console.
To use the video screen, do the following:
1) Push the release button located on the
RSE overhead console.
2) Rotate the screen to the desired posi-
tion.
When the video screen is not in use, push
it up into its locked position.If a DVD is playing and the screen is raised
to its locked position, the screen will
remain on, this is normal, and the DVD will
continue to play through the previous audio
source. Use the remote control power but-
ton or eject the disc to turn off the screen.
The RSE overhead console contains the
infrared receivers for the wireless head-
phones and the infrared receivers for the
remote control. They are located at the
rear of the console.
CAUTION
Avoid directly touching the video
screen, as damage may occur. See
“Cleaning the Video Screen” later in
this section for more information.
Page 152 of 274

3-70 INSTRUMENT PANEL
78J00-03E
Remote Control
To use the remote control, aim it at the
transmitter window at the rear of the RSE
overhead console and press the desired
button. Direct sunlight or very bright light
may affect the ability of the RSE transmit-
ter to receive signals from the remote con-
trol. If the remote control does not seem to
be working, the batteries may need to be
replaced. See “Battery Replacement” later
in this section. Objects blocking the line of
sight may also affect the function of the
remote control.
If a CD or DVD is in the Radio DVD slot,
the remote control power button can be
used to turn on the video screen display
and start the disc. The radio can also turn
on the video screen display. Refer to
“Radio with CD and DVD (MP3)” in this
section for more information.Remote control buttons
1523717
(Power):
Press this button to turn the video screen
on and off.
(Illumination):
Press this button to turn the remote control
backlight on. The backlight will automati-
cally time out after seven to ten seconds if
no other button is pressed while the back-
light is on.
(Title):
Press this button to return the DVD to the
main menu of the DVD. This function may
vary for each disc.
(Main Menu):
Press this button to access the DVD menu.
The DVD menu is different on every DVD.
Use the up, down, left, and right arrow but-
tons to move the cursor around the DVD
menu. After making a selection press theenter button. This button only operates
when using a DVD.
, , , (Menu Navigation
Arrows):
Use the arrow buttons to navigate through
a menu.
(Enter):
Press this button to select the choice that
is highlighted in any menu.
(Display Menu):
Press this button to adjust the brightness,
screen display mode (normal, full, or
zoom), and display the language menu.
(Return):
Press this button to exit the current active
menu and return to the previous menu.
This button will operate only when the dis-
play menu or a DVD menu is active.
(Stop):
Press this button to stop playing, rewind-
ing, or fast forwarding a DVD. Press this
button twice to return to the beginning of
the DVD.
(Play/Pause):
Press this button to start playing a DVD.
Press this button while a DVD is playing to
pause it. Press it again to continue playing
the DVD.
When the DVD is playing, depending on
the radio, you may be able to do slow play
by pressing the pause button then pressing
the fast forward button. The DVD will con-
CAUTION
Storing the remote control in a hot
area or in direct sunlight can damage
it, and the repairs will not be covered
by your warranty. Keep the remote
control stored in a cool, dry place.
 1
1 2
2 3
3 4
4 5
5 6
6 7
7 8
8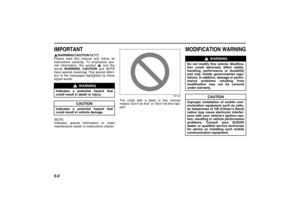 9
9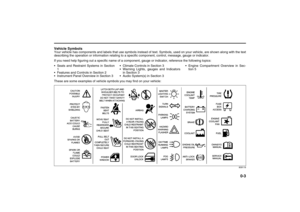 10
10 11
11 12
12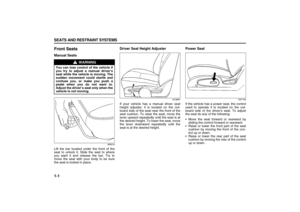 13
13 14
14 15
15 16
16 17
17 18
18 19
19 20
20 21
21 22
22 23
23 24
24 25
25 26
26 27
27 28
28 29
29 30
30 31
31 32
32 33
33 34
34 35
35 36
36 37
37 38
38 39
39 40
40 41
41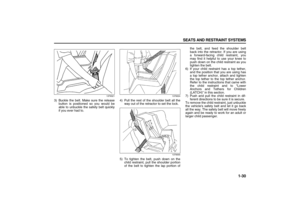 42
42 43
43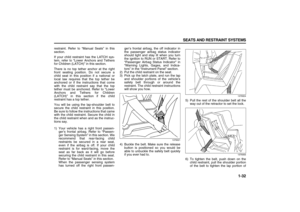 44
44 45
45 46
46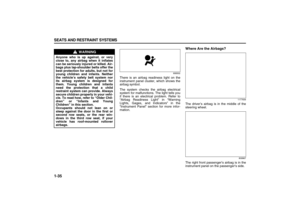 47
47 48
48 49
49 50
50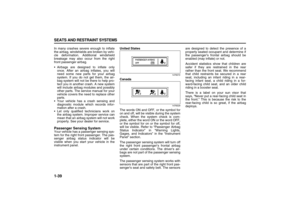 51
51 52
52 53
53 54
54 55
55 56
56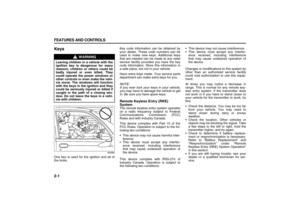 57
57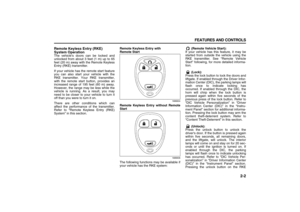 58
58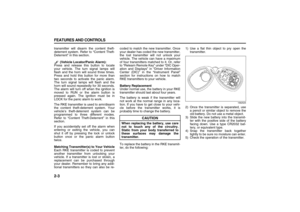 59
59 60
60 61
61 62
62 63
63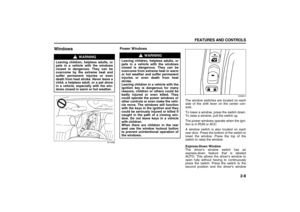 64
64 65
65 66
66 67
67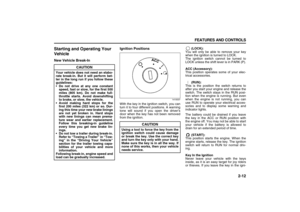 68
68 69
69 70
70 71
71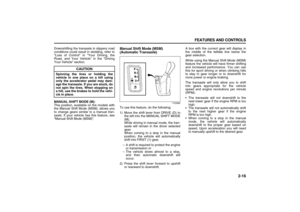 72
72 73
73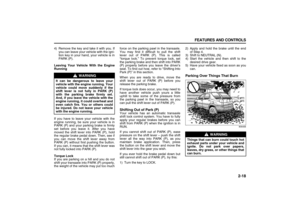 74
74 75
75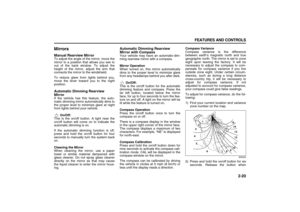 76
76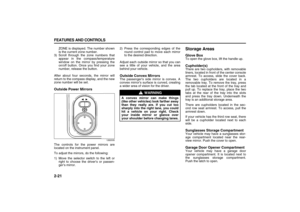 77
77 78
78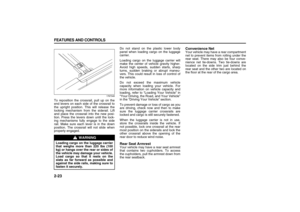 79
79 80
80 81
81 82
82 83
83 84
84 85
85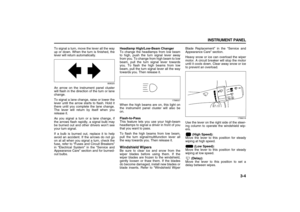 86
86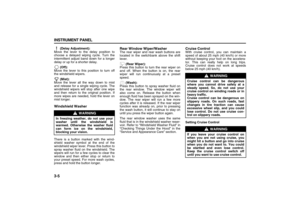 87
87 88
88 89
89 90
90 91
91 92
92 93
93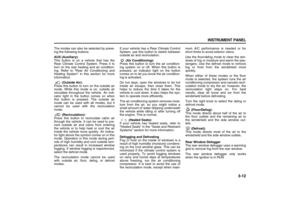 94
94 95
95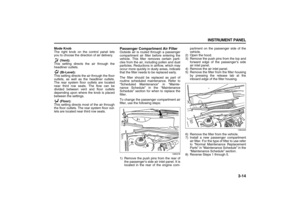 96
96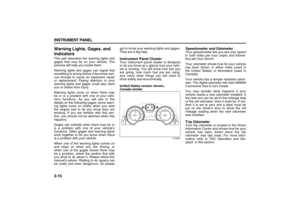 97
97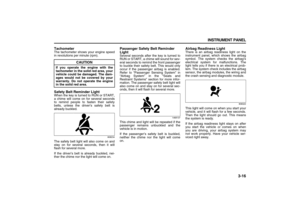 98
98 99
99 100
100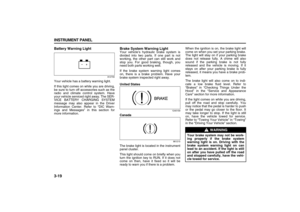 101
101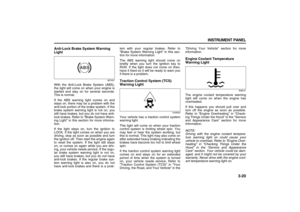 102
102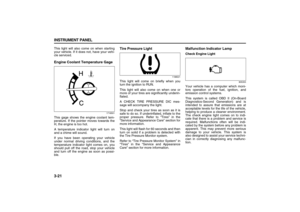 103
103 104
104 105
105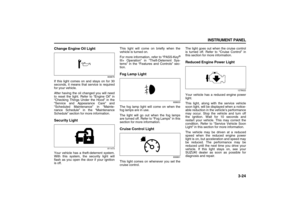 106
106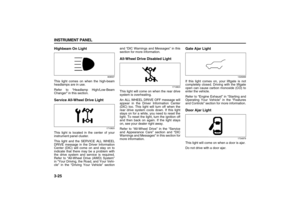 107
107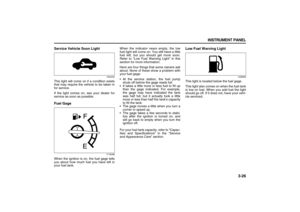 108
108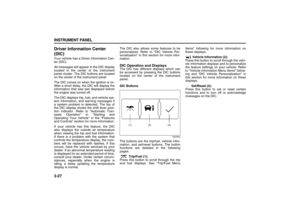 109
109 110
110 111
111 112
112 113
113 114
114 115
115 116
116 117
117 118
118 119
119 120
120 121
121 122
122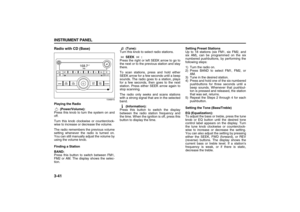 123
123 124
124 125
125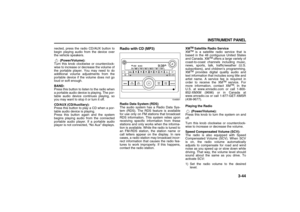 126
126 127
127 128
128 129
129 130
130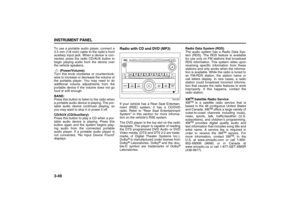 131
131 132
132 133
133 134
134 135
135 136
136 137
137 138
138 139
139 140
140 141
141 142
142 143
143 144
144 145
145 146
146 147
147 148
148 149
149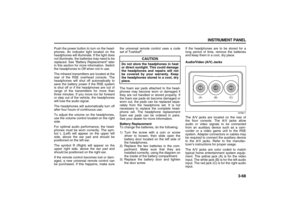 150
150 151
151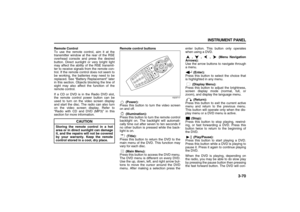 152
152 153
153 154
154 155
155 156
156 157
157 158
158 159
159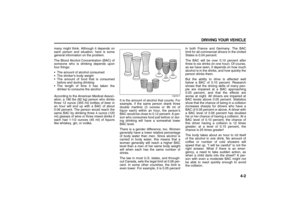 160
160 161
161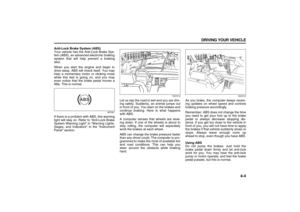 162
162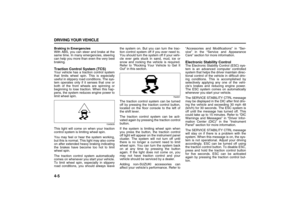 163
163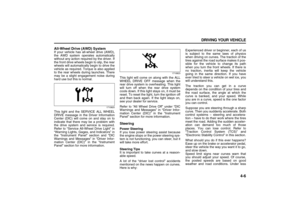 164
164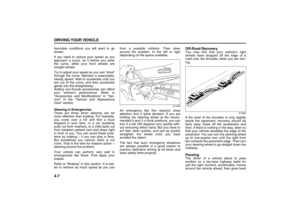 165
165 166
166 167
167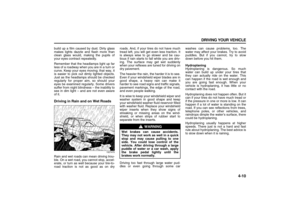 168
168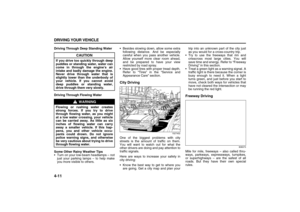 169
169 170
170 171
171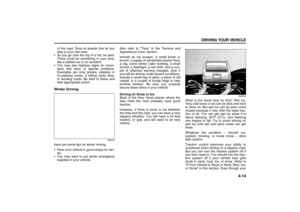 172
172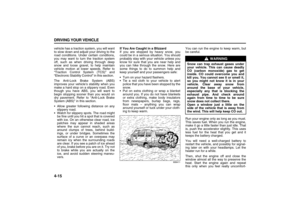 173
173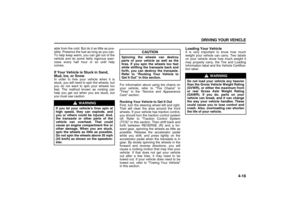 174
174 175
175 176
176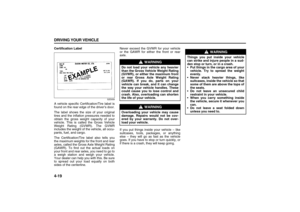 177
177 178
178 179
179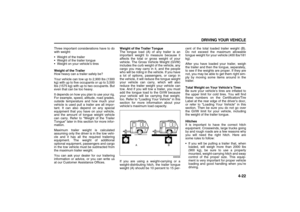 180
180 181
181 182
182 183
183 184
184 185
185 186
186 187
187 188
188 189
189 190
190 191
191 192
192 193
193 194
194 195
195 196
196 197
197 198
198 199
199 200
200 201
201 202
202 203
203 204
204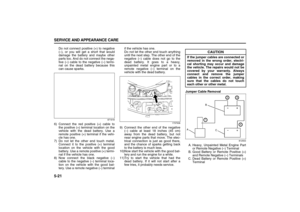 205
205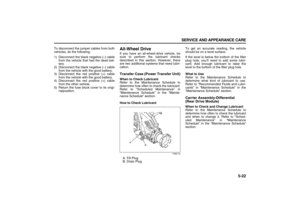 206
206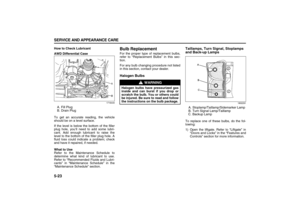 207
207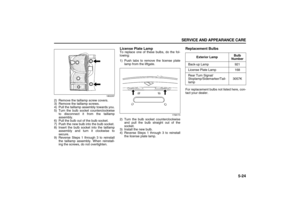 208
208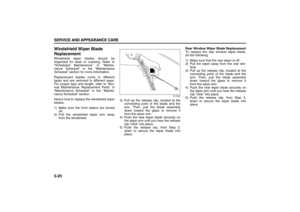 209
209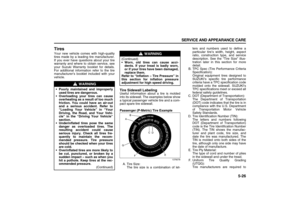 210
210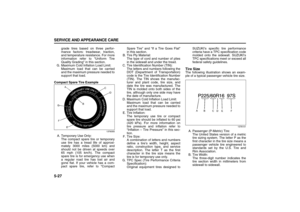 211
211 212
212 213
213 214
214 215
215 216
216 217
217 218
218 219
219 220
220 221
221 222
222 223
223 224
224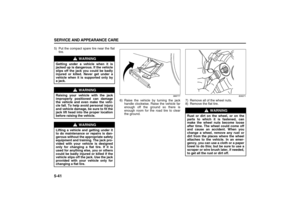 225
225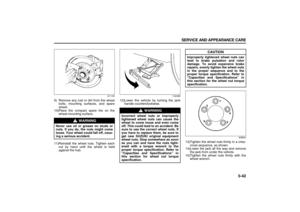 226
226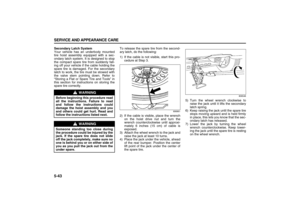 227
227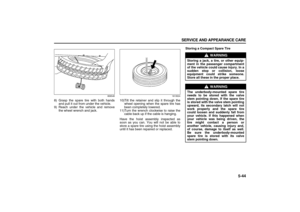 228
228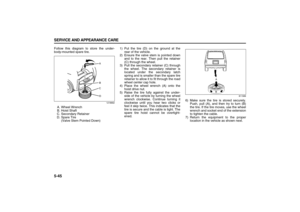 229
229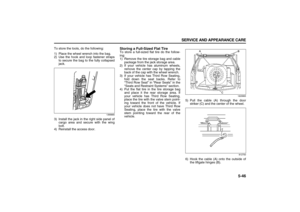 230
230 231
231 232
232 233
233 234
234 235
235 236
236 237
237 238
238 239
239 240
240 241
241 242
242 243
243 244
244 245
245 246
246 247
247 248
248 249
249 250
250 251
251 252
252 253
253 254
254 255
255 256
256 257
257 258
258 259
259 260
260 261
261 262
262 263
263 264
264 265
265 266
266 267
267 268
268 269
269 270
270 271
271 272
272 273
273