Page 169 of 274

4-11 DRIVING YOUR VEHICLE
78J00-03E
Driving Through Deep Standing Water
Driving Through Flowing Water
Some Other Rainy Weather Tips
Turn on your low-beam headlamps – not
just your parking lamps – to help make
you more visible to others. Besides slowing down, allow some extra
following distance. And be especially
careful when you pass another vehicle.
Allow yourself more clear room ahead,
and be prepared to have your view
restricted by road spray.
Have good tires with proper tread depth.
Refer to “Tires” in the “Service and
Appearance Care” section.
City Driving
1527452
One of the biggest problems with city
streets is the amount of traffic on them.
You will want to watch out for what the
other drivers are doing and pay attention to
traffic signals.
Here are ways to increase your safety in
city driving:
Know the best way to get to where you
are going. Get a city map and plan yourtrip into an unknown part of the city just
as you would for a cross-country trip.
Try to use the freeways that rim and
crisscross most large cities. You will
save time and energy. Refer to “Freeway
Driving” in this section.
Treat a green light as a warning signal. A
traffic light is there because the corner is
busy enough to need it. When a light
turns green, and just before you start to
move, check both ways for vehicles that
have not cleared the intersection or may
be running the red light.
Freeway Driving
808373
Mile for mile, freeways – also called thru-
ways, parkways, expressways, turnpikes,
or superhighways – are the safest of all
roads. But they have their own special
rules.
CAUTION
If you drive too quickly through deep
puddles or standing water, water can
come in through the engine’s air
intake and badly damage the engine.
Never drive through water that is
slightly lower than the underbody of
your vehicle. If you cannot avoid
deep puddles or standing water,
drive through them very slowly.
WARNING
Flowing or rushing water creates
strong forces. If you try to drive
through flowing water, as you might
at a low water crossing, your vehicle
can be carried away. As little as six
inches of flowing water can carry
away a smaller vehicle. If this hap-
pens, you and other vehicle occu-
pants could drown. Do not ignore
police warning signs, and otherwise
be very cautious about trying to drive
through flowing water.
Page 170 of 274

4-12 DRIVING YOUR VEHICLE
78J00-03E
The most important advice on freeway
driving is: Keep up with traffic and keep to
the right. Drive at the same speed most of
the other drivers are driving. Too-fast or
too-slow driving breaks a smooth traffic
flow. Treat the left lane on a freeway as a
passing lane.
At the entrance, there is usually a ramp
that leads to the freeway. If you have a
clear view of the freeway as you drive
along the entrance ramp, you should begin
to check traffic. Try to determine where you
expect to blend with the flow. Try to merge
into the gap at close to the prevailing
speed. Switch on your turn signal, check
your mirrors, and glance over your shoul-
der as often as necessary. Try to blend
smoothly with the traffic flow.
Once you are on the freeway, adjust your
speed to the posted limit or to the prevail-
ing rate if it is slower. Stay in the right lane
unless you want to pass.
Before changing lanes, check your mirrors.
Then use your turn signal.
Just before you leave the lane, glance
quickly over your shoulder to make sure
there is not another vehicle in your blind
spot.
Once you are moving on the freeway,
make certain you allow a reasonable fol-
lowing distance. Expect to move slightly
slower at night.When you want to leave the freeway, move
to the proper lane well in advance. If you
miss your exit, do not, under any circum-
stances, stop and back up. Drive on to the
next exit.
The exit ramp can be curved, sometimes
quite sharply. The exit speed is usually
posted.
Reduce your speed according to your
speedometer, not to your sense of motion.
After driving for any distance at higher
speeds, you may tend to think you are
going slower than you actually are.
Before Leaving on a Long TripMake sure you are ready. Try to be well
rested. If you must start when you are not
fresh – such as after a day’s work – do not
plan to make too many miles that first part
of the journey. Wear comfortable clothing
and shoes you can easily drive in.
Is your vehicle ready for a long trip? If you
keep it serviced and maintained, it is ready
to go. If it needs service, have it done
before starting out. Of course, you will find
experienced and able service experts in
dealerships all across North America.
They will be ready and willing to help if you
need it.Here are some things you can check
before a trip:
Windshield Washer Fluid:
Is the reservoir full? Are all windows
clean inside and outside?
Wiper Blades:
Are they in good shape?
Fuel, Engine Oil, Other Fluids:
Have you checked all levels?
Lamps:
Are they all working? Are the lenses
clean?
Tires:
They are vitally important to a safe, trou-
ble-free trip. Is the tread good enough for
long-distance driving? Are the tires all
inflated to the recommended pressure?
Weather Forecasts:
What is the weather outlook along your
route? Should you delay your trip a short
time to avoid a major storm system?
Maps:
Do you have up-to-date maps?
Highway HypnosisIs there actually such a condition as high-
way hypnosis? Or is it just plain falling
asleep at the wheel? Call it highway hyp-
nosis, lack of awareness, or whatever.
There is something about an easy stretch
of road with the same scenery, along with
the hum of the tires on the road, the drone
of the engine, and the rush of the wind
against the vehicle that can make you
sleepy. Do not let it happen to you! If it
Page 171 of 274

4-13 DRIVING YOUR VEHICLE
78J00-03E
does, your vehicle can leave the road in
less than a second, and you could crash
and be injured.
What can you do about highway hypnosis?
First, be aware that it can happen.
Then here are some tips:
Make sure your vehicle is well ventilated,
with a comfortably cool interior.
Keep your eyes moving. Scan the road
ahead and to the sides. Check your
vehicle’s mirrors and instruments fre-
quently.
If you get sleepy, pull off the road into a
rest, service, or parking area and take a
nap, get some exercise, or both. For
safety, treat drowsiness on the highway
as an emergency.
Hill and Mountain Roads
806088
Driving on steep hills or mountains is differ-
ent from driving in flat or rolling terrain.
If you drive regularly in steep country, or if
you are planning to visit there, here are
some tips that can make your trips safer
and more enjoyable.
Keep your vehicle in good shape. Check
all fluid levels and also the brakes, tires,
cooling system, and transaxle. These
parts can work hard on mountain roads. Know how to go down hills. The most
important thing to know is this: let your
engine do some of the slowing down.
Shift to a lower gear when you go down
a steep or long hill.
Know how to go uphill. You may want to
shift down to a lower gear. The lower
gears help cool your engine and tran-
saxle, and you can climb the hill better.
Stay in your own lane when driving on
two-lane roads in hills or mountains. Do
not swing wide or cut across the center
WARNING
If you do not shift down, the brakes
could get so hot that they would not
work well. You would then have poor
braking or even none going down a
hill. You could crash. Shift down to
let the engine assist the brakes on a
steep downhill slope.
WARNING
Coasting downhill in NEUTRAL (N) or
with the ignition off is dangerous.
The brakes will have to do all the
work of slowing down. They could
get so hot that they would not work
well. You would then have poor brak-
ing or even none going down a hill.
You could crash. Always have the
engine running and your vehicle in
gear when you go downhill.
Page 172 of 274

4-14 DRIVING YOUR VEHICLE
78J00-03E
of the road. Drive at speeds that let you
stay in your own lane.
As you go over the top of a hill, be alert.
There could be something in your lane,
like a stalled car or an accident.
You may see highway signs on moun-
tains that warn of special problems.
Examples are long grades, passing or
no-passing zones, a falling rocks area,
or winding roads. Be alert to these and
take appropriate action.Winter Driving
808372
Here are some tips for winter driving:
Have your vehicle in good shape for win-
ter.
You may want to put winter emergency
supplies in your vehicle.Also refer to “Tires” in the “Service and
Appearance Care” section.
Include an ice scraper, a small brush or
broom, a supply of windshield washer fluid,
a rag, some winter outer clothing, a small
shovel, a flashlight, a red cloth, and a cou-
ple of reflective warning triangles. And, if
you will be driving under severe conditions,
include a small bag of sand, a piece of old
carpet, or a couple of burlap bags to help
provide traction. Be sure you properly
secure these items in your vehicle.
Driving on Snow or Ice
Most of the time, those places where the
tires meet the road probably have good
traction.
However, if there is snow or ice between
the tires and the road, you can have a very
slippery situation. You will have a lot less
traction, or grip, and will need to be very
careful.
808402
What is the worst time for this? Wet ice.
Very cold snow or ice can be slick and hard
to drive on. But wet ice can be even more
trouble because it may offer the least trac-
tion of all. You can get wet ice when it is
about freezing, 32°F (0°C), and freezing
rain begins to fall. Try to avoid driving on
wet ice until salt and sand crews can get
there.
Whatever the condition – smooth ice,
packed, blowing, or loose snow – drive
with caution.
Traction control improves your ability to
accelerate when driving on a slippery road.
But you can turn the traction system off if
you ever need to. You should turn the trac-
tion system off if your vehicle ever gets
stuck in sand, mud, ice, or snow. Refer to
“If Your Vehicle is Stuck in Sand, Mud, Ice,
or Snow” in this section. Even though your
Page 173 of 274

4-15 DRIVING YOUR VEHICLE
78J00-03E
vehicle has a traction system, you will want
to slow down and adjust your driving to the
road conditions. Under certain conditions,
you may want to turn the traction system
off, such as when driving through deep
snow and loose gravel, to help maintain
vehicle motion at lower speeds. Refer to
“Traction Control System (TCS)” and
“Electronic Stability Control” in this section.
The Anti-Lock Brake System (ABS)
improves your vehicle’s stability when you
make a hard stop on a slippery road. Even
though you have ABS, you will want to
begin stopping sooner than you would on
dry pavement. Refer to “Anti-Lock Brake
System (ABS)” in this section.
Allow greater following distance on any
slippery road.
Watch for slippery spots. The road might
be fine until you hit a spot that is covered
with ice. On an otherwise clear road, ice
patches may appear in shaded areas
where the sun cannot reach, such as
around clumps of trees, behind build-
ings, or under bridges. Sometimes the
surface of a curve or an overpass may
remain icy when the surrounding roads
are clear. If you see a patch of ice ahead
of you, brake before you are on it. Try not
to brake while you are actually on the
ice, and avoid sudden steering maneu-
vers.If You Are Caught in a Blizzard
If you are stopped by heavy snow, you
could be in a serious situation. You should
probably stay with your vehicle unless you
know for sure that you are near help and
you can hike through the snow. Here are
some things to do to summon help and
keep yourself and your passengers safe:
Turn on your hazard flashers.
Tie a red cloth to your vehicle to alert
police that you have been stopped by the
snow.
Put on extra clothing or wrap a blanket
around you. If you do not have blankets
or extra clothing, make body insulators
from newspapers, burlap bags, rags,
floor mats – anything you can wrap
around yourself or tuck under your cloth-
ing to keep warm.
808411
You can run the engine to keep warm, but
be careful.
Run your engine only as long as you must.
This saves fuel. When you run the engine,
make it go a little faster than just idle. That
is, push the accelerator slightly. This uses
less fuel for the heat that you get and it
keeps the battery charged.
You will need a well-charged battery to
restart the vehicle, and possibly for signal-
ing later on with your headlamps. Let the
heater run for a while.
Then, shut the engine off and close the
window almost all the way to preserve the
heat. Start the engine again and repeat
this only when you feel really uncomfort-
WARNING
Snow can trap exhaust gases under
your vehicle. This can cause deadly
CO (carbon monoxide) gas to get
inside. CO could overcome you and
kill you. You cannot see it or smell it,
so you might not know it is in your
vehicle. Clear away snow from
around the base of your vehicle,
especially any that is blocking the
exhaust pipe. And check around
again from time to time to be sure
snow does not collect there.
Open a window just a little on the
side of the vehicle that is away from
the wind. This will help keep CO out.
Page 174 of 274

4-16 DRIVING YOUR VEHICLE
78J00-03E
able from the cold. But do it as little as pos-
sible. Preserve the fuel as long as you can.
To help keep warm, you can get out of the
vehicle and do some fairly vigorous exer-
cises every half hour or so until help
comes.If Your Vehicle is Stuck in Sand,
Mud, Ice, or SnowIn order to free your vehicle when it is
stuck, you will need to spin the wheels, but
you do not want to spin your wheels too
fast. The method known as rocking can
help you get out when you are stuck, but
you must use caution.For information about using tire chains on
your vehicle, refer to “Tire Chains” in
“Tires” in the “Service and Appearance
Care” section.
Rocking Your Vehicle to Get It Out
First, turn the steering wheel left and right.
That will clear the area around the front
wheels. If your vehicle has traction control,
you should turn the traction control system
off. Refer to “Traction Control System
(TCS)” in this section. Then shift back and
forth between REVERSE (R) and a for-
ward gear, spinning the wheels as little as
possible. Release the accelerator pedal
while you shift, and press lightly on the
accelerator pedal when the transaxle is in
gear. By slowly spinning the wheels in the
forward and reverse directions, you will
cause a rocking motion that may free your
vehicle. If that does not get your vehicle
out after a few tries, it may need to be
towed out. If your vehicle does need to be
towed out, refer to “Towing Your Vehicle”
in this section.
Loading Your VehicleIt is very important to know how much
weight your vehicle can carry. Two labels
on your vehicle show how much weight it
may properly carry, the Tire and Loading
Information label and the Vehicle Certifica-
tion label.
WARNING
If you let your vehicle’s tires spin at
high speed, they can explode, and
you or others could be injured. And,
the transaxle or other parts of the
vehicle can overheat. That could
cause an engine compartment fire or
other damage. When you are stuck,
spin the wheels as little as possible.
Do not spin the wheels above 35 mph
(55 km/h) as shown on the speedom-
eter.
CAUTION
Spinning the wheels can destroy
parts of your vehicle as well as the
tires. If you spin the wheels too fast
while shifting the transaxle back and
forth, you can destroy the transaxle.
Refer to “Rocking Your Vehicle to
Get It Out” in this section.
WARNING
Do not load your vehicle any heavier
than the Gross Vehicle Weight Rating
(GVWR), or either the maximum front
or rear Gross Axle Weight Rating
(GAWR). If you do, parts on your
vehicle can break, and it can change
the way your vehicle handles. These
could cause you to lose control and
crash. Also, overloading can shorten
the life of your vehicle.
Page 175 of 274

4-17 DRIVING YOUR VEHICLE
78J00-03E
Tire and Loading Information Label
Label Example
1556694
A vehicle specific Tire and Loading Infor-
mation label is attached to the vehicle’s
center pillar (B-pillar). With the driver’s
door open, you will find the label attached
below the door lock post (striker). The tire
and loading information label lists the num-
ber of occupant seating positions (A), and
the maximum vehicle capacity weight (B)
in kilograms and pounds. The vehicle
capacity weight includes the weight of all
occupants, cargo, and all nonfactory-
installed options.
The Tire and Loading Information label
also lists the tire size of the original equip-
ment tires (C) and the recommended cold
tire inflation pressures (D). For more infor-
mation on tires and inflation, refer to “Tires”
in the “Service and Appearance Care” sec-tion and “Inflation - Tire Pressure” in “Tires”
in the “Service and Appearance Care” sec-
tion.
There is also important loading information
on the Certification/Tire label. It tells you
the Gross Vehicle Weight Rating (GVWR)
and the Gross Axle Weight Rating (GAWR)
for the front and rear axles. See “Certifica-
tion/Tire Label” later in this section.
Steps for Determining Correct Load
Limit
1) Locate the statement “The combined
weight of occupants and cargo should
never exceed XXX kg or XXX lbs” on
your vehicle’s placard.
2) Determine the combined weight of the
driver and passengers that will be riding
in your vehicle.
3) Subtract the combined weight of the
driver and passengers from XXX kg or
XXX lbs.
4) The resulting figure equals the available
amount of cargo and luggage load
capacity. For example, if the “XXX”
amount equals 1400 lbs and there will
be five 150 lb passengers in your vehi-
cle, the amount of available cargo and
luggage load capacity is 650 lbs (1400
– 750 (5 x 150) = 650 lbs).
5) Determine the combined weight of lug-
gage and cargo being loaded on the
vehicle. That weight may not safely
exceed the available cargo and luggage
load capacity calculated in Step 4.6) If your vehicle will be towing a trailer,
the load from your trailer will be trans-
ferred to your vehicle. Consult this man-
ual to determine how this reduces the
available cargo and luggage load
capacity for your vehicle.
If your vehicle can tow a trailer, refer to
“Towing a Trailer” in this section for impor-
tant information on towing a trailer, towing
safety rules, and trailering tips.
Page 176 of 274
4-18 DRIVING YOUR VEHICLE
78J00-03E
Example 1
1273153
Example 2
1273154
Example 3
1273155
Refer to your vehicle’s tire and loading
information label for specific information
about your vehicle’s maximum vehicle
capacity weight and seating positions. The
combined weight of the driver, passengers,
and cargo should never exceed your vehi-
cle’s maximum vehicle capacity weight. Item Descripion Total
AMaximum Vehicle
Capacity Weight for
Example 1 =1000 lbs
(453 kg)
BSubtract Occupant
Weight 150 lbs (68
kg) x 2 =300 lbs
(136 kg)
CAvailable Occupant
and Cargo Weight = 700 lbs
(317 kg)
Item Descripion Total
AMaximum Vehicle
Capacity Weight for
Example 2 =1000 lbs
(453 kg)
BSubtract Occupant
Weight 150 lbs (68
kg) x 2 =750 lbs
(340 kg)
CAvailable Occupant
Weight = 250 lbs
(113 kg)
Item Descripion Total
AMaximum Vehicle
Capacity Weight for
Example 3 =1000 lbs
(453 kg)
BSubtract Occupant
Weight 200 lbs (91
kg) × 5 =1000 lbs
(453 kg)
CAvailable Cargo
Weight = 0 lbs
(0 kg)
 1
1 2
2 3
3 4
4 5
5 6
6 7
7 8
8 9
9 10
10 11
11 12
12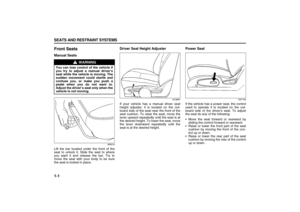 13
13 14
14 15
15 16
16 17
17 18
18 19
19 20
20 21
21 22
22 23
23 24
24 25
25 26
26 27
27 28
28 29
29 30
30 31
31 32
32 33
33 34
34 35
35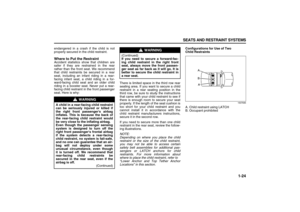 36
36 37
37 38
38 39
39 40
40 41
41 42
42 43
43 44
44 45
45 46
46 47
47 48
48 49
49 50
50 51
51 52
52 53
53 54
54 55
55 56
56 57
57 58
58 59
59 60
60 61
61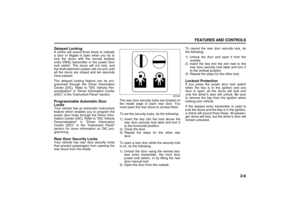 62
62 63
63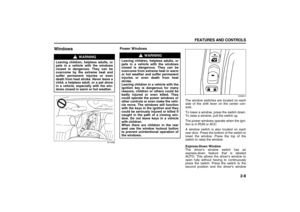 64
64 65
65 66
66 67
67 68
68 69
69 70
70 71
71 72
72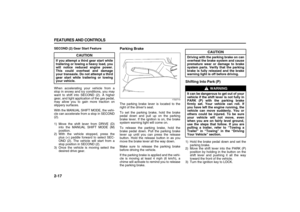 73
73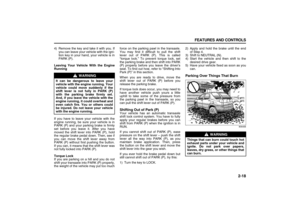 74
74 75
75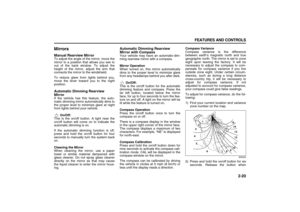 76
76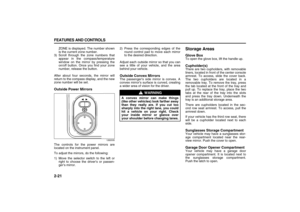 77
77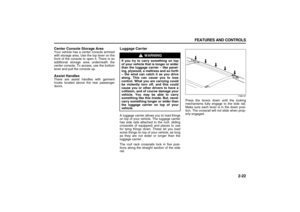 78
78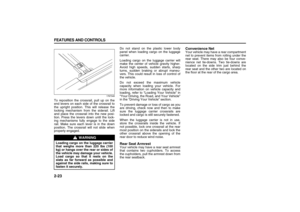 79
79 80
80 81
81 82
82 83
83 84
84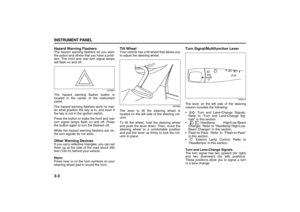 85
85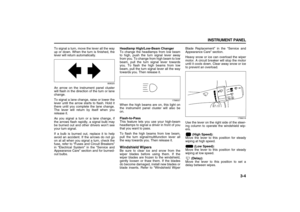 86
86 87
87 88
88 89
89 90
90 91
91 92
92 93
93 94
94 95
95 96
96 97
97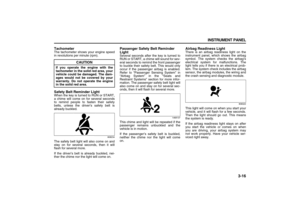 98
98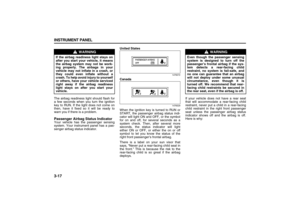 99
99 100
100 101
101 102
102 103
103 104
104 105
105 106
106 107
107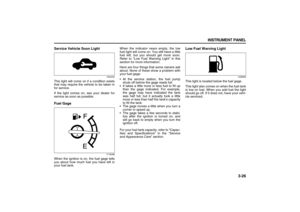 108
108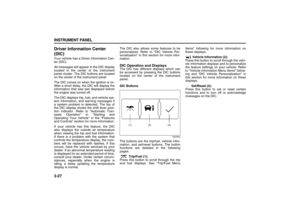 109
109 110
110 111
111 112
112 113
113 114
114 115
115 116
116 117
117 118
118 119
119 120
120 121
121 122
122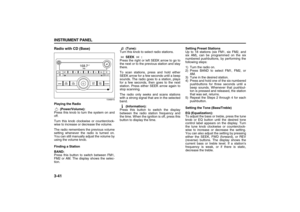 123
123 124
124 125
125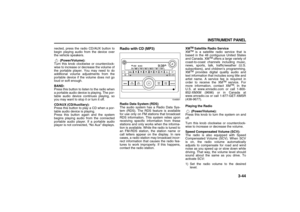 126
126 127
127 128
128 129
129 130
130 131
131 132
132 133
133 134
134 135
135 136
136 137
137 138
138 139
139 140
140 141
141 142
142 143
143 144
144 145
145 146
146 147
147 148
148 149
149 150
150 151
151 152
152 153
153 154
154 155
155 156
156 157
157 158
158 159
159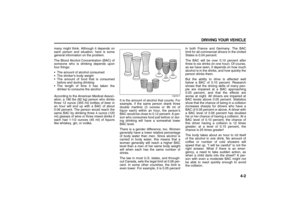 160
160 161
161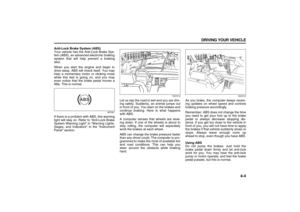 162
162 163
163 164
164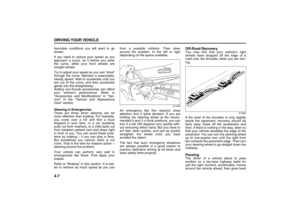 165
165 166
166 167
167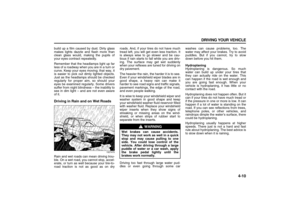 168
168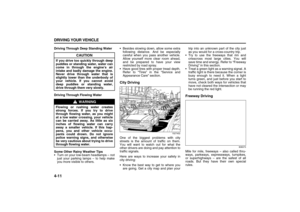 169
169 170
170 171
171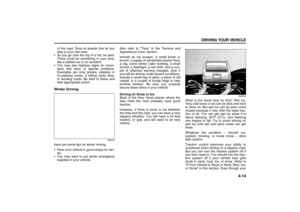 172
172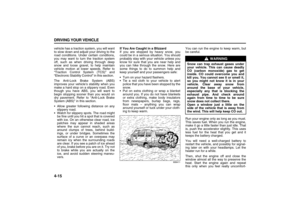 173
173 174
174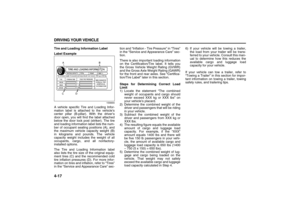 175
175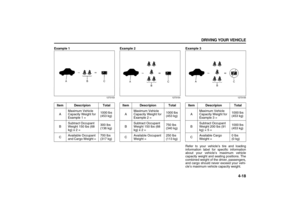 176
176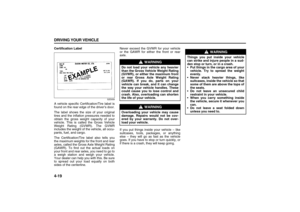 177
177 178
178 179
179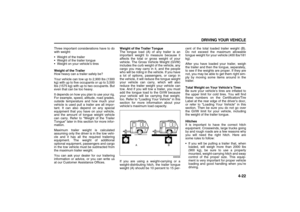 180
180 181
181 182
182 183
183 184
184 185
185 186
186 187
187 188
188 189
189 190
190 191
191 192
192 193
193 194
194 195
195 196
196 197
197 198
198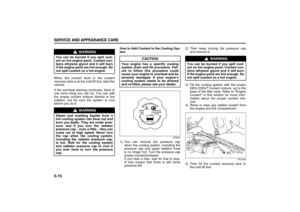 199
199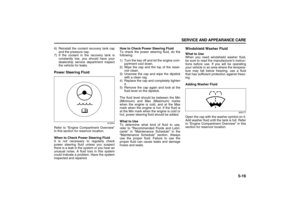 200
200 201
201 202
202 203
203 204
204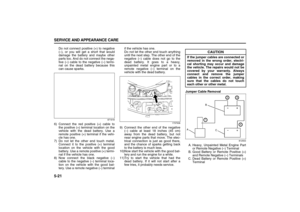 205
205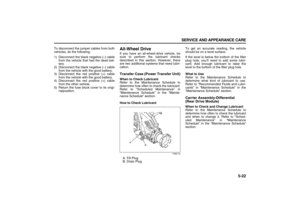 206
206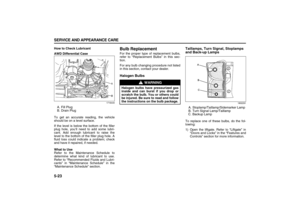 207
207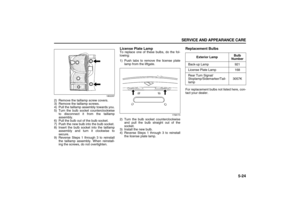 208
208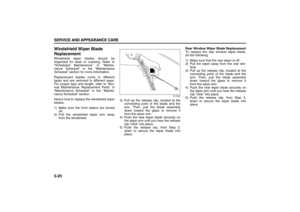 209
209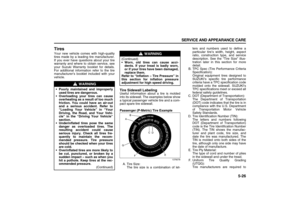 210
210 211
211 212
212 213
213 214
214 215
215 216
216 217
217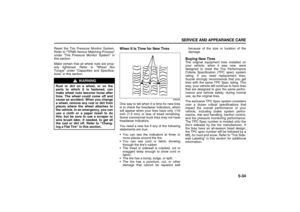 218
218 219
219 220
220 221
221 222
222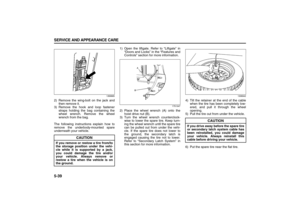 223
223 224
224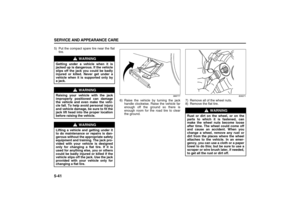 225
225 226
226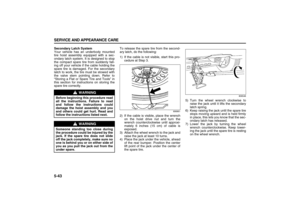 227
227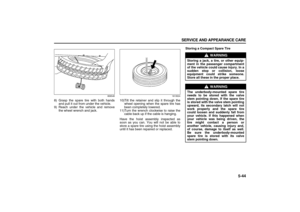 228
228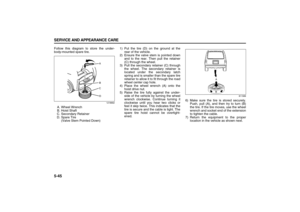 229
229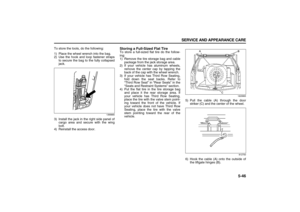 230
230 231
231 232
232 233
233 234
234 235
235 236
236 237
237 238
238 239
239 240
240 241
241 242
242 243
243 244
244 245
245 246
246 247
247 248
248 249
249 250
250 251
251 252
252 253
253 254
254 255
255 256
256 257
257 258
258 259
259 260
260 261
261 262
262 263
263 264
264 265
265 266
266 267
267 268
268 269
269 270
270 271
271 272
272 273
273