Page 1028 of 1575
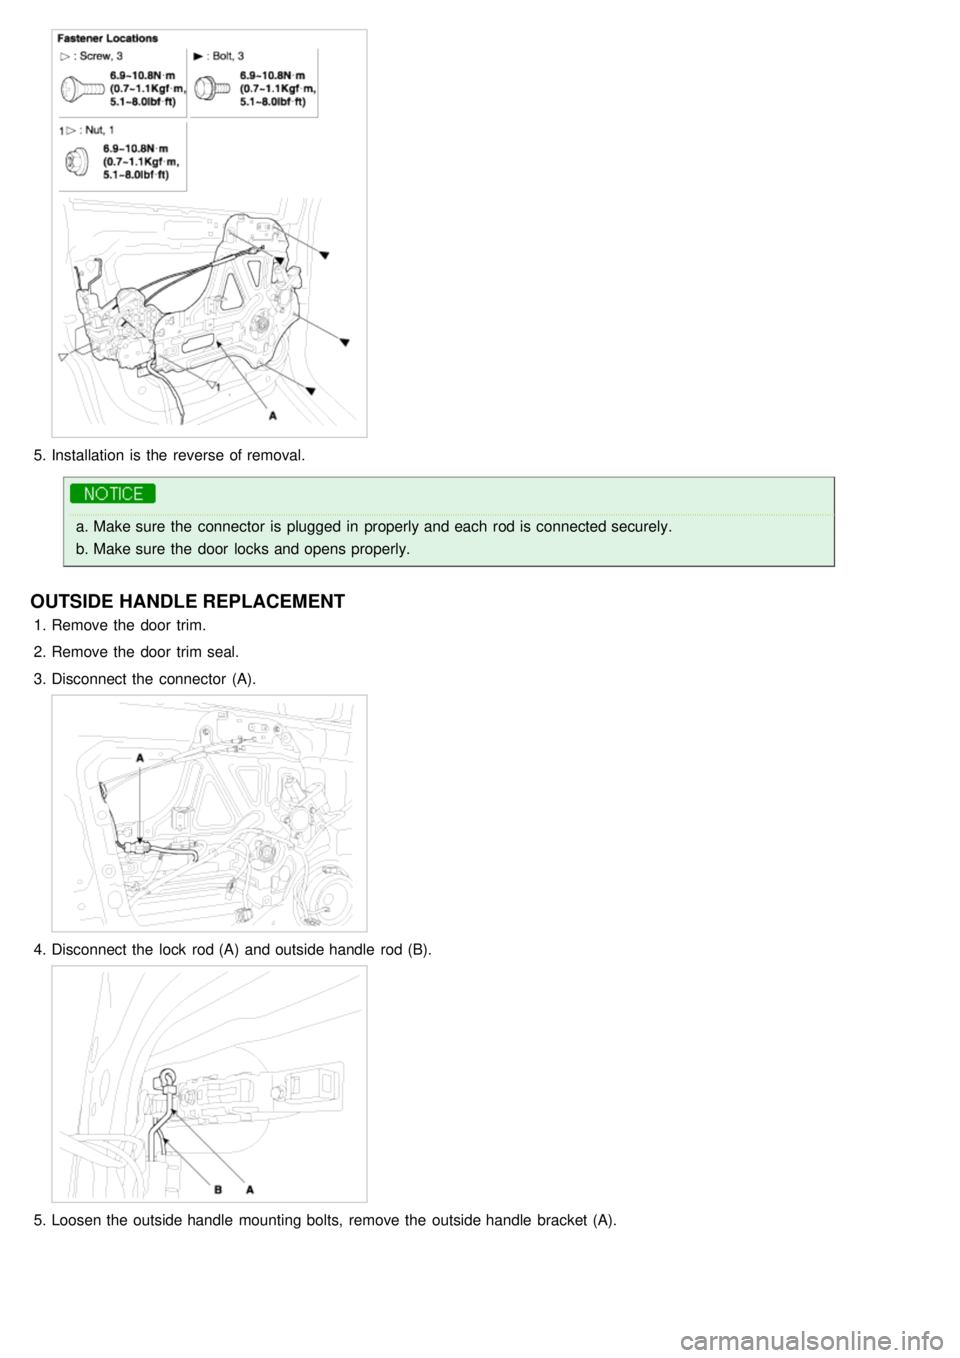
5.Installation is the reverse of removal.
a.Make sure the connector is plugged in properly and each rod is connected securely.
b. Make sure the door locks and opens properly.
OUTSIDE HANDLE REPLACEMENT
1.Remove the door trim.
2. Remove the door trim seal.
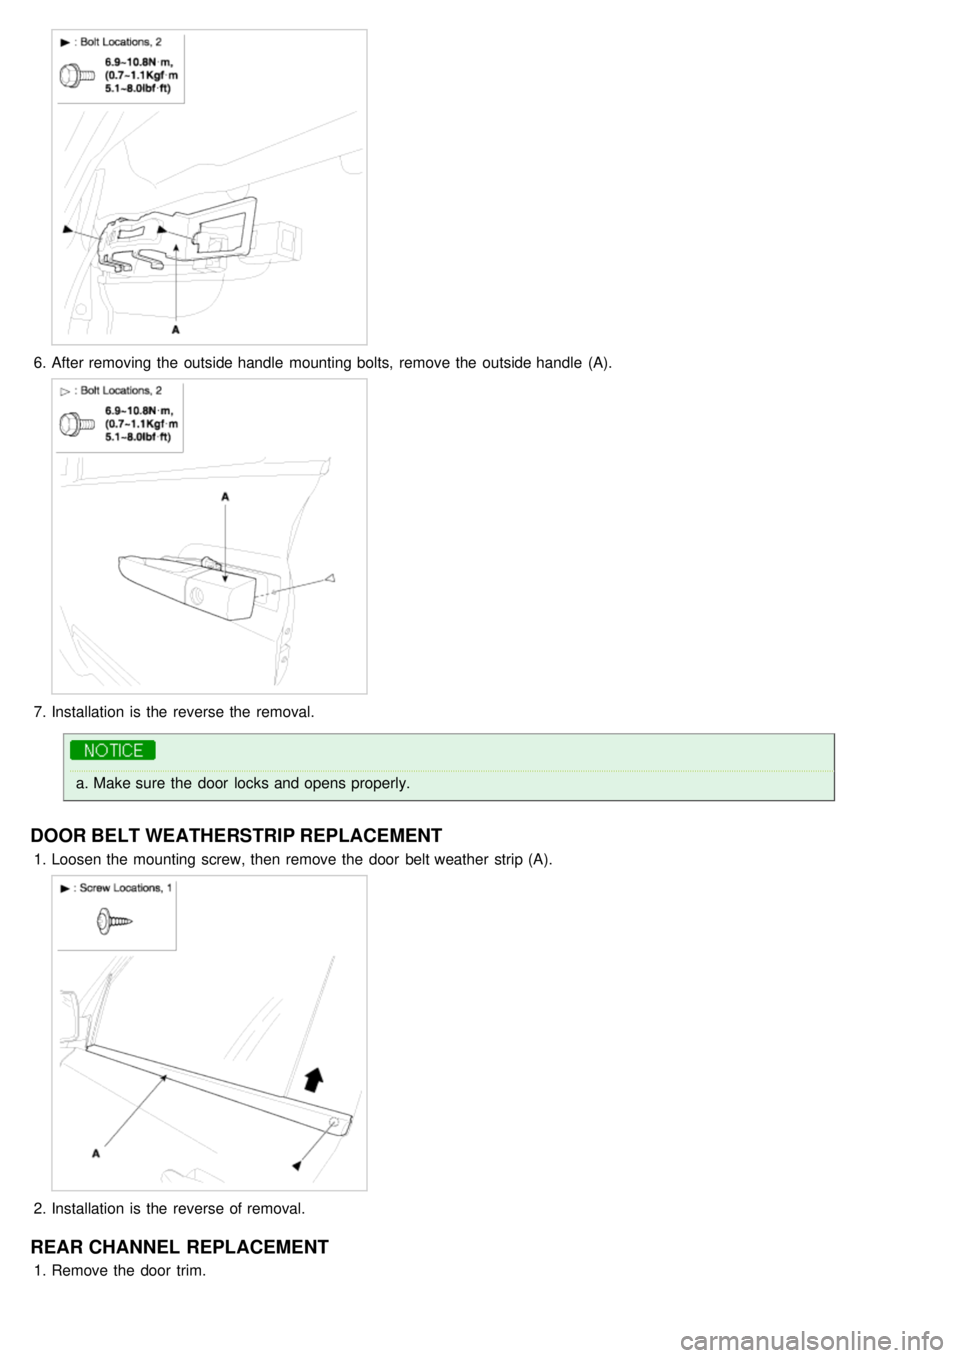
3. Disconnect the connector (A).
4.Disconnect the lock rod (A) and outside handle rod (B).
5.Loosen the outside handle mounting bolts, remove the outside handle bracket (A).
Page 1029 of 1575
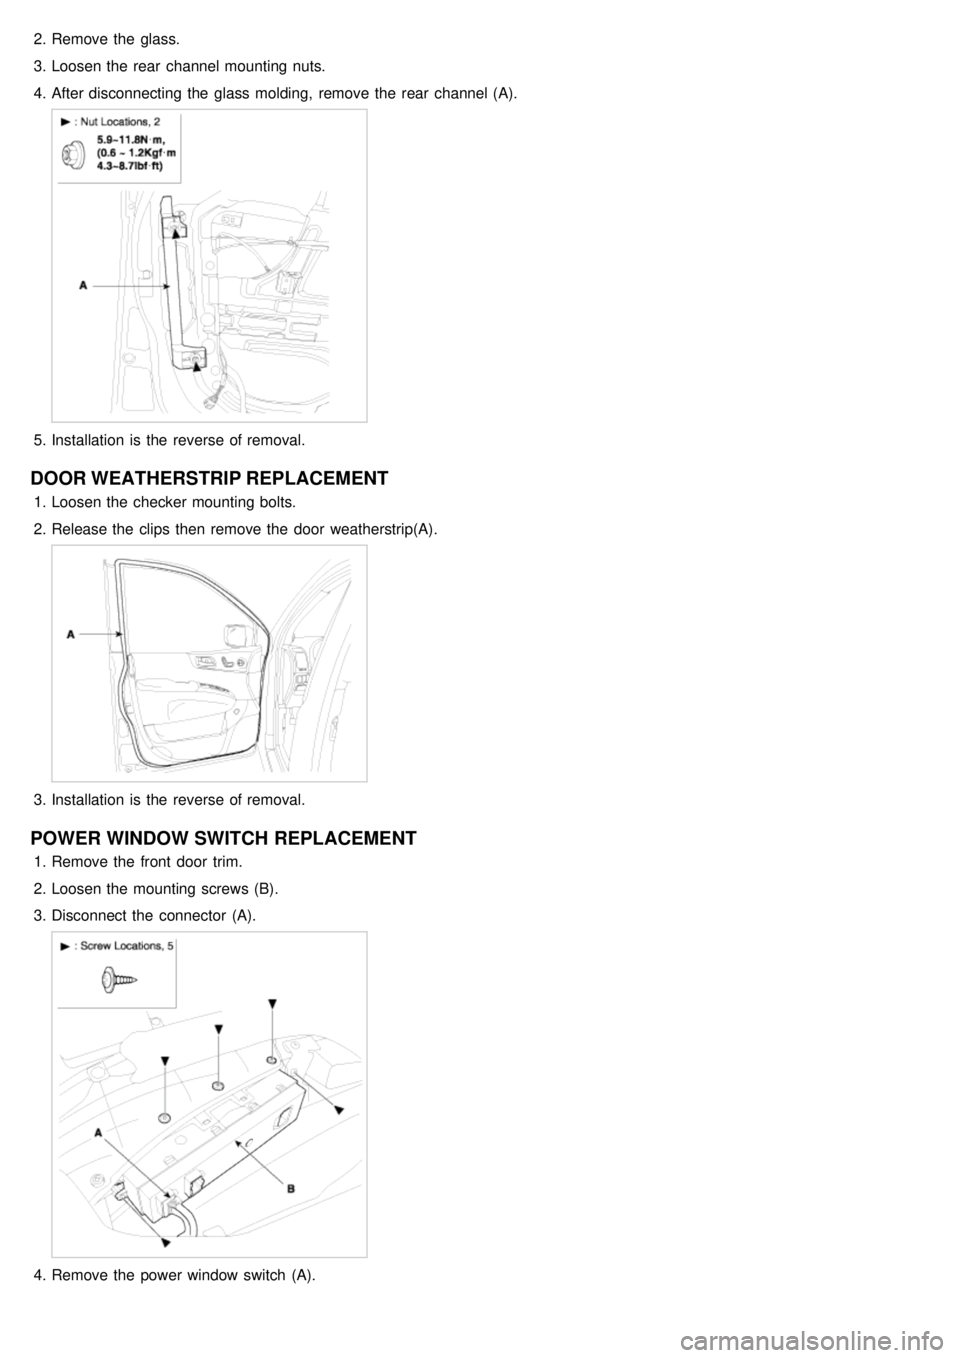
6.After removing the outside handle mounting bolts, remove the outside handle (A).
7.Installation is the reverse the removal.
a.Make sure the door locks and opens properly.
DOOR BELT WEATHERSTRIP REPLACEMENT
1.Loosen the mounting screw, then remove the door belt weather strip (A).
2.Installation is the reverse of removal.
REAR CHANNEL REPLACEMENT
1.Remove the door trim.
Page 1030 of 1575
2.Remove the glass.
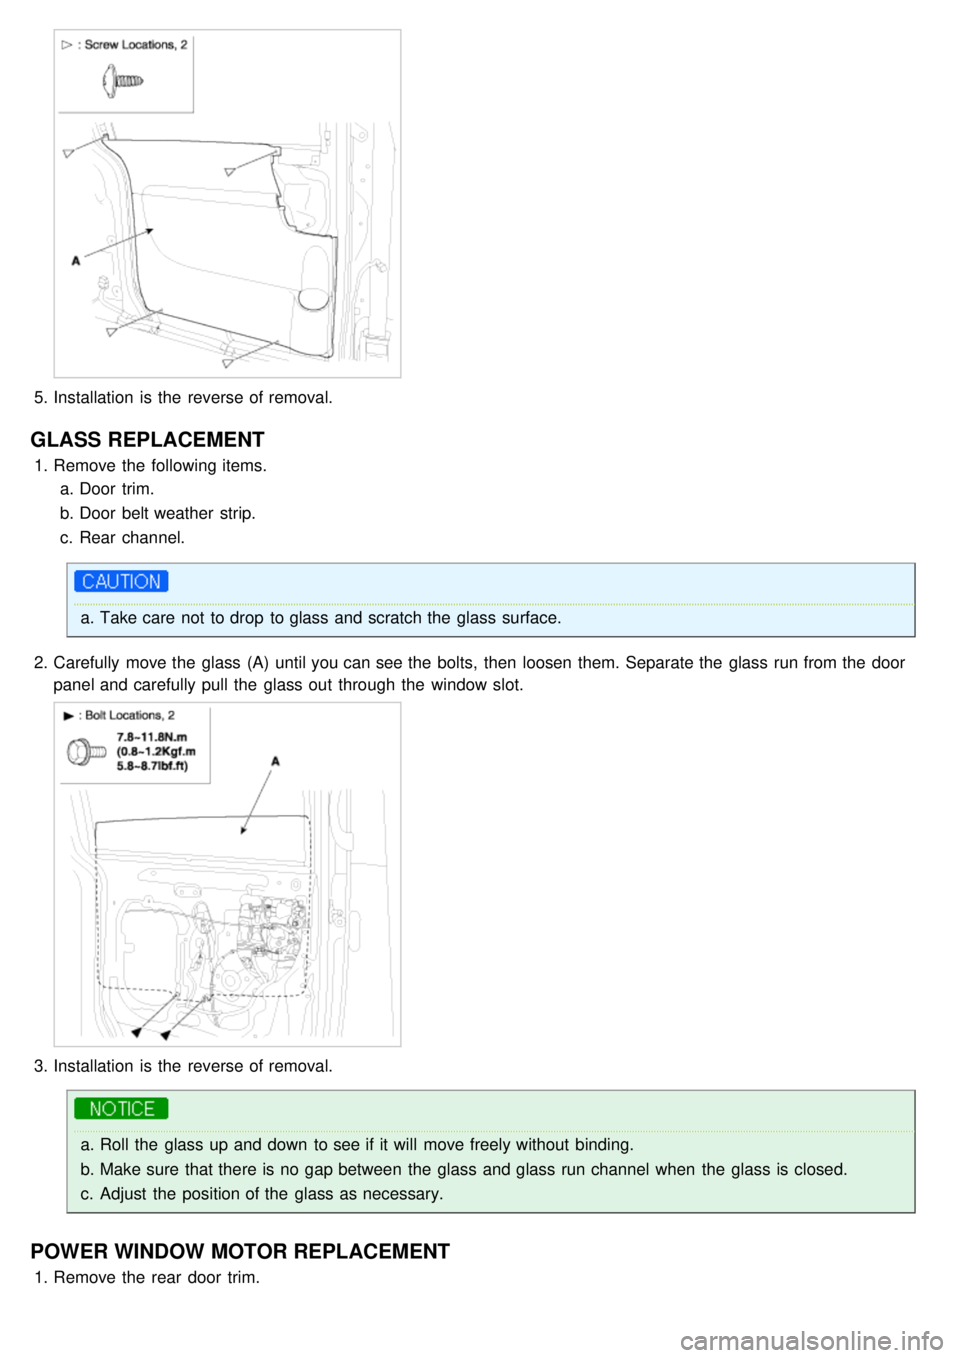
3. Loosen the rear channel mounting nuts.
4. After disconnecting the glass molding, remove the rear channel (A).
5.Installation is the reverse of removal.
DOOR WEATHERSTRIP REPLACEMENT
1.Loosen the checker mounting bolts.
2. Release the clips then remove the door weatherstrip(A).
3.Installation is the reverse of removal.
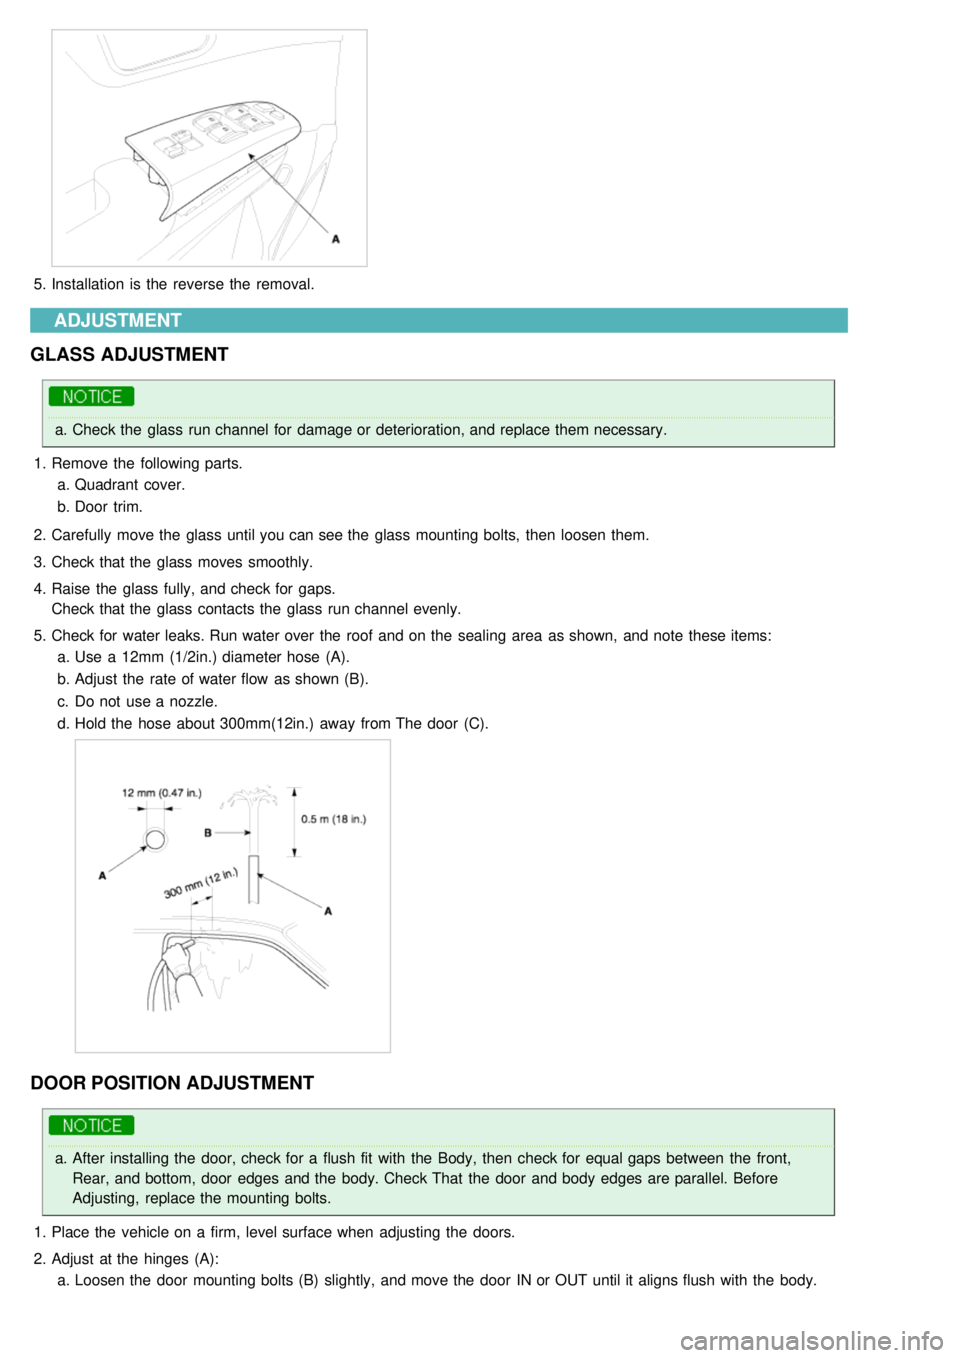
POWER WINDOW SWITCH REPLACEMENT
1.Remove the front door trim.
2. Loosen the mounting screws (B).
3. Disconnect the connector (A).
4.Remove the power window switch (A).
Page 1031 of 1575
5.Installation is the reverse the removal.
ADJUSTMENT
GLASS ADJUSTMENT
a. Check the glass run channel for damage or deterioration, and replace them necessary.
1. Remove the following parts.
a. Quadrant cover.
b. Door trim.
2. Carefully move the glass until you can see the glass mounting bolts, then loosen them.
3. Check that the glass moves smoothly.
4. Raise the glass fully, and check for gaps.
Check that the glass contacts the glass run channel evenly.
5. Check for water leaks. Run water over the roof and on the sealing area as shown, and note these items:
a. Use a 12mm (1/2in.) diameter hose (A).
b. Adjust the rate of water flow as shown (B).
c. Do not use a nozzle.
d. Hold the hose about 300mm(12in.) away from The door (C).
DOOR POSITION ADJUSTMENT
a.After installing the door, check for a flush fit with the Body, then check for equal gaps between the front,
Rear, and bottom, door edges and the body. Check That the door and body edges are parallel. Before
Adjusting, replace the mounting bolts.
1. Place the vehicle on a firm, level surface when adjusting the doors.
2. Adjust at the hinges (A):
a. Loosen the door mounting bolts (B) slightly, and move the door IN or OUT until it aligns flush with the body.
Page 1037 of 1575
5.Installation is the reverse of removal.
GLASS REPLACEMENT
1.Remove the following items.
a. Door trim.
b. Door belt weather strip.
c. Rear channel.
a.Take care not to drop to glass and scratch the glass surface.
2. Carefully move the glass (A) until you can see the bolts, then loosen them. Separate the glass run from the door
panel and carefully pull the glass out through the window slot.
3.Installation is the reverse of removal.
a.Roll the glass up and down to see if it will move freely without binding.
b. Make sure that there is no gap between the glass and glass run channel when the glass is closed.
c. Adjust the position of the glass as necessary.
POWER WINDOW MOTOR REPLACEMENT
1.Remove the rear door trim.
Page 1038 of 1575
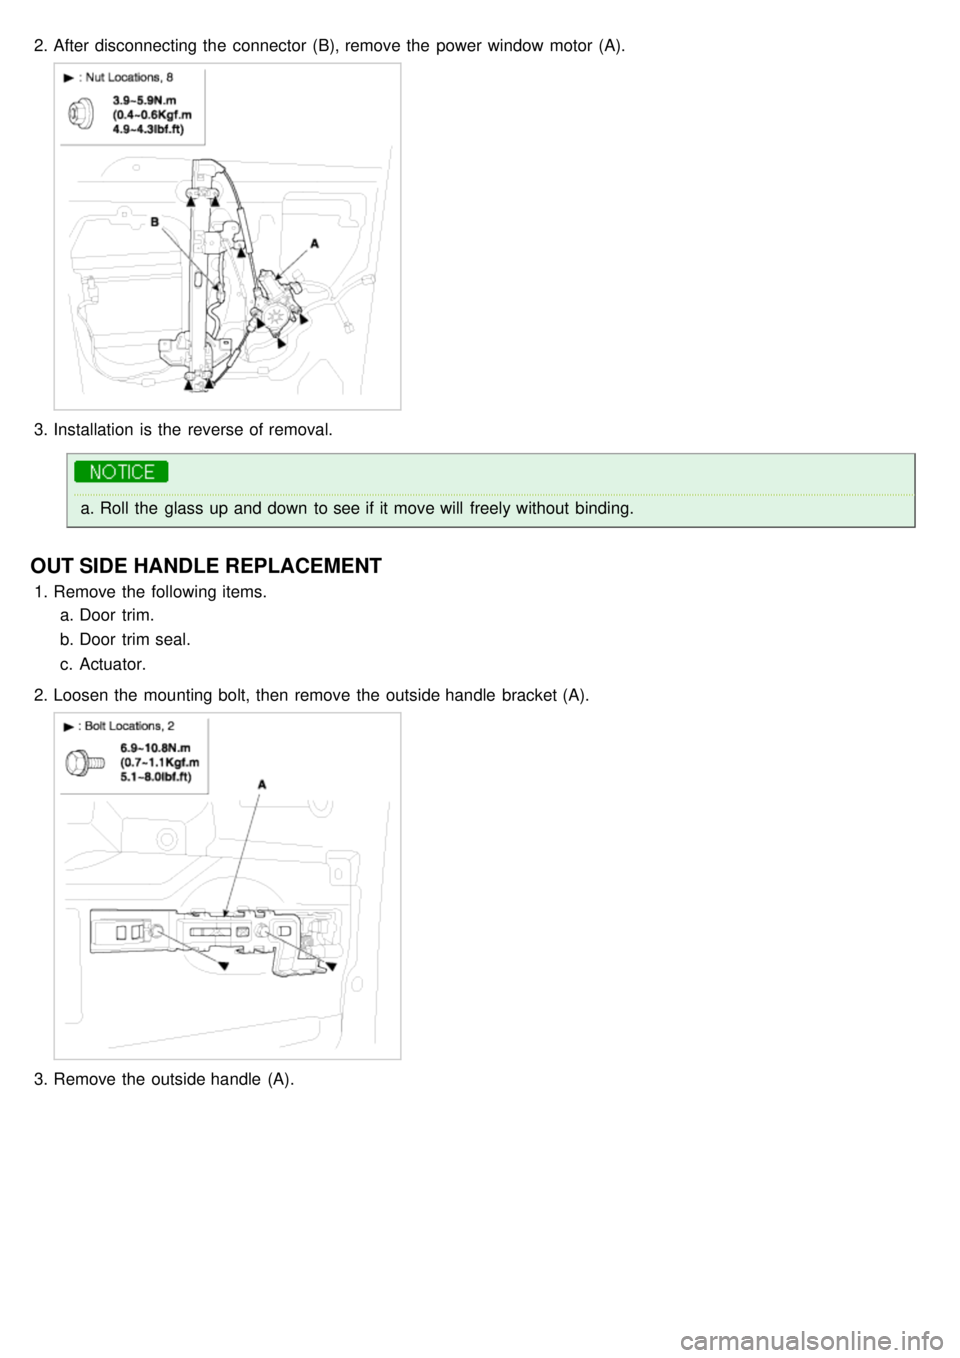
2.After disconnecting the connector (B), remove the power window motor (A).
3.Installation is the reverse of removal.
a.Roll the glass up and down to see if it move will freely without binding.
OUT SIDE HANDLE REPLACEMENT
1.Remove the following items.
a. Door trim.
b. Door trim seal.
c. Actuator.
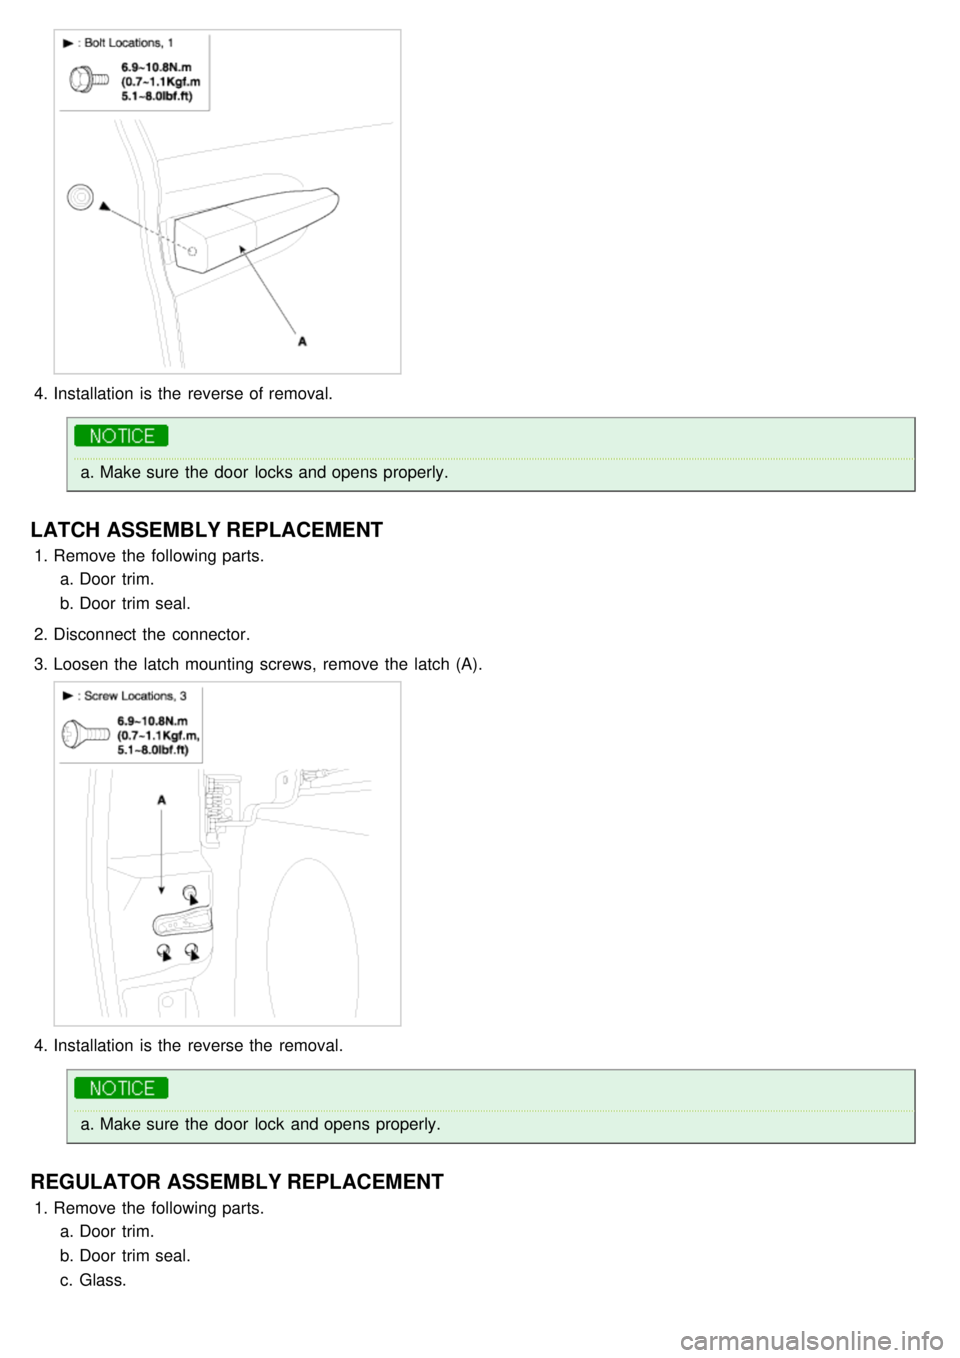
2. Loosen the mounting bolt, then remove the outside handle bracket (A).
3.Remove the outside handle (A).
Page 1039 of 1575
4.Installation is the reverse of removal.
a.Make sure the door locks and opens properly.
LATCH ASSEMBLY REPLACEMENT
1.Remove the following parts.
a. Door trim.
b. Door trim seal.
2. Disconnect the connector.
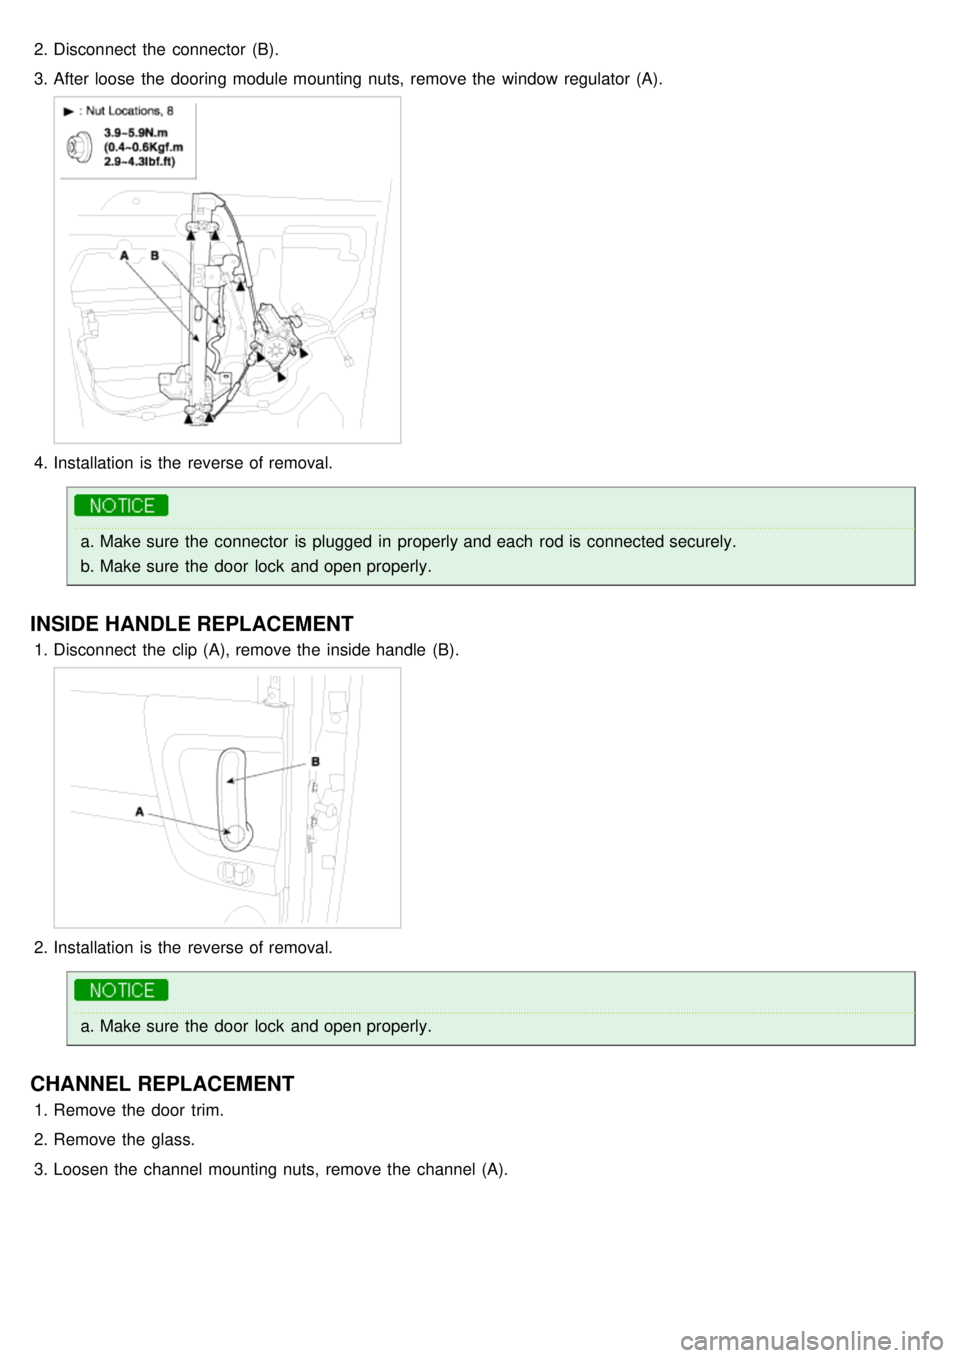
3. Loosen the latch mounting screws, remove the latch (A).
4.Installation is the reverse the removal.
a.Make sure the door lock and opens properly.
REGULATOR ASSEMBLY REPLACEMENT
1.Remove the following parts.
a. Door trim.
b. Door trim seal.
c. Glass.
Page 1040 of 1575
2.Disconnect the connector (B).
3. After loose the dooring module mounting nuts, remove the window regulator (A).
4.Installation is the reverse of removal.
a.Make sure the connector is plugged in properly and each rod is connected securely.
b. Make sure the door lock and open properly.
INSIDE HANDLE REPLACEMENT
1.Disconnect the clip (A), remove the inside handle (B).
2.Installation is the reverse of removal.
a.Make sure the door lock and open properly.
CHANNEL REPLACEMENT
1.Remove the door trim.
2. Remove the glass.
3. Loosen the channel mounting nuts, remove the channel (A).