Page 1003 of 1575
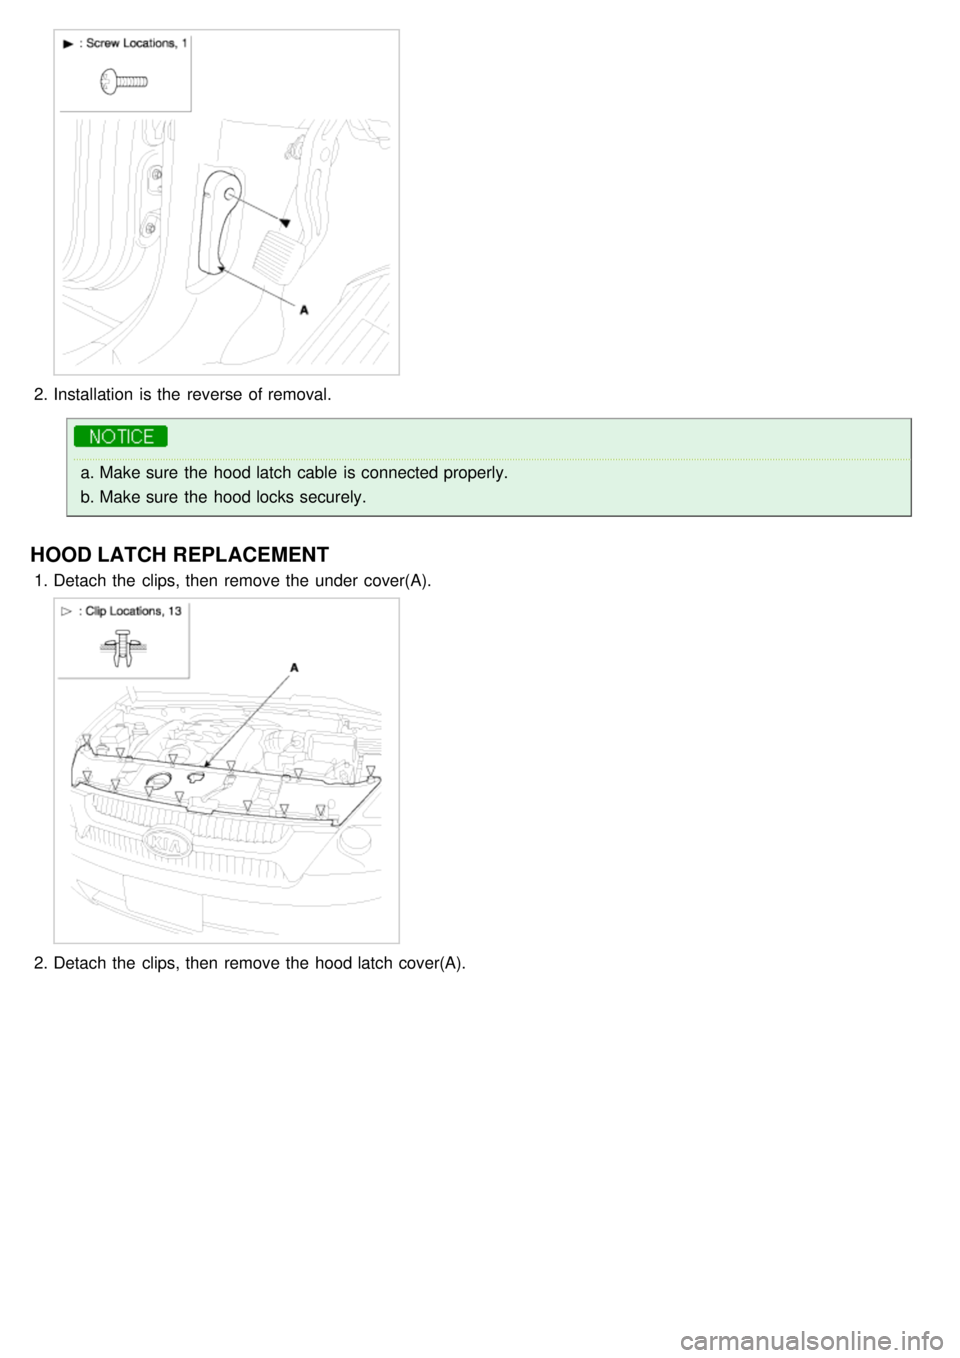
2.Installation is the reverse of removal.
a.Make sure the hood latch cable is connected properly.
b. Make sure the hood locks securely.
HOOD LATCH REPLACEMENT
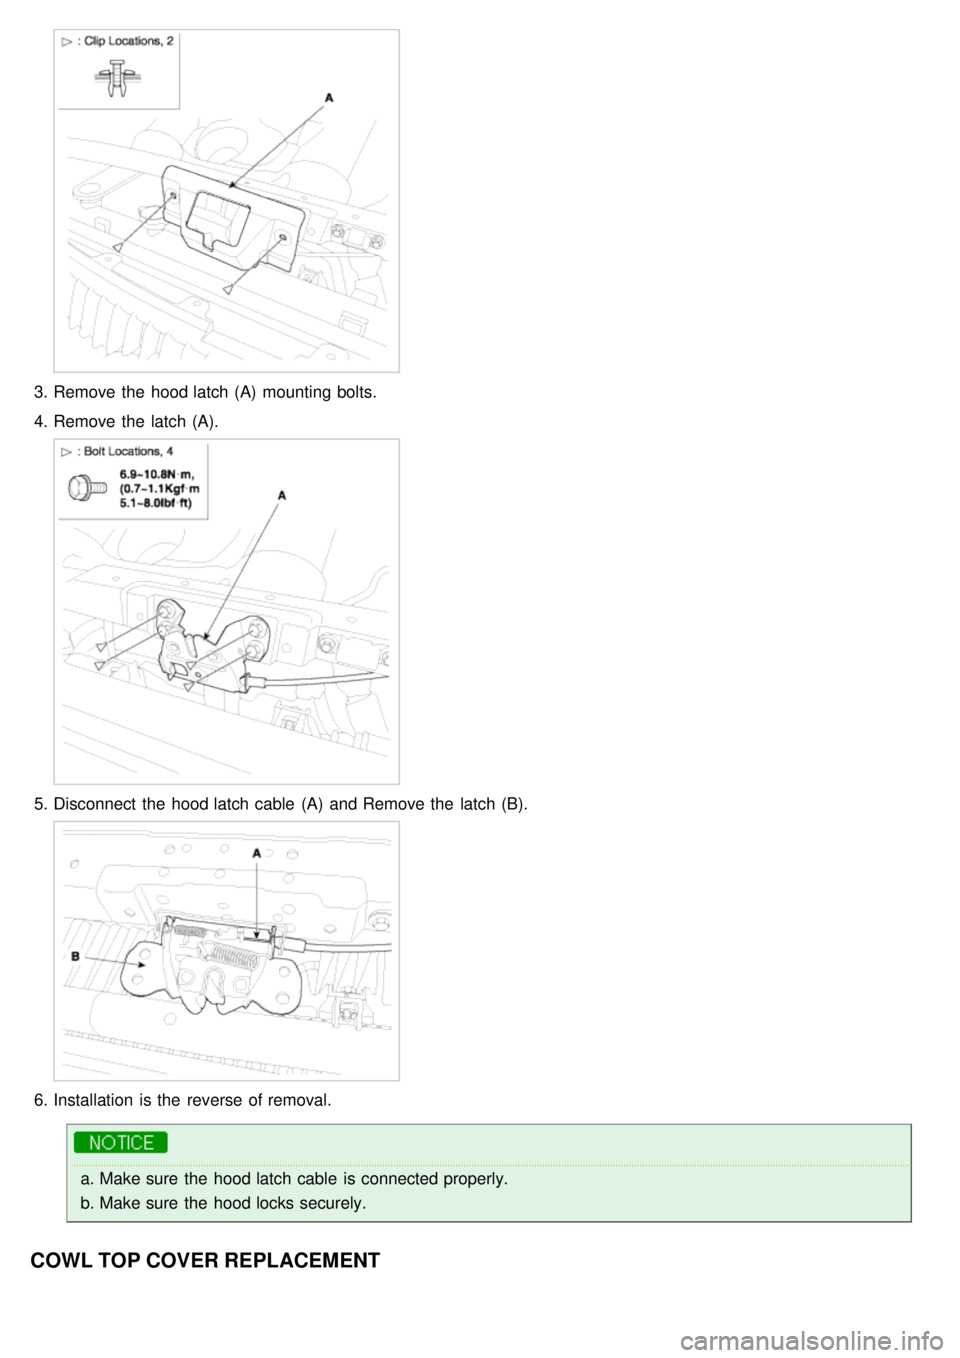
1.Detach the clips, then remove the under cover(A).
2.Detach the clips, then remove the hood latch cover(A).
Page 1004 of 1575
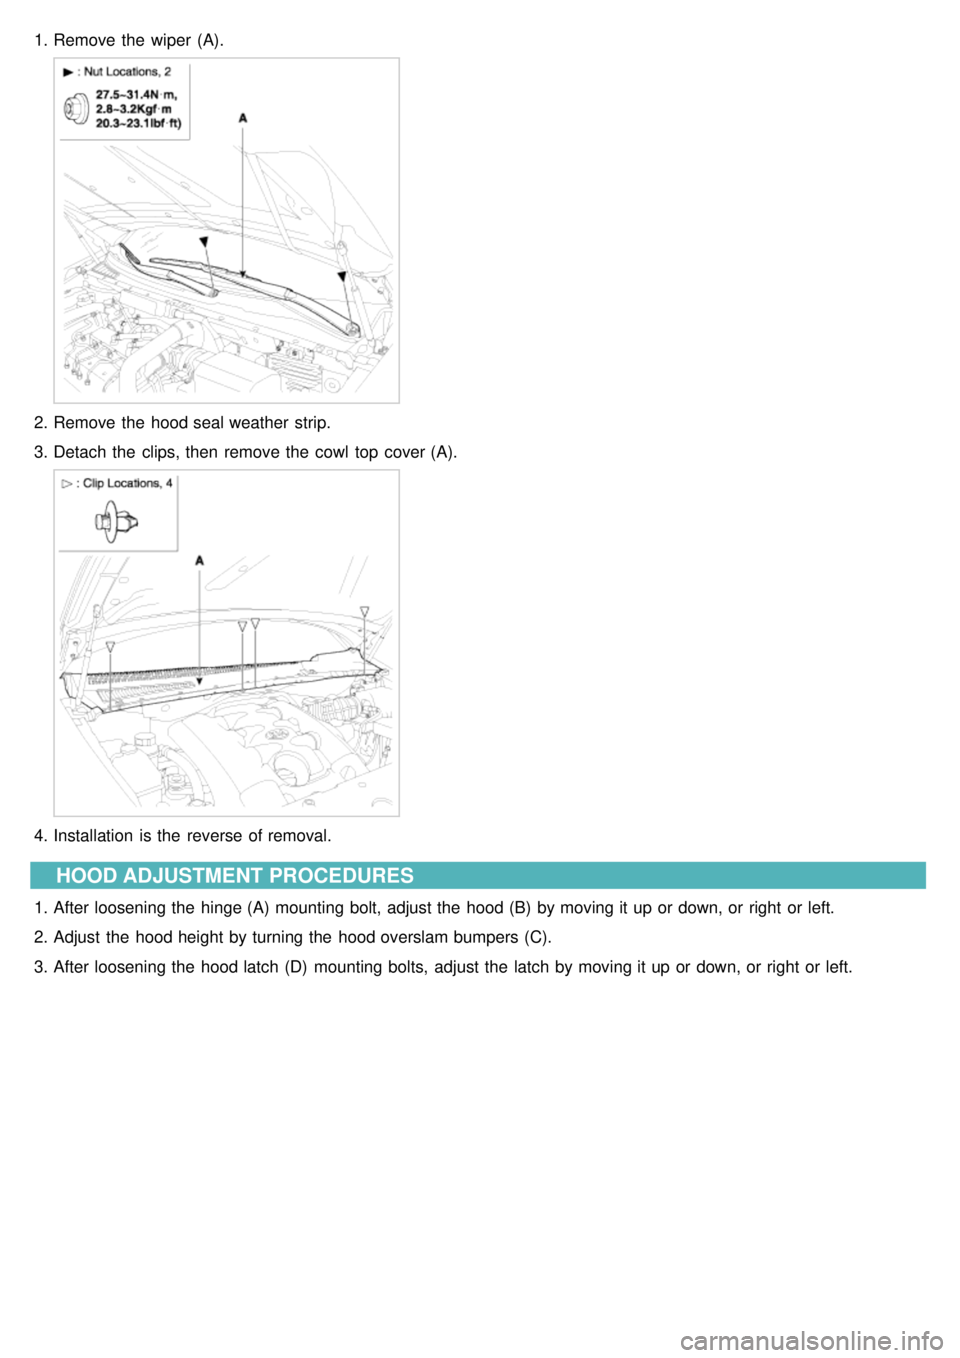
3.Remove the hood latch (A) mounting bolts.
4. Remove the latch (A).
5.Disconnect the hood latch cable (A) and Remove the latch (B).
6.Installation is the reverse of removal.
a.Make sure the hood latch cable is connected properly.
b. Make sure the hood locks securely.
COWL TOP COVER REPLACEMENT
Page 1005 of 1575
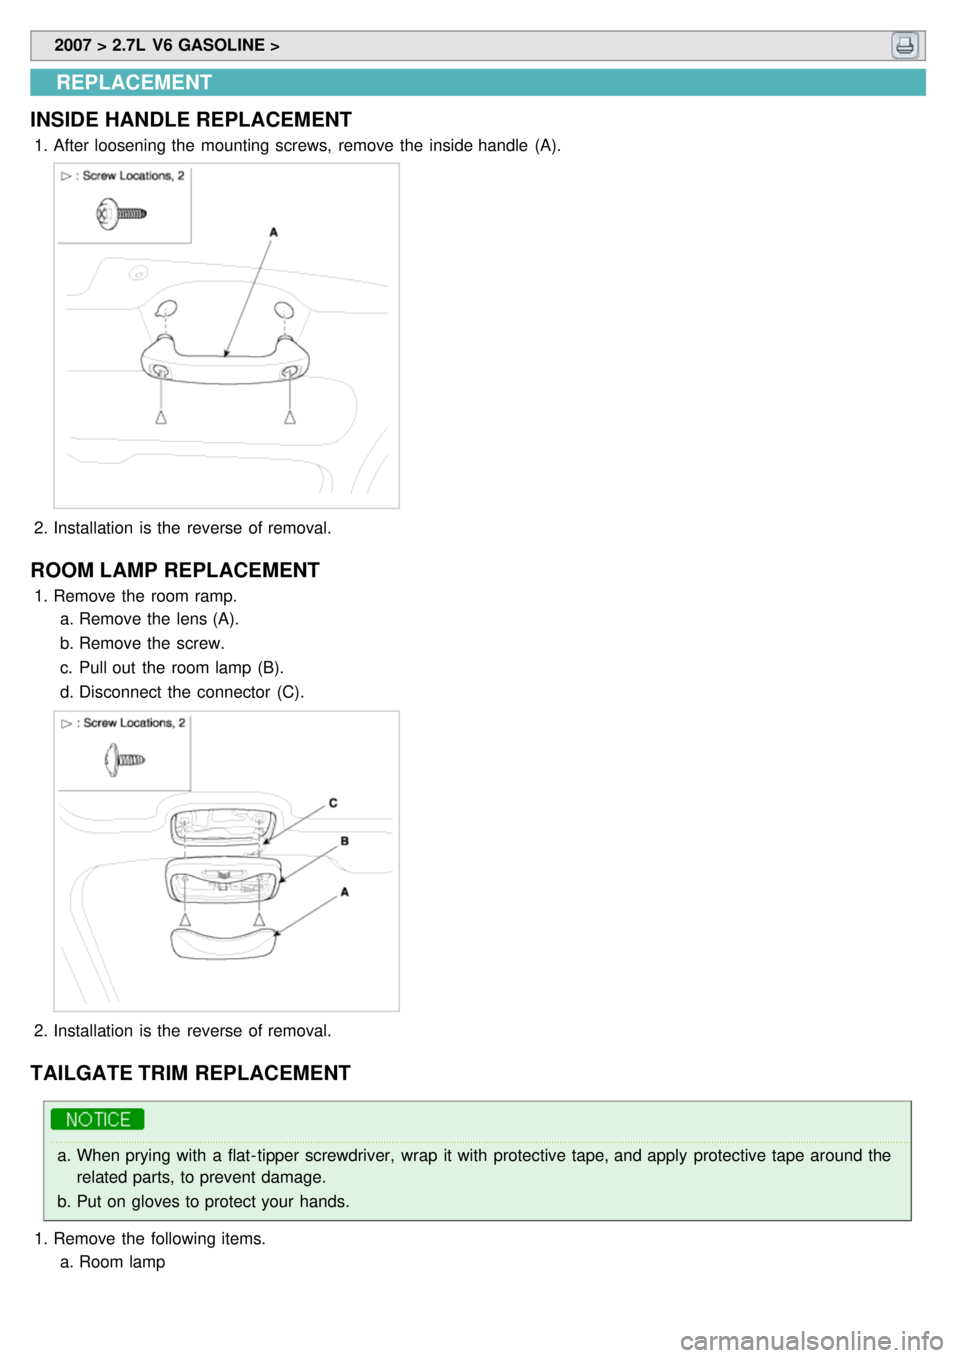
1.Remove the wiper (A).
2.Remove the hood seal weather strip.
3. Detach the clips, then remove the cowl top cover (A).
4.Installation is the reverse of removal.
HOOD ADJUSTMENT PROCEDURES
1.After loosening the hinge (A) mounting bolt, adjust the hood (B) by moving it up or down, or right or left.
2. Adjust the hood height by turning the hood overslam bumpers (C).
3. After loosening the hood latch (D) mounting bolts, adjust the latch by moving it up or down, or right or left.
Page 1008 of 1575
2007 > 2.7L V6 GASOLINE >
REPLACEMENT
INSIDE HANDLE REPLACEMENT
1. After loosening the mounting screws, remove the inside handle (A).
2.Installation is the reverse of removal.
ROOM LAMP REPLACEMENT
1.Remove the room ramp.
a. Remove the lens (A).
b. Remove the screw.
c. Pull out the room lamp (B).
d. Disconnect the connector (C).
2.Installation is the reverse of removal.
TAILGATE TRIM REPLACEMENT
a.When prying with a flat- tipper screwdriver, wrap it with protective tape, and apply protective tape around the
related parts, to prevent damage.
b. Put on gloves to protect your hands.
1. Remove the following items.
a. Room lamp
Page 1010 of 1575
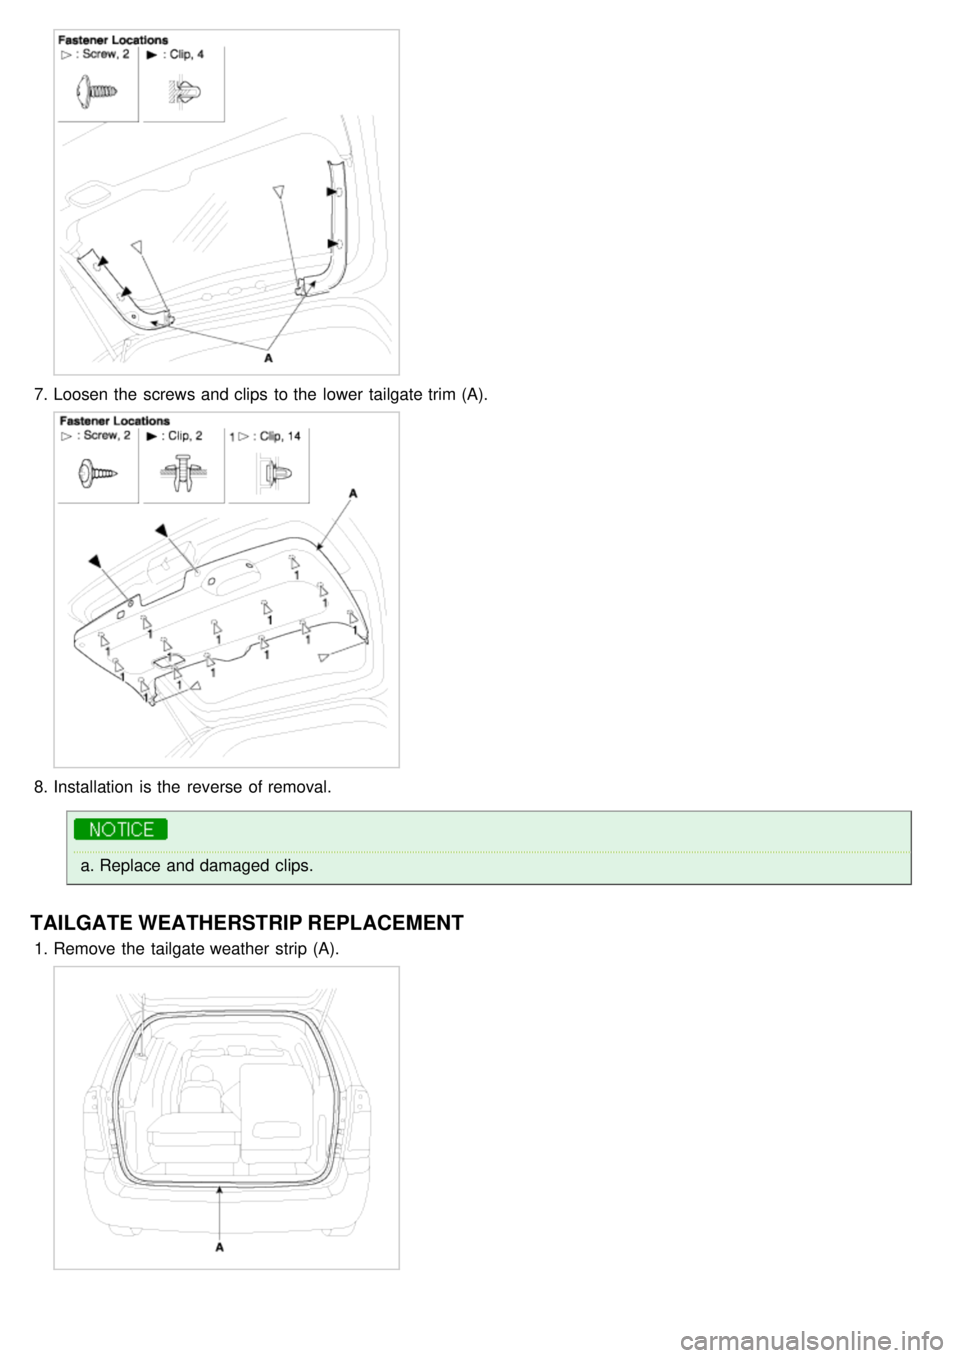
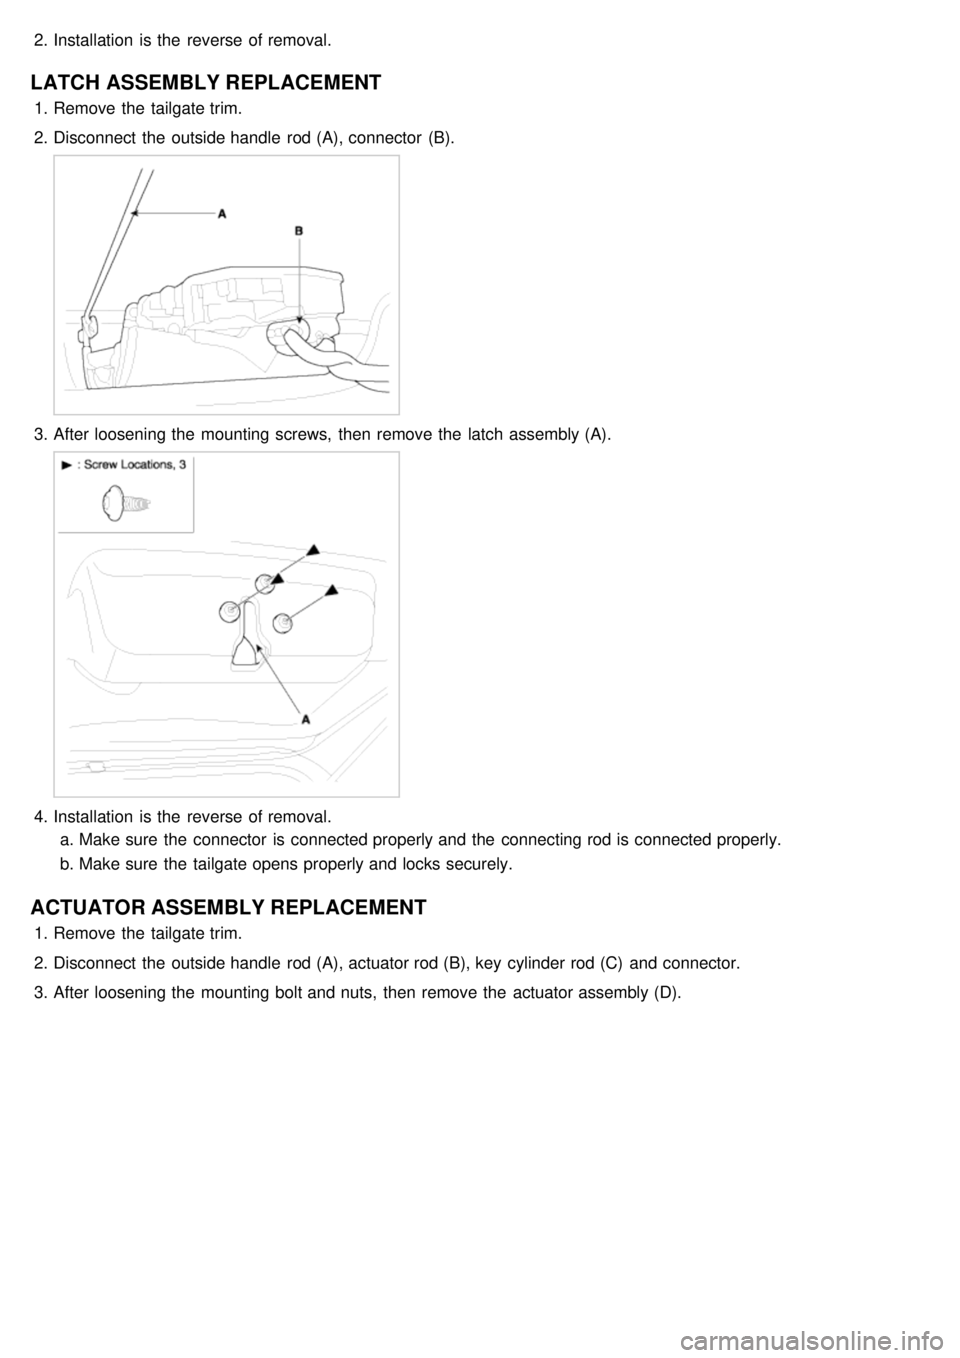
7.Loosen the screws and clips to the lower tailgate trim (A).
8.Installation is the reverse of removal.
a.Replace and damaged clips.
TAILGATE WEATHERSTRIP REPLACEMENT
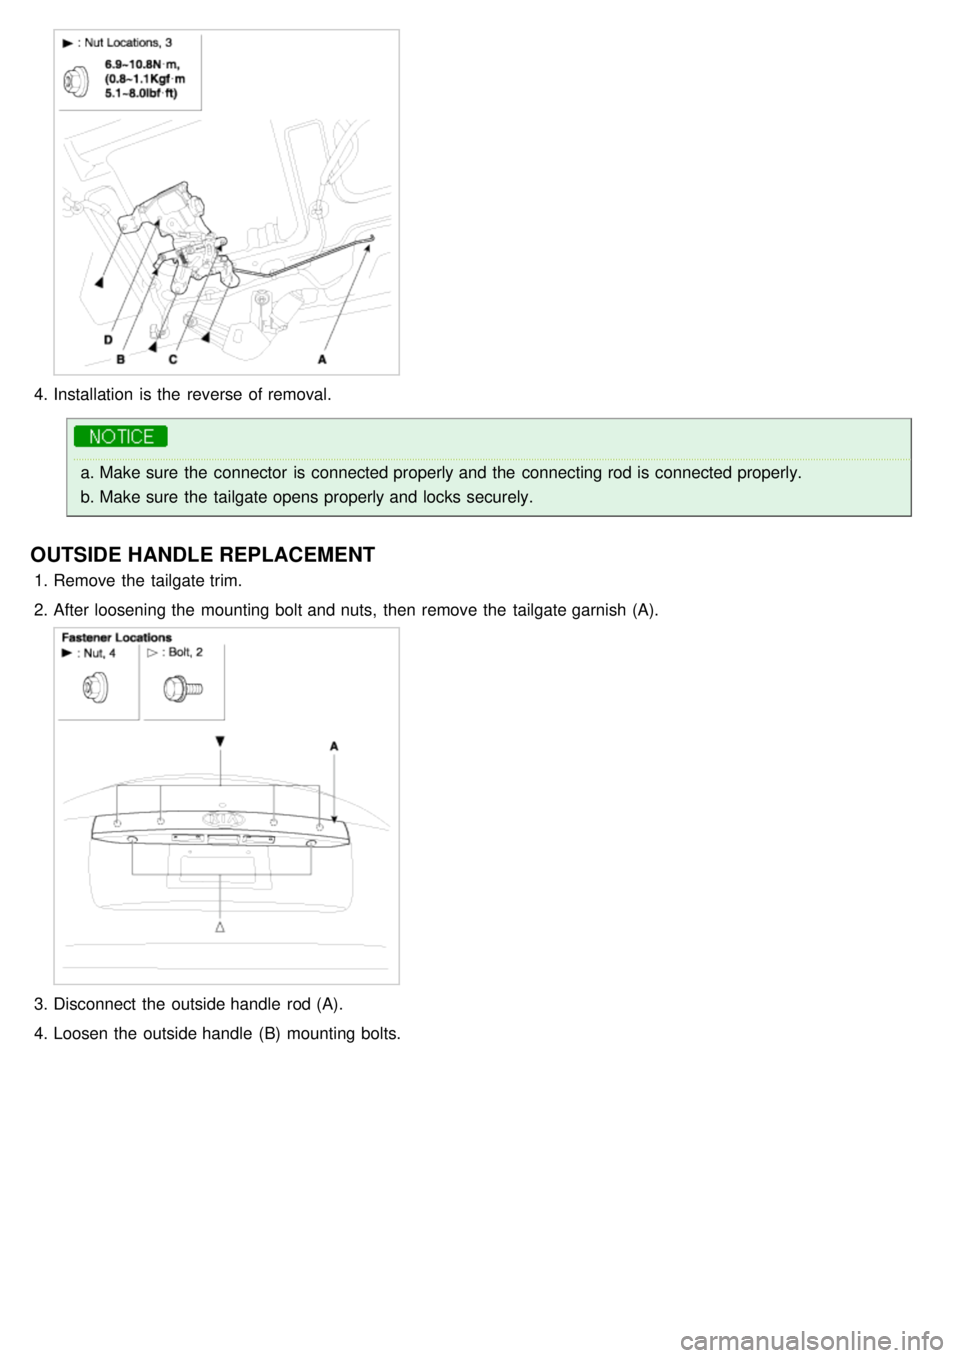
1.Remove the tailgate weather strip (A).
Page 1011 of 1575
2.Installation is the reverse of removal.
LATCH ASSEMBLY REPLACEMENT
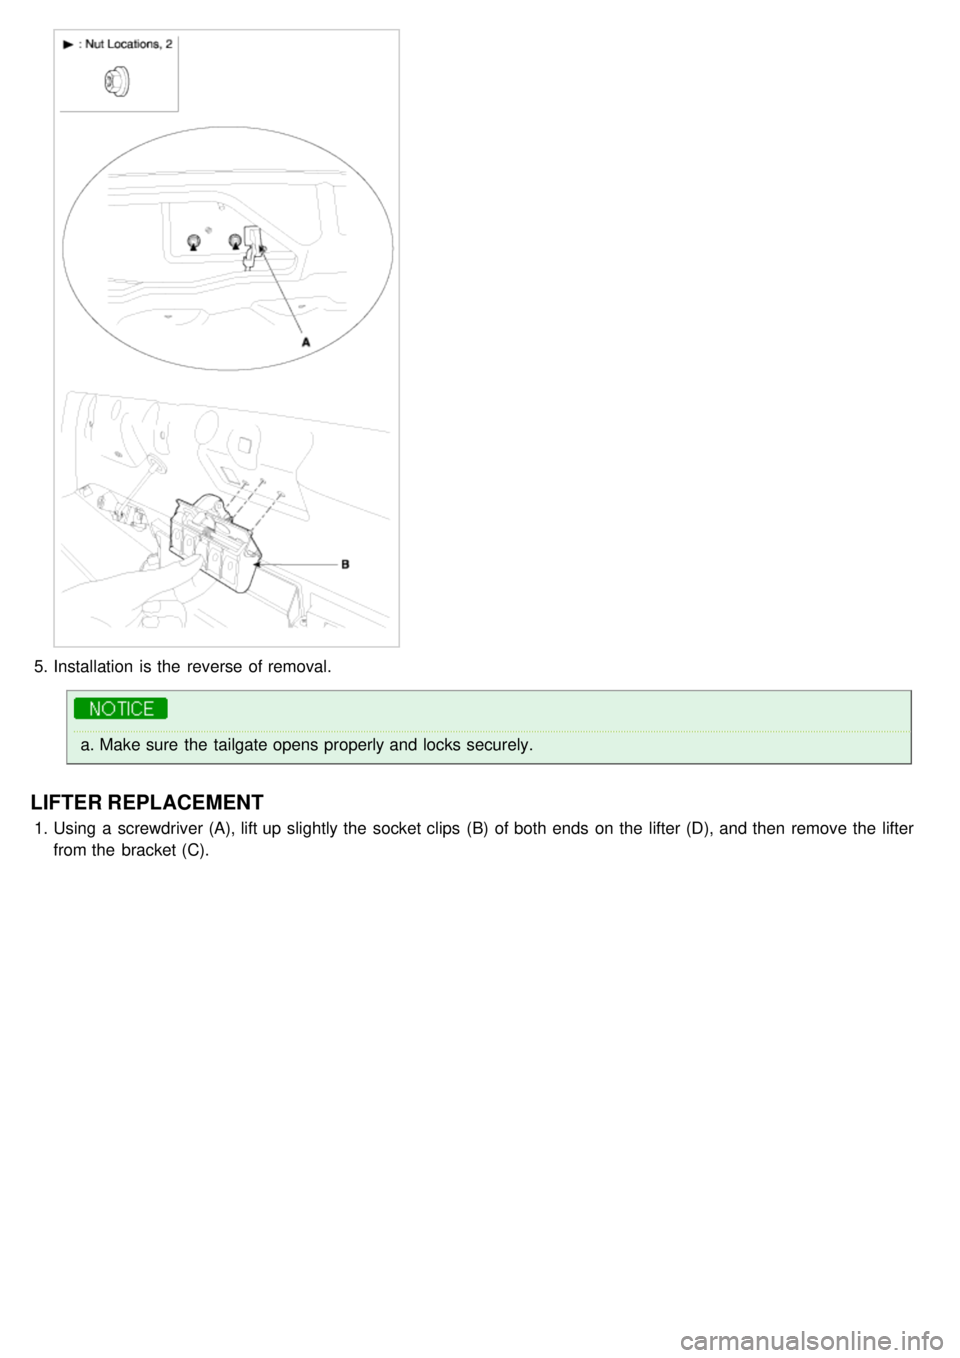
1.Remove the tailgate trim.
2. Disconnect the outside handle rod (A), connector (B).
3.After loosening the mounting screws, then remove the latch assembly (A).
4.Installation is the reverse of removal.
a. Make sure the connector is connected properly and the connecting rod is connected properly.
b. Make sure the tailgate opens properly and locks securely.
ACTUATOR ASSEMBLY REPLACEMENT
1.Remove the tailgate trim.
2. Disconnect the outside handle rod (A), actuator rod (B), key cylinder rod (C) and connector.
3. After loosening the mounting bolt and nuts, then remove the actuator assembly (D).
Page 1012 of 1575
4.Installation is the reverse of removal.
a.Make sure the connector is connected properly and the connecting rod is connected properly.
b. Make sure the tailgate opens properly and locks securely.
OUTSIDE HANDLE REPLACEMENT
1.Remove the tailgate trim.
2. After loosening the mounting bolt and nuts, then remove the tailgate garnish (A).
3.Disconnect the outside handle rod (A).
4. Loosen the outside handle (B) mounting bolts.
Page 1013 of 1575
5.Installation is the reverse of removal.
a.Make sure the tailgate opens properly and locks securely.
LIFTER REPLACEMENT
1.Using a screwdriver (A), lift up slightly the socket clips (B) of both ends on the lifter (D), and then remove the lifter
from the bracket (C).