Page 1015 of 1575
5.Installation is the reverse of removal.
a.Make sure the tailgate opens properly and locks securely.
POWER TAILGATE MOTER ASSEMBLY REPLACEMENT
1.Remove the rear seat assembly.
2. Remove the luggage trim.
3. Disconnect the clip (A), remove the tailgate lifter (B).
4.Disconnect the connector.
5. After loosening the mounting bolts, then remove the tailgate motor assembly (A).
6.Installation is the reverse of removal.
Page 1016 of 1575
a.Make sure the connector is plugged in properly.
b. Make sure the tailgate opens properly and locks securely.
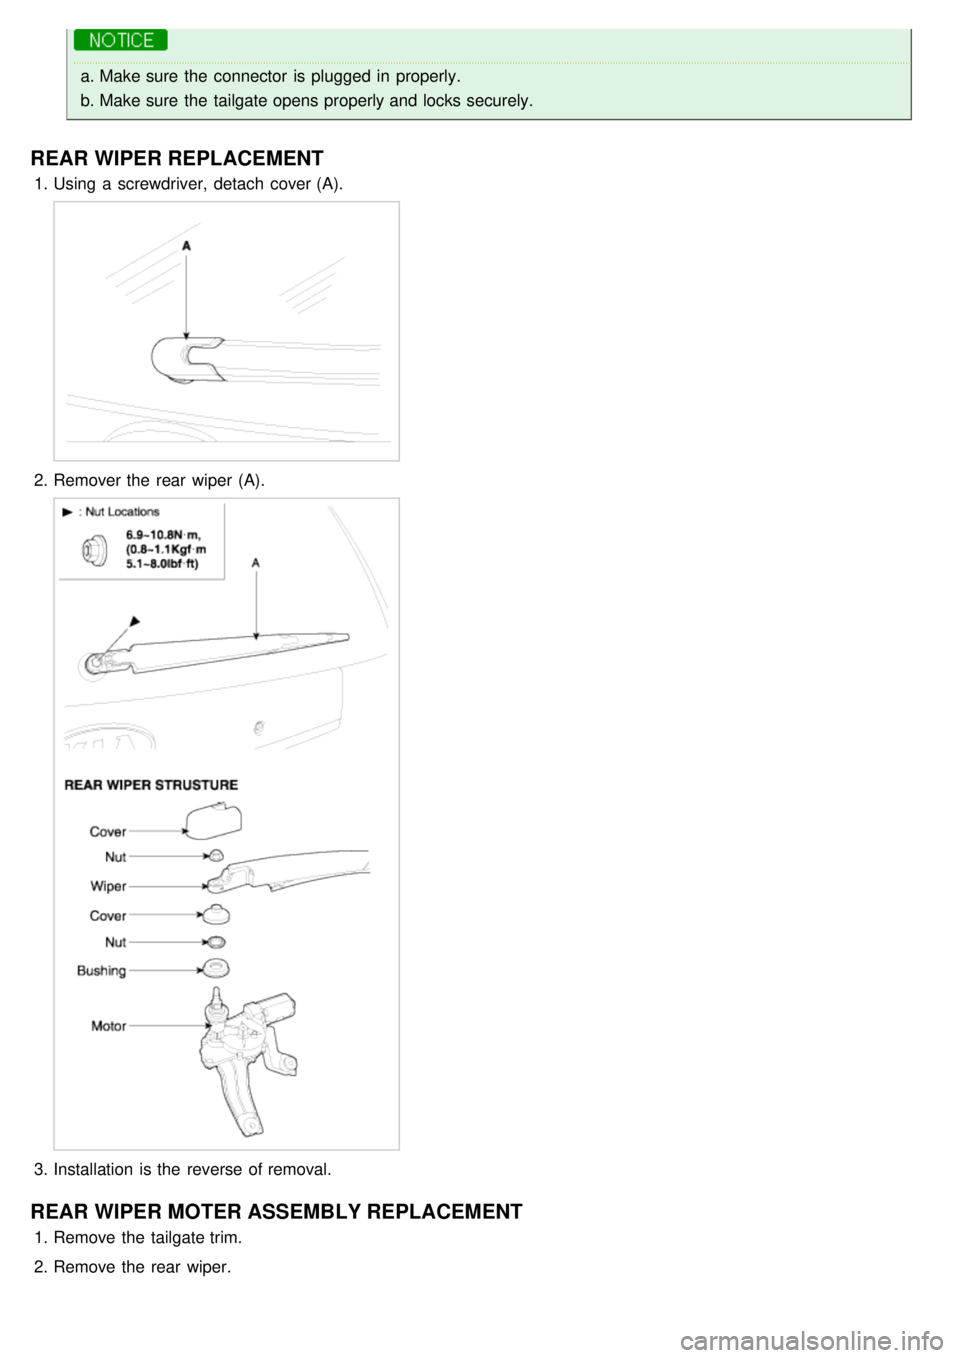
REAR WIPER REPLACEMENT
1.Using a screwdriver, detach cover (A).
2.Remover the rear wiper (A).
3.Installation is the reverse of removal.
REAR WIPER MOTER ASSEMBLY REPLACEMENT
1.Remove the tailgate trim.
2. Remove the rear wiper.
Page 1017 of 1575
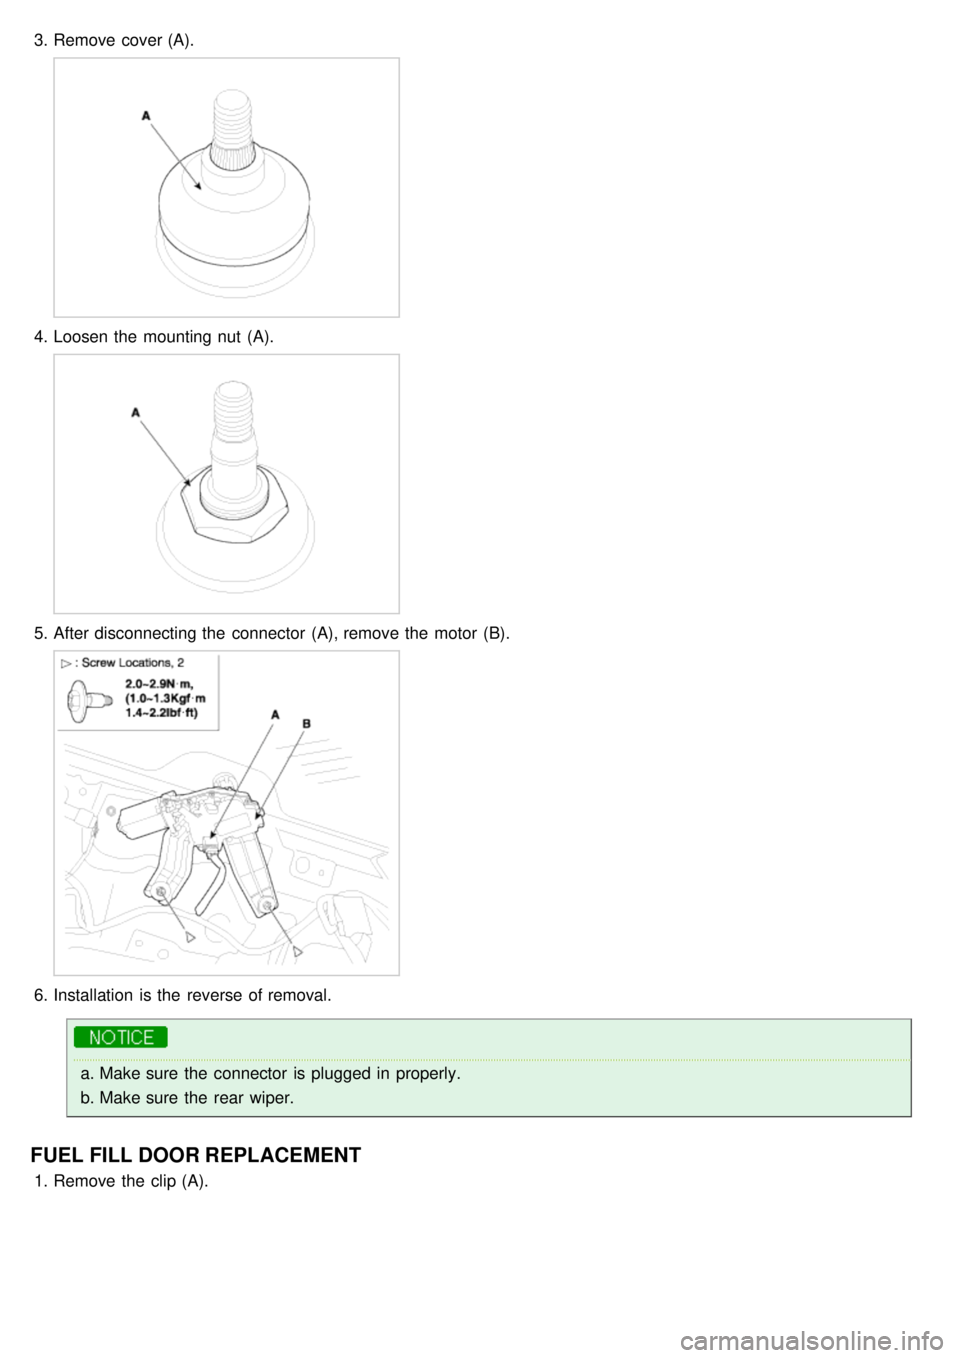
3.Remove cover (A).
4.Loosen the mounting nut (A).
5.After disconnecting the connector (A), remove the motor (B).
6.Installation is the reverse of removal.
a.Make sure the connector is plugged in properly.
b. Make sure the rear wiper.
FUEL FILL DOOR REPLACEMENT
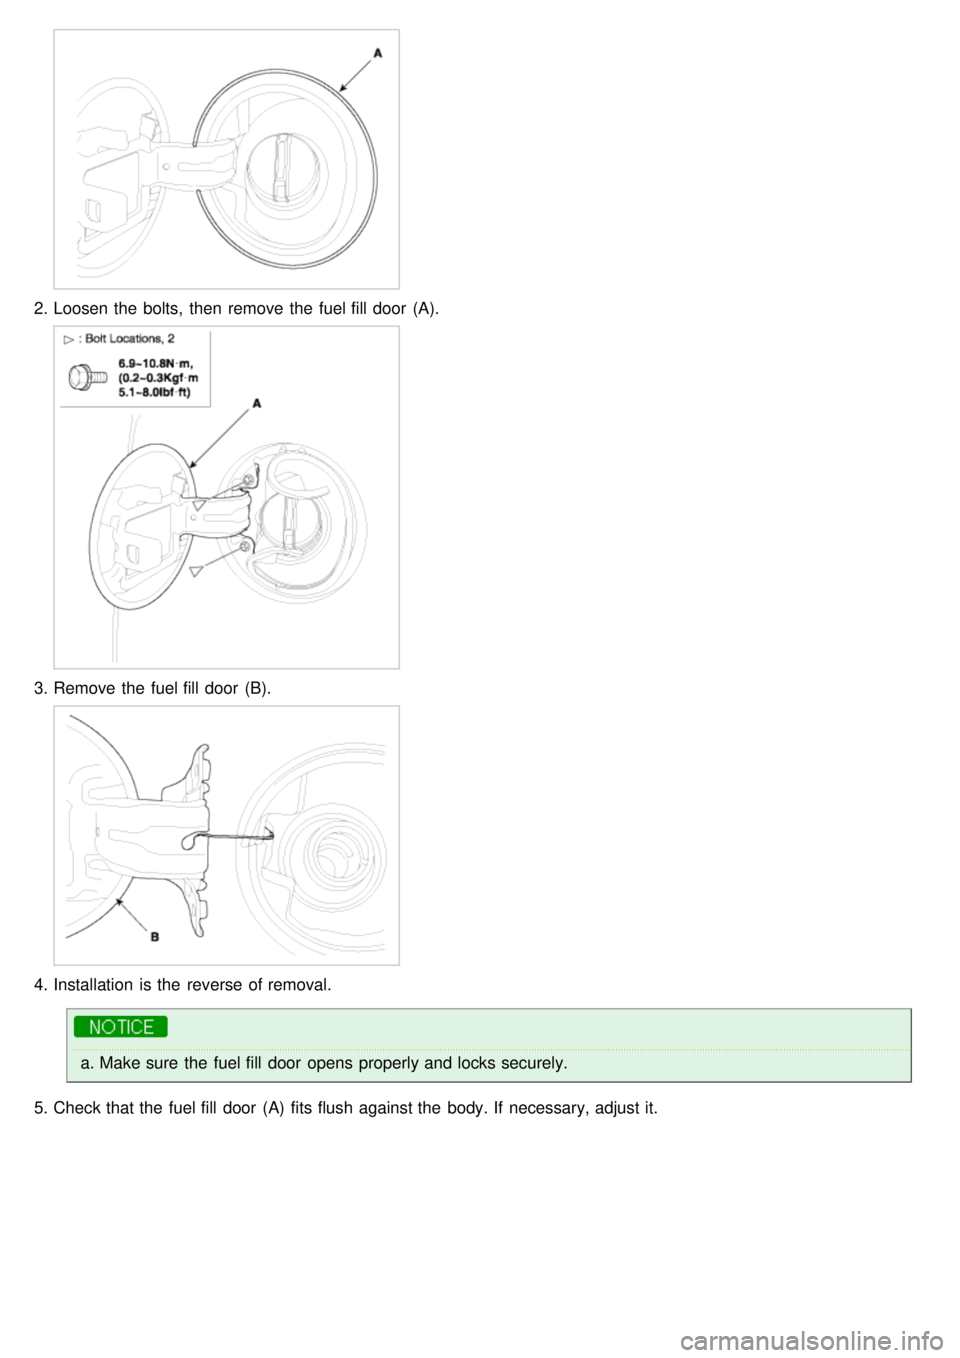
1.Remove the clip (A).
Page 1018 of 1575
2.Loosen the bolts, then remove the fuel fill door (A).
3.Remove the fuel fill door (B).
4.Installation is the reverse of removal.
a.Make sure the fuel fill door opens properly and locks securely.
5. Check that the fuel fill door (A) fits flush against the body. If necessary, adjust it.
Page 1024 of 1575
[RHD]
4.Installation is the reverse of removal.
a.Make sure of connectors is plugged in properly and each rod is connected securely.
b. Make sure the door locks and opens properly.
GLASS REPLACEMENT
1.Remove the front door trim.
2. Remove the door trim seal (A).
3.Carefully move the glass (A) until you can see the bolts, then loosen them. Carefully pull the glass out through the
window slot (B).
4.Installation is the reverse of removal.
Page 1025 of 1575
a.Roll the glass up down to see if it moves freely without binding.
b. Make sure that there is no clearance between the glass and glass run channel when the glass is closed.
c. Adjust the position of the glass as necessary.
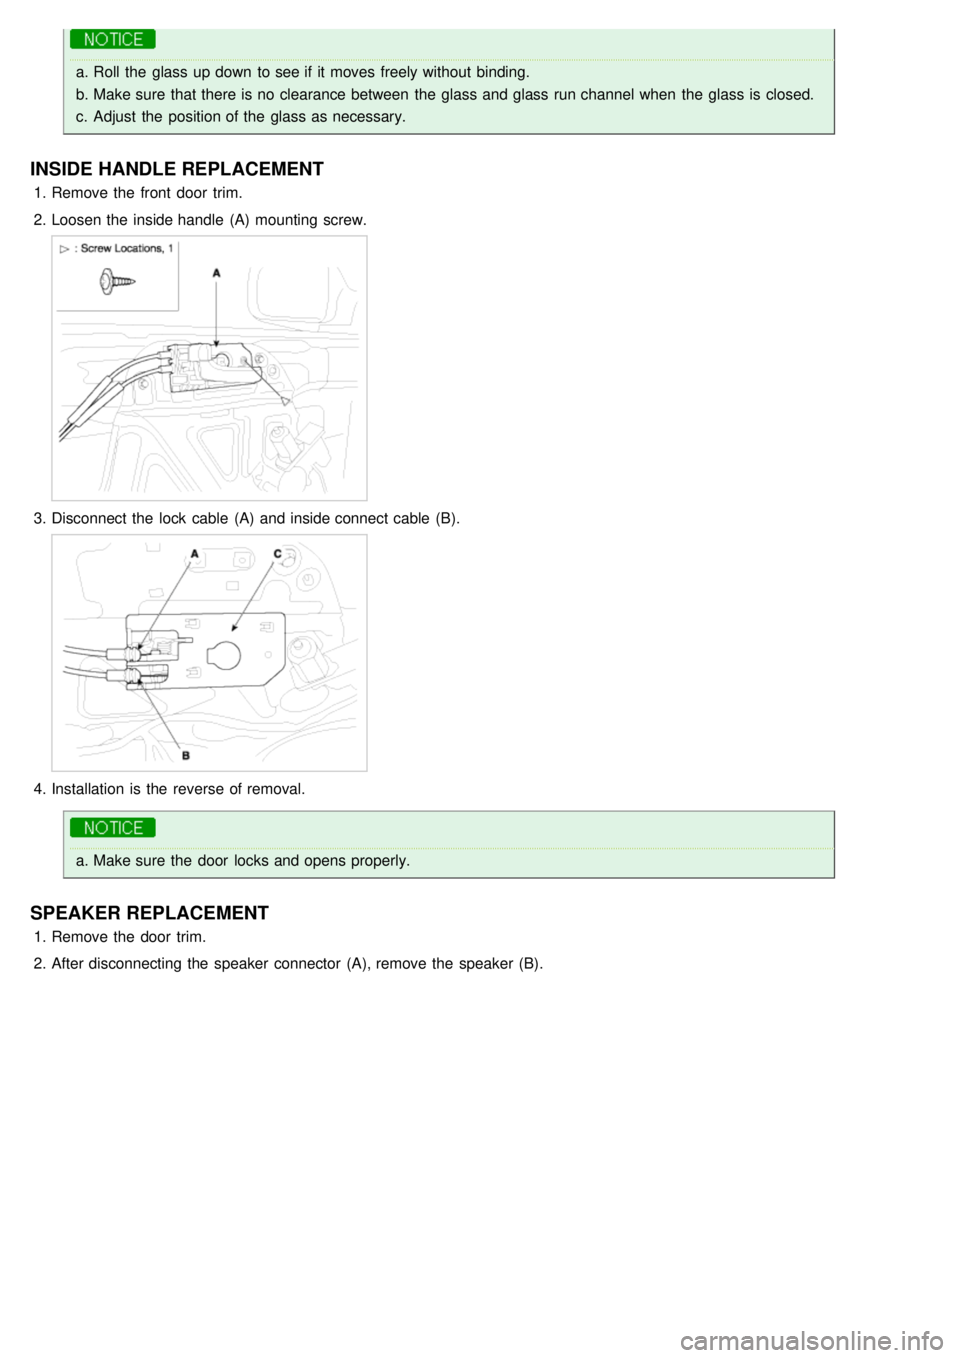
INSIDE HANDLE REPLACEMENT
1.Remove the front door trim.
2. Loosen the inside handle (A) mounting screw.
3.Disconnect the lock cable (A) and inside connect cable (B).
4.Installation is the reverse of removal.
a.Make sure the door locks and opens properly.
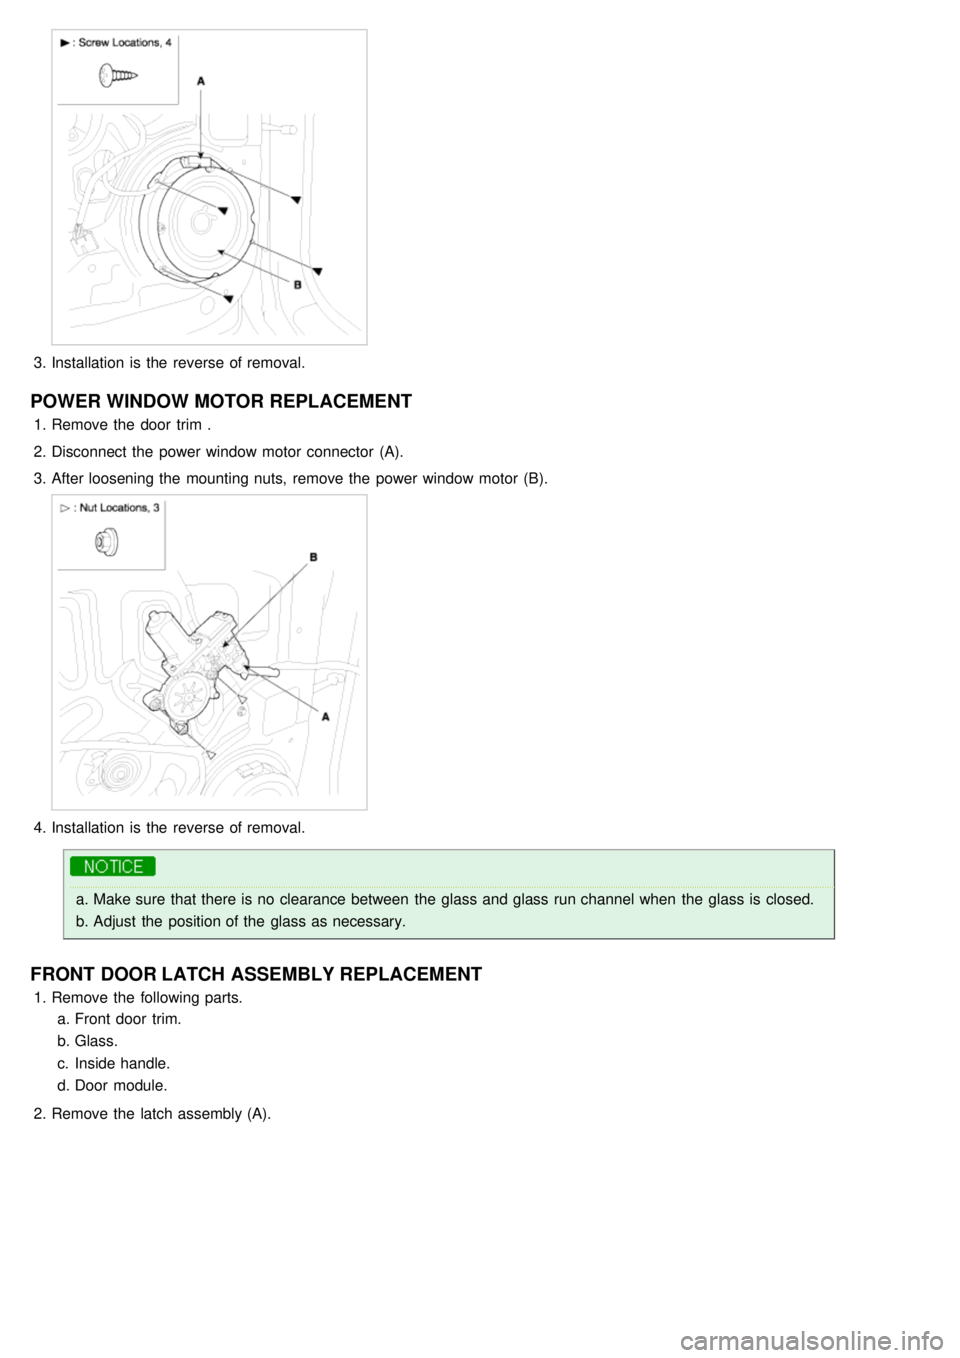
SPEAKER REPLACEMENT
1.Remove the door trim.
2. After disconnecting the speaker connector (A), remove the speaker (B).
Page 1026 of 1575
3.Installation is the reverse of removal.
POWER WINDOW MOTOR REPLACEMENT
1.Remove the door trim .
2. Disconnect the power window motor connector (A).
3. After loosening the mounting nuts, remove the power window motor (B).
4.Installation is the reverse of removal.
a.Make sure that there is no clearance between the glass and glass run channel when the glass is closed.
b. Adjust the position of the glass as necessary.
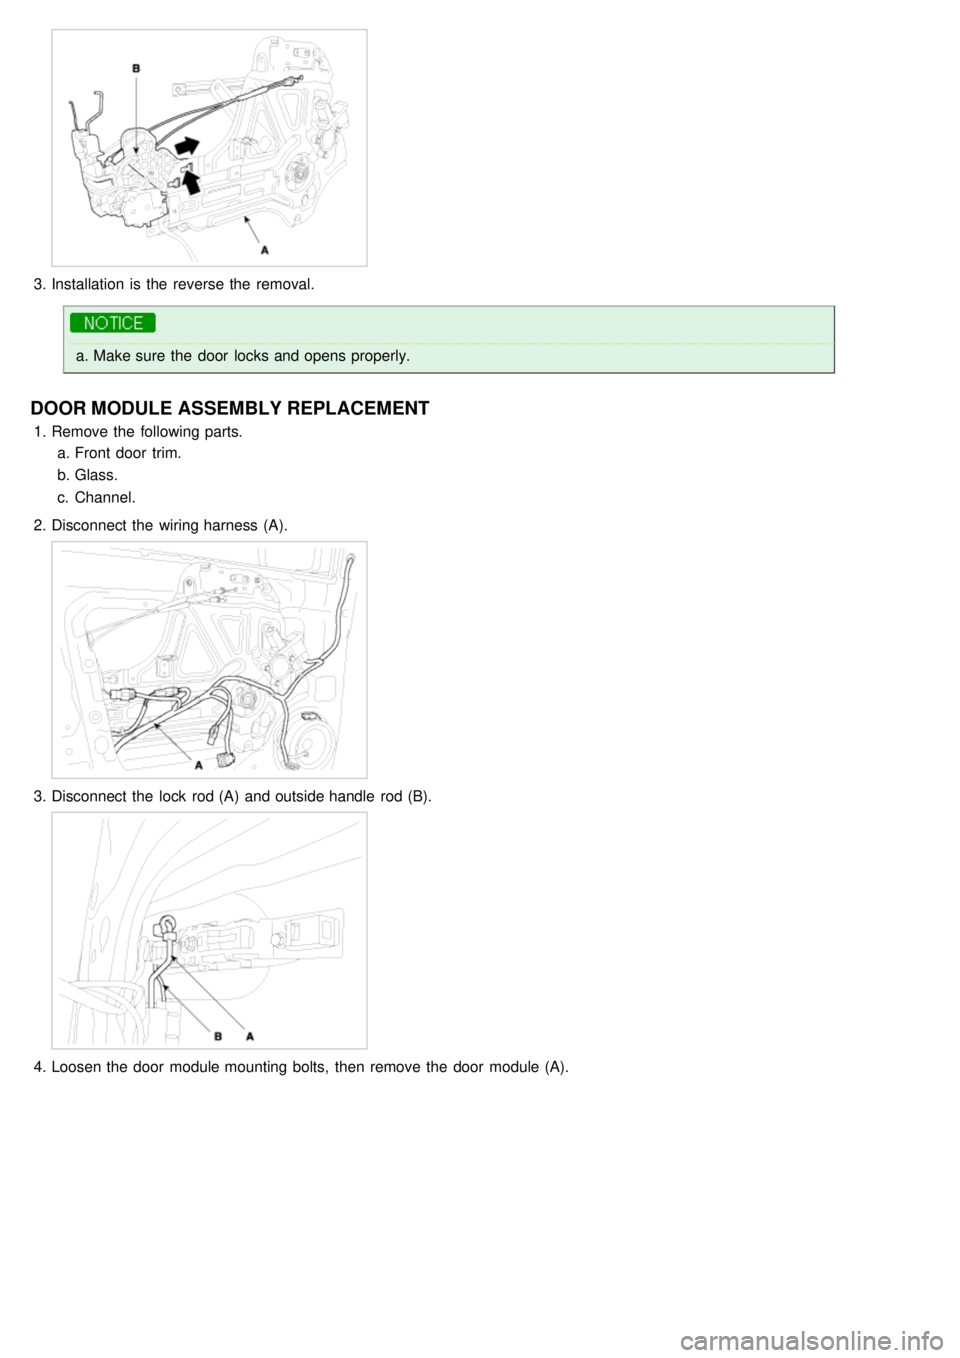
FRONT DOOR LATCH ASSEMBLY REPLACEMENT
1.Remove the following parts.
a. Front door trim.
b. Glass.
c. Inside handle.
d. Door module.
2. Remove the latch assembly (A).
Page 1027 of 1575
3.Installation is the reverse the removal.
a.Make sure the door locks and opens properly.
DOOR MODULE ASSEMBLY REPLACEMENT
1.Remove the following parts.
a. Front door trim.
b. Glass.
c. Channel.
2. Disconnect the wiring harness (A).
3.Disconnect the lock rod (A) and outside handle rod (B).
4.Loosen the door module mounting bolts, then remove the door module (A).
![KIA CARNIVAL 2007 Workshop Manual [RHD]
4.Installation is the reverse of removal.
a.Make sure of connectors is plugged in properly and each rod is connected securely.
b. Make sure the door locks and opens properly.
GLASS REP](/manual-img/2/57045/w960_57045-1023.png "KIA CARNIVAL 2007 Workshop Manual [RHD]
4.Installation is the reverse of removal.
a.Make sure of connectors is plugged in properly and each rod is connected securely.
b. Make sure the door locks and opens properly.
GLASS REP")