Page 1041 of 1575
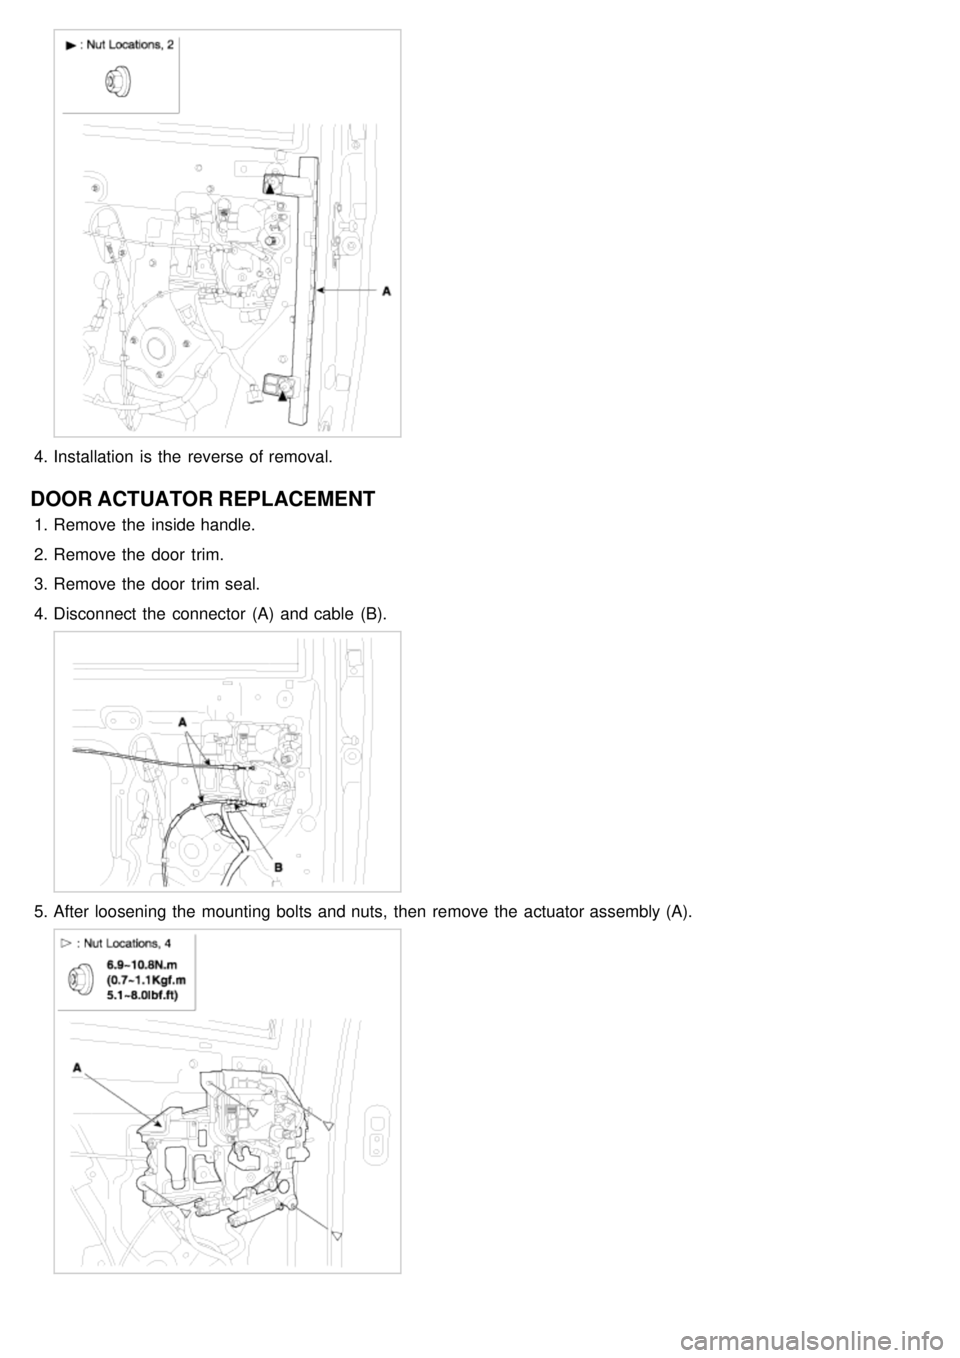
4.Installation is the reverse of removal.
DOOR ACTUATOR REPLACEMENT
1.Remove the inside handle.
2. Remove the door trim.
3. Remove the door trim seal.
4. Disconnect the connector (A) and cable (B).
5.After loosening the mounting bolts and nuts, then remove the actuator assembly (A).
Page 1042 of 1575
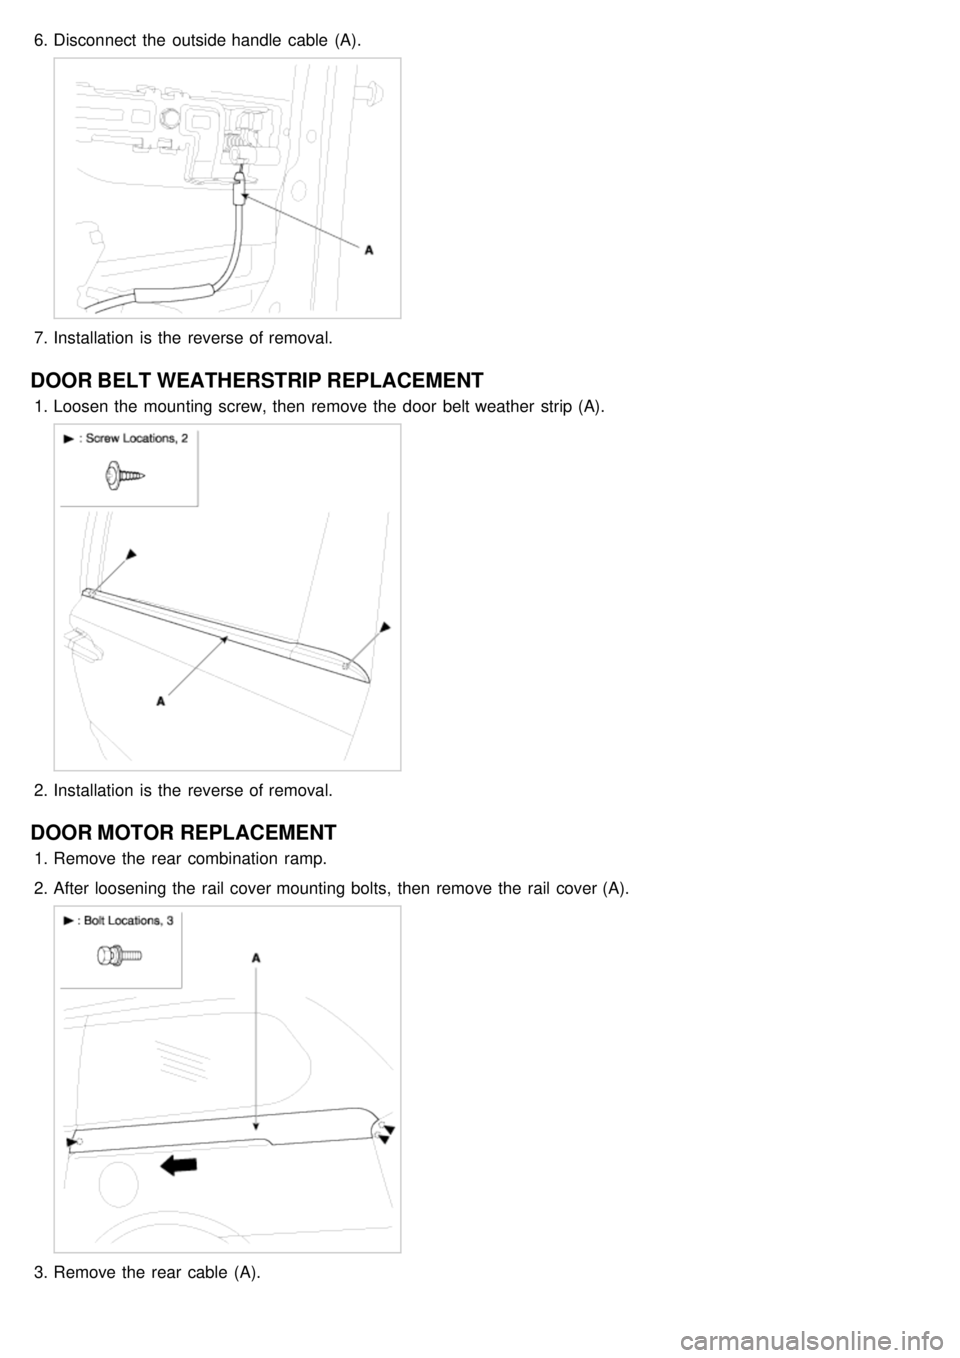
6.Disconnect the outside handle cable (A).
7.Installation is the reverse of removal.
DOOR BELT WEATHERSTRIP REPLACEMENT
1.Loosen the mounting screw, then remove the door belt weather strip (A).
2.Installation is the reverse of removal.
DOOR MOTOR REPLACEMENT
1.Remove the rear combination ramp.
2. After loosening the rail cover mounting bolts, then remove the rail cover (A).
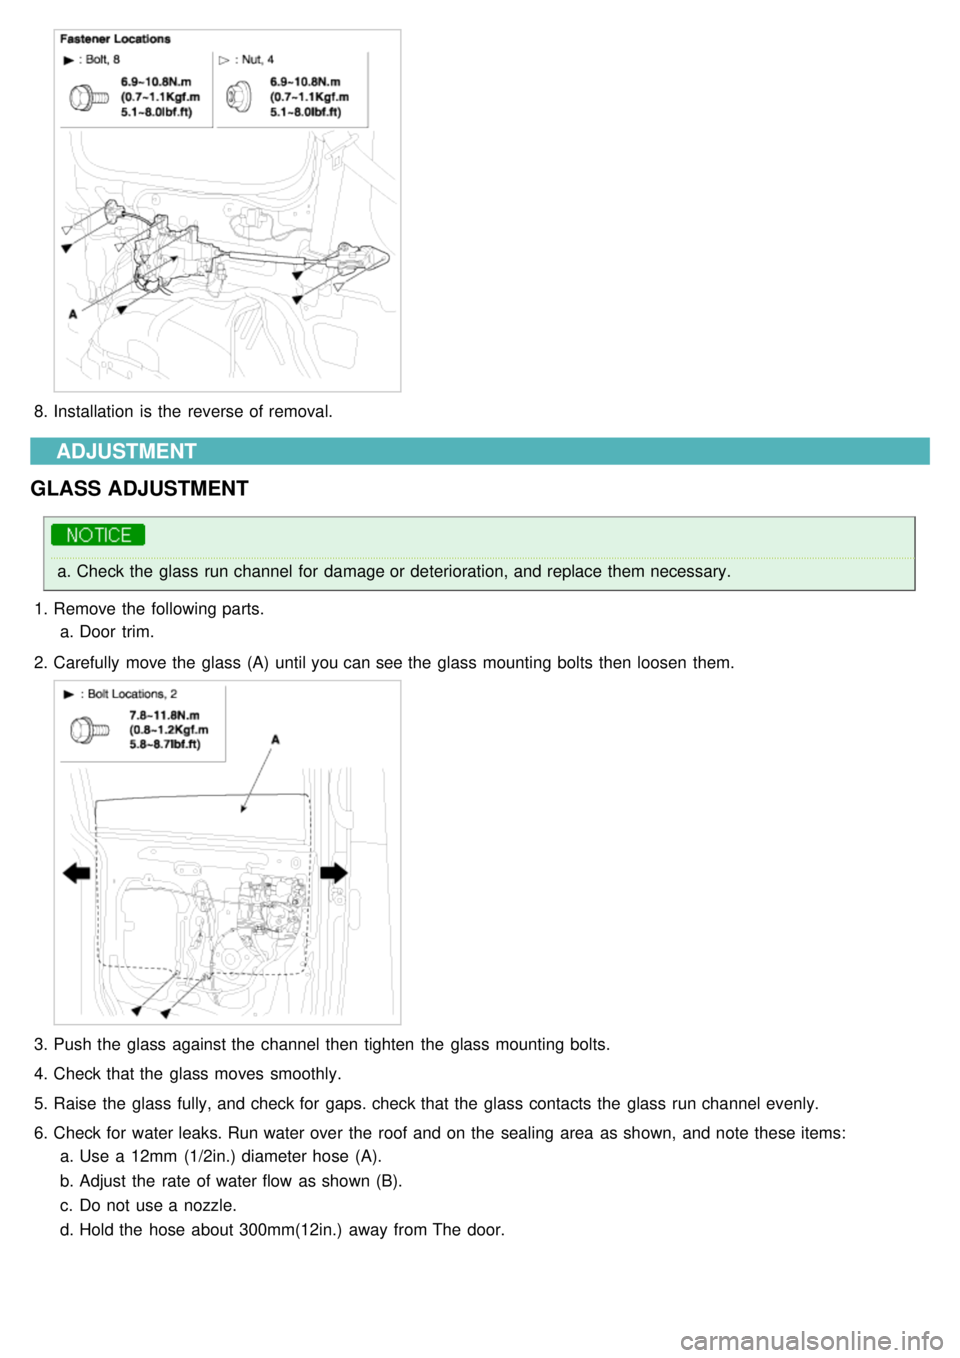
3.Remove the rear cable (A).
Page 1044 of 1575
8.Installation is the reverse of removal.
ADJUSTMENT
GLASS ADJUSTMENT
a. Check the glass run channel for damage or deterioration, and replace them necessary.
1. Remove the following parts.
a. Door trim.
2. Carefully move the glass (A) until you can see the glass mounting bolts then loosen them.
3.Push the glass against the channel then tighten the glass mounting bolts.
4. Check that the glass moves smoothly.
5. Raise the glass fully, and check for gaps. check that the glass contacts the glass run channel evenly.
6. Check for water leaks. Run water over the roof and on the sealing area as shown, and note these items:
a. Use a 12mm (1/2in.) diameter hose (A).
b. Adjust the rate of water flow as shown (B).
c. Do not use a nozzle.
d. Hold the hose about 300mm(12in.) away from The door.
Page 1047 of 1575
2007 > 2.7L V6 GASOLINE >
REPLACEMENT
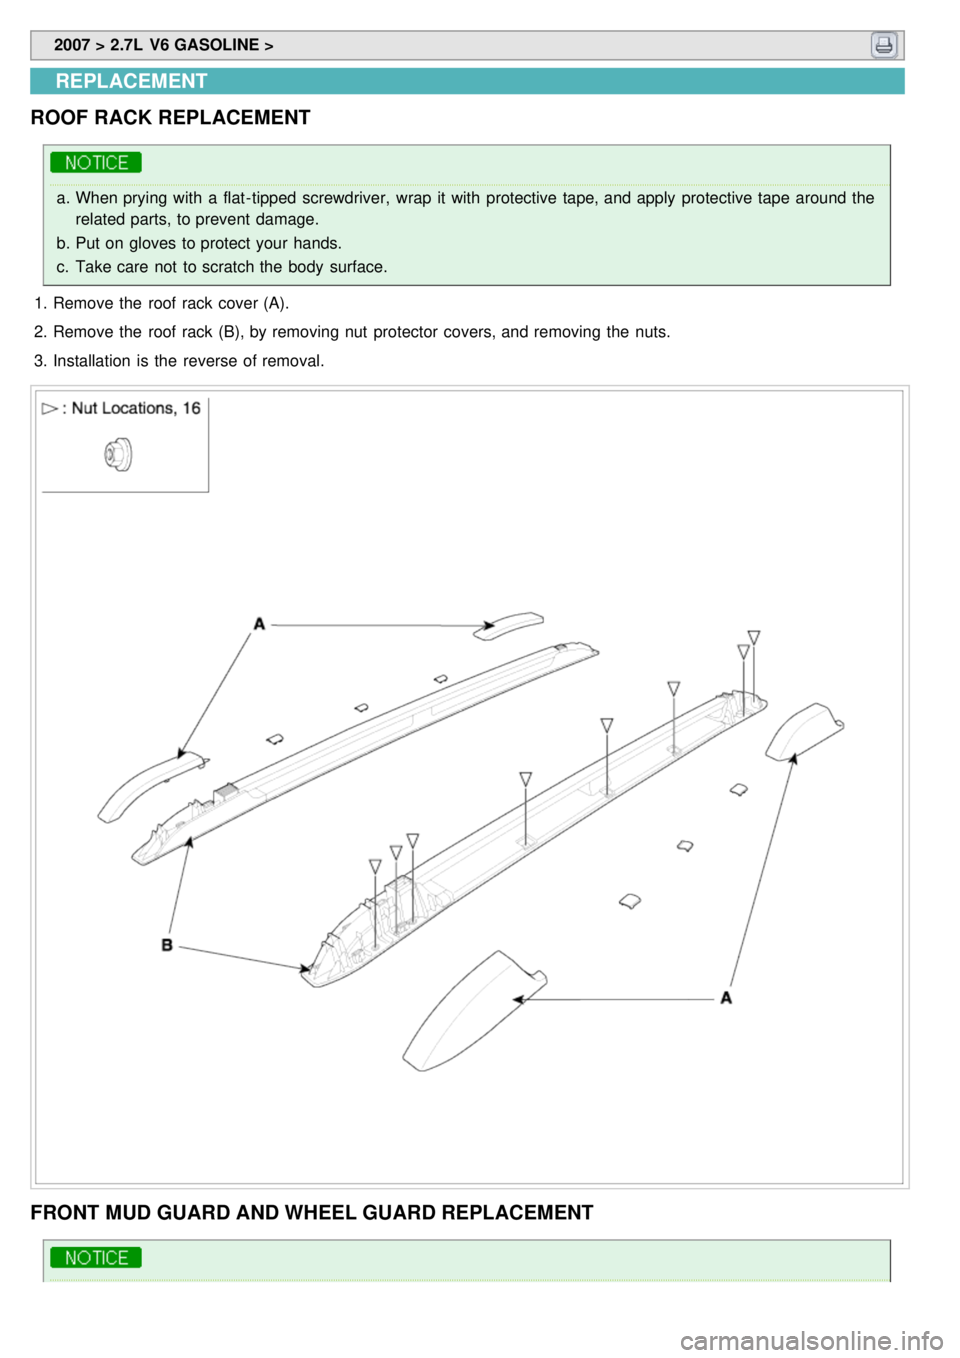
ROOF RACK REPLACEMENT
a. When prying with a flat- tipped screwdriver, wrap it with protective tape, and apply protective tape around the
related parts, to prevent damage.
b. Put on gloves to protect your hands.
c. Take care not to scratch the body surface.
1. Remove the roof rack cover (A).
2. Remove the roof rack (B), by removing nut protector covers, and removing the nuts.
3. Installation is the reverse of removal.
FRONT MUD GUARD AND WHEEL GUARD REPLACEMENT
Page 1048 of 1575
a.When prying with a flat- tipped screwdriver, wrap it with protective tape, and apply protective tape around the
related parts, to prevent damage.
b. Put on gloves to protect your hands.
c. Take care not to scratch the body surface.
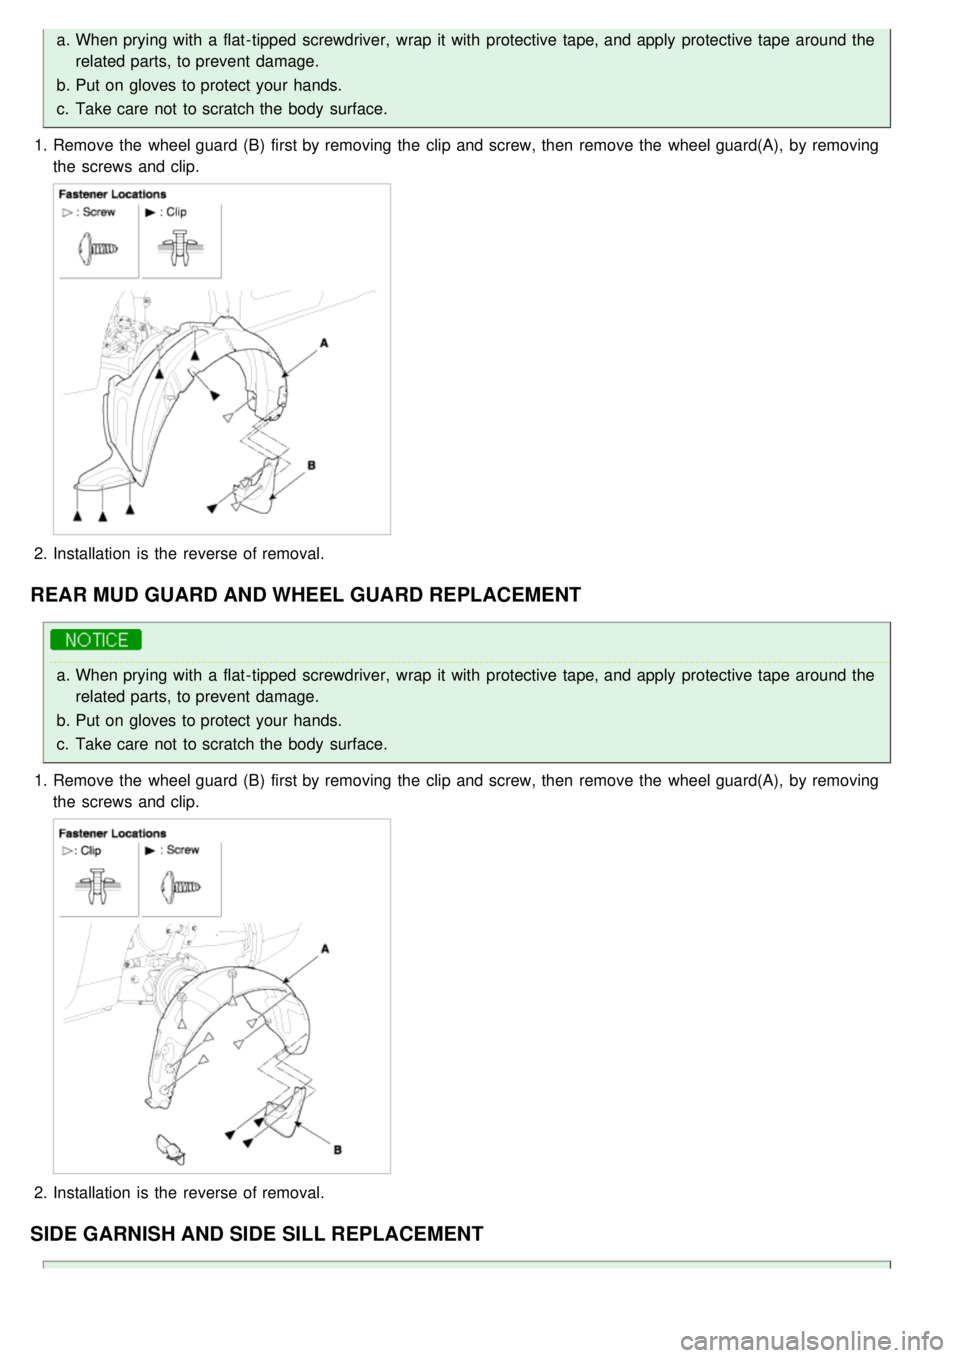
1. Remove the wheel guard (B) first by removing the clip and screw, then remove the wheel guard(A), by removing
the screws and clip.
2.Installation is the reverse of removal.
REAR MUD GUARD AND WHEEL GUARD REPLACEMENT
a.When prying with a flat- tipped screwdriver, wrap it with protective tape, and apply protective tape around the
related parts, to prevent damage.
b. Put on gloves to protect your hands.
c. Take care not to scratch the body surface.
1. Remove the wheel guard (B) first by removing the clip and screw, then remove the wheel guard(A), by removing
the screws and clip.
2.Installation is the reverse of removal.
SIDE GARNISH AND SIDE SILL REPLACEMENT
Page 1052 of 1575
2007 > 2.7L V6 GASOLINE >
REPLACEMENT
OUTSIDE REAR VIEW MIRROR RELPLACEMENT
a. When prying with a flat- tipper screwdriver, wrap it with protective tape, and apply protective tape around the
related parts, to prevent damage.
b. Put on gloves to protect your hands.
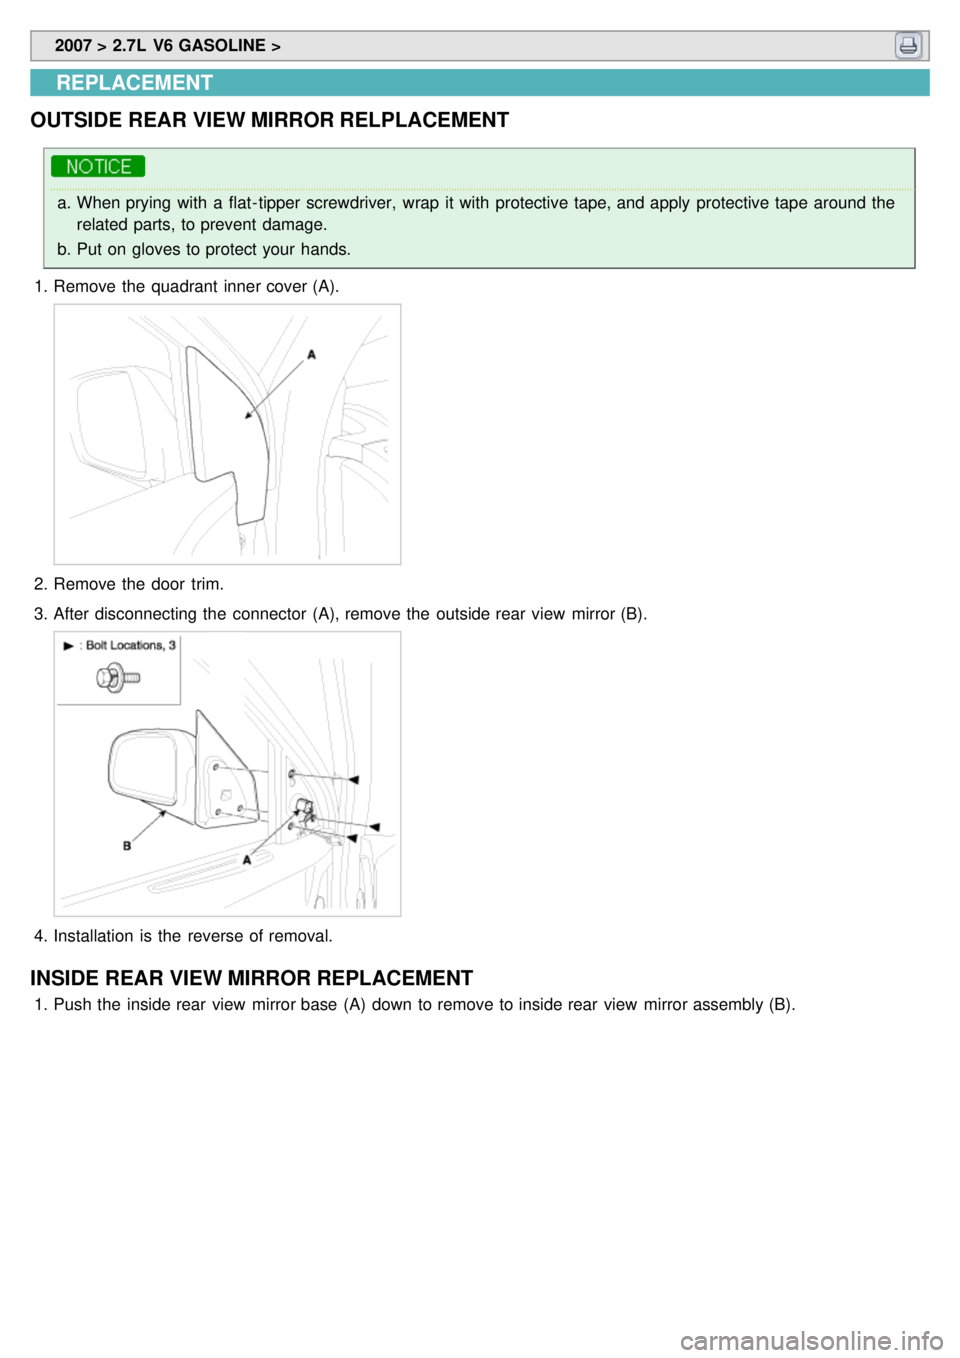
1. Remove the quadrant inner cover (A).
2.Remove the door trim.
3. After disconnecting the connector (A), remove the outside rear view mirror (B).
4.Installation is the reverse of removal.
INSIDE REAR VIEW MIRROR REPLACEMENT
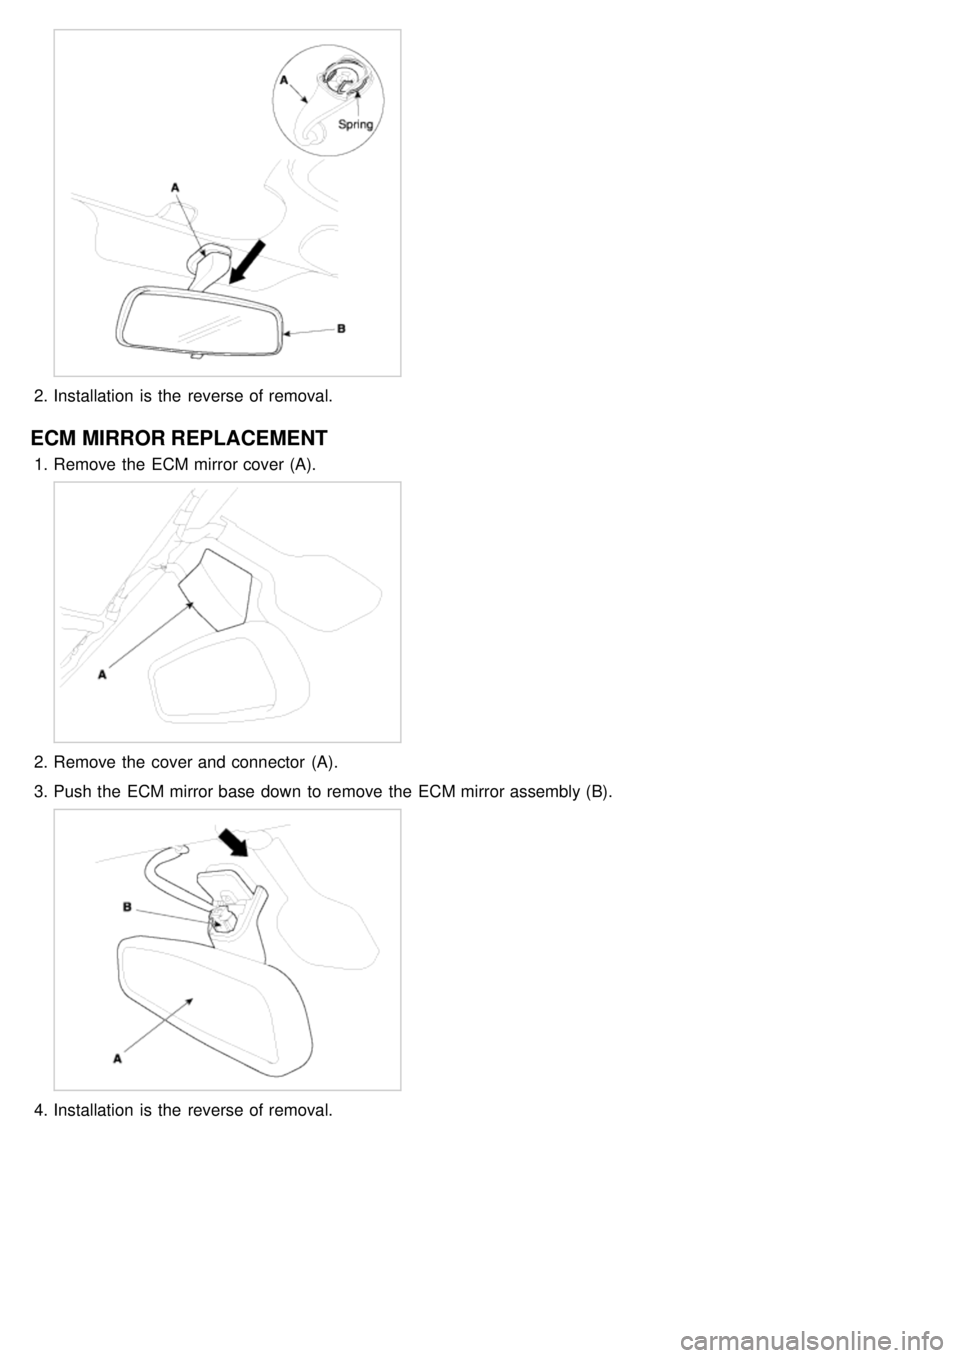
1.Push the inside rear view mirror base (A) down to remove to inside rear view mirror assembly (B).
Page 1053 of 1575
2.Installation is the reverse of removal.
ECM MIRROR REPLACEMENT
1.Remove the ECM mirror cover (A).
2.Remove the cover and connector (A).
3. Push the ECM mirror base down to remove the ECM mirror assembly (B).
4.Installation is the reverse of removal.
Page 1059 of 1575
[LHD]
[RHD]
4.Installation is the reverse of removal.
CUP HOLDER ASSEMBLY REPLACEMENT
1.Remove the front console assembly.
2. After removing the mounting bracket (A), remove the cup holder assembly (B).
![KIA CARNIVAL 2007 Workshop Manual [LHD]
[RHD]
4.Installation is the reverse of removal.
CUP HOLDER ASSEMBLY REPLACEMENT
1.Remove the front console assembly.
2. After removing the mounting bracket (A), remove the cup holder asse](/manual-img/2/57045/w960_57045-1058.png "KIA CARNIVAL 2007 Workshop Manual [LHD]
[RHD]
4.Installation is the reverse of removal.
CUP HOLDER ASSEMBLY REPLACEMENT
1.Remove the front console assembly.
2. After removing the mounting bracket (A), remove the cup holder asse")