Page 1089 of 1575
a.Put on gloves to protect your hands.
b. When prying with a flat- tipped screwdriver, wrap it with protective tape to prevent damage.
c. Take care not to bend or scratch the trim and panels.
1. Remove the front door scuff trim.
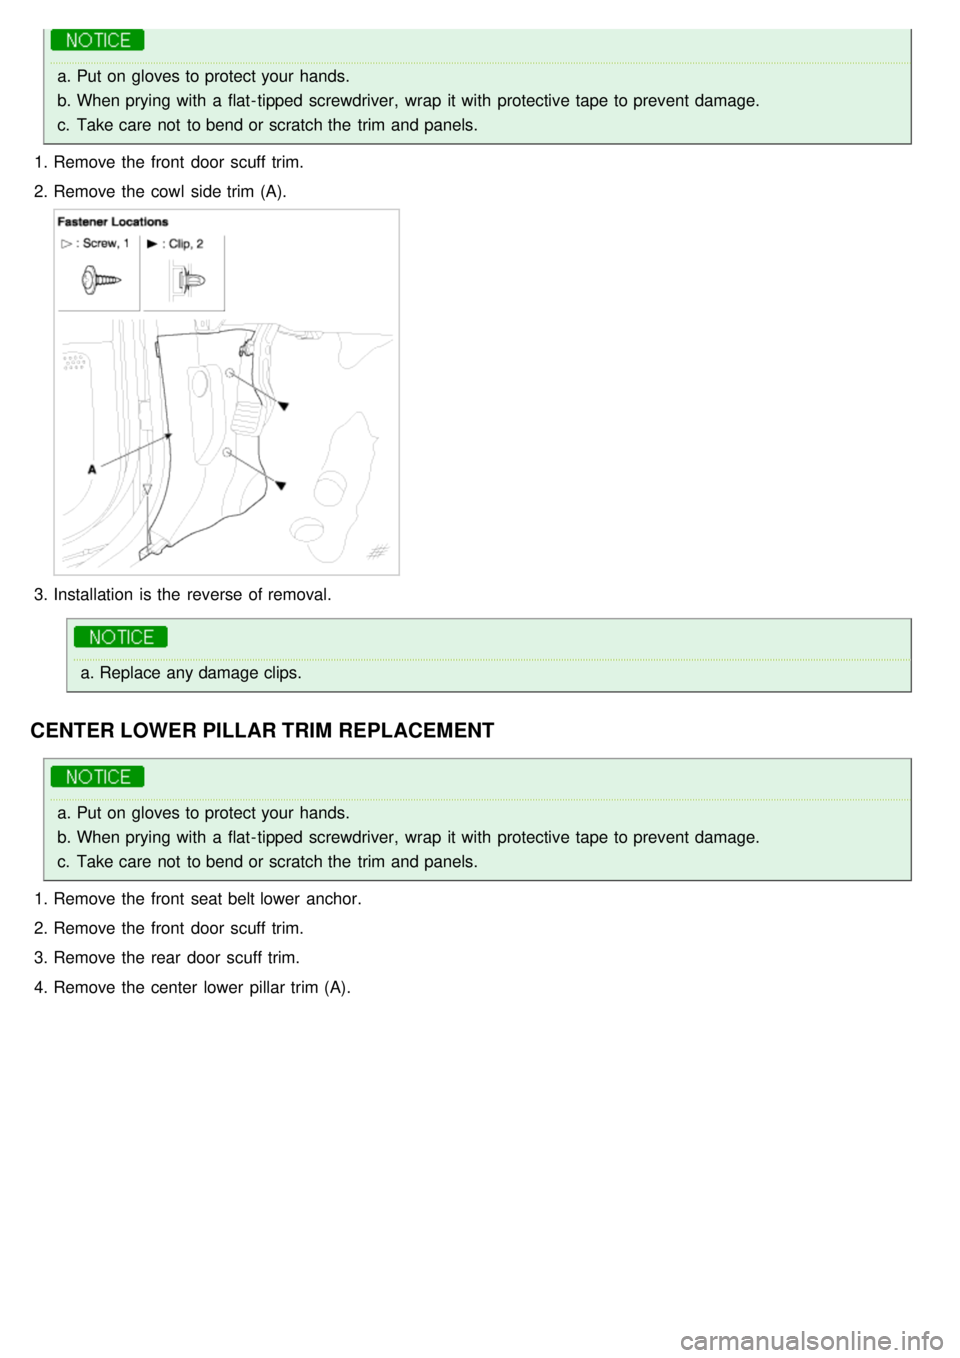
2. Remove the cowl side trim (A).
3.Installation is the reverse of removal.
a.Replace any damage clips.
CENTER LOWER PILLAR TRIM REPLACEMENT
a.Put on gloves to protect your hands.
b. When prying with a flat- tipped screwdriver, wrap it with protective tape to prevent damage.
c. Take care not to bend or scratch the trim and panels.
1. Remove the front seat belt lower anchor.
2. Remove the front door scuff trim.
3. Remove the rear door scuff trim.
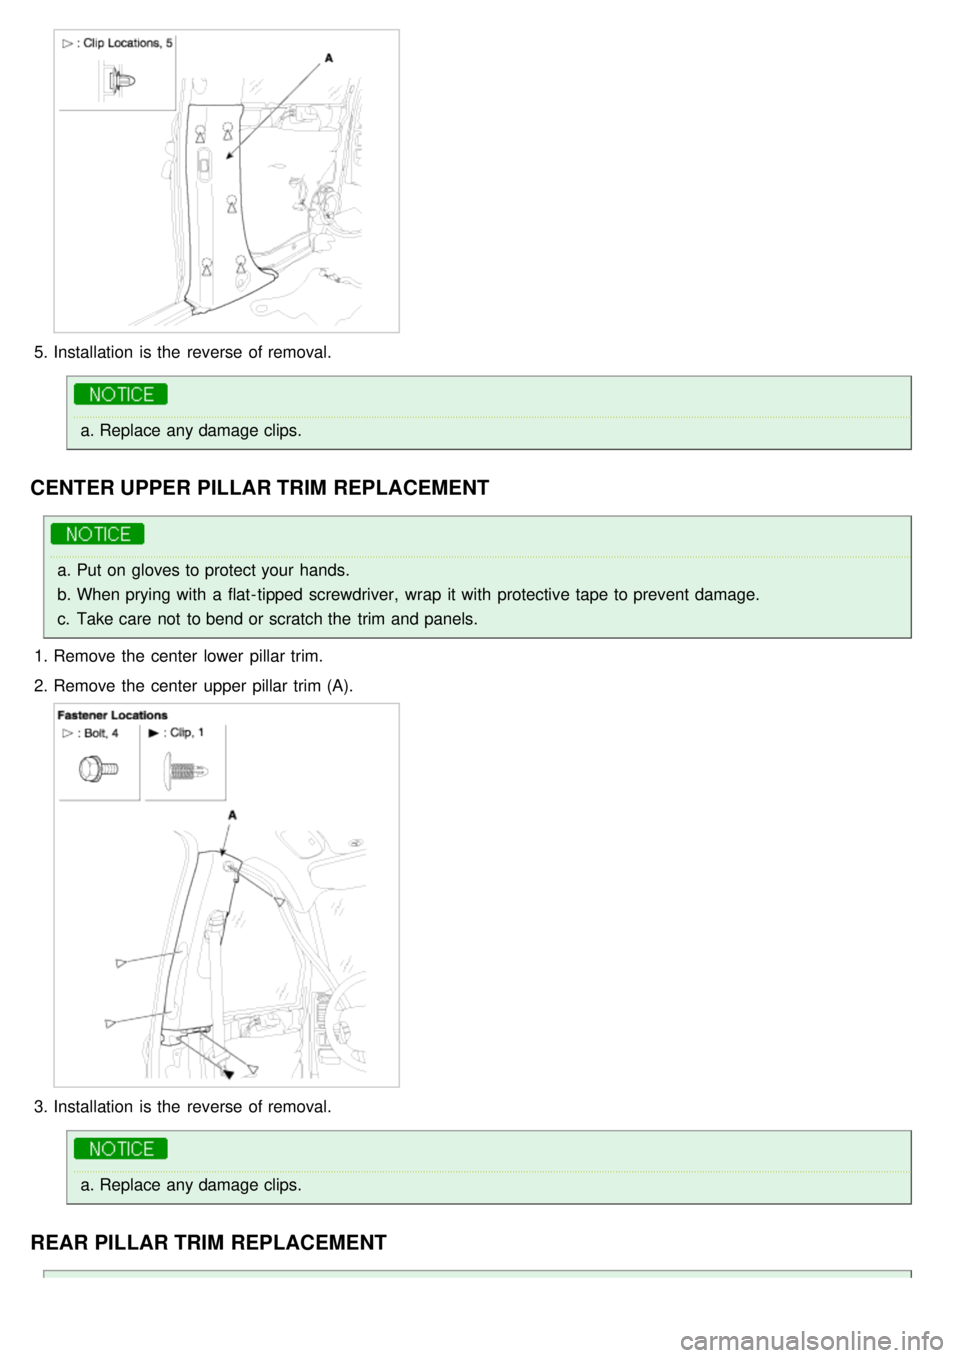
4. Remove the center lower pillar trim (A).
Page 1090 of 1575
5.Installation is the reverse of removal.
a.Replace any damage clips.
CENTER UPPER PILLAR TRIM REPLACEMENT
a.Put on gloves to protect your hands.
b. When prying with a flat- tipped screwdriver, wrap it with protective tape to prevent damage.
c. Take care not to bend or scratch the trim and panels.
1. Remove the center lower pillar trim.
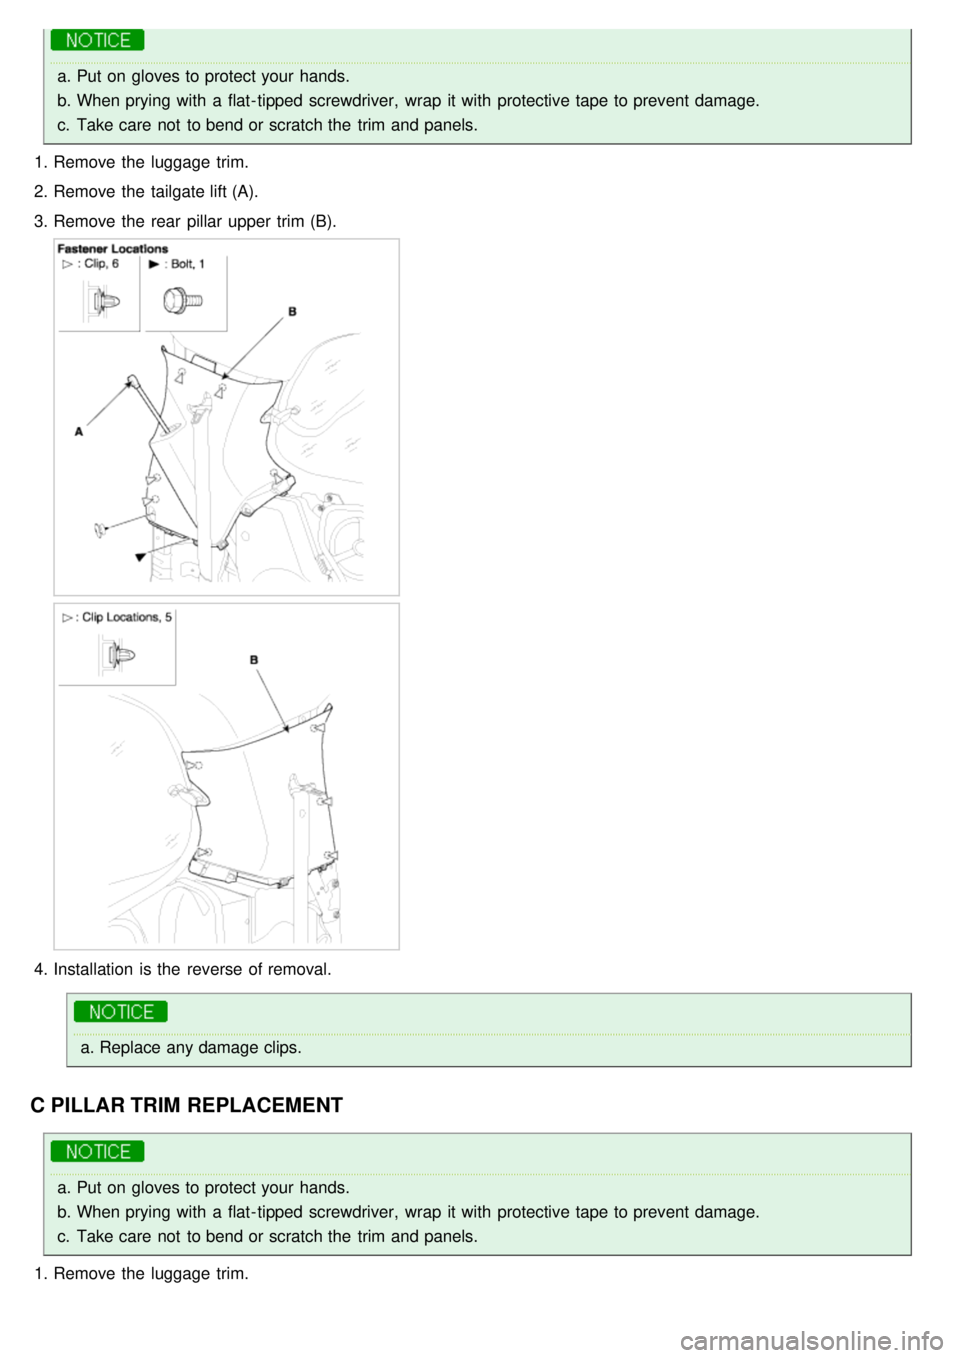
2. Remove the center upper pillar trim (A).
3.Installation is the reverse of removal.
a.Replace any damage clips.
REAR PILLAR TRIM REPLACEMENT
Page 1091 of 1575
a.Put on gloves to protect your hands.
b. When prying with a flat- tipped screwdriver, wrap it with protective tape to prevent damage.
c. Take care not to bend or scratch the trim and panels.
1. Remove the luggage trim.
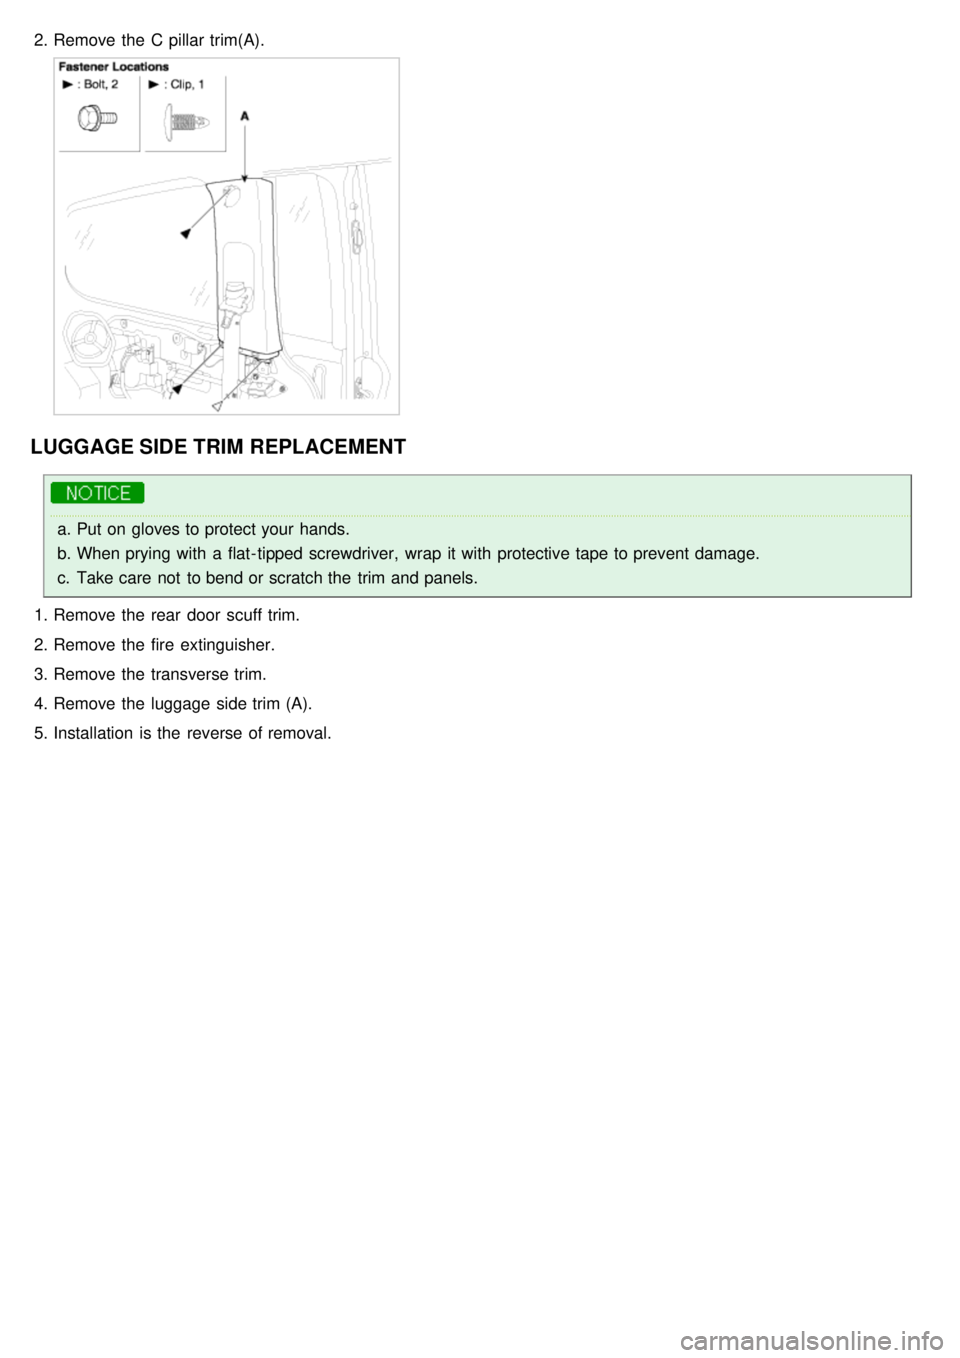
2. Remove the tailgate lift (A).
3. Remove the rear pillar upper trim (B).
4.Installation is the reverse of removal.
a.Replace any damage clips.
C PILLAR TRIM REPLACEMENT
a.Put on gloves to protect your hands.
b. When prying with a flat- tipped screwdriver, wrap it with protective tape to prevent damage.
c. Take care not to bend or scratch the trim and panels.
1. Remove the luggage trim.
Page 1092 of 1575
2.Remove the C pillar trim(A).
LUGGAGE SIDE TRIM REPLACEMENT
a.Put on gloves to protect your hands.
b. When prying with a flat- tipped screwdriver, wrap it with protective tape to prevent damage.
c. Take care not to bend or scratch the trim and panels.
1. Remove the rear door scuff trim.
2. Remove the fire extinguisher.
3. Remove the transverse trim.
4. Remove the luggage side trim (A).
5. Installation is the reverse of removal.
Page 1101 of 1575
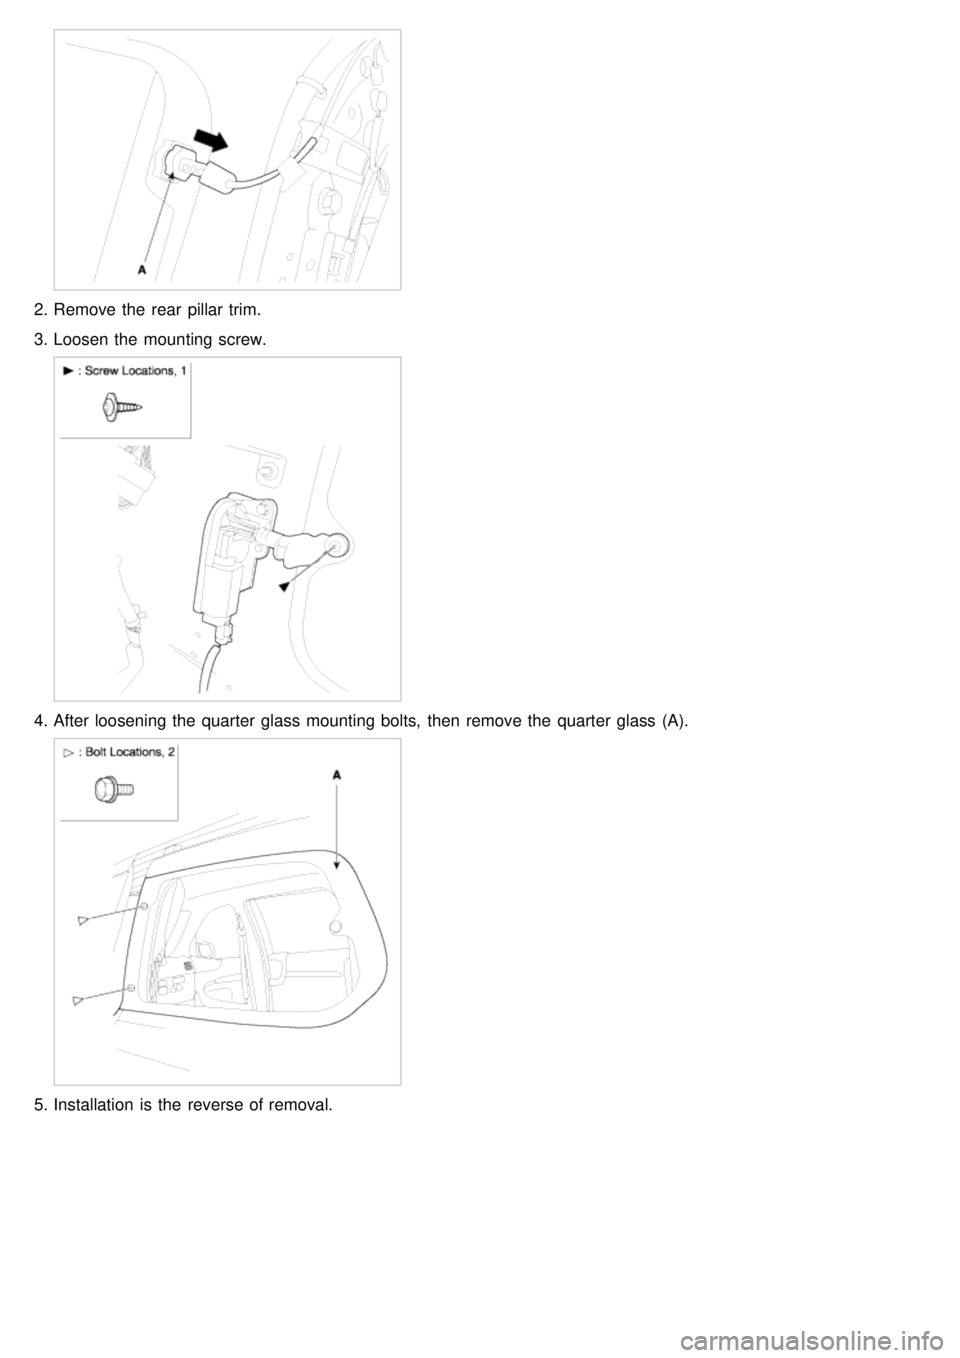
2.Remove the rear pillar trim.
3. Loosen the mounting screw.
4.After loosening the quarter glass mounting bolts, then remove the quarter glass (A).
5.Installation is the reverse of removal.
Page 1104 of 1575
2007 > 2.7L V6 GASOLINE >
REPLACEMENT
FRONT BUMPER COVER REPLACEMENT
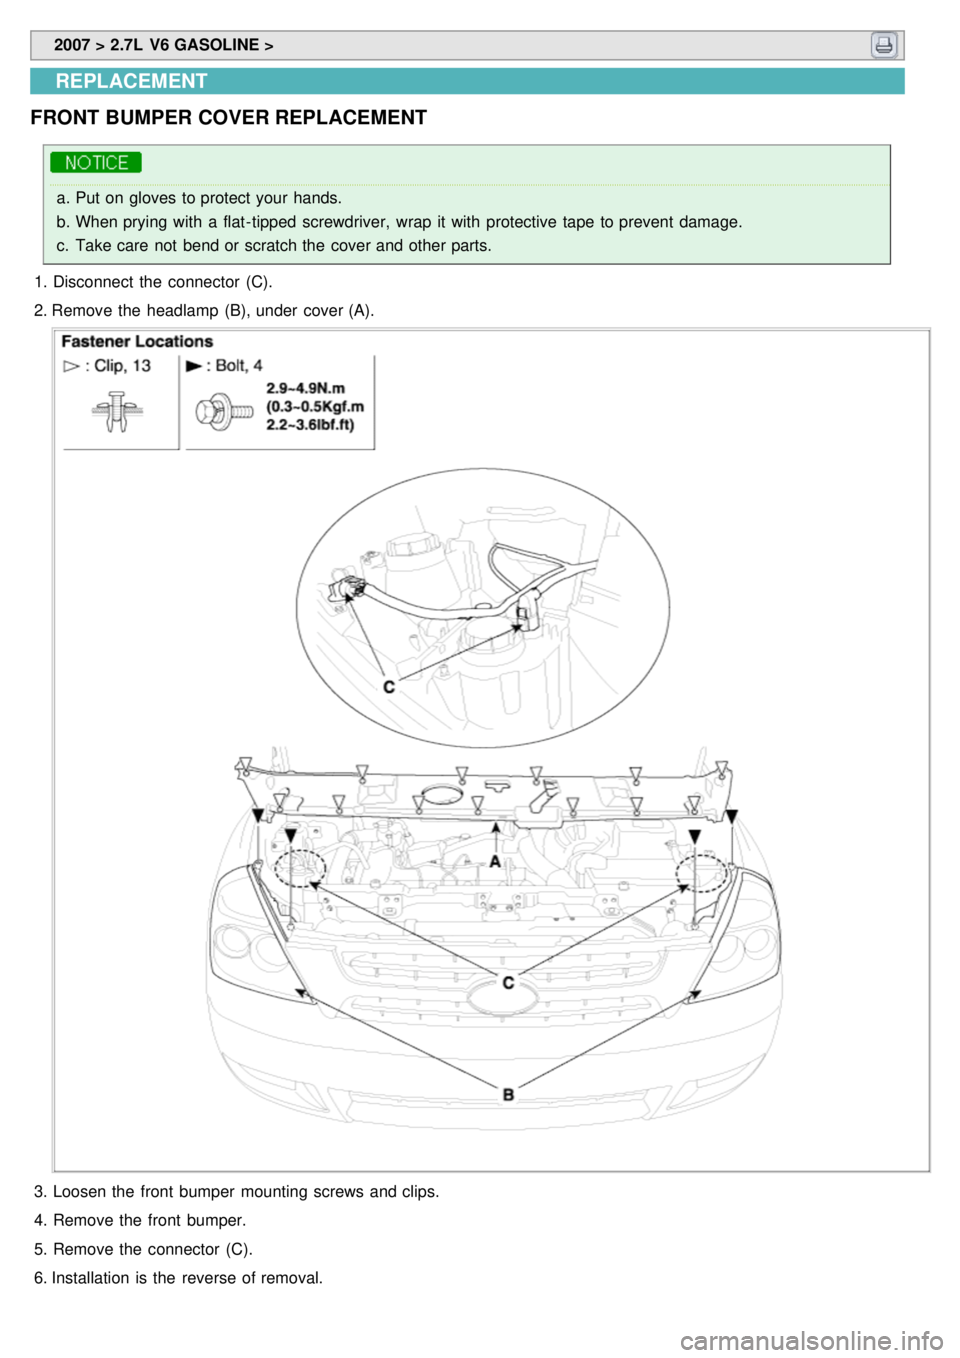
a. Put on gloves to protect your hands.
b. When prying with a flat- tipped screwdriver, wrap it with protective tape to prevent damage.
c. Take care not bend or scratch the cover and other parts.
1. Disconnect the connector (C).
2. Remove the headlamp (B), under cover (A).
3. Loosen the front bumper mounting screws and clips.
4. Remove the front bumper.
5. Remove the connector (C).
6. Installation is the reverse of removal.
Page 1107 of 1575
2007 > 2.7L V6 GASOLINE >
REPLACEMENT
REAR BUMPER COVER REPLACEMENT
a. When prying with a flat- tipped screwdriver, wrap it with protective tape , and apply protective tape around the
related parts your hands.
b. Put on gloves to protect your hands.
c. Take care not bend or scratch the cover and other parts.
1. Remove the rear combination ramp(A).
2. Loosen the rear bumper screws and clips.
3. Remove the rear bumper.
4. Installation is the reverse of removal.
a.Replace any damage clips.
Page 1114 of 1575
2007 > 2.7L V6 GASOLINE >
REPLACEMENT
SEAT ASSEMBLY REPLACEMENT
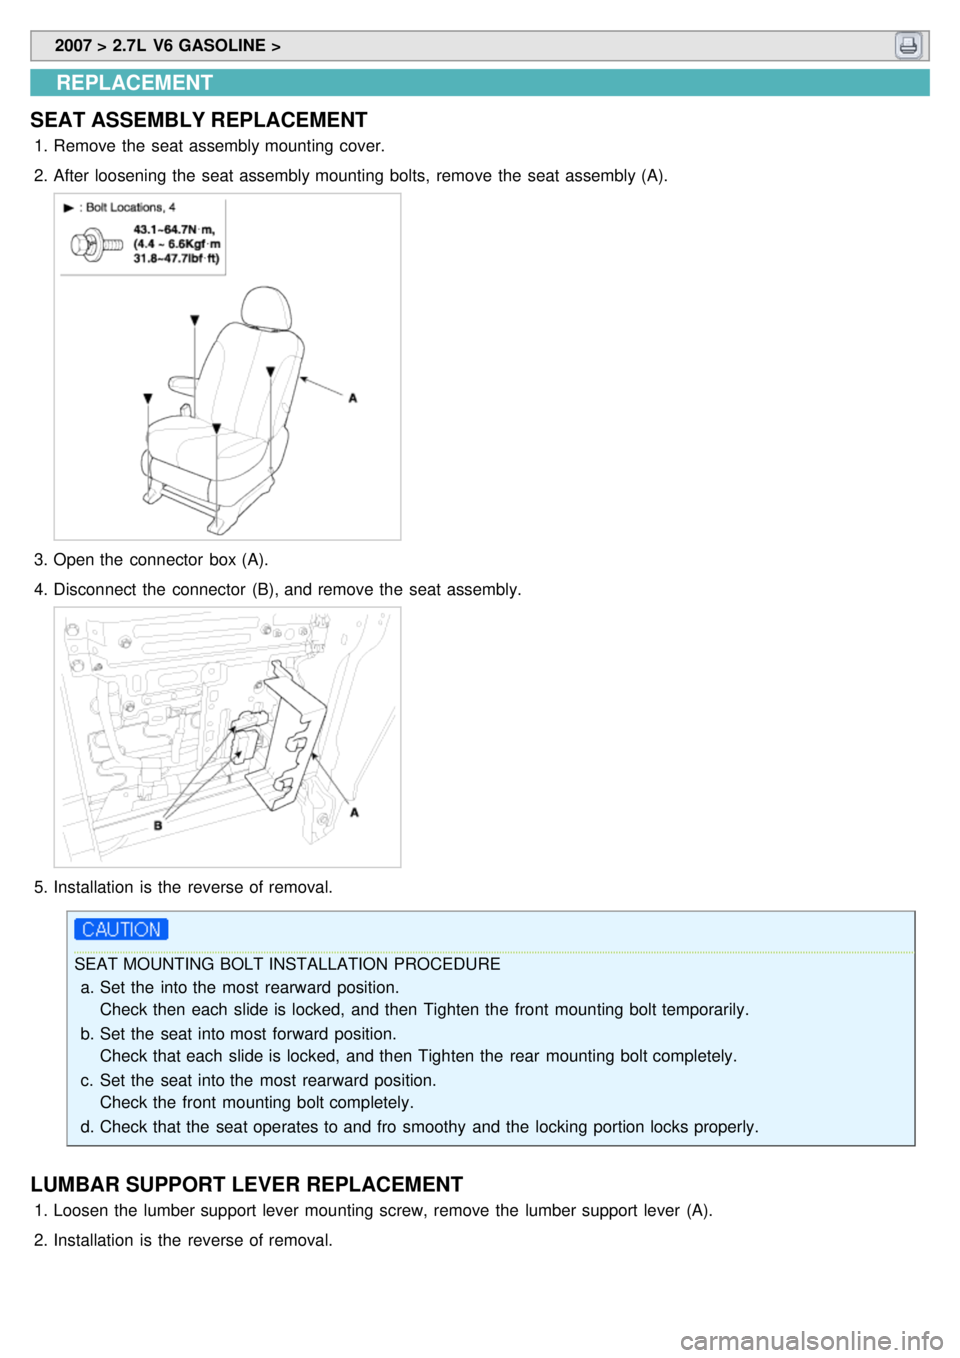
1. Remove the seat assembly mounting cover.
2. After loosening the seat assembly mounting bolts, remove the seat assembly (A).
3.Open the connector box (A).
4. Disconnect the connector (B), and remove the seat assembly.
5.Installation is the reverse of removal.
SEAT MOUNTING BOLT INSTALLATION PROCEDURE
a. Set the into the most rearward position.
Check then each slide is locked, and then Tighten the front mounting bolt temporarily.
b. Set the seat into most forward position.
Check that each slide is locked, and then Tighten the rear mounting bolt completely.
c. Set the seat into the most rearward position.
Check the front mounting bolt completely.
d. Check that the seat operates to and fro smoothy and the locking portion locks properly.
LUMBAR SUPPORT LEVER REPLACEMENT
1.Loosen the lumber support lever mounting screw, remove the lumber support lever (A).
2. Installation is the reverse of removal.