Page 1073 of 1575
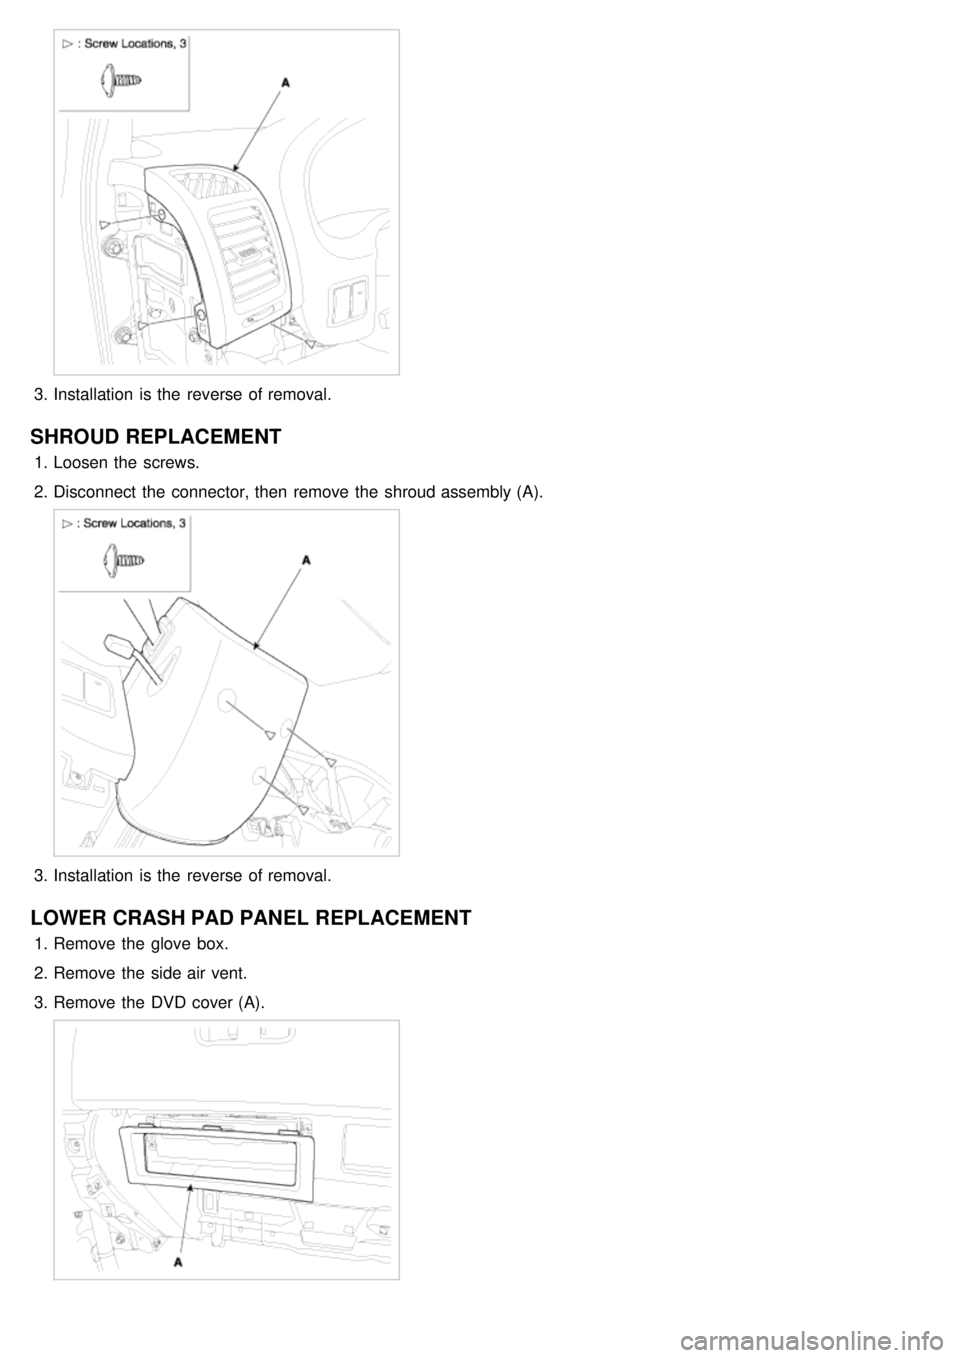
3.Installation is the reverse of removal.
SHROUD REPLACEMENT
1.Loosen the screws.
2. Disconnect the connector, then remove the shroud assembly (A).
3.Installation is the reverse of removal.
LOWER CRASH PAD PANEL REPLACEMENT
1.Remove the glove box.
2. Remove the side air vent.
3. Remove the DVD cover (A).
Page 1075 of 1575
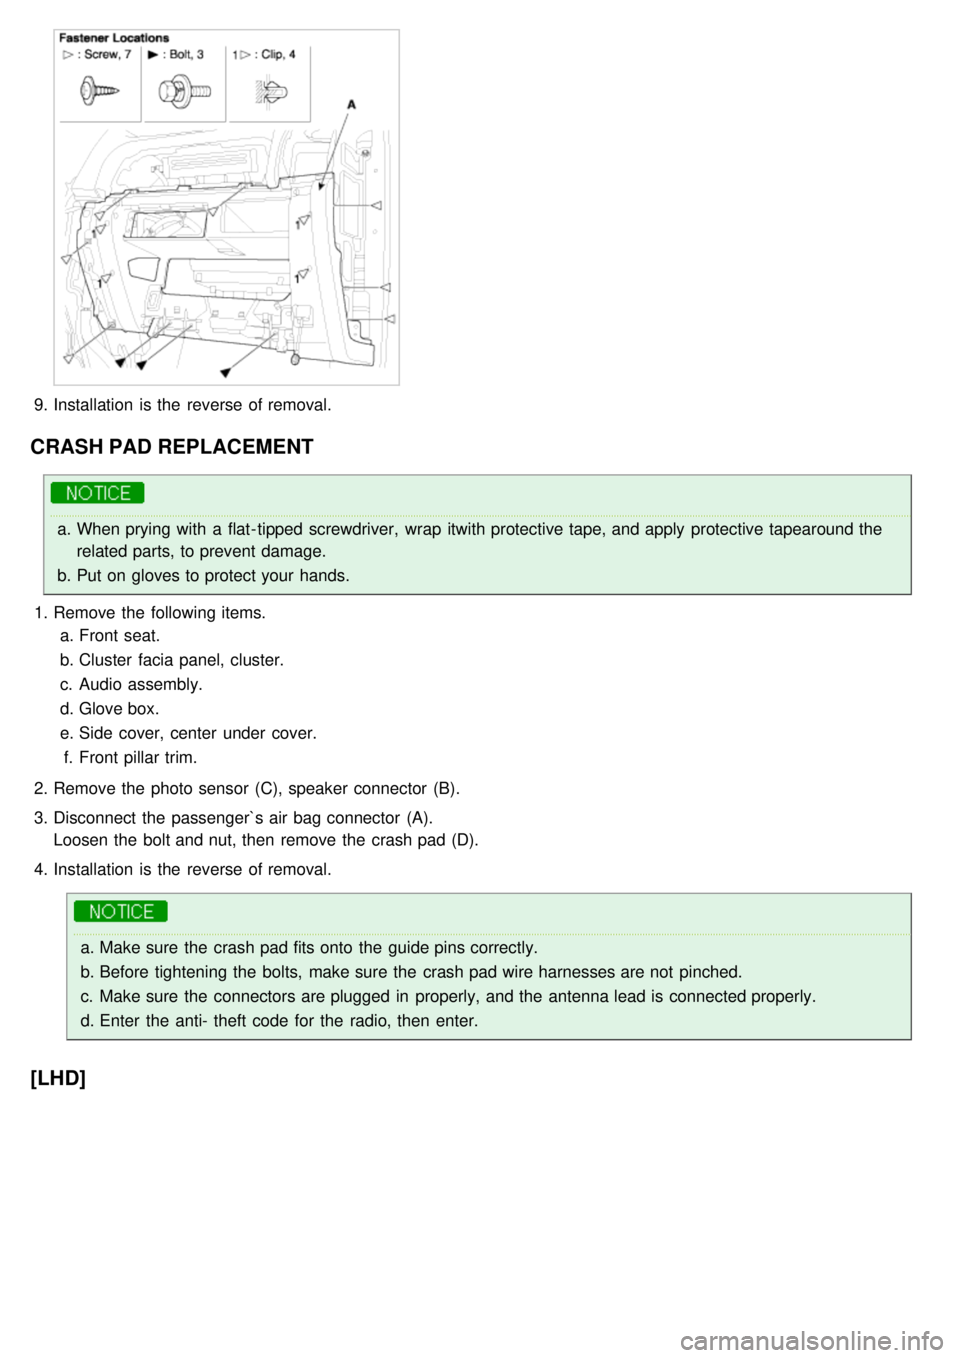
9.Installation is the reverse of removal.
CRASH PAD REPLACEMENT
a.When prying with a flat- tipped screwdriver, wrap itwith protective tape, and apply protective tapearound the
related parts, to prevent damage.
b. Put on gloves to protect your hands.
1. Remove the following items.
a. Front seat.
b. Cluster facia panel, cluster.
c. Audio assembly.
d. Glove box.
e. Side cover, center under cover.
f. Front pillar trim.
2. Remove the photo sensor (C), speaker connector (B).
3. Disconnect the passenger`s air bag connector (A).
Loosen the bolt and nut, then remove the crash pad (D).
4. Installation is the reverse of removal.
a.Make sure the crash pad fits onto the guide pins correctly.
b. Before tightening the bolts, make sure the crash pad wire harnesses are not pinched.
c. Make sure the connectors are plugged in properly, and the antenna lead is connected properly.
d. Enter the anti- theft code for the radio, then enter.
[LHD]
Page 1077 of 1575
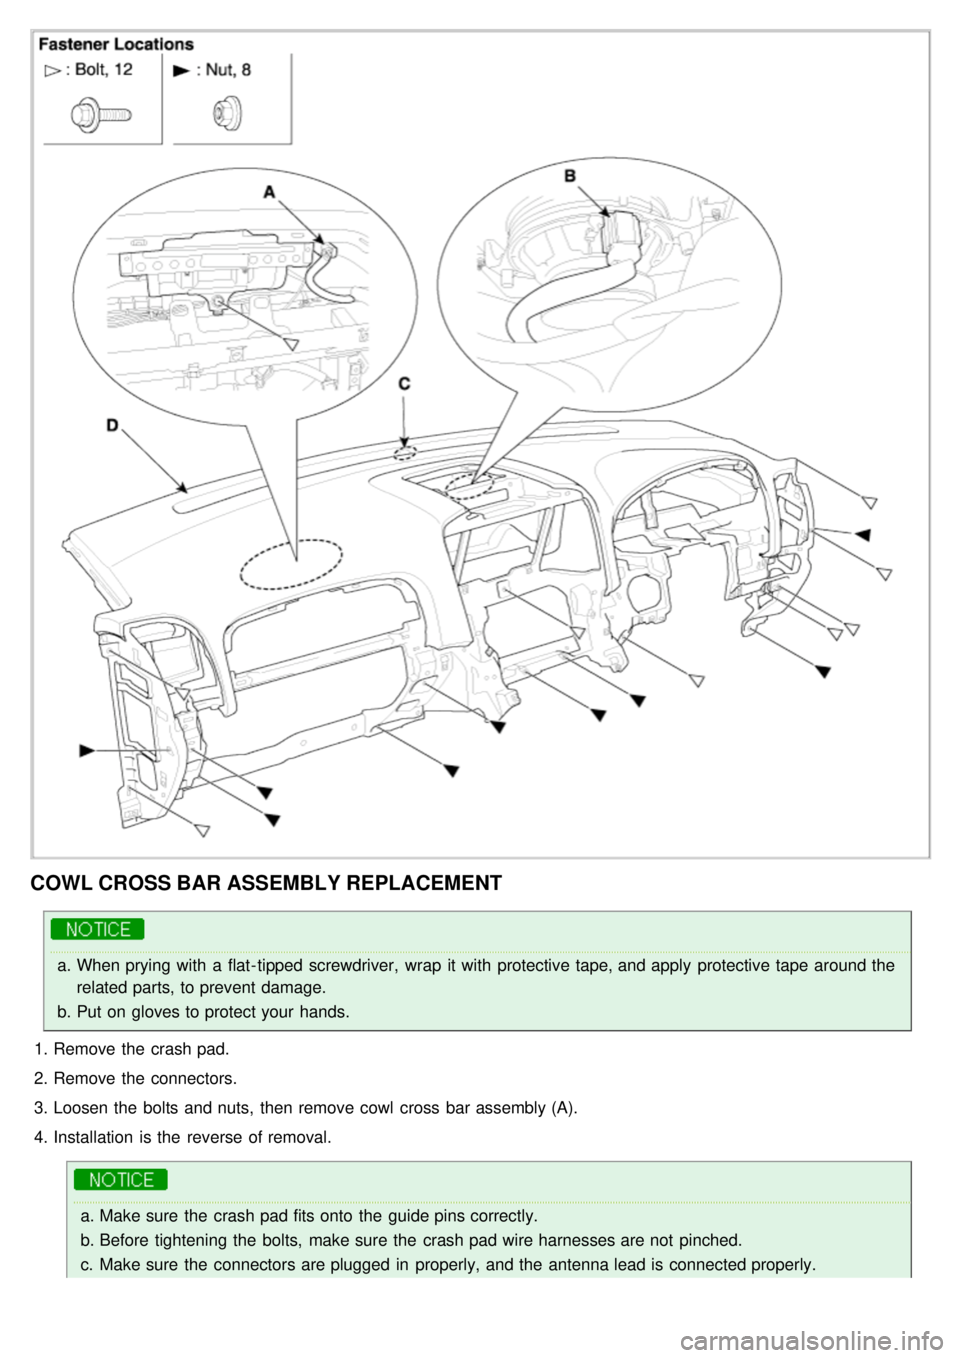
COWL CROSS BAR ASSEMBLY REPLACEMENT
a.When prying with a flat- tipped screwdriver, wrap it with protective tape, and apply protective tape around the
related parts, to prevent damage.
b. Put on gloves to protect your hands.
1. Remove the crash pad.
2. Remove the connectors.
3. Loosen the bolts and nuts, then remove cowl cross bar assembly (A).
4. Installation is the reverse of removal.
a.Make sure the crash pad fits onto the guide pins correctly.
b. Before tightening the bolts, make sure the crash pad wire harnesses are not pinched.
c. Make sure the connectors are plugged in properly, and the antenna lead is connected properly.
Page 1081 of 1575
2007 > 2.7L V6 GASOLINE >
REPLACEMENT
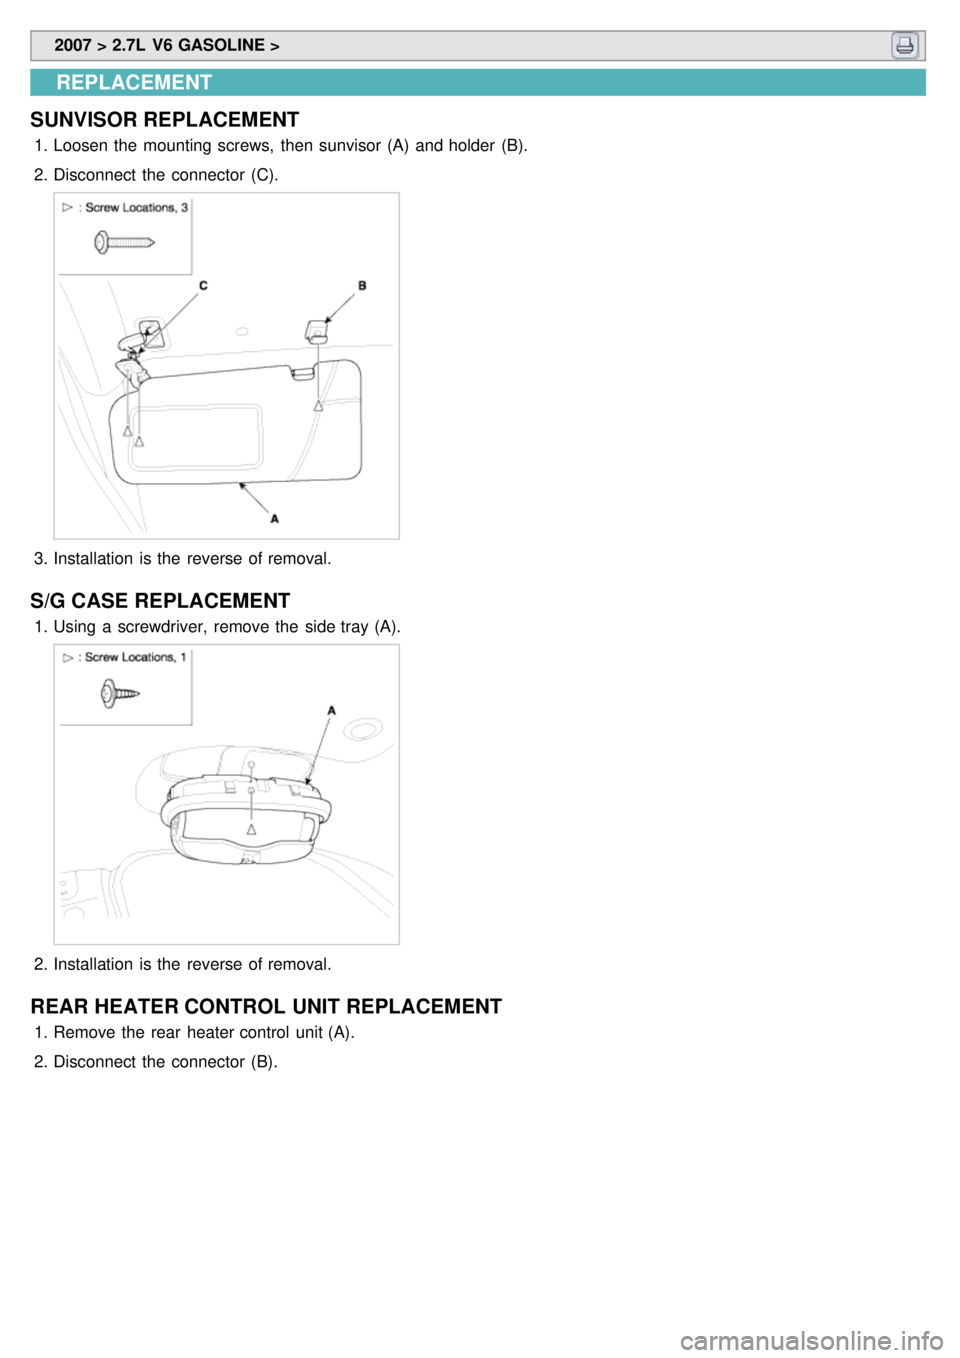
SUNVISOR REPLACEMENT
1. Loosen the mounting screws, then sunvisor (A) and holder (B).
2. Disconnect the connector (C).
3.Installation is the reverse of removal.
S/G CASE REPLACEMENT
1.Using a screwdriver, remove the side tray (A).
2.Installation is the reverse of removal.
REAR HEATER CONTROL UNIT REPLACEMENT
1.Remove the rear heater control unit (A).
2. Disconnect the connector (B).
Page 1082 of 1575
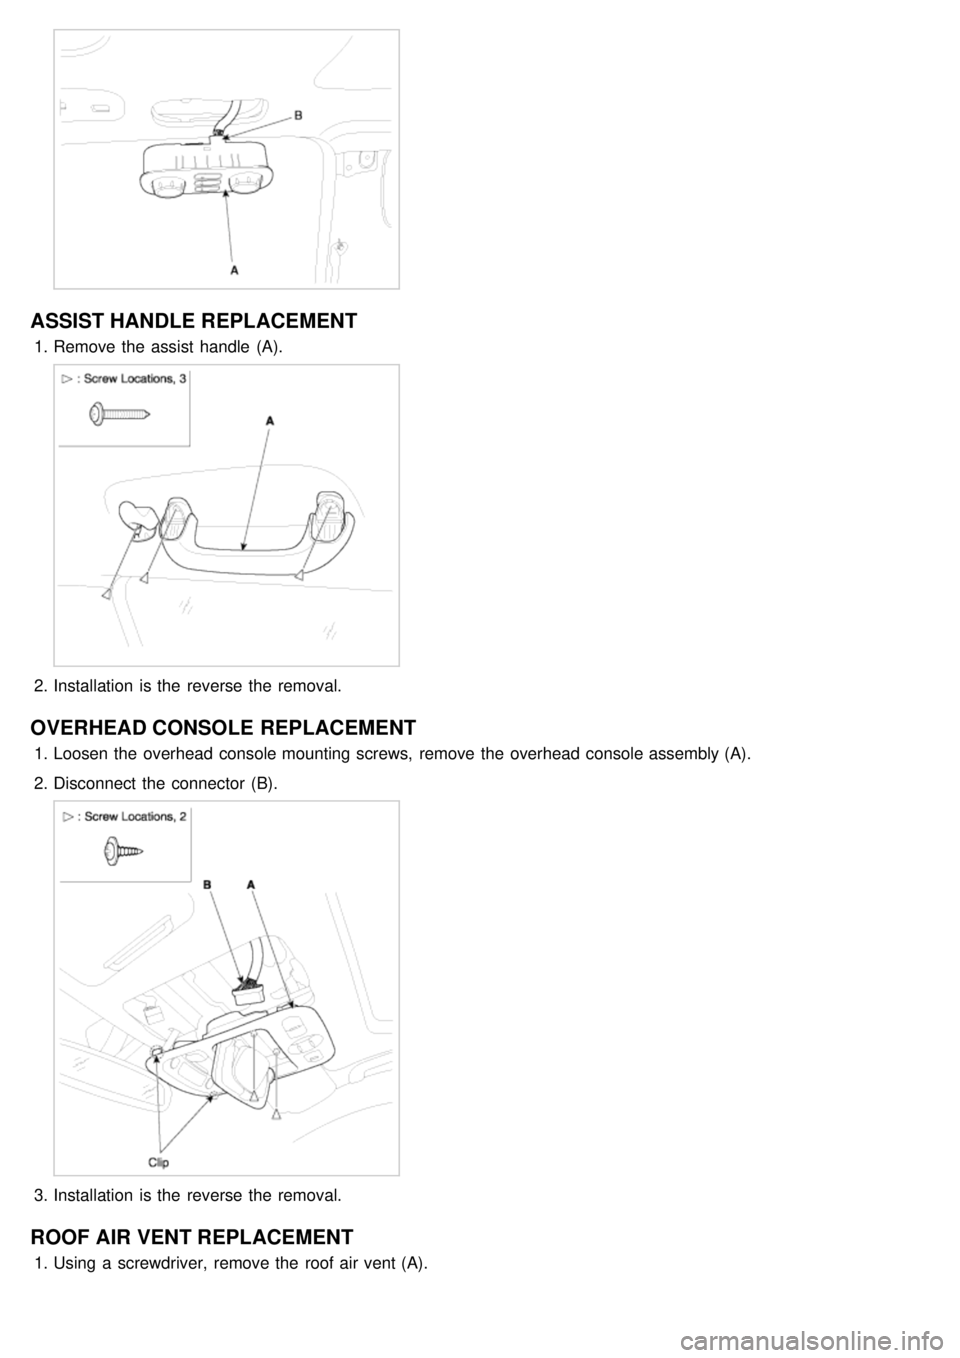
ASSIST HANDLE REPLACEMENT
1.Remove the assist handle (A).
2.Installation is the reverse the removal.
OVERHEAD CONSOLE REPLACEMENT
1.Loosen the overhead console mounting screws, remove the overhead console assembly (A).
2. Disconnect the connector (B).
3.Installation is the reverse the removal.
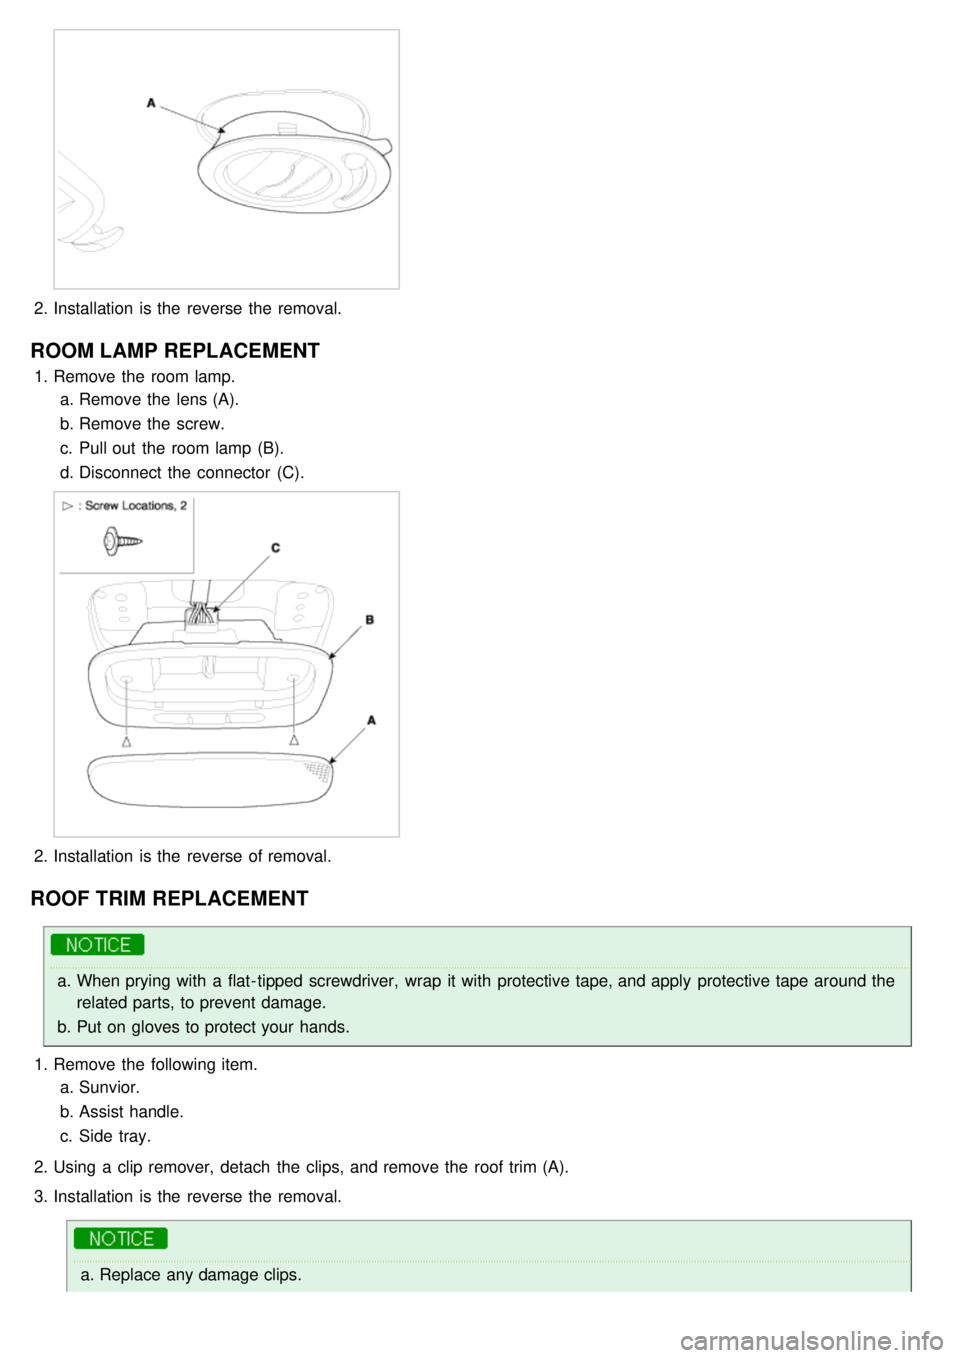
ROOF AIR VENT REPLACEMENT
1.Using a screwdriver, remove the roof air vent (A).
Page 1083 of 1575
2.Installation is the reverse the removal.
ROOM LAMP REPLACEMENT
1.Remove the room lamp.
a. Remove the lens (A).
b. Remove the screw.
c. Pull out the room lamp (B).
d. Disconnect the connector (C).
2.Installation is the reverse of removal.
ROOF TRIM REPLACEMENT
a.When prying with a flat- tipped screwdriver, wrap it with protective tape, and apply protective tape around the
related parts, to prevent damage.
b. Put on gloves to protect your hands.
1. Remove the following item.
a. Sunvior.
b. Assist handle.
c. Side tray.
2. Using a clip remover, detach the clips, and remove the roof trim (A).
3. Installation is the reverse the removal.
a.Replace any damage clips.
Page 1087 of 1575
2007 > 2.7L V6 GASOLINE >
REPLACEMENT
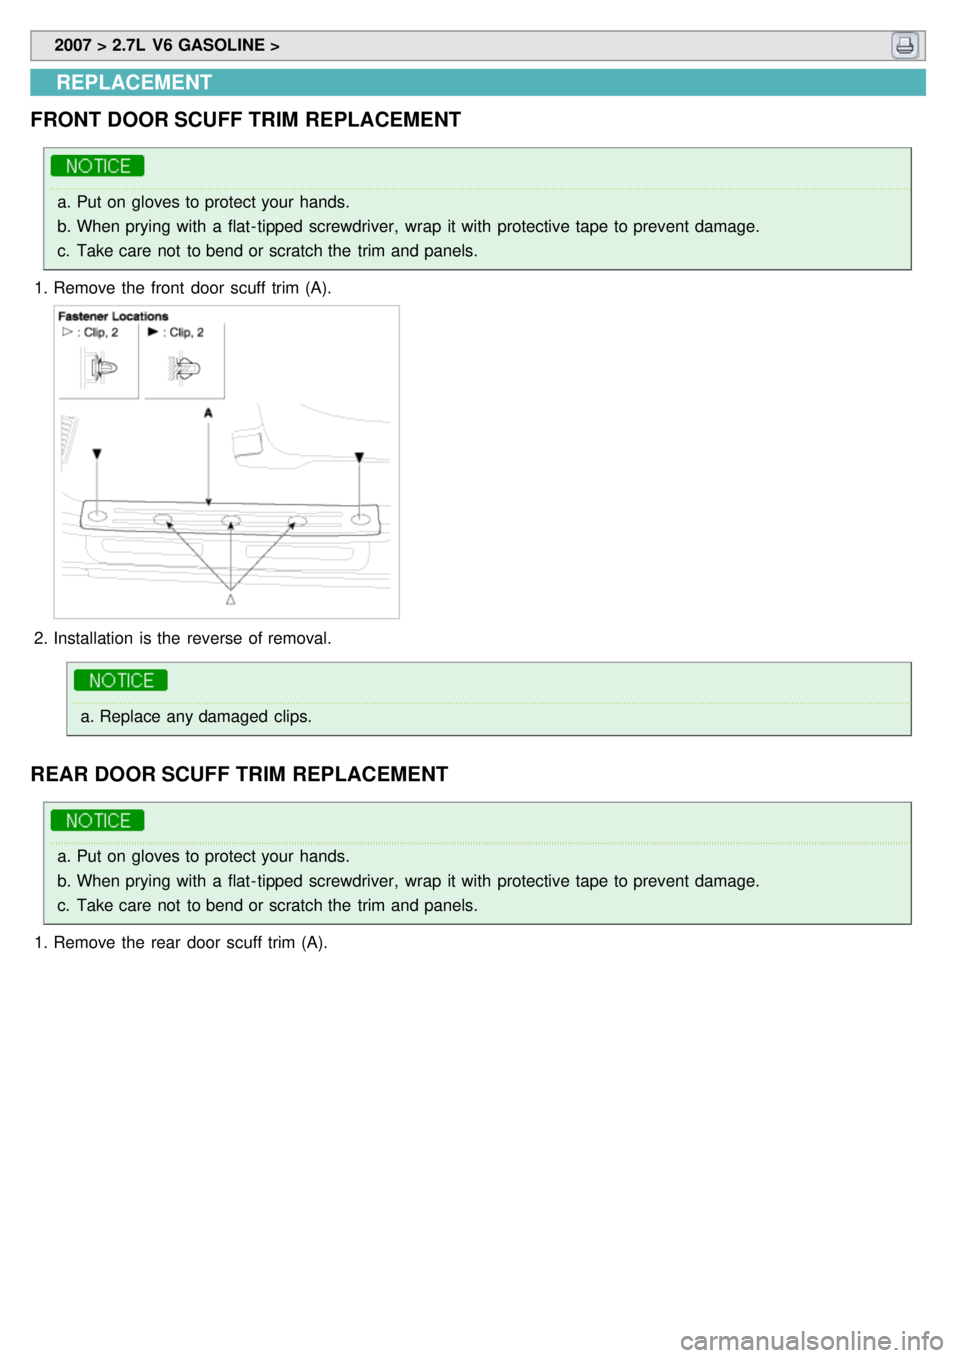
FRONT DOOR SCUFF TRIM REPLACEMENT
a. Put on gloves to protect your hands.
b. When prying with a flat- tipped screwdriver, wrap it with protective tape to prevent damage.
c. Take care not to bend or scratch the trim and panels.
1. Remove the front door scuff trim (A).
2.Installation is the reverse of removal.
a.Replace any damaged clips.
REAR DOOR SCUFF TRIM REPLACEMENT
a.Put on gloves to protect your hands.
b. When prying with a flat- tipped screwdriver, wrap it with protective tape to prevent damage.
c. Take care not to bend or scratch the trim and panels.
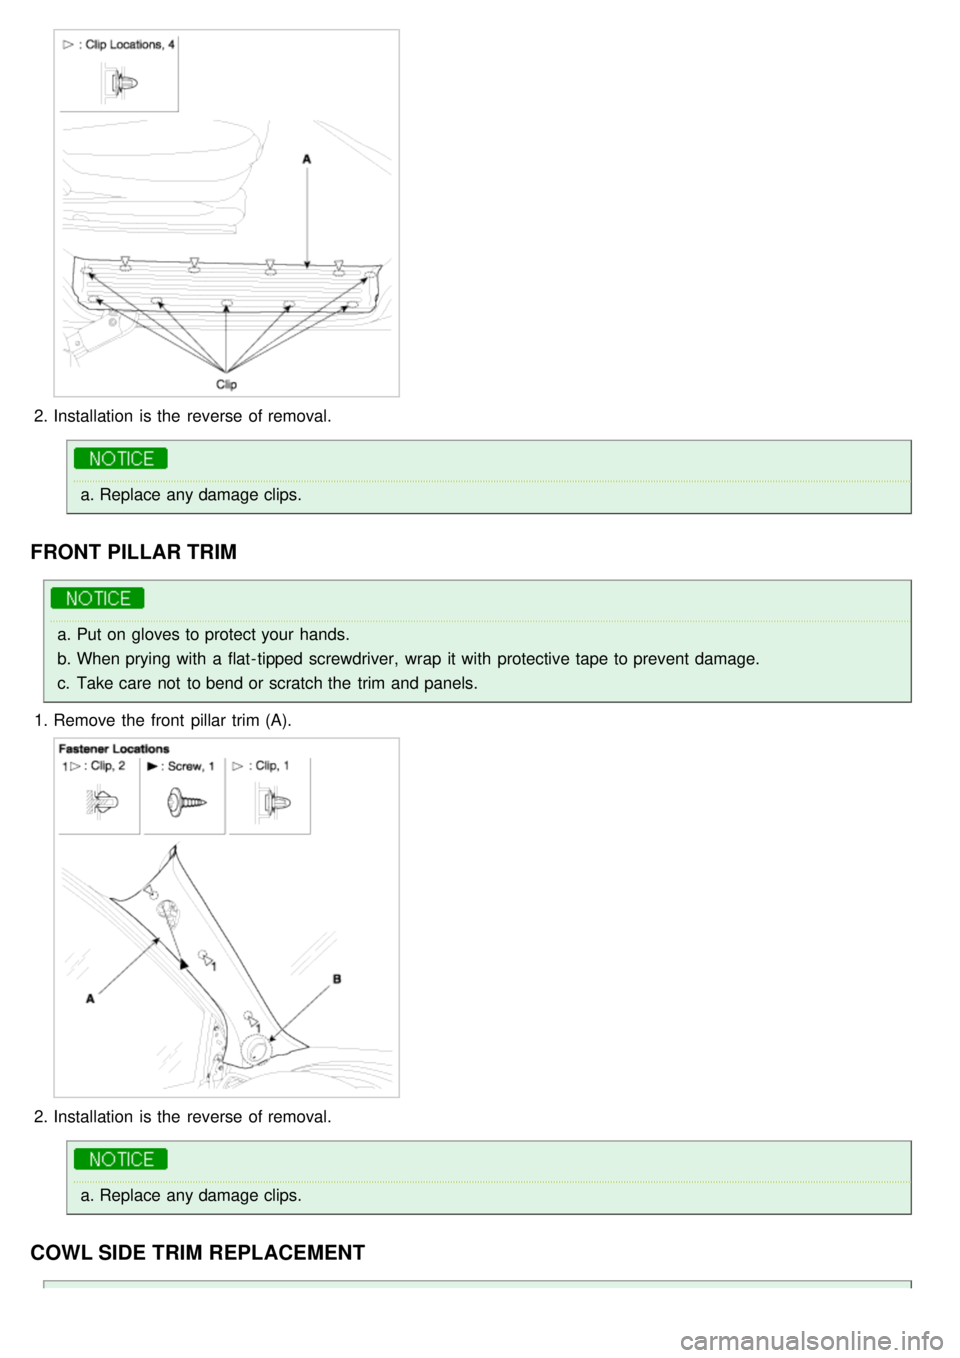
1. Remove the rear door scuff trim (A).
Page 1088 of 1575
2.Installation is the reverse of removal.
a.Replace any damage clips.
FRONT PILLAR TRIM
a.Put on gloves to protect your hands.
b. When prying with a flat- tipped screwdriver, wrap it with protective tape to prevent damage.
c. Take care not to bend or scratch the trim and panels.
1. Remove the front pillar trim (A).
2.Installation is the reverse of removal.
a.Replace any damage clips.
COWL SIDE TRIM REPLACEMENT