Page 49 of 210

Doors and windows47
Controls
Safety
Driving tips
General maintenance
Self-help
Technical data
Luggage lidOpening and closing the luggage lidThe windscreen wipers must be switched off and the wiper
arms must be in contact with the windscreen when the
luggage lid is opened. Otherwise the paint may get
damaged.
Opening luggage lid
– Press the centre button on the remote control key, or
– Press the unlock switch on the driver's door ⇒fig. 40.– Pull the release lever ⇒fig. 41 in the direction indicated
(arrow). This will release the arrester hook.
– Pull the luggage lid up.
Closing luggage lid
– To close the luggage lid, pull it down to overcome the
spring pressure.
– Close the luggage lid.
– Press down the luggage lid carefully with both hands
until you hear it engage ⇒.
WARNING
•
For safety reasons the luggage lid must always be completely
closed when the vehicle is moving. After closing it always check
that it is properly secured. The luggage lid must be flush with the
adjacent body panels.
•
Should you notice that the luggage lid is not safely secured
when the vehicle is moving, stop the vehicle immediately and
close the luggage lid properly, otherwise it could cause an acci-
dent.Caution
Make sure that no objects protrude beyond the edges of the storage
well otherwise the luggage lid could be damaged.
Note
The door catches/luggage lid warning symbol lights up in the instru-
ment cluster if the luggage lid is not properly closed when the igni-
tion is switched on.
Fig. 40 Driver's door:
Unlocking the luggage
lidFig. 41 Luggage lid
unlocked: Release lever
document_0900452a816e6cc9.book Seite 47 Mittwoch, 21. Februar 2007 1:32 13
Page 50 of 210

Doors and windows 48Manual release of the luggage lid
The luggage lid can be released manually if it will not
open in the normal way.– Fold out the foot rest in the passenger's footwell
⇒page 190.
– Pull the plastic cord towards you ⇒fig. 42.Anti-theft alarm systemDescription
The anti-theft alarm triggers an alarm if anyone attempts
to break into the vehicle.The anti-theft alarm helps to prevent the vehicle being broken into
or stolen. If the system senses interference with the vehicle it trig-
gers an audible and visible alarm.
How is the system switched on (armed)?
The anti-theft alarm system switches on automatically when the
vehicle is locked with the remote control or by turning the key in the
driver's door (if the door is closed). The system becomes active
about 30 seconds after the vehicle is locked.If you turn the key twice to the lock position within one second, the
anti-theft warning system is not activated.
How is the system switched off?
The anti-theft alarm is only switched off when the vehicle is
unlocked using the remote control. The vehicle will lock itself again
automatically if none of the doors is opened within 60 seconds after
pressing the remote control button.
If the vehicle is opened with the key on the driver side door, the
passenger side door remains locked. The anti-theft alarm is only
switched off if the key is inserted into the ignition lock within 15
seconds and the ignition is switched on. Otherwise the system trig-
gers the alarm. On some export versions the alarm is already trig-
gered as soon as the driver's door is unlocked with the key and
opened.
When does the system trigger an alarm?
The anti-theft alarm monitors and protects the following parts of
the car:
•
Engine compartment (engine lid)
•
Luggage compartment
•
Doors
•
Ignition
•
Interior ⇒page 49
If any of the named areas are entered or tampered with, the alarm
will sound.
How is the alarm switched off?
The alarm can be switched off by unlocking the vehicle using the
remote control, or by switching on the ignition with the key and thus
“disarming” the system. The alarm will also switch itself off when it
comes to the end of its cycle.
Fig. 42 Detail: Manual
release
document_0900452a816e6cc9.book Seite 48 Mittwoch, 21. Februar 2007 1:32 13
Page 51 of 210

Doors and windows49
Controls
Safety
Driving tips
General maintenance
Self-help
Technical data Turn signals
The turn signals flash briefly when the vehicle is locked to confirm
that the doors, the engine lid and the luggage lid are properly
closed and locked.
If the turn signals do not flash, check the doors, engine lid and
luggage lid to make sure they are properly closed. The turn signals
will flash briefly if one of the doors, the luggage lid or the engine lid
is closed after the system has been switched on.
Note
•
To make sure that the alarm is fully operative when leaving the
vehicle, briefly check that all the doors and windows are closed.
•
If the vehicle is unlocked at the driver's door using the key, the
central locking switch only becomes fully functional after the igni-
tion is switched on.
•
The alarm is triggered immediately if one of the battery cables is
disconnected while the alarm system is active.
Interior monitor
The interior monitor triggers an alarm if it detects move-
ment inside the vehicle.
You should deactivate the interior monitor if there is a
possibility that the alarm could be set off, for instance, by a
pet or by an object moving about inside the car ⇒. The
tow-away protection function* should be deactivated if the
car is being towed or transported (for instance by rail or
ship).
Deactivating interior monitor
– Press the switch on the door ⇒fig. 43.
– Then lock the vehicle.
Deactivating the tow-away protection*
– Press the switch on the door.
– Then lock the vehicle.The diode in the switch
or
will light up when the interior
monitor / tow-away protection* function is deactivated. In addition,
the diode on the dashboard will light up for about 3 seconds. The
diode on the dashboard will flash rapidly for about 3 seconds after
the vehicle is locked. There then follows an interval of about 30
seconds before the diode starts flashing slowly.
The interior monitor / tow-away protection* function is automati-
cally switched on again next time the vehicle is locked.
WARNING
Do not leave anyone (especially children) in the car if it is locked
from the outside and the deadlock mechanism is activated: the
doors and windows cannot then be opened from the inside.
Locked doors could delay assistance in an emergency, potentially
putting lives at risk.
Fig. 43 Switches for
the interior monitor in
the door trim (only
visible when the
driver's door is open)
AAAB
document_0900452a816e6cc9.book Seite 49 Mittwoch, 21. Februar 2007 1:32 13
Page 52 of 210

Doors and windows 50Electric windowsControls
The driver can operate all the electric windows in the
vehicle.The electric windows are controlled by two-stage switches:
Opening the windows
– Press the switch as far as the first stop and hold it until
the window has moved to the desired position.
– Press the switch briefly to the second stop: the window
will automatically open all the way.Closing the windows
– Pull the switch as far as the first stop and hold it until the
window has moved to the desired position.
– Pull the switch briefly to the second stop: the window will
automatically close all the way.
WARNING
•
Always take the key with you when leaving the vehicle - even if
you only intend to be gone for a short time. This is especially
important if children are left in the car. They might otherwise be
able to start the engine or use power-operated equipment such as
the electric windows - this could lead to injuries. The window
switches are only deactivated when the driver's door or the front
passenger's door is opened.
•
Always be careful when closing the windows. Careless use of
the electric windows can cause severe injuries.
•
When locking the vehicle from the outside, make sure that
nobody is inside the vehicle, as the windows cannot be opened
from the inside in an emergency.Note
•
When the doors are opened the windows will automatically
come down approximately 10 mm.
•
You can also open the windows using the remote control key
⇒page 43.
Possible malfunctionsThe one-touch open and close function will not work if the battery
has been temporarily disconnected. The function can be restored as
follows:
Fig. 44 Detail of the
driver's door: ControlsFig. 45 Switch on front
passenger's door
document_0900452a816e6cc9.book Seite 50 Mittwoch, 21. Februar 2007 1:32 13
Page 53 of 210
Doors and windows51
Controls
Safety
Driving tips
General maintenance
Self-help
Technical data
•
Close the window as far as it will go by lifting and holding the
window switch.
•
Release the switch and then lift it again for one second. This will
reactivate the automatic function.
document_0900452a816e6cc9.book Seite 51 Mittwoch, 21. Februar 2007 1:32 13
Page 54 of 210

Lights and vision 52Lights and visionLightsSwitching lights on and off
Switching on the side lights
– Turn the light switch ⇒fig. 46 to position
. The indi-
cator lamp
lights up when the side lights are on.
Switching on the dipped or main beam
headlights
– Turn the light switch to position
.
– Press the main beam lever forward ⇒page 56.
Switching off the lights
– Turn the light switch to position O.
The dipped beam headlights will only work with the ignition on. The
headlights are switched to side lights while the engine is being
started and after the ignition has been switched off.The daytime running lights are activated when you switch on the
ignition if the light switch is in position 0 or AUTO, provided that the
daytime running lights function has been activated in the menu
display ⇒page 24.
Note
•
If the lights are left on after the key has been taken out of the
ignition lock, a buzzer sounds when the driver's door is opened.
•
The use of the lighting described here is subject to the relevant
statutory requirements.
•
The headlights and rear lights may mist up temporarily on the
inside in cool or damp weather.
−This is due to the difference in temperature on the inside and
the outside of the headlight glass.
−When the headlights are switched on the surface heated by
the light will soon be demisted, however the glass may still be
misted up inside, around the edges.
−This phenomenon has no influence on the life expectancy of
the vehicle lights.
•
Switch on the headlights when the ambient light starts to fade
or in conditions of poor visibility.
Fig. 46 Detail of the
dashboard: Light
switch
document_0900452a816e6cc9.book Seite 52 Mittwoch, 21. Februar 2007 1:32 13
Page 55 of 210
 headlights
If you set the swit")
Lights and vision53
Controls
Safety
Driving tips
General maintenance
Self-help
Technical data
Applies to vehicles: with automatic headlightsAutomatic (sensor-controlled) headlights
If you set the switch to “AUTO”, the headlights will come
on and switch off automatically according to the ambient
light level.The automatic headlight setting only activates the dipped
beam headlights (not the main beam headlights)
⇒page 52.
Activating automatic headlights
– Turn the light switch ⇒fig. 47 to the AUTO position.
Deactivating automatic headlights
– Turn the light switch to position O.The symbol in the switch lights up when the switch is in the AUTO
position.
The dipped beams, side lights, rear lights and number plate lights
come on together when the headlights are switched on automati-
cally.
When you are using the automatic headlights you can also operate
the main beam headlights, however, please note the following: If you activate the main beam headlights while using the automatic
headlights function (e.g. when driving through a tunnel), but do not
deactivate them again, only the dipped beam headlights will come
on the next time the lights are automatically switched on. To be able
to use the main beam headlights again you must first pull the main
beam lever back to the "off" position and then push it forward again
to "on".
The side lights, headlights and rear fog light can still be switched on
manually in the normal way by using the light switch ⇒page 52.
Sensors in the mounting for the interior mirror monitor the ambient
light level. The headlights will be switched on automatically if the
available light drops below a preset value (for instance when driving
through a tunnel, etc.). The headlights switch off again automati-
cally when the light level increases ⇒.
Malfunction of light sensor
If a malfunction should occur in the light sensor, the symbol
will
light up in the display. For safety reasons, the dipped beam head-
lights will then be switched on permanently when the light switch
is set to the AUTO position. However, you can still switch the lights
on and off in the normal way with the light switch. You should have
the light sensor checked by a qualified workshop as soon as
possible.
WARNING
•
The automatic headlights are only intended to assist the driver.
The driver must always ensure that the headlights are used when
required, and may have to switch them on manually when the light
conditions or visibility are poor. The light sensors are, for example,
not able to detect rain and fog - you should therefore always
switch on the headlights
in these conditions and when driving
after dark.
•
Observe all relevant statutory requirements when using the
lighting systems described here.
Fig. 47 Detail of the
dashboard: Light
switch
document_0900452a816e6cc9.book Seite 53 Mittwoch, 21. Februar 2007 1:32 13
Page 56 of 210

Lights and vision 54
Note•
When the automatic headlights have been activated, the dipped-
beam headlights will go out when the ignition is switched off, and
the side lights will go out when the key is taken out.
•
Do not attach any stickers to the windscreen in front of the
sensor, as this would interfere with the operation of the automatic
headlights and the automatic anti-dazzle function for the mirrors.
Rear fog light
The light switch can also be used to turn on the rear fog
light.–Do not turn the light switch
⇒page 52, fig. 46 to the
symbol
.
– First turn the light switch
⇒page 52, fig. 46 to posi-
tion
.
– Then pull out the light switch to switch on the rear fog
light.
The symbol
next to the switch will light up when the rear fog light
is on.
Caution
To avoid dazzling the traffic behind you, the rear fog light should
only be used in accordance with statutory regulations.
Applies to vehicles: with coming home/leaving home functionComing home/leaving home function
After dark the area around the car is lit up with the aid of
the coming home / leaving home function.Activating the functions
– Press the button
⇒fig. 48. The diode will be lit in the
button.
Deactivating the functions
– Press the button . The diode in the button will go off.
The coming home / leaving home function is controlled by light
sensors in the mounting for the rear view mirror. The system will
function when the following requirements are met:•
The diode in the button is lit
.
•
The headlights and the ignition are switched off.
•
Dark conditions; the sensors register little or no light.
•
The leaving home function is activated in the menu display
⇒page 24.
Fig. 48 Detail of the
dashboard: Coming
home / leaving home
switch
document_0900452a816e6cc9.book Seite 54 Mittwoch, 21. Februar 2007 1:32 13
 1
1 2
2 3
3 4
4 5
5 6
6 7
7 8
8 9
9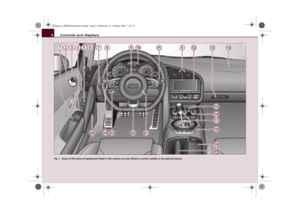 10
10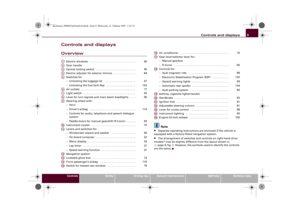 11
11 12
12 13
13 14
14 15
15 16
16 17
17 18
18 19
19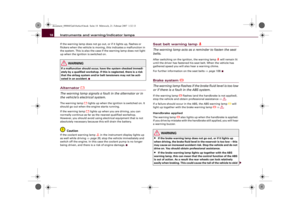 20
20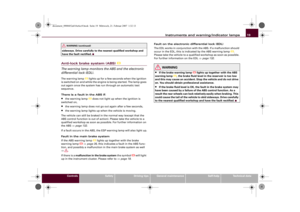 21
21 22
22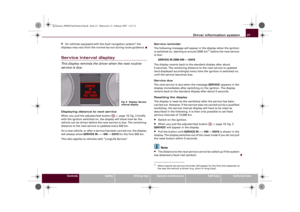 23
23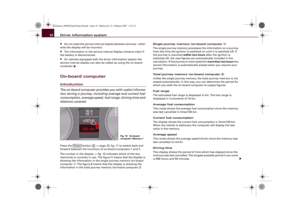 24
24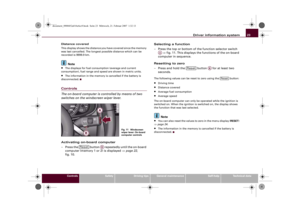 25
25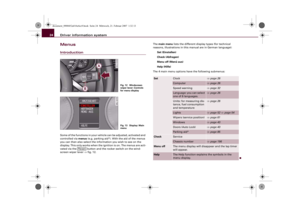 26
26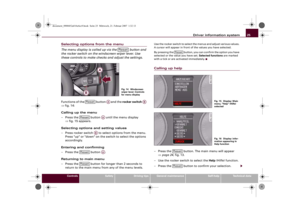 27
27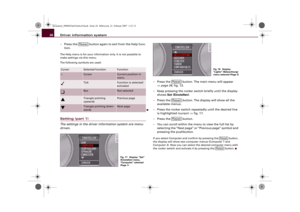 28
28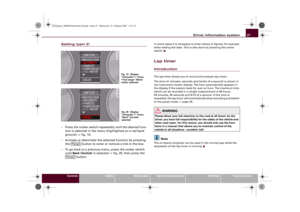 29
29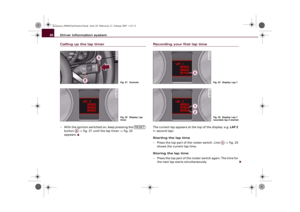 30
30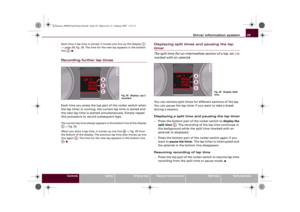 31
31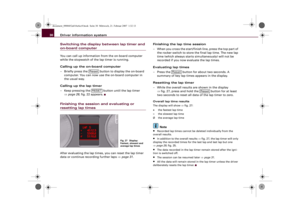 32
32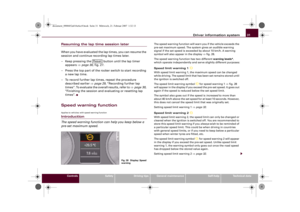 33
33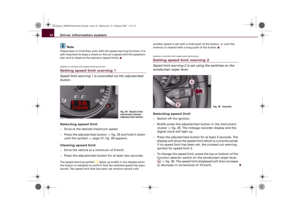 34
34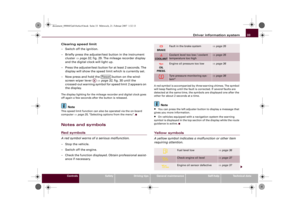 35
35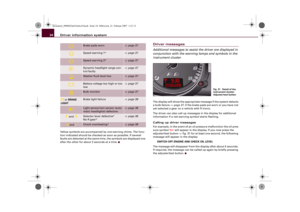 36
36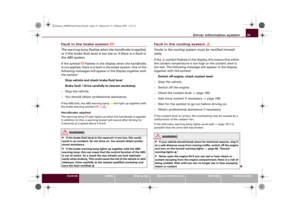 37
37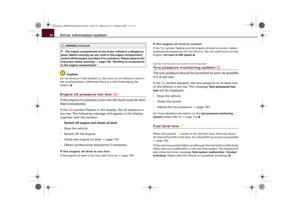 38
38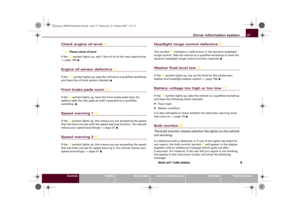 39
39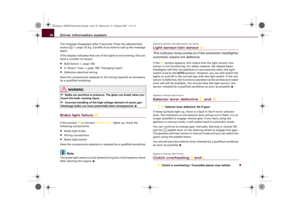 40
40 41
41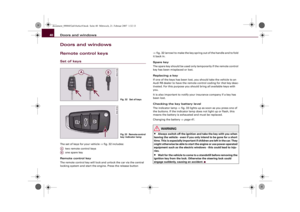 42
42 43
43 44
44 45
45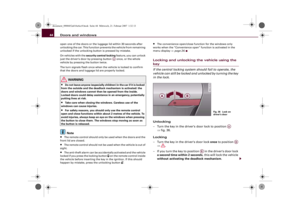 46
46 47
47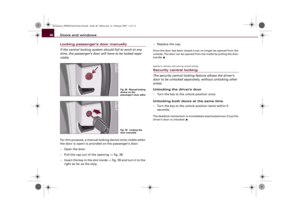 48
48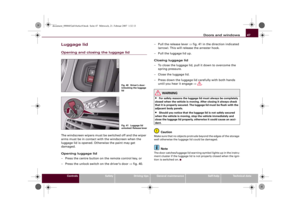 49
49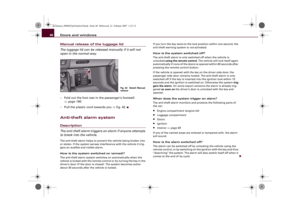 50
50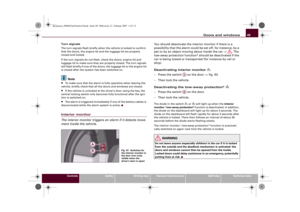 51
51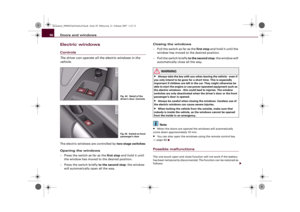 52
52 53
53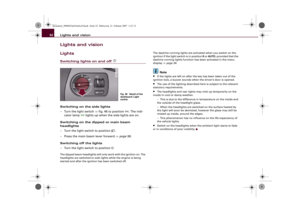 54
54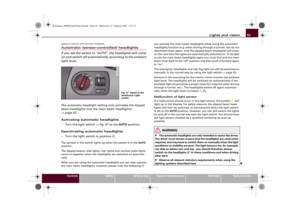 55
55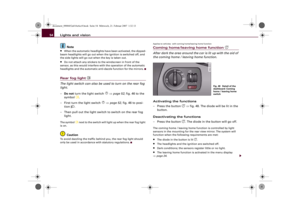 56
56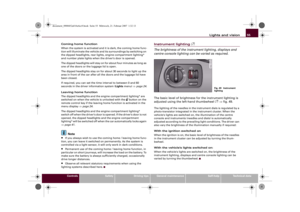 57
57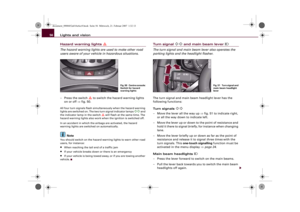 58
58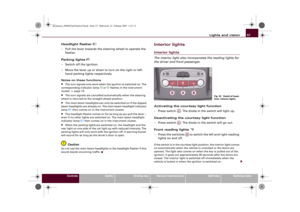 59
59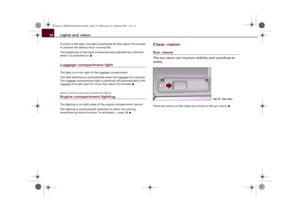 60
60 61
61 62
62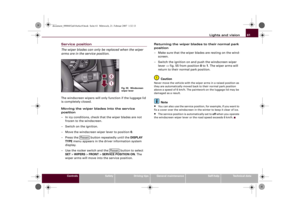 63
63 64
64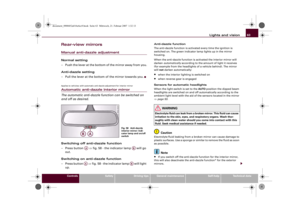 65
65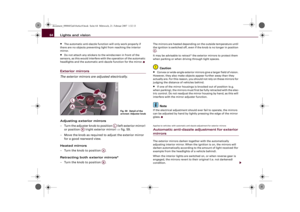 66
66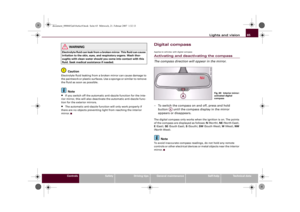 67
67 68
68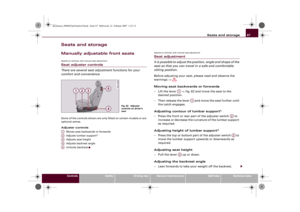 69
69 70
70 71
71 72
72 73
73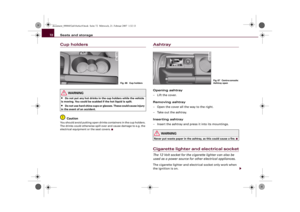 74
74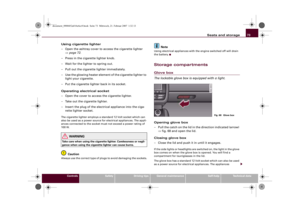 75
75 76
76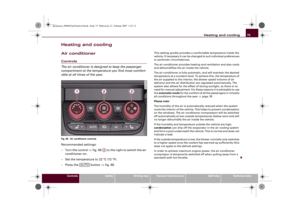 77
77 78
78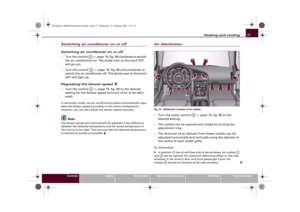 79
79 80
80 81
81 82
82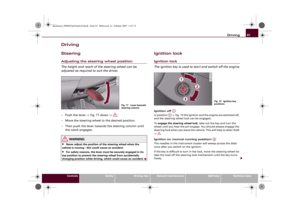 83
83 84
84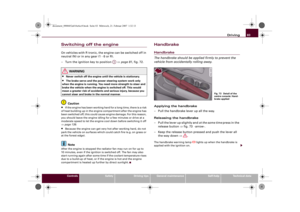 85
85 86
86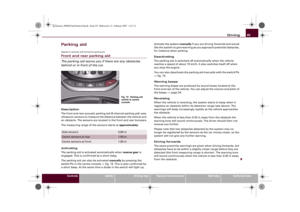 87
87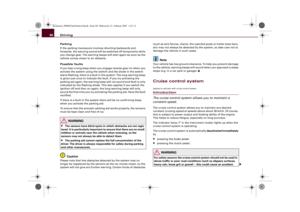 88
88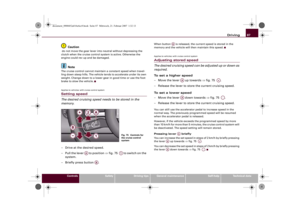 89
89 90
90 91
91 92
92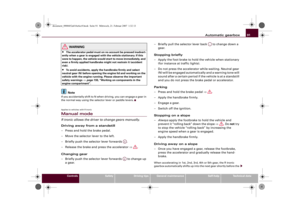 93
93 94
94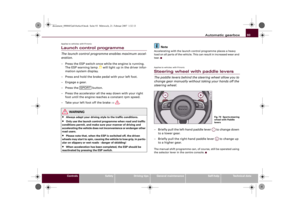 95
95 96
96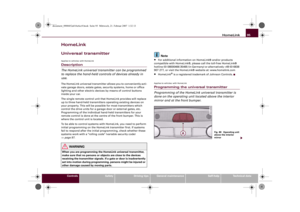 97
97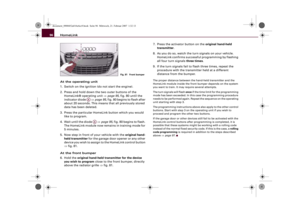 98
98 99
99 100
100 101
101 102
102 103
103 104
104 105
105 106
106 107
107 108
108 109
109 110
110 111
111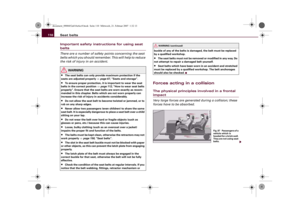 112
112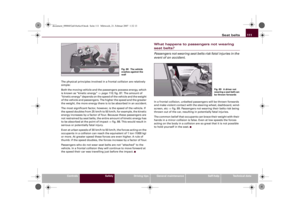 113
113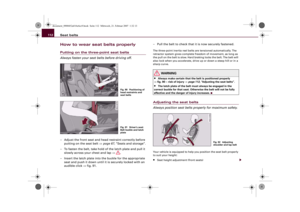 114
114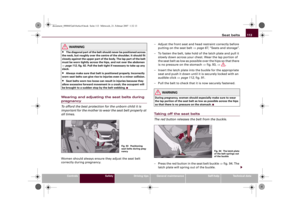 115
115 116
116 117
117 118
118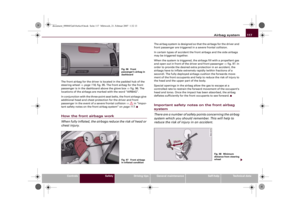 119
119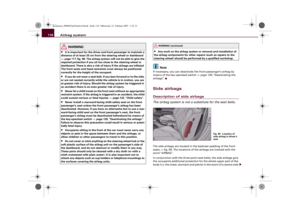 120
120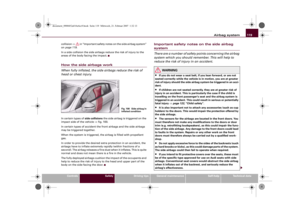 121
121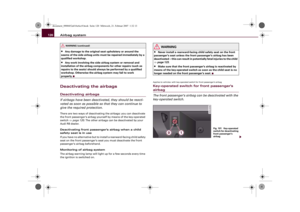 122
122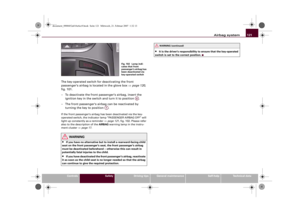 123
123 124
124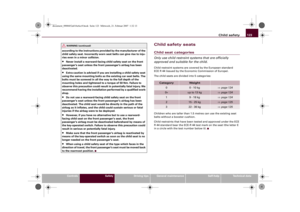 125
125 126
126 127
127 128
128 129
129 130
130 131
131 132
132 133
133 134
134 135
135 136
136 137
137 138
138 139
139 140
140 141
141 142
142 143
143 144
144 145
145 146
146 147
147 148
148 149
149 150
150 151
151 152
152 153
153 154
154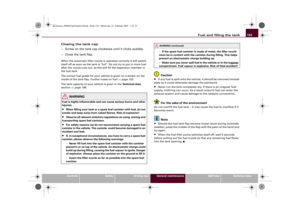 155
155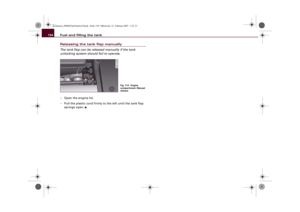 156
156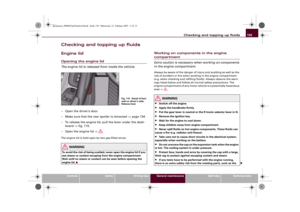 157
157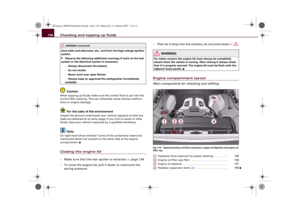 158
158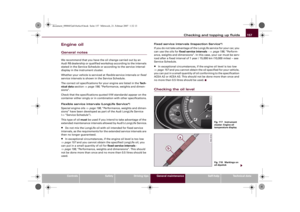 159
159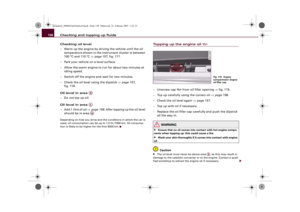 160
160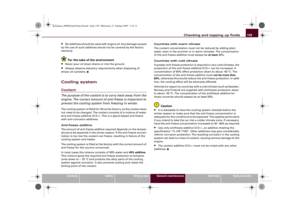 161
161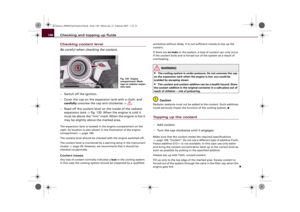 162
162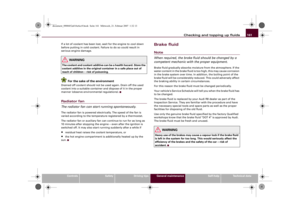 163
163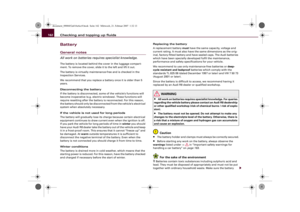 164
164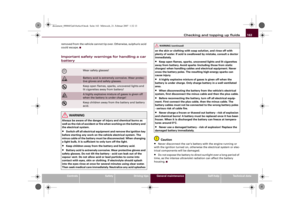 165
165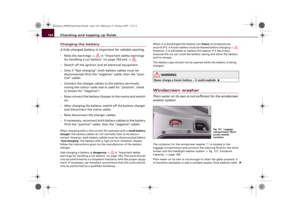 166
166 167
167 168
168 169
169 170
170 171
171 172
172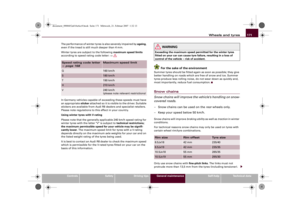 173
173 174
174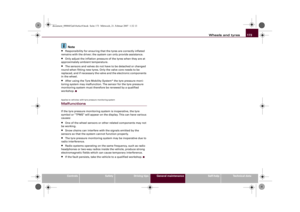 175
175 176
176 177
177 178
178 179
179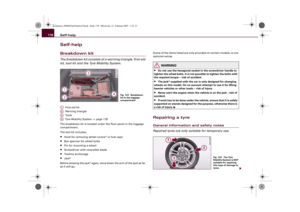 180
180 181
181 182
182 183
183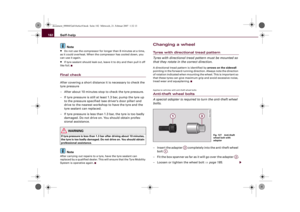 184
184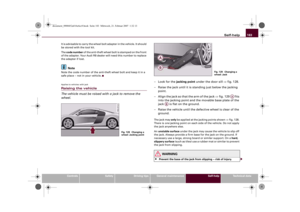 185
185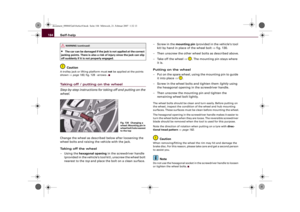 186
186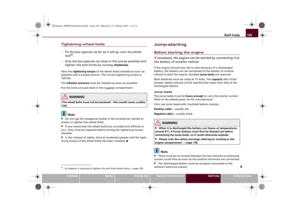 187
187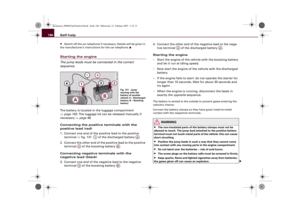 188
188 189
189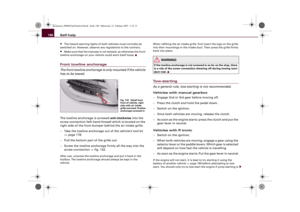 190
190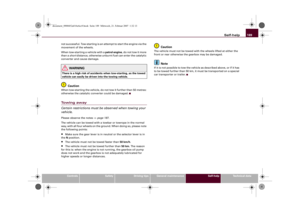 191
191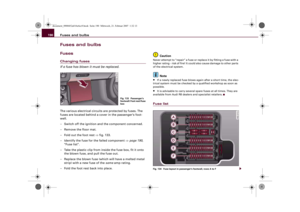 192
192 193
193 194
194 195
195 196
196 197
197 198
198 199
199 200
200 201
201 202
202 203
203 204
204 205
205 206
206 207
207 208
208 209
209