Page 185 of 210

Self-help183
Controls
Safety
Driving tips
General maintenance
Self-help
Technical data It is advisable to carry the wheel bolt adapter in the vehicle. It should
be stored with the tool kit.
The code number of the anti-theft wheel bolt is stamped on the front
of the adapter. Your Audi R8 dealer will need this number to replace
the adapter if lost.
Note
Note the code number of the anti-theft wheel bolt and keep it in a
safe place – not in your vehicle.Applies to vehicles: with jackRaising the vehicle
The vehicle must be raised with a jack to remove the
wheel.
–Look for the jacking point under the door sill ⇒fig. 128.
– Raise the jack until it is standing just below the jacking
point.
– Align the jack so that the arm of the jack ⇒fig. 129 fits
into the jacking point and the movable base plate of the
jack is flat on the ground.
– Raise the vehicle until the defective wheel is clear of the
ground.The jack may only be applied at the jacking points shown ⇒fig. 128.
There is one jacking point on each side of the vehicle. Do not apply
the jack anywhere else.
An unstable surface under the jack may cause the vehicle to slip off
the jack. Always provide a firm base for the jack on the ground. If
necessary use a large, strong board or similar support. On a hard,
slippery surface (such as tiles) use a rubber mat or similar to prevent
the jack from slipping.
WARNING
•
Prevent the base of the jack from slipping – risk of injury.
Fig. 128 Changing a
wheel: Jacking point
Fig. 129 Changing a
wheel: Jack
AA
AB
document_0900452a816e6cc9.book Seite 183 Mittwoch, 21. Februar 2007 1:32 13
Page 186 of 210

Self-help 184•
The car can be damaged if the jack is not applied at the correct
jacking points. There is also a risk of injury since the jack can slip
off suddenly if it is not properly engaged.Caution
A trolley jack or lifting platform must not be applied at the points
shown ⇒page 183, fig. 128 -arrows-.Taking off / putting on the wheel
Step-by-step instructions for taking off and putting on the
wheel.Change the wheel as described below after loosening the
wheel bolts and raising the vehicle with the jack.
Taking off the wheel
–Using the hexagonal opening in the screwdriver handle
(provided in the vehicle's tool kit), unscrew the wheel bolt
nearest to the top and place the bolt on a clean surface.–Screw in the mounting pin (provided in the vehicle's tool
kit) by hand in place of the wheel bolt ⇒fig. 130.
– Then unscrew the other wheel bolts as described above.
– Take off the wheel ⇒. The mounting pin stays where
it is.
Putting on the wheel
– Put on the spare wheel, using the mounting pin to guide
it into place ⇒.
– Screw in the wheel bolts and tighten them lightly using
the hexagonal opening in the screwdriver handle.
– Then unscrew the mounting pin and tighten the
remaining wheel bolt lightly.
The wheel bolts should be clean and turn easily. Before putting on
the wheel, inspect the condition of the wheel and hub mounting
surfaces. These surfaces must be clean before mounting the wheel.
The hexagonal opening in the screwdriver handle makes it easier to
turn the wheel bolts when they are loose. The reversible screwdriver
blade should be removed when the tool is used for this purpose.
Note the direction of rotation when putting on a tyre with direc-
tional tread pattern ⇒page 182.
Caution
When removing/fitting the wheel the rim may hit and damage the
brake disc. For this reason, please take care and get a second person
to assist you.
Note
Do not use the hexagonal socket in the screwdriver handle to loosen
or tighten the wheel bolts.
WARNING (continued)
Fig. 130 Changing a
wheel: Mounting pin in
wheel bolt hole nearest
to the top
document_0900452a816e6cc9.book Seite 184 Mittwoch, 21. Februar 2007 1:32 13
Page 187 of 210
.
– Grip the box span")
Self-help185
Controls
Safety
Driving tips
General maintenance
Self-help
Technical data
Tightening wheel bolts– Fit the box spanner as far as it will go over the wheel
bolt
5).
– Grip the box spanner as close to the end as possible and
tighten the bolt firmly by turning clockwise.
Have the tightening torque of the wheel bolts checked as soon as
possible with a torque wrench. The correct tightening torque is
120 Nm.
The inflation pressure must be checked as soon as possible.
Put the tools and jack back in the luggage compartment.
WARNING
The wheel bolts must not be loosened – this would cause a safety
risk.
Note
•
Do not use the hexagonal socket in the screwdriver handle to
loosen or tighten the wheel bolts.
•
If you notice that the wheel bolts are corroded and difficult to
turn, they must be replaced before having the tightening torque
checked.
•
In the interest of safety, drive at moderate speeds until the tight-
ening torque of the wheel bolts has been checked.
Jump-startingBefore starting the engine
If necessary, the engine can be started by connecting it to
the battery of another vehicle.If the engine should ever fail to start because of a discharged
battery, the battery can be connected to the battery of another
vehicle to start the engine. Suitable jump leads are required.
Both batteries must be rated at 12 Volts. The capacity (Ah) of the
booster battery should not be significantly lower than that of the
discharged battery.
Jump leads
The jump leads must be heavy enough to carry the starter current.
Refer to the details given by the manufacturer.
Only use jump leads with insulated battery clamps.
Positive cable – usually red
Negative cable – usually black
WARNING
•
When it is discharged the battery can freeze at temperatures
around 0°C. A frozen battery must first be thawed out before
connecting the jump leads, as it could otherwise explode.
•
Please note the safety warnings referring to working in the
engine compartment ⇒page 155.Note
•
There must be no contact between the two vehicles as otherwise
current could flow as soon as the positive terminals are connected.
•
The discharged battery must be properly connected to the
vehicle's electrical system.
5)An adapter is required to tighten the anti-theft wheel bolts ⇒page 182.
document_0900452a816e6cc9.book Seite 185 Mittwoch, 21. Februar 2007 1:32 13
Page 188 of 210

Self-help 186•
Switch off the car telephone if necessary. Details will be given in
the manufacturer's instructions for the car telephone.
Starting the engine
The jump leads must be connected in the correct
sequence.The battery is located in the luggage compartment
⇒page 163. The luggage lid can be released manually if
necessary ⇒page 48.
Connecting the positive terminals with the
positive lead (red)
1. Connect one end of the positive lead to the positive
terminal ⇒fig. 131 of the discharged battery .
2. Connect the other end of the positive lead to the positive
terminal of the boosting battery .
Connecting negative terminals with the
negative lead (black)
3. Connect one end of the negative lead to the negative
terminal of the boosting battery .4. Connect the other end of the negative lead to the nega-
tive terminal of the discharged battery .
Starting the engine
– Start the engine of the vehicle with the boosting battery
and let it run at idling speed.
– Now start the engine of the vehicle with the discharged
battery.
– If the engine fails to start: do not operate the starter for
longer than 10 seconds. Wait for about 30 seconds and
try again.
– When the engine is running, disconnect the leads in
exactly the opposite sequence.
The battery is vented to the outside to prevent gases entering the
vehicle's interior.
Connect the battery clamps so they have good metal-to-metal
contact with the respective terminals.
WARNING
•
The non-insulated parts of the battery clamps must not be
allowed to touch. The jump lead attached to the positive battery
terminal must not touch metal parts of the vehicle: this can cause
short circuiting.
•
Position the jump leads in such a way that they cannot come
into contact with any moving parts in the engine compartment.
•
Do not bend over the batteries – risk of acid burns.
•
The screw plugs on the battery cells must be screwed in firmly.
•
Keep sparks, flame and lighted cigarettes away from batteries:
the gases given off can cause an explosion.
Fig. 131 Jump-
starting with the
battery of another
vehicle: A – Discharged
battery, B – Boosting
battery
A1
AA
A2
AB
A3
AB
A4
AA
document_0900452a816e6cc9.book Seite 186 Mittwoch, 21. Februar 2007 1:32 13
Page 189 of 210

Self-help187
Controls
Safety
Driving tips
General maintenance
Self-help
Technical data
Caution
Please note that the described method of connecting the leads is
meant for jump-starting your vehicle. If jump-starting another
vehicle, you should not connect the negative lead (–) to the negative
terminal of the discharged battery ⇒page 186, fig. 131 , but
directly to the engine block or a solid metal part bolted to the engine
block. If the battery of the other vehicle does not have a gas vent,
there is a risk that a mixture of oxygen and hydrogen gas can accu-
mulate and cause an explosion.Tow-starting and towing awayGeneral notes
Points to observe when tow-starting or towing awayIf you use a towrope:
Notes for the driver of the towing vehicle
– The towrope must be taut before driving off.
– Engage the clutch very gently when starting to move
(press the accelerator slowly if you have R tronic).
Notes for the driver of the towed vehicle
– The ignition should be switched on so that the turn
signals, horn, windscreen wipers and washers can be
used. Please ensure that the steering wheel is unlocked
when you switch on the ignition and that it moves freely.
– Put the gear lever in neutral or move the selector lever to
position N.– The brake servo and power steering only work when the
engine is running. Considerably more effort is required
on the brake pedal and steering wheel when the engine
is switched off.
– Ensure that the towrope remains taut at all times when
towing.
Towrope or towbar
It is easier and safer to tow a vehicle with a towbar. You should only
use a towrope if you do not have a towbar.
A towrope should be slightly elastic to reduce the loading on both
vehicles. It is advisable to use a towrope made of synthetic fibre or
similar material.
Attach the towrope or the towbar only to the towing anchorages
provided for this purpose ⇒page 188.
Driving technique
Towing requires some experience – especially when using a
towrope. Both drivers should be familiar with the technique required
for towing. Inexperienced drivers should not attempt to tow-start or
tow away another vehicle.
Do not pull too hard with the towing vehicle and take care to avoid
jerking the towrope. When towing on a loose surface there is always
a risk of overloading and damaging the anchorage points.
Caution
If there is no oil in the gearbox or no lubricant in the automatic
transmission the car may only be towed with the driven wheels
lifted clear of the road, or transported on a special car transporter
or trailer.
Note
•
Note the regulations concerning towing.
A4
document_0900452a816e6cc9.book Seite 187 Mittwoch, 21. Februar 2007 1:32 13
Page 190 of 210

Self-help 188•
The hazard warning lights of both vehicles must normally be
switched on. However, observe any regulations to the contrary.
•
Make sure that the towrope is not twisted, as otherwise the front
towline anchorage on your vehicle could work itself loose.
Front towline anchorage
The front towline anchorage is only mounted if the vehicle
has to be towed.The towline anchorage is screwed anti-clockwise into the
screw connection (left-hand thread) which is located on the
right side of the front bumper behind the air intake grille.
– Take the towline anchorage out of the vehicle's tool kit
⇒page 178.
– Pull the bottom part of the grille out.
– Screw the towline anchorage firmly all the way into the
screw connection ⇒fig. 132.After use, unscrew the towline anchorage and put it back in the
toolbox. The towline anchorage should always be kept in the
vehicle.When refitting the air intake grille, first insert the lugs on the grille
into their mountings in the intake duct. Then press the grille firmly
back into place.
WARNING
If the towline anchorage is not screwed in as far as the stop, there
is a risk of the screw connection shearing off during towing (acci-
dent risk).Tow-starting
As a general rule, tow-starting is not recommended.Vehicles with manual gearbox
– Engage 2nd or 3rd gear before moving off.
– Press the clutch and hold the pedal down.
– Switch on the ignition.
– Once both vehicles are moving, release the clutch.
– As soon as the engine starts: press the clutch and put the
gear lever in neutral.
Vehicles with R tronic
– Switch on the ignition.
– When both vehicles are moving, engage a gear using the
selector lever or the paddle levers. Which gear is selected
will depend on how fast the vehicle is travelling.
– As soon as the engine starts: Put the gear lever in neutral.If the engine will not start, it is best to try starting it using the
battery of another vehicle ⇒page 185 before attempting to tow
start. You should only try to tow-start the engine if jump-starting is
Fig. 132 Detail from
front of vehicle, right
side with air intake
grille removed: Towline
anchorage screwed in
document_0900452a816e6cc9.book Seite 188 Mittwoch, 21. Februar 2007 1:32 13
Page 191 of 210

Self-help189
Controls
Safety
Driving tips
General maintenance
Self-help
Technical data not successful. Tow-starting is an attempt to start the engine via the
movement of the wheels.
When tow-starting a vehicle with a petrol engine, do not tow it more
than a short distance, otherwise unburnt fuel can enter the catalytic
converter and cause damage.
WARNING
There is a high risk of accidents when tow-starting, as the towed
vehicle can easily be driven into the towing vehicle.
Caution
When tow-starting the vehicle, do not tow it further than 50 metres:
otherwise the catalytic converter could be damaged.To w i n g a w a y
Certain restrictions must be observed when towing your
vehicle.Please observe the notes ⇒page 187.
The vehicle can be towed with a towbar or towrope in the normal
way, with all four wheels on the ground. When doing so, please note
the following points:•
Make sure the gear lever is in neutral or the selector lever is in
the N position.
•
The vehicle must not be towed faster than 50 km/h.
•
The vehicle must not be towed further than 50 km. The reason
for this is: when the engine is not running, the gearbox oil pump
does not work and the gearbox is not adequately lubricated for
higher speeds or longer distances.
Caution
The vehicle must not be towed with the wheels lifted at either the
front or rear otherwise the gearbox may be damaged.
Note
If it is not possible to tow the vehicle as described above, or if it has
to be towed further than 50 km, it must be transported on a special
car transporter or trailer.
document_0900452a816e6cc9.book Seite 189 Mittwoch, 21. Februar 2007 1:32 13
Page 192 of 210

Fuses and bulbs 190Fuses and bulbsFusesChanging fuses
If a fuse has blown it must be replaced.The various electrical circuits are protected by fuses. The
fuses are located behind a cover in the passenger's foot-
well.
– Switch off the ignition and the component concerned.
– Remove the floor mat.
– Fold out the foot rest ⇒fig. 133.
– Identify the fuse for the failed component ⇒page 190,
“Fuse list”.
– Take the plastic clip from inside the fuse box, fit it onto
the blown fuse, and pull the fuse out.
– Replace the blown fuse (which will have a melted metal
strip) with a new fuse of the same amp rating.
– Fold the foot rest back into place.Caution
Never attempt to “repair” a fuse or replace it by fitting a fuse with a
higher rating - risk of fire! It could also cause damage to other parts
of the electrical system.
Note
•
If a newly replaced fuse blows again after a short time, the elec-
trical system must be checked by a qualified workshop as soon as
possible.
•
It is advisable to carry several spare fuses at all times. They are
available from Audi R8 dealers and specialist retailers.
Fuse listFig. 134 Fuse layout in passenger's footwell, rows A to F
Fig. 133 Passenger's
footwell: Foot rest/fuse
box
document_0900452a816e6cc9.book Seite 190 Mittwoch, 21. Februar 2007 1:32 13
 1
1 2
2 3
3 4
4 5
5 6
6 7
7 8
8 9
9 10
10 11
11 12
12 13
13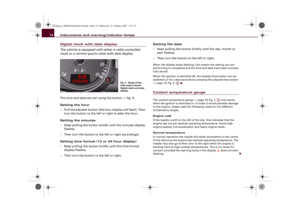 14
14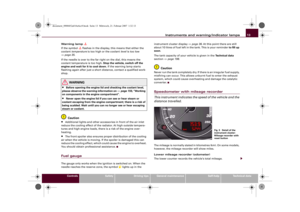 15
15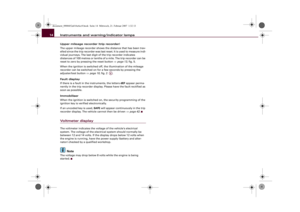 16
16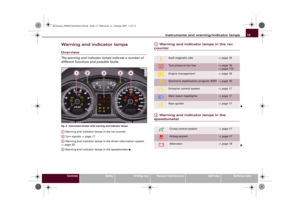 17
17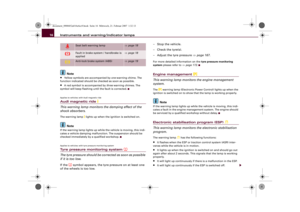 18
18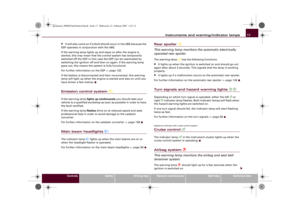 19
19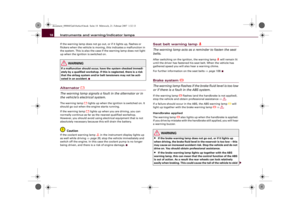 20
20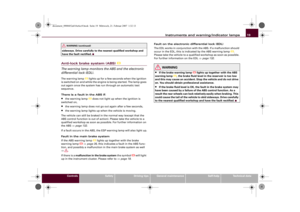 21
21 22
22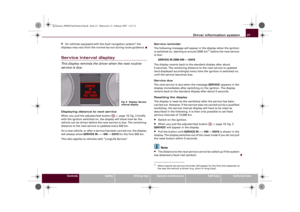 23
23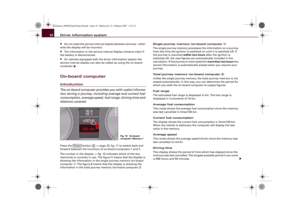 24
24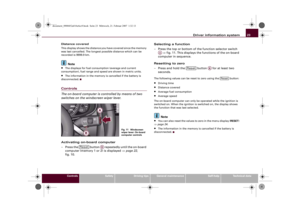 25
25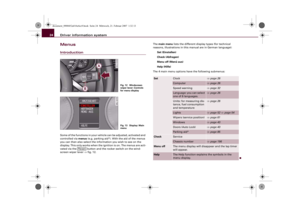 26
26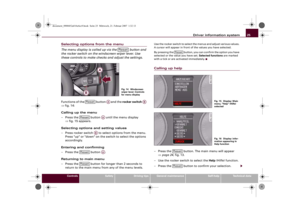 27
27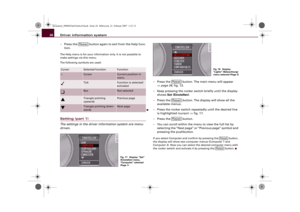 28
28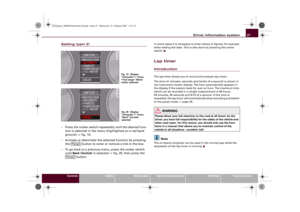 29
29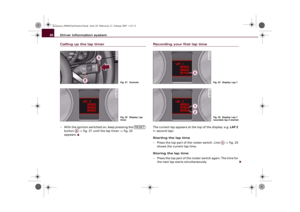 30
30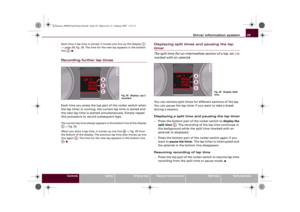 31
31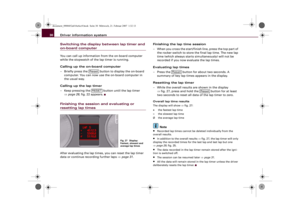 32
32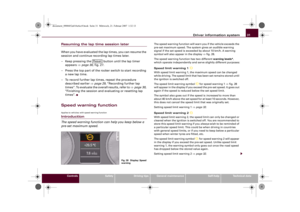 33
33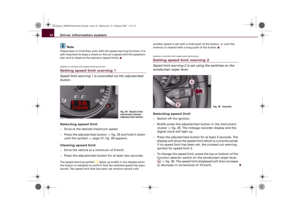 34
34 35
35 36
36 37
37 38
38 39
39 40
40 41
41 42
42 43
43 44
44 45
45 46
46 47
47 48
48 49
49 50
50 51
51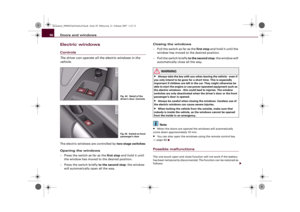 52
52 53
53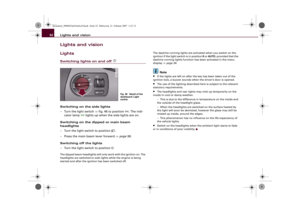 54
54 55
55 56
56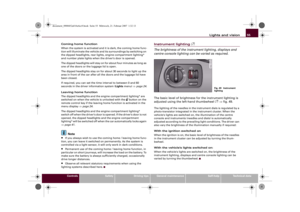 57
57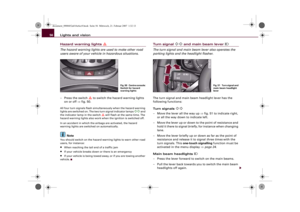 58
58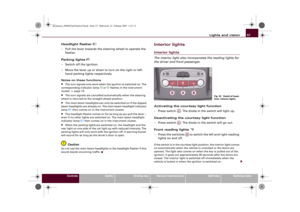 59
59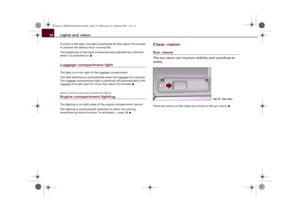 60
60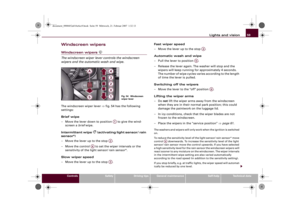 61
61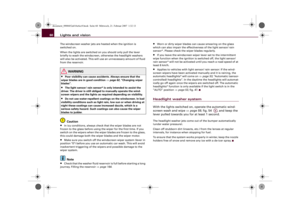 62
62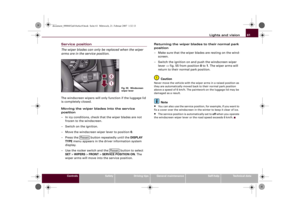 63
63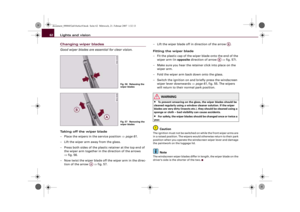 64
64 65
65 66
66 67
67 68
68 69
69 70
70 71
71 72
72 73
73 74
74 75
75 76
76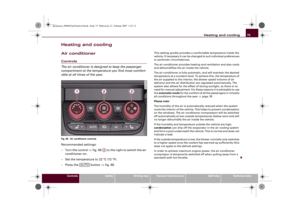 77
77 78
78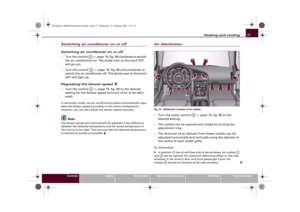 79
79 80
80 81
81 82
82 83
83 84
84 85
85 86
86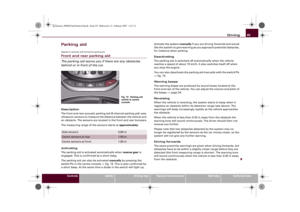 87
87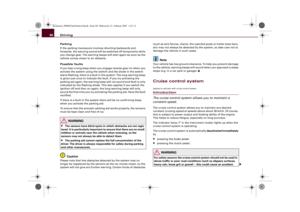 88
88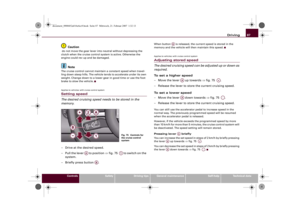 89
89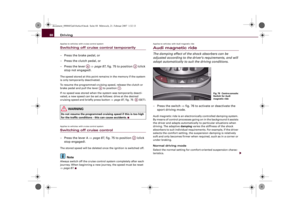 90
90 91
91 92
92 93
93 94
94 95
95 96
96 97
97 98
98 99
99 100
100 101
101 102
102 103
103 104
104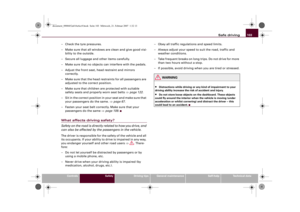 105
105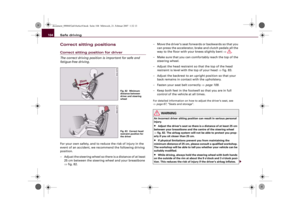 106
106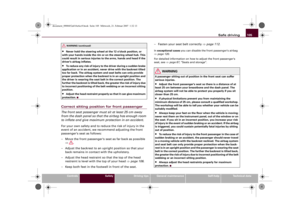 107
107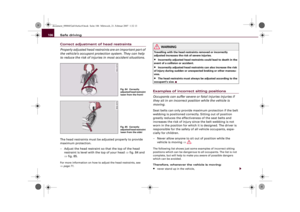 108
108 109
109 110
110 111
111 112
112 113
113 114
114 115
115 116
116 117
117 118
118 119
119 120
120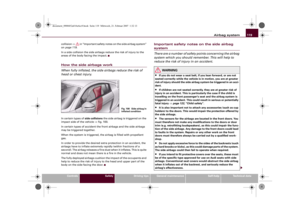 121
121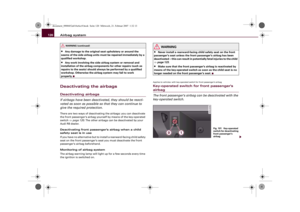 122
122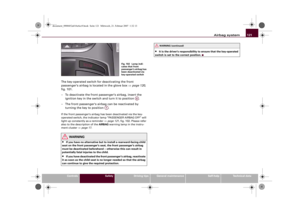 123
123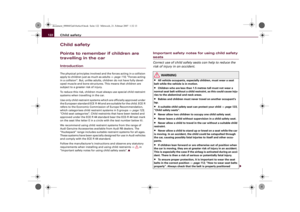 124
124 125
125 126
126 127
127 128
128 129
129 130
130 131
131 132
132 133
133 134
134 135
135 136
136 137
137 138
138 139
139 140
140 141
141 142
142 143
143 144
144 145
145 146
146 147
147 148
148 149
149 150
150 151
151 152
152 153
153 154
154 155
155 156
156 157
157 158
158 159
159 160
160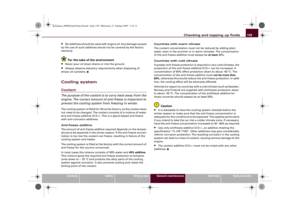 161
161 162
162 163
163 164
164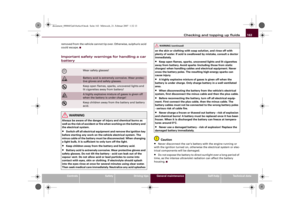 165
165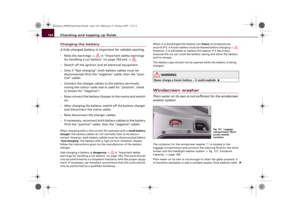 166
166 167
167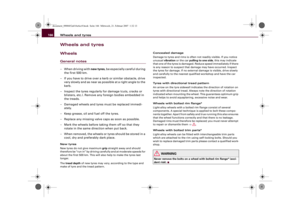 168
168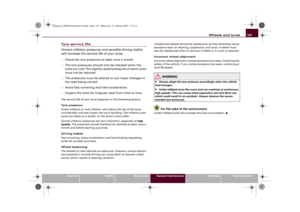 169
169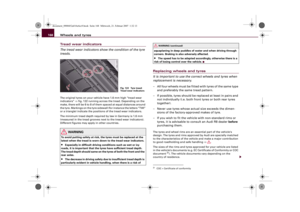 170
170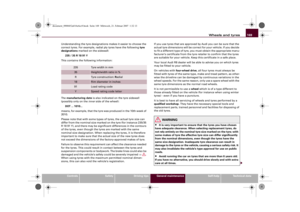 171
171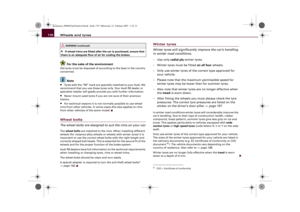 172
172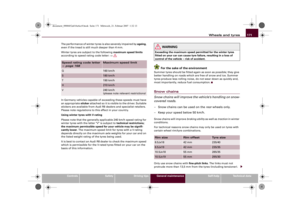 173
173 174
174 175
175 176
176 177
177 178
178 179
179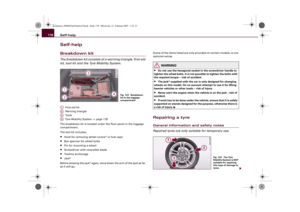 180
180 181
181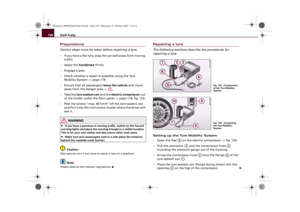 182
182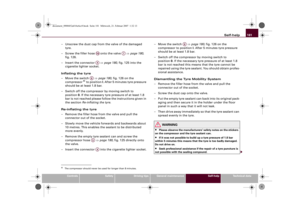 183
183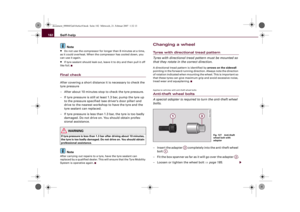 184
184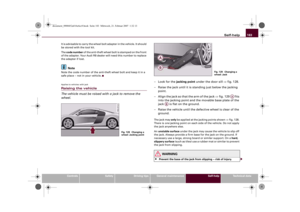 185
185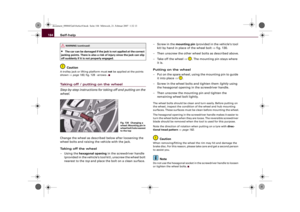 186
186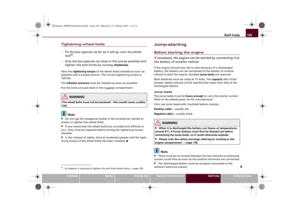 187
187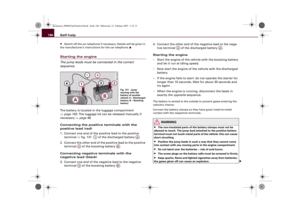 188
188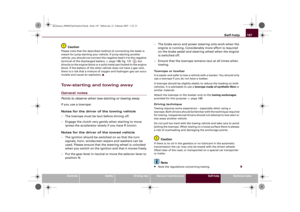 189
189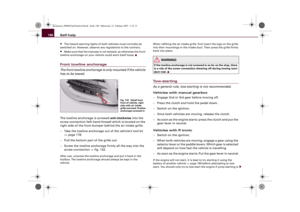 190
190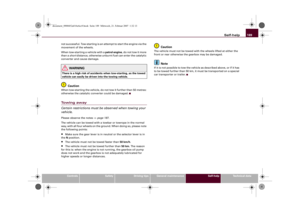 191
191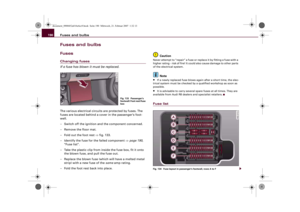 192
192 193
193 194
194 195
195 196
196 197
197 198
198 199
199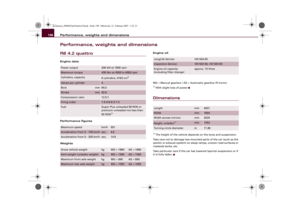 200
200 201
201 202
202 203
203 204
204 205
205 206
206 207
207 208
208 209
209