Page 57 of 210

Lights and vision55
Controls
Safety
Driving tips
General maintenance
Self-help
Technical data Coming home function
When the system is activated and it is dark, the coming home func-
tion will illuminate the vehicle and its surroundings by switching on
the dipped headlights, rear lights, engine compartment lighting*
and number plate lights when the driver's door is opened.
The dipped headlights will stay on for about four minutes as long as
one of the doors or the luggage lid is open.
The dipped headlights stay on for about 30 seconds to light up the
area in front of the car after all the doors and the luggage lid have
been closed.
If required, you can set the time interval to between 0 and 60
seconds in the driver information system (Lights menu) ⇒page 24.
Leaving home function
The dipped headlights and the engine compartment lighting* are
switched on when the vehicle is unlocked with the
button on the
remote control key if the leaving home function is activated in the
menu display ⇒page 24.
The dipped headlights and the engine compartment lighting*
switch off when the driver's door is opened. If the driver's door is not
opened, the dipped headlights and the engine compartment
lighting* will be switched off when the car automatically locks again
⇒page 41.
Note
•
If you always wish to use the coming home / leaving home func-
tion, you can leave it switched on permanently. As the system is
controlled via a light sensor, it will only work in dark conditions.
•
Permanent use of the coming home / leaving home function, in
particular on short journeys, will increase the load on the battery. To
make sure the battery is always sufficiently charged, occasionally
drive longer distances.
•
Observe all relevant statutory requirements when using the
lighting systems described here.
Instrument lighting
The brightness of the instrument lighting, displays and
centre console lighting can be varied as required.The basic level of brightness for the instrument lighting is
adjusted using the left-hand thumbwheel
⇒fig. 49.
The lighting of the needles in the instrument dials is regulated by a
photo-transistor integrated in the instrument cluster. When the
vehicle's lights are switched on, the illumination of the centre
console and instruments (needles and dials) is automatically
adjusted according to the prevailing light conditions. The driver can
also vary the brightness of the illumination manually if required:
With the ignition switched on
When the ignition is on, the basic level of brightness of the needles
in the instrument cluster can be adjusted by turning the thum-
bwheel.
With the vehicle's lights switched on:
When the vehicle's lights are switched on, the brightness of the
instrument lighting, displays and centre console lighting can be
varied by turning the thumbwheel.
Fig. 49 Instrument
lighting
document_0900452a816e6cc9.book Seite 55 Mittwoch, 21. Februar 2007 1:32 13
Page 58 of 210

Lights and vision 56Hazard warning lights
The hazard warning lights are used to make other road
users aware of your vehicle in hazardous situations.– Press the switch
to switch the hazard warning lights
on or off ⇒fig. 50.
All four turn signals flash simultaneously when the hazard warning
lights are switched on. The two turn signal indicator lamps
and
the indicator lamp in the switch
will flash at the same time. The
hazard warning lights also work when the ignition is switched off.
In an accident in which the airbags are activated, the hazard
warning lights are switched on automatically.
Note
You should switch on the hazard warning lights to warn other road
users, for instance:•
When reaching the tail end of a traffic jam
•
If your vehicle breaks down or there is an emergency
•
If your vehicle is being towed away, or if you are towing another
vehicle.
Tu r n s i g n a l
and main beam lever
The turn signal and main beam lever also operates the
parking lights and the headlight flasher.The turn signal and main beam headlight lever has the
following functions:
Turn signals
– Move the lever all the way up ⇒fig. 51 to indicate right,
or all the way down to indicate left.
– Move the lever up or down to the point of resistance and
hold it there to signal briefly, for instance when changing
lane.
– Move the lever briefly up or down as far as the point of
resistance and release it to signal three times with the
turn signals. This one-touch signalling function must be
activated in the menu display ⇒page 24.
Main beam headlights
– Press the lever forward to switch on the main beams.
– Pull the lever back towards you to switch the main beam
headlights off again.
Fig. 50 Centre console:
Switch for hazard
warning lights
Fig. 51 Turn signal and
main beam headlight
lever
document_0900452a816e6cc9.book Seite 56 Mittwoch, 21. Februar 2007 1:32 13
Page 59 of 210

Lights and vision57
Controls
Safety
Driving tips
General maintenance
Self-help
Technical data
Headlight flasher
– Pull the lever towards the steering wheel to operate the
flasher.
Parking lights
– Switch off the ignition.
– Move the lever up or down to turn on the right or left-
hand parking lights respectively.Notes on these functions•
The turn signals only work when the ignition is switched on. The
corresponding indicator lamp
or
flashes in the instrument
cluster ⇒page 15.
•
The turn signals are cancelled automatically when the steering
wheel is returned to the straight-ahead position.
•
The main beam headlights can only be switched on if the dipped
beam headlights are already on. The main beam headlight indicator
lamp then comes on in the instrument cluster.
•
The headlight flasher comes on for as long as you pull the lever –
even if no other lights are switched on. The main beam headlight
indicator lamp
then comes on in the instrument cluster.
•
When the parking lights are switched on, the headlight and the
rear light on one side of the car light up with reduced intensity. The
parking lights will only work with the ignition off. A warning buzzer
will sound for as long as the driver's door is open.Caution
Do not use the main beam headlights or the headlight flasher if this
would dazzle oncoming traffic.
Interior lightsInterior lights
The interior light also incorporates the reading lights for
the driver and front passenger.Activating the courtesy light function
– Press switch . The diode in the switch will light up.
Deactivating the courtesy light function
– Press switch . The diode in the switch will go out.
Front reading lights
– Press the switches to switch the left and right reading
lights on and off.If the switch is in the courtesy light position, the interior light comes
on automatically when the vehicle is unlocked or the doors are
opened. The light also comes on when the key is pulled out of the
ignition. It goes out approximately 30 seconds after the doors are
closed. The interior light is switched off immediately when the
vehicle is locked or when the ignition is switched on.
Fig. 52 Detail of head-
liner: Interior lights
AAAA
AB
document_0900452a816e6cc9.book Seite 57 Mittwoch, 21. Februar 2007 1:32 13
Page 60 of 210
Lights and vision 58If a door is left open, the light is switched off after about 10 minutes
to prevent the battery from running flat.
The brightness of the light is automatically adjusted by a dimmer
when it is switched on.Luggage compartment lightThe light is on the right of the luggage compartment.
The light switches on automatically when the luggage lid is opened.
The luggage compartment light is switched off automatically if the
luggage lid is left open for more than about 10 minutes.Applies to vehicles: with engine compartment lightingEngine compartment lightingThe lighting is on both sides of the engine compartment interior.
The lighting is automatically switched on when the coming
home/leaving home function* is activated ⇒page 54.
Clear visionSun visors
The sun visors can improve visibility and contribute to
safety.There are covers on the make-up mirrors in the sun visors.
Fig. 53 Sun visor
document_0900452a816e6cc9.book Seite 58 Mittwoch, 21. Februar 2007 1:32 13
Page 61 of 210

Lights and vision59
Controls
Safety
Driving tips
General maintenance
Self-help
Technical data
Windscreen wipersWindscreen wipers
The windscreen wiper lever controls the windscreen
wipers and the automatic wash and wipe.The windscreen wiper lever ⇒fig. 54 has the following
settings:
Brief wipe
– Move the lever down to position to give the wind-
screen a brief wipe.
Intermittent wipe
(activating light sensor/ rain
sensor*)
– Move the lever up to the stop .
– Move the control to set the wiper intervals or the
sensitivity of the light sensor/ rain sensor*.
Slow wiper speed
– Move the lever up to the stop .Fast wiper speed
– Move the lever up to the stop .
Automatic wash and wipe
– Pull the lever to position .
– Release the lever again. The washer will stop and the
wipers will keep running for approximately 4 seconds.
The number of wipe cycles varies according to the length
of time the lever is pulled.
Switching off the wipers
– Move the lever to the "off" position .
Lifting the wiper arms
–Do not lift the wiper arms away from the windscreen
when they are in their normal park position; this could
damage the paintwork on the luggage lid.
– In icy conditions, check that the wiper blades are not
frozen to the windscreen.
–Place the wipers in the “service position” ⇒page 61.
The washers and wipers will only work when the ignition is switched
on.
To reduce the sensitivity level of the light sensor/ rain sensor* move
control downwards. To increase the sensitivity level of the light
sensor/ rain sensor move the control upwards. If you have selected
a high sensitivity level for the rain sensor the windscreen wipers will
react sooner to any moisture on the windscreen. The wiper intervals
in the intermittent wipe setting are also varied automatically
according to the road speed (in addition to the sensitivity setting).
If you stop briefly, e.g. at traffic lights, the wiper speed will automat-
ically be reduced by one level.
Fig. 54 Windscreen
wiper lever
A1
A2
AA
A3
A4
A5
A0
AA
document_0900452a816e6cc9.book Seite 59 Mittwoch, 21. Februar 2007 1:32 13
Page 62 of 210

Lights and vision 60The windscreen washer jets are heated when the ignition is
switched on.
When the lights are switched on you should only pull the lever
briefly to wash the windscreen, otherwise the headlight washers
will also be activated. This will use an unnecessary amount of fluid
from the reservoir.
WARNING
•
Poor visibility can cause accidents. Always ensure that the
wiper blades are in good condition ⇒page 62, “Changing wiper
blades”.
•
The light sensor/ rain sensor* is only intended to assist the
driver. The driver is still obliged to manually operate the wind-
screen wipers and the lights as required depending on visibility.
•
Do not use water-repellent coatings on the windscreen. In bad
visibility conditions such as light rain, low sun or when driving at
night these coatings can cause increased dazzle, which is a
serious safety hazard. Such coatings can also cause the wiper
blades to judder.Caution
•
In icy conditions, always check that the wiper blades are not
frozen to the glass before using the wiper for the first time. If you
switch on the wipers when the wiper blades are frozen to the glass,
this could damage both the wiper blades and the wiper motor.
•
Make sure you switch off the windscreen wiper system (lever in
position "0") before you use an automatic car wash. This will avoid
inadvertent triggering of the wipers and possible damage to the
wiper system.Note
•
Check that the washer fluid reservoir is full before starting a long
journey. Filling the reservoir ⇒page 164.
•
Worn or dirty wiper blades can cause smearing on the glass
which can also impair the effectiveness of the light sensor/ rain
sensor*. Please check the wiper blades regularly.
•
If you leave the windscreen wiper lever set to the intermittent
wipe function when the ignition is switched off, the light sensor/
rain sensor* will not be activated until you reach a road speed of at
least 6 km/h.
•
Applies to vehicles with light sensor/ rain sensor: If the wind-
screen wipers have been activated manually and it is raining, the
automatic headlights* will come on ⇒page 53, “Automatic (sensor-
controlled) headlights”. In the daytime the headlights will automat-
ically go off again once the wipers are switched off. The automatic
headlights* function is only available if the light switch is in the
“AUTO” position ⇒page 53, fig. 47.
Headlight washer systemWith the lights switched on, operate the automatic wind-
screen wash and wipe ⇒page 59, fig. 54 , and keep the
lever pulled towards you for at least 1 second.The headlight washer jets come out of the bumper automatically
(under water pressure).
Clean off stubborn dirt (insects, etc.) from the lenses at regular
intervals, for instance when stopping for fuel.
To ensure that the system works properly in winter, keep the nozzle
holders free of snow and remove any ice with a de-icer spray.
A5
document_0900452a816e6cc9.book Seite 60 Mittwoch, 21. Februar 2007 1:32 13
Page 63 of 210

Lights and vision61
Controls
Safety
Driving tips
General maintenance
Self-help
Technical data
Service position
The wiper blades can only be replaced when the wiper
arms are in the service position.The windscreen wipers will only function if the luggage lid
is completely closed.
Moving the wiper blades into the service
position
– In icy conditions, check that the wiper blades are not
frozen to the windscreen.
– Switch on the ignition.
– Move the windscreen wiper lever to position 0.
– Press the button repeatedly until the DISPLAY
TYPE menu appears in the driver information system
display.
– Use the rocker switch and the button to select
SET > WIPERS > FRONT > SERVICE POSITION ON. The
wiper arms will move into the service position.Returning the wiper blades to their normal park
position
– Make sure that the wiper blades are resting on the wind-
screen.
– Switch the ignition on and push the windscreen wiper
lever ⇒fig. 55 from position 0 to 1. The wiper arms will
return to their normal park position.
Caution
Never move the vehicle with the wiper arms in a raised position as
they are automatically moved back to their normal park position
above a speed of 6 km/h. The paintwork on the luggage lid may be
damaged as a result.
Note
•
You can also use the service position, for example, if you want to
fix a cover over the windscreen in the winter to keep it clear of ice.
•
The service position is automatically set to off when you operate
the windscreen wiper lever or the road speed exceeds 6 km/h.
Fig. 55 Windscreen
wiper lever
Reset
Reset
document_0900452a816e6cc9.book Seite 61 Mittwoch, 21. Februar 2007 1:32 13
Page 64 of 210

Lights and vision 62Changing wiper blades
Good wiper blades are essential for clear vision.Taking off the wiper blade
– Place the wipers in the service position ⇒page 61.
– Lift the wiper arm away from the glass.
– Press both sides of the plastic retainer at the top end of
the wiper arm together in the direction of the arrows
⇒fig. 56.
– Now twist the wiper blade off the wiper arm in the direc-
tion of the arrow ⇒fig. 57.– Lift the wiper blade off in direction of the arrow .
Fitting the wiper blade
– Fit the plastic cap of the wiper blade onto the end of the
wiper arm (in opposite direction of arrow ⇒fig. 57).
– Make sure you hear the retainer click into place on the
wiper arm.
– Fold the wiper arm back down onto the glass.
– Switch the ignition on and briefly press the windscreen
wiper lever downwards ⇒page 61, fig. 55. The wipers
will return to their normal park position.
WARNING
•
To prevent smearing on the glass, the wiper blades should be
cleaned regularly using a window cleaner solution. If the wiper
blades are very dirty (insects etc.), they should be cleaned using a
sponge or cloth – bad visibility can cause accidents.
•
For safety, the wiper blades should be changed once or twice a
year.Caution
The ignition must not be switched on while the front wiper arms are
in a raised position. The wipers would otherwise return to their park
position when you operate the windscreen wiper lever and damage
the paintwork on the luggage lid.
Note
The windscreen wiper blades differ in length, the wiper blade on the
driver's side is the shorter of the two.
Fig. 56 Releasing the
wiper bladesFig. 57 Removing the
wiper blades
AA
AB
AB
document_0900452a816e6cc9.book Seite 62 Mittwoch, 21. Februar 2007 1:32 13
 1
1 2
2 3
3 4
4 5
5 6
6 7
7 8
8 9
9 10
10 11
11 12
12 13
13 14
14 15
15 16
16 17
17 18
18 19
19 20
20 21
21 22
22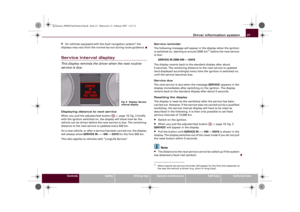 23
23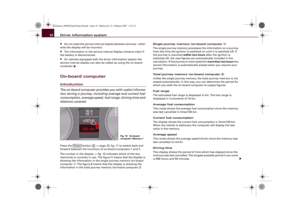 24
24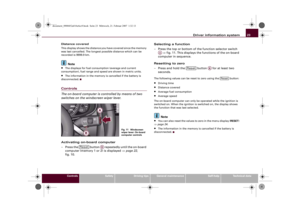 25
25 26
26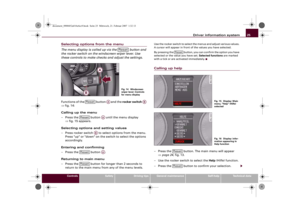 27
27 28
28 29
29 30
30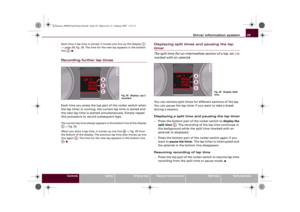 31
31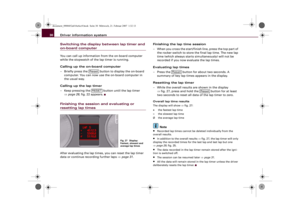 32
32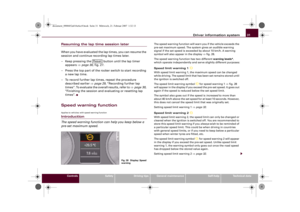 33
33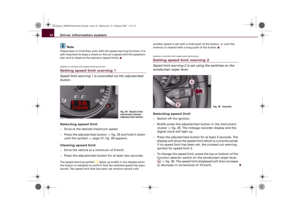 34
34 35
35 36
36 37
37 38
38 39
39 40
40 41
41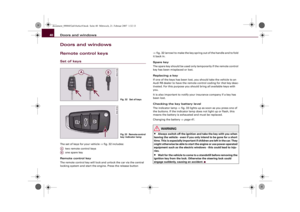 42
42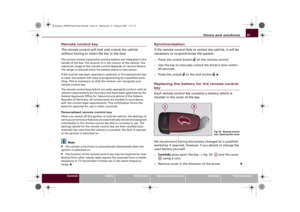 43
43 44
44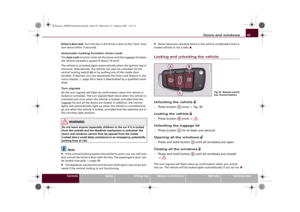 45
45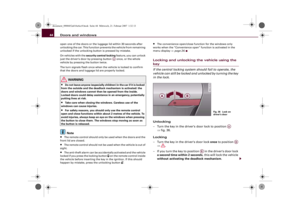 46
46 47
47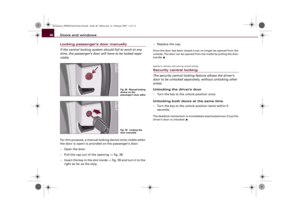 48
48 49
49 50
50 51
51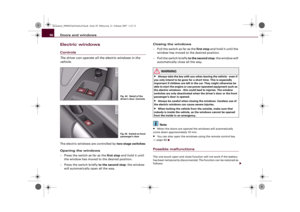 52
52 53
53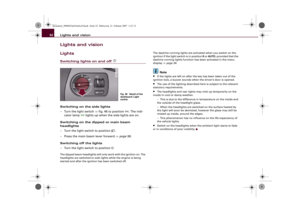 54
54 55
55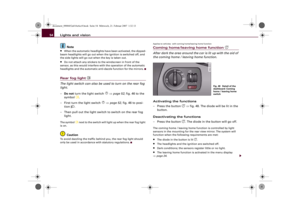 56
56 57
57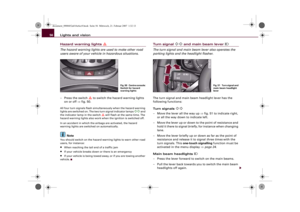 58
58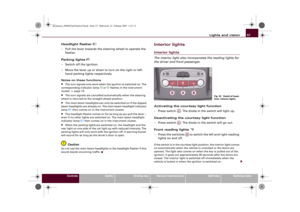 59
59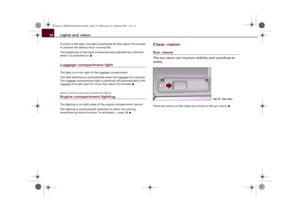 60
60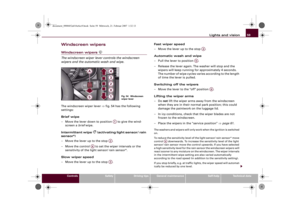 61
61 62
62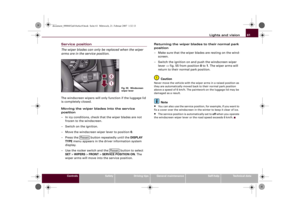 63
63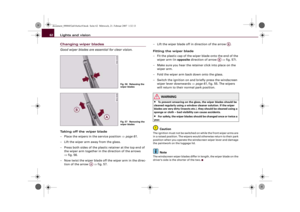 64
64 65
65 66
66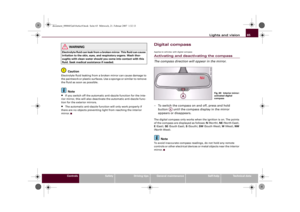 67
67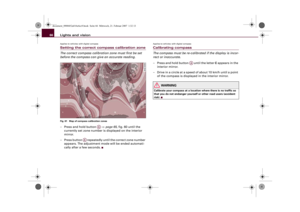 68
68 69
69 70
70 71
71 72
72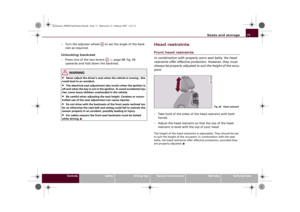 73
73 74
74 75
75 76
76 77
77 78
78 79
79 80
80 81
81 82
82 83
83 84
84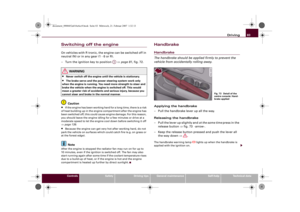 85
85 86
86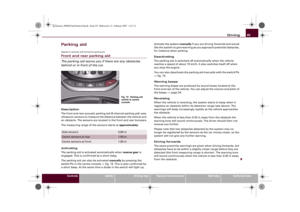 87
87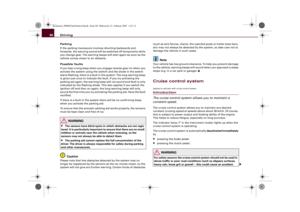 88
88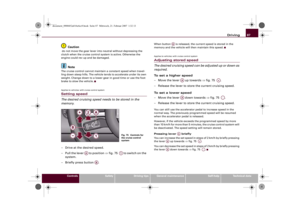 89
89 90
90 91
91 92
92 93
93 94
94 95
95 96
96 97
97 98
98 99
99 100
100 101
101 102
102 103
103 104
104 105
105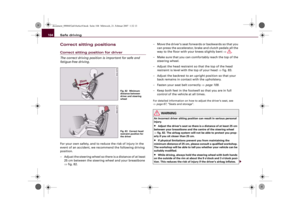 106
106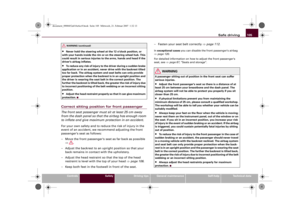 107
107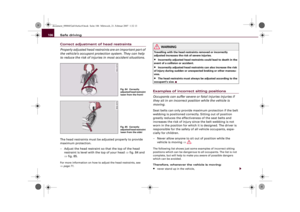 108
108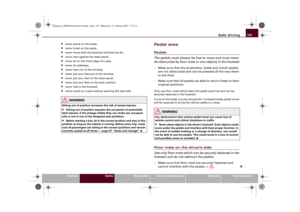 109
109 110
110 111
111 112
112 113
113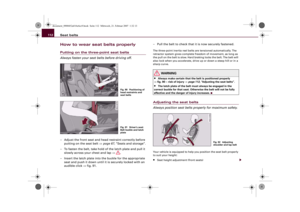 114
114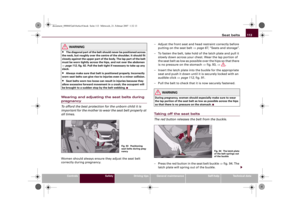 115
115 116
116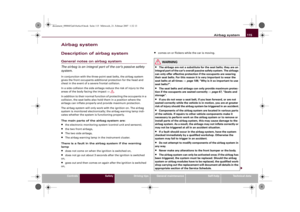 117
117 118
118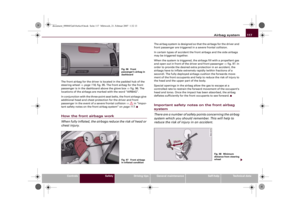 119
119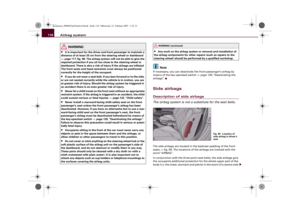 120
120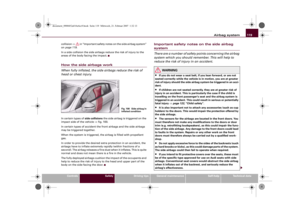 121
121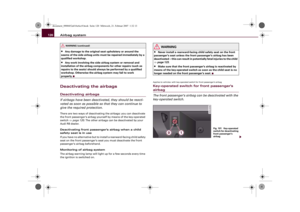 122
122 123
123 124
124 125
125 126
126 127
127 128
128 129
129 130
130 131
131 132
132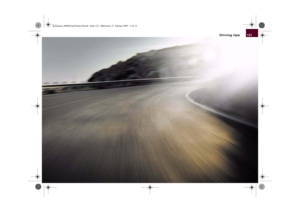 133
133 134
134 135
135 136
136 137
137 138
138 139
139 140
140 141
141 142
142 143
143 144
144 145
145 146
146 147
147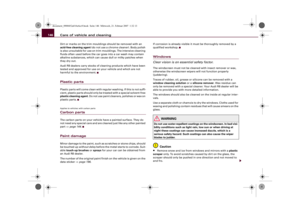 148
148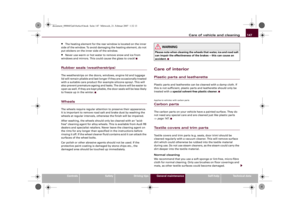 149
149 150
150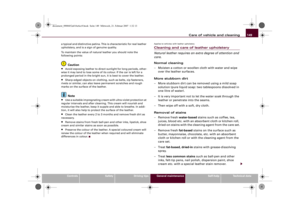 151
151 152
152 153
153 154
154 155
155 156
156 157
157 158
158 159
159 160
160 161
161 162
162 163
163 164
164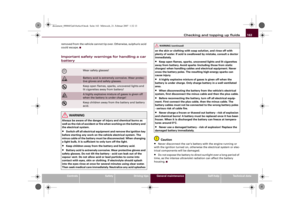 165
165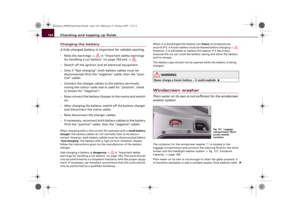 166
166 167
167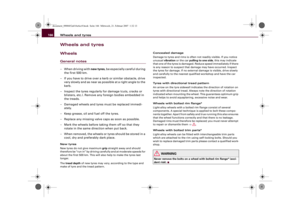 168
168 169
169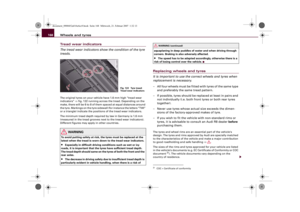 170
170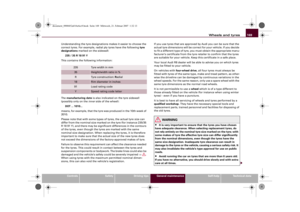 171
171 172
172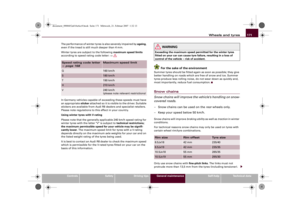 173
173 174
174 175
175 176
176 177
177 178
178 179
179 180
180 181
181 182
182 183
183 184
184 185
185 186
186 187
187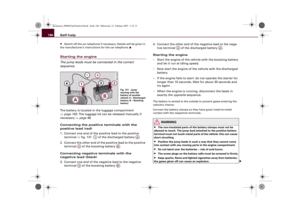 188
188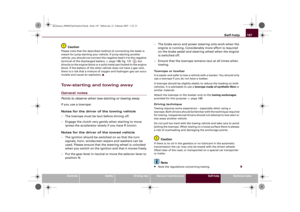 189
189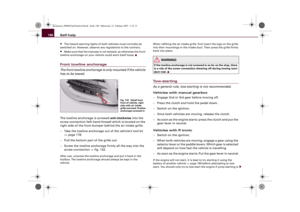 190
190 191
191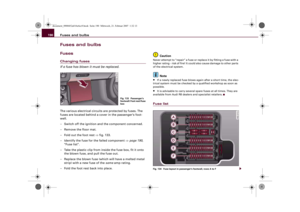 192
192 193
193 194
194 195
195 196
196 197
197 198
198 199
199 200
200 201
201 202
202 203
203 204
204 205
205 206
206 207
207 208
208 209
209