Page 1620 of 3229
Publi s hed: 11-May-2011
Speed Control - I6 3.2L Petrol - Speed Control Actuator
Removal and Inst all ati on
Removal
Remove t he accelerat or pedal as sembl y.
Refer t o: Accelerat or Pedal (310-02 Accelerati on Cont rol , Removaland Inst all at ion).
1.
Installation
Inst all t he accelerat or pedal as sembl y.
Refer t o: Accelerat or Pedal (310-02 Accelerati on Cont rol , Removaland Inst all at ion).
1.
Page 1626 of 3229
Publi s hed: 11-May-2011
Speed Control - TD4 2.2L Diesel - Speed Control Actuator
Removal and Inst all ati on
Removal
Remove t he accelerat or pedal as sembl y.
Refer t o: Accelerat or Pedal (310-02 Accelerati on Cont rol , Removal
and Inst all at ion).
1.
Installation Inst all t he accelerat or pedal as sembl y.
Refer t o: Accelerat or Pedal (310-02 Accelerati on Cont rol , Removal
and Inst all at ion).
1.
Page 1656 of 3229
Publi s hed: 11-May-2011
Climate Control - Blower MotorLHD AWD
Removal and Inst all ati on
Special T ool(s)
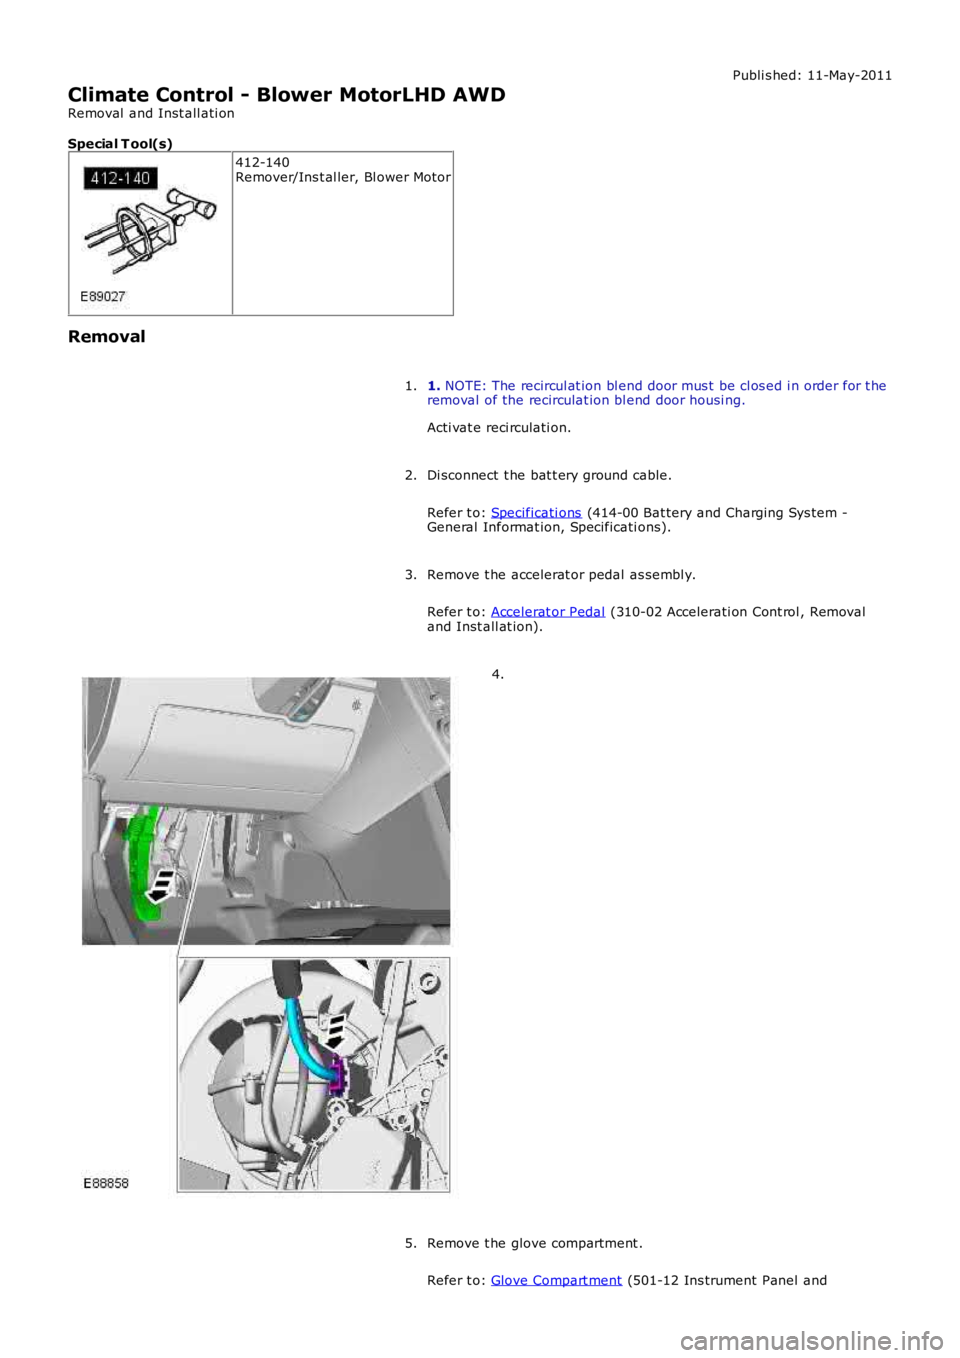
412-140Remover/Ins t al ler, Bl ower Motor
Removal
1. NOTE: The recircul at ion bl end door mus t be cl os ed i n order for t heremoval of the recirculat ion bl end door housi ng.
Acti vat e reci rculati on.
1.
Di sconnect t he bat t ery ground cable.
Refer t o: Specificati ons (414-00 Bat tery and Charging Sys tem -General Informat ion, Specificati ons).
2.
Remove t he accelerat or pedal as sembl y.
Refer t o: Accelerat or Pedal (310-02 Accelerati on Cont rol , Removaland Inst all at ion).
3.
4.
Remove t he glove compartment .
Refer t o: Glove Compart ment (501-12 Ins trument Panel and
5.
Page 1662 of 3229
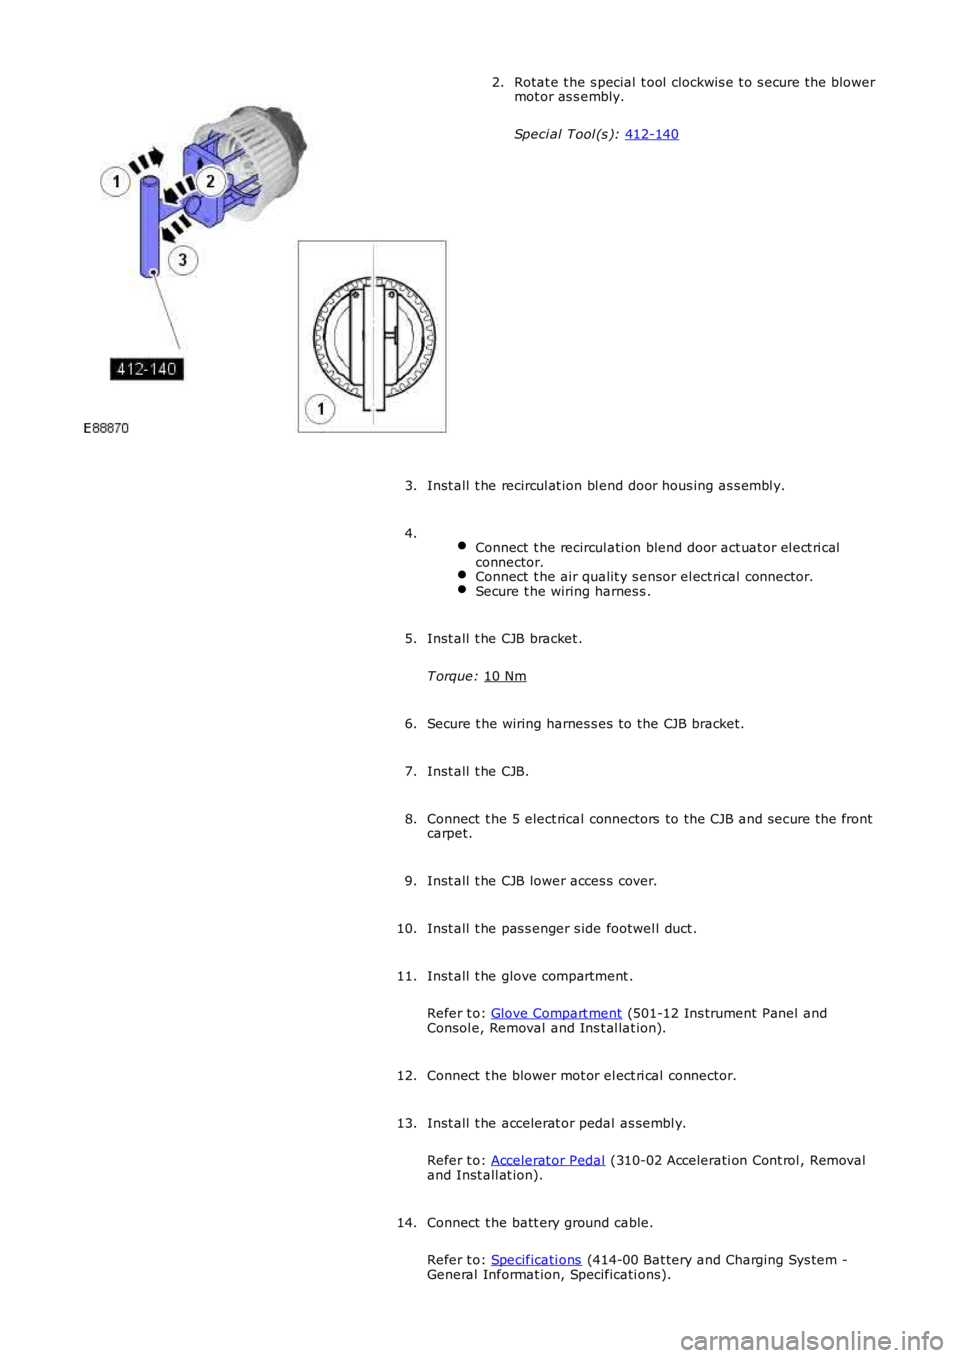
Rotat e t he s pecial t ool clockwis e t o s ecure t he blower
mot or as s embly.
Speci al Tool (s ): 412-140 2.
Inst all t he recircul at ion bl end door hous ing as s embl y.
3.
Connect t he recircul ati on blend door act uat or el ect ri cal
connector. Connect t he air qualit y s ensor el ect ri cal connector.
Secure t he wiring harnes s .4.
Inst all t he CJB bracket .
T orque: 10 Nm 5.
Secure t he wiring harnes s es to the CJB bracket.
6.
Inst all t he CJB.
7.
Connect t he 5 elect rical connectors to the CJB and s ecure t he front
carpet.
8.
Inst all t he CJB lower acces s cover.
9.
Inst all t he pas s enger s ide footwel l duct .
10.
Inst all t he glove compartment .
Refer t o: Glove Compart ment (501-12 Ins trument Panel and
Consol e, Removal and Ins t al lat ion).
11.
Connect t he blower mot or el ect ri cal connector.
12.
Inst all t he accelerat or pedal as sembl y.
Refer t o: Accelerat or Pedal (310-02 Accelerati on Cont rol , Removal
and Inst all at ion).
13.
Connect t he batt ery ground cable.
Refer t o: Specificati ons (414-00 Bat tery and Charging Sys tem -
General Informat ion, Specificati ons).
14.
Page 1692 of 3229
Publi s hed: 11-May-2011
Climate Control - EvaporatorRHD AWD
Removal and Inst all ati on
Removal
• NOTE: The removal of thi s component involves cut t ing an apert ure in t he evaporator hous i ng wall and cutt ing t hrought he high and l ow pres s ure A/C l ines. A s ervice repai r ki t is s uppli ed to cover thi s procedure.
All vehicles
Make t he SRS s ys t em s afe.
Refer t o: Standard W orks hop Pract ices (100-00 General Informat ion,Des cript ion and Operat ion).
1.
Recover t he A/C refrigerant .
Refer t o: Air Condi ti oning (A/C) Sys tem Recovery, Evacuati on andCharging (412-00 Cl imat e Control Sys t em - General Informat ion,General Procedures).
2.
Remove t he s teeri ng col umn.
Refer t o: Steeri ng Column (211-04 St eering Col umn, Removal andInst all at ion).
3.
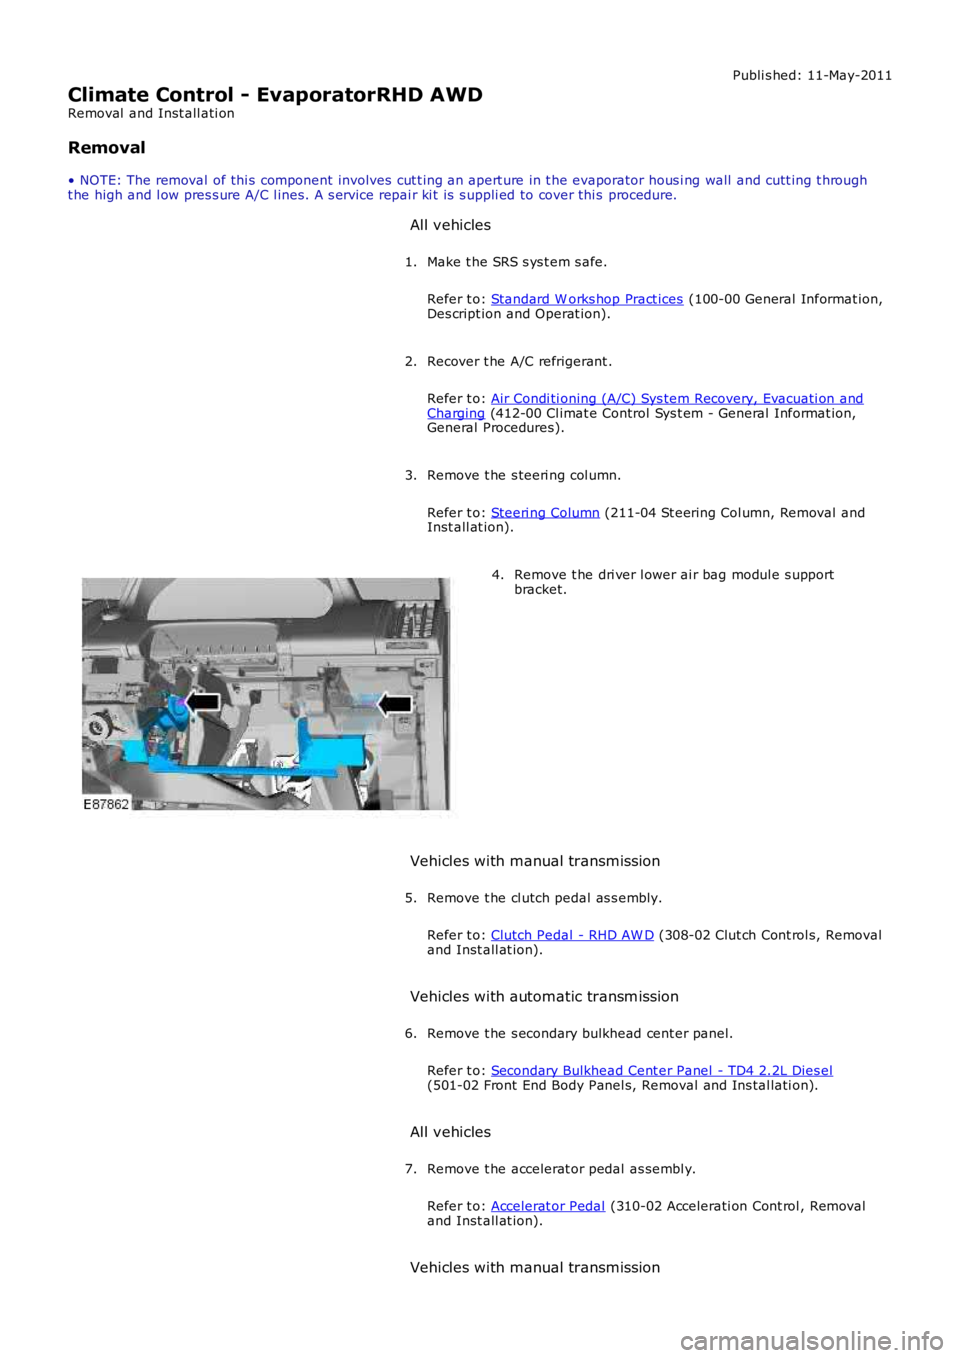
Remove t he dri ver l ower ai r bag modul e s upportbracket.4.
Vehicles with manual transmission
Remove t he cl utch pedal as s embly.
Refer t o: Clutch Pedal - RHD AW D (308-02 Clut ch Cont rol s, Removaland Inst all at ion).
5.
Vehicles with automatic transm ission
Remove t he s econdary bulkhead cent er panel.
Refer t o: Secondary Bulkhead Cent er Panel - TD4 2.2L Dies el(501-02 Front End Body Panel s, Removal and Ins tal lati on).
6.
All vehicles
Remove t he accelerat or pedal as sembl y.
Refer t o: Accelerat or Pedal (310-02 Accelerati on Cont rol , Removaland Inst all at ion).
7.
Vehicles with manual transmission
Page 1700 of 3229
Connect t he blower mot or el ect ri cal connector.
10.
11. NOTE: Ins tal l new O-ring seals .
Inst all t he TXV as sembl y.
T orque: 4 Nm 11.
12. NOTE: Ins tal l new O-ring seals .
Connect t he A/C pipes t o the TXV and ti ght en t he M6 nut .
T orque: 9 Nm 12.
Inst all t he RH floor cons ole ext ens ion.
13.
Inst all t he brake pedal as s embly.
T orque: 25 Nm 14.
Inst all t he brake pedal clevis pi n.
15.
Connect t he s toplamp swit ch and speed cont rol deact ivat or s wi tch
electrical connect ors .
16.
Secure t he wiring harnes s t o t he brake pedal bracket.
17.
Inst all t he accelerat or pedal as sembl y.
Refer t o: Accelerat or Pedal (310-02 Accelerati on Cont rol , Removal
and Inst all at ion).
18.
Vehicles with automatic transm ission Inst all t he s econdary bulkhead cent er panel.
Refer t o: Secondary Bulkhead Cent er Panel - TD4 2.2L Dies el (501-02 Front End Body Panel s, Removal and Ins tal lati on).
19.
Vehicles with manual transmission Inst all t he cl utch pedal as s embly.
Refer t o: Clutch Pedal - RHD AW D (308-02 Clut ch Cont rol s, Removal
and Inst all at ion).
20.
All vehicles Inst all t he dri ver l ower ai r bag modul e s upport bracket .
T orque: 7 Nm 21.
Inst all t he s teeri ng col umn.
Refer t o: Steeri ng Column (211-04 St eering Col umn, Removal and
Inst all at ion).
22.
Recharge the A/C sys tem.
Refer t o: Air Condi ti oning (A/C) Sys tem Recovery, Evacuati on and Charging (412-00 Cl imat e Control Sys t em - General Informat ion,
23.