2006 LAND ROVER FRELANDER 2 ignition
[x] Cancel search: ignitionPage 2733 of 3229
13
Quick start
R
Seat belts and Child restraints
A warning indicator on the
instrument pack will illuminate to
alert you that the driver's or front
passenger's seat be lt is unbuckled.
Child seats
It is important to remember that the child's
weight, rather than age, determines the type of
seat that is required. See CHILD SEATS
(page 64).
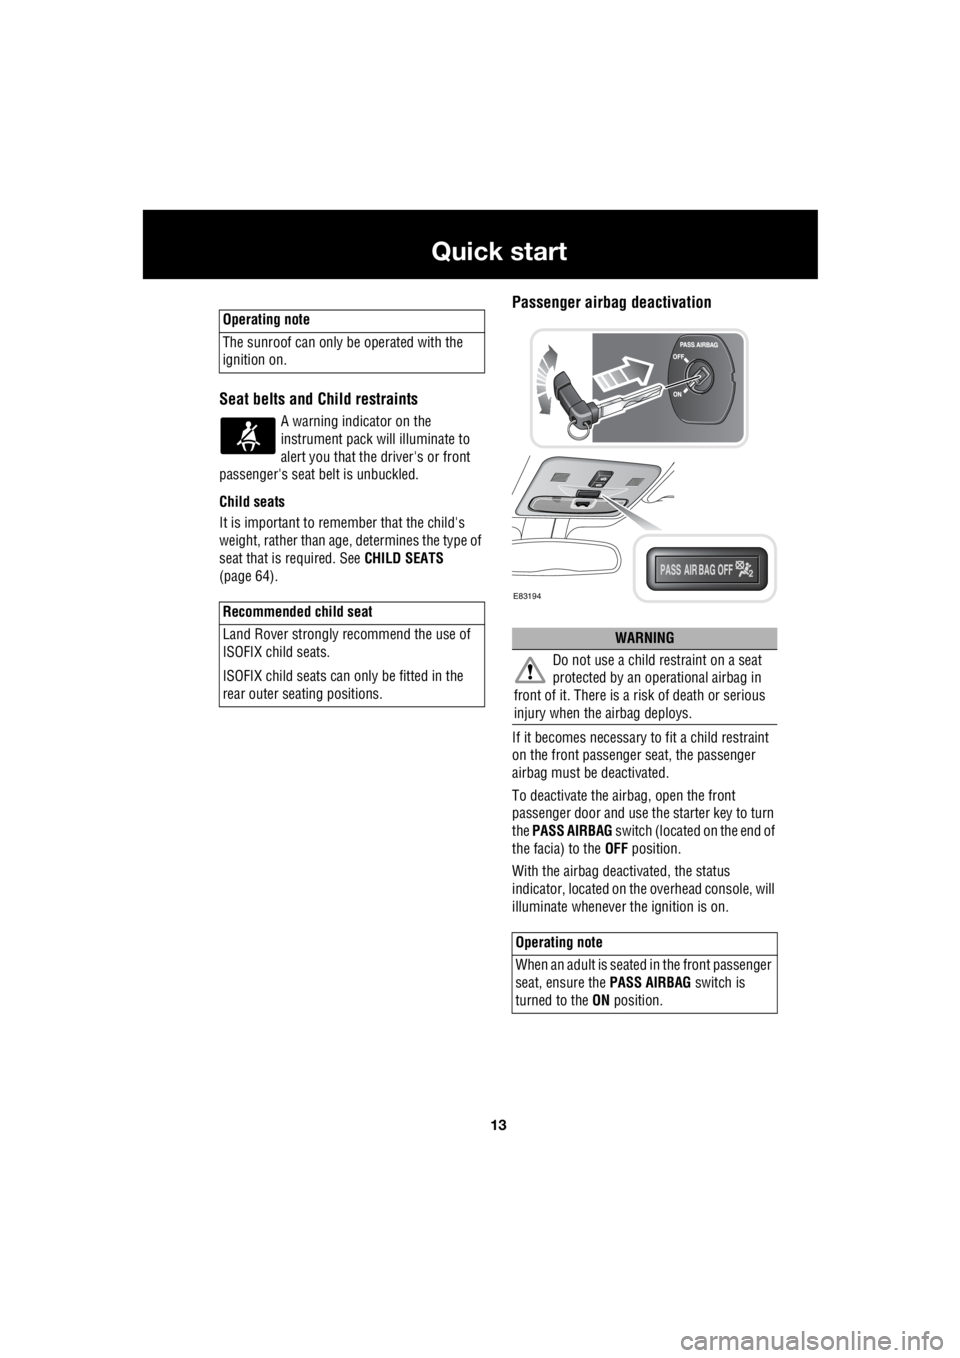
Passenger airbag deactivation
If it becomes necessary to fit a child restraint
on the front passenger seat, the passenger
airbag must be deactivated.
To deactivate the airbag, open the front
passenger door and use the starter key to turn
the PASS AIRBAG switch (located on the end of
the facia) to the OFF position.
With the airbag deactivated, the status
indicator, located on the overhead console, will
illuminate whenever the ignition is on.
Operating note
The sunroof can only be operated with the
ignition on.
Recommended child seat
Land Rover strongly recommend the use of
ISOFIX child seats.
ISOFIX child seats can only be fitted in the
rear outer seating positions.
WARNING
Do not use a child restraint on a seat
protected by an oper ational airbag in
front of it. There is a ri sk of death or serious
injury when the airbag deploys.
Operating note
When an adult is seated in the front passenger
seat, ensure the PASS AIRBAG switch is
turned to the ON position.
E83194
Page 2740 of 3229
20
Quick start
L
Tachometer
Indicates engine spee d in revolutions per
minute (x 1 000). In normal driving conditions
the engine is most fuel efficient between 2 000
and 3 000 rev/min.
Temperature gauge
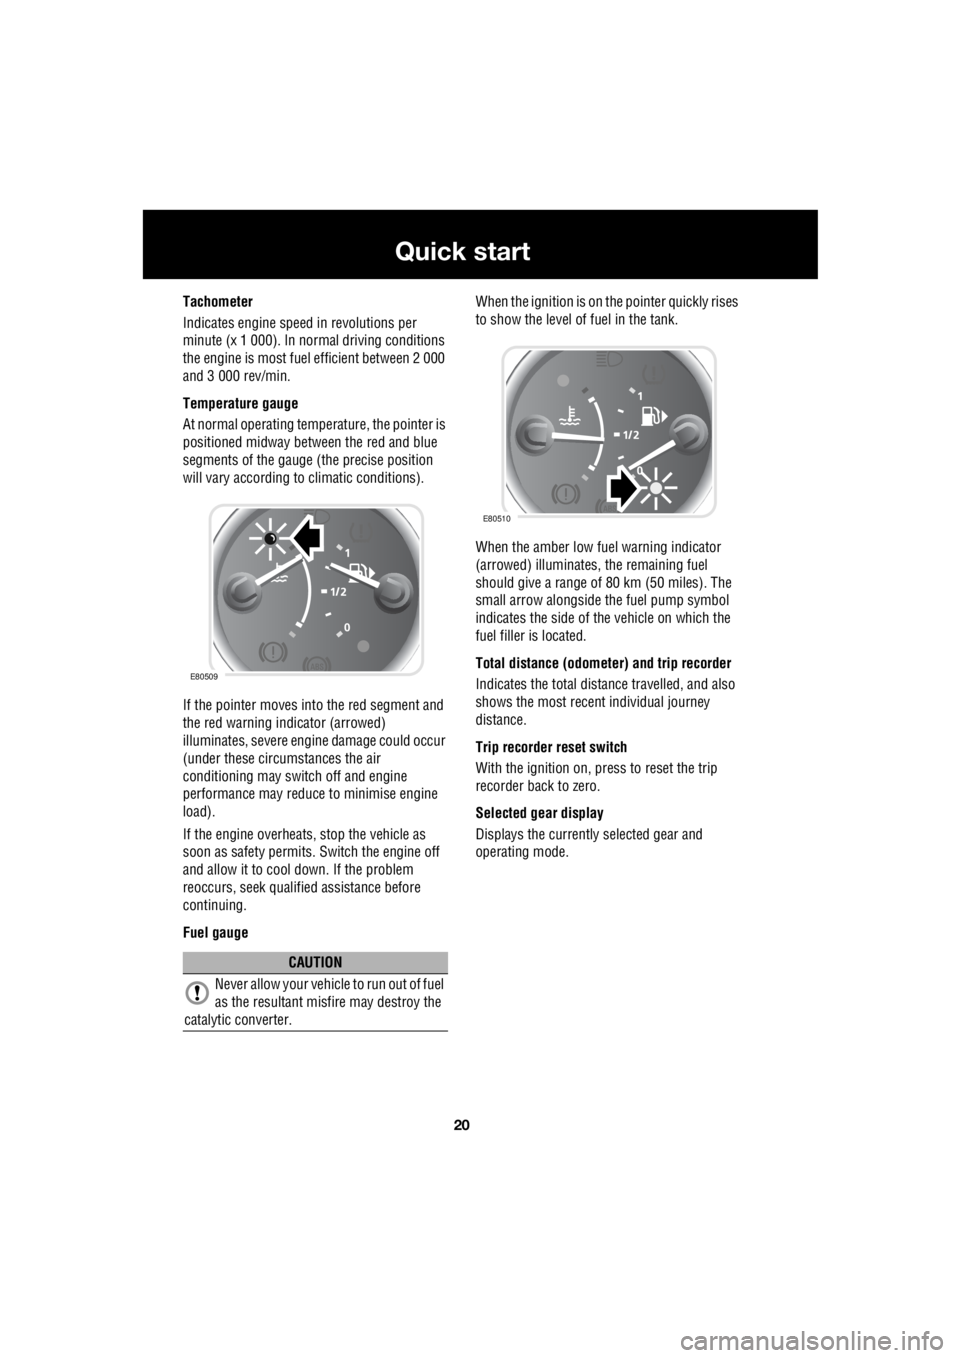
At normal operating temperature, the pointer is
positioned midway between the red and blue
segments of the gauge (the precise position
will vary according to climatic conditions).
If the pointer moves into the red segment and
the red warning indicator (arrowed)
illuminates, severe engi ne damage could occur
(under these circumstances the air
conditioning may switch off and engine
performance may reduce to minimise engine
load).
If the engine overheats, stop the vehicle as
soon as safety pe rmits. Switch the engine off
and allow it to cool down. If the problem
reoccurs, seek qualified assistance before
continuing.
Fuel gauge When the ignition is on the pointer quickly rises
to show the level of fuel in the tank.
When the amber low fuel warning indicator
(arrowed) illuminates, the remaining fuel
should give a range of 80 km (50 miles). The
small arrow alongside th e fuel pump symbol
indicates the side of the vehicle on which the
fuel filler is located.
Total distance (odometer) and trip recorder
Indicates the total distance travelled, and also
shows the most recent individual journey
distance.
Trip recorder reset switch
With the ignition on, press to reset the trip
recorder back to zero.
Selected gear display
Displays the currently selected gear and
operating mode.
CAUTION
Never allow your vehicl e to run out of fuel
as the resultant misfire may destroy the
catalytic converter.
E80509
E80510
Page 2742 of 3229
22
Quick start
L
Wipers and washers
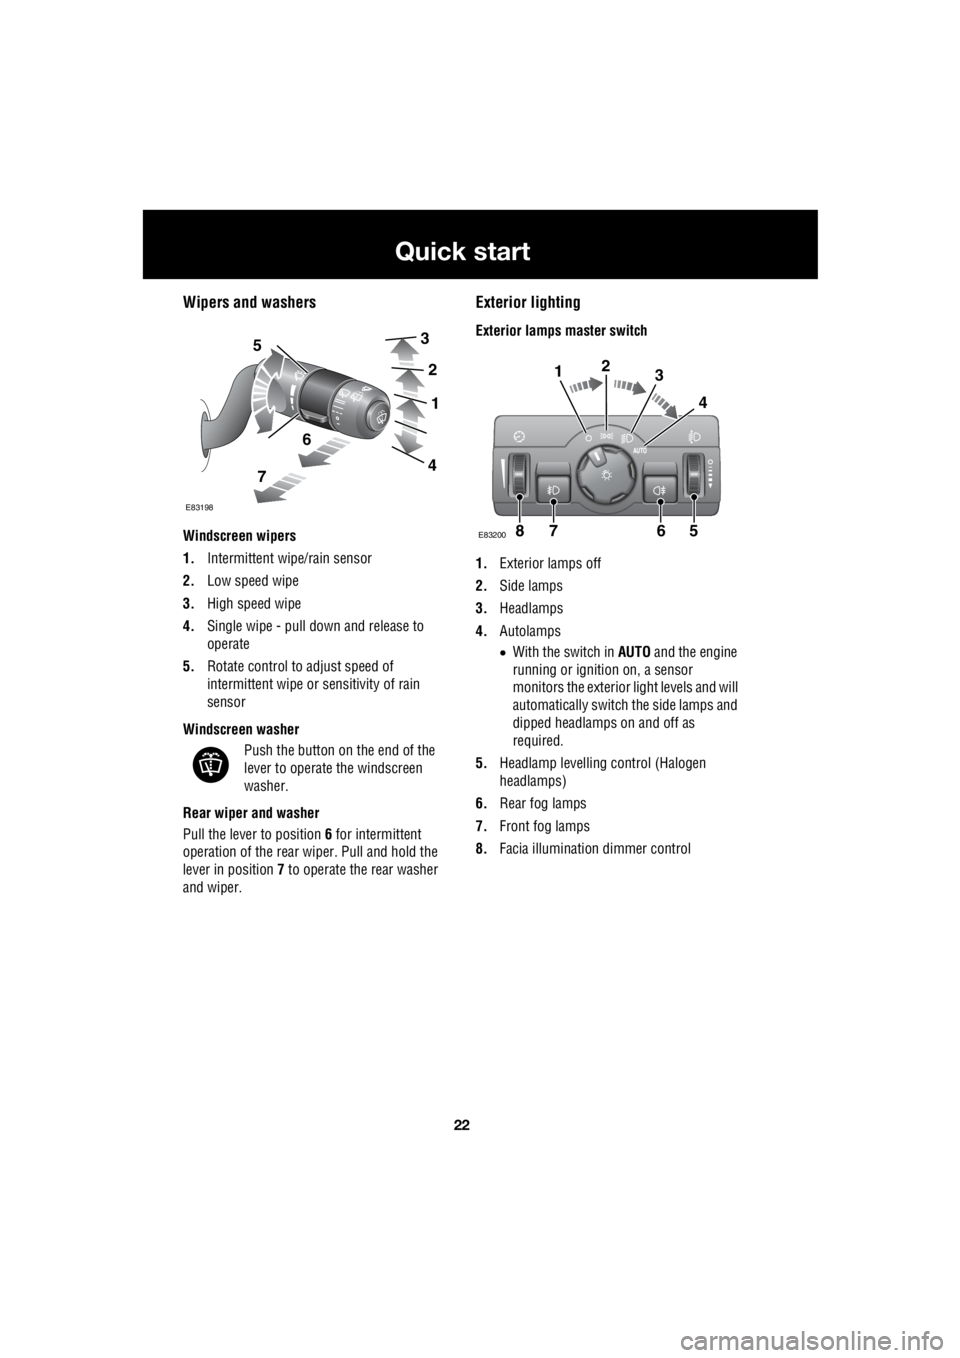
Windscreen wipers
1. Intermittent wipe/rain sensor
2. Low speed wipe
3. High speed wipe
4. Single wipe - pull down and release to
operate
5. Rotate control to adjust speed of
intermittent wipe or sensitivity of rain
sensor
Windscreen washer Push the button on the end of the
lever to operate the windscreen
washer.
Rear wiper and washer
Pull the lever to position 6 for intermittent
operation of the rear wiper. Pull and hold the
lever in position 7 to operate the rear washer
and wiper.
Exterior lighting
Exterior lamps master switch
1. Exterior lamps off
2. Side lamps
3. Headlamps
4. Autolamps
• With the switch in AUTO and the engine
running or ignition on, a sensor
monitors the exterior light levels and will
automatically switch the side lamps and
dipped headlamps on and off as
required.
5. Headlamp levelli ng control (Halogen
headlamps)
6. Rear fog lamps
7. Front fog lamps
8. Facia illumination dimmer control 5
6
7
3
2
1
4
E83198
7865
123
4
E83200
Page 2746 of 3229
26
Quick start
L
Sand Suitable for soft, predominantly dry,
yielding sandy ground, e.g. sand
dunes and deserts. If the sand is
damp or wet the Mud-Ruts program may be
more beneficial.
Parking aid
With the ignition on, the front and rear parking
sensors are activated whenever reverse gear is
selected. A short confirmation tone will sound
after one second.
If an obstruction is detected by the sensors, an
intermittent tone will sound (higher pitch for
objects detected by the front sensors). As the
vehicle moves closer to the obstruction the
intermittent tone in creases in frequency.
When the distance between the sensor and the
obstruction is less than approximately 30 cm
(1 foot) the tone becomes continuous.
The parking aid is automatically switched off
when the vehicle's forward speed exceeds 16
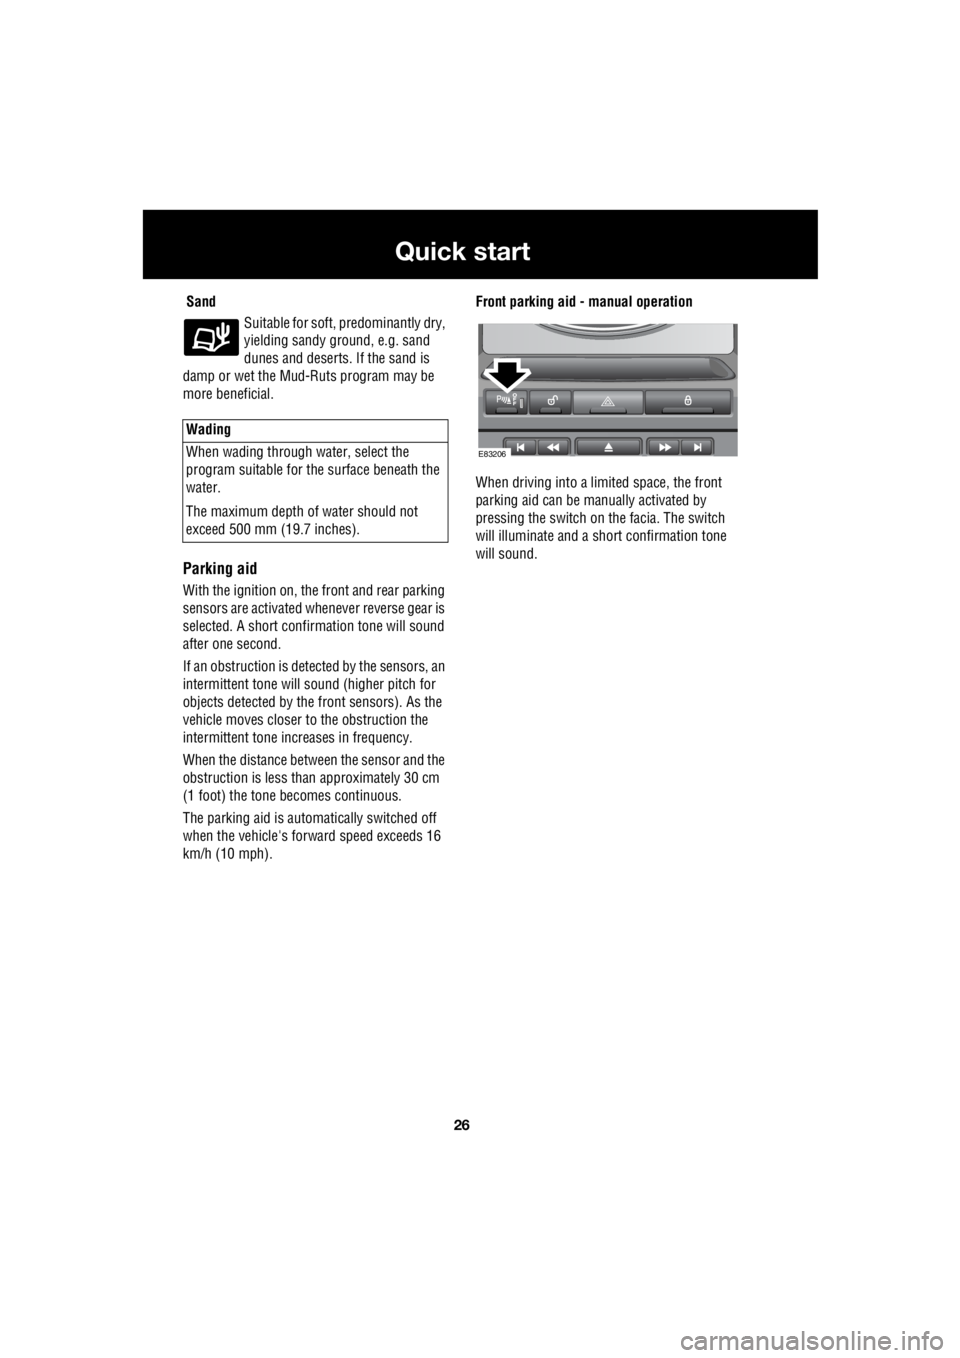
km/h (10 mph). Front parking aid - manual operation
When driving into a limited space, the front
parking aid can be ma nually activated by
pressing the switch on the facia. The switch
will illuminate and a short confirmation tone
will sound.
Wading
When wading through water, select the
program suitable for the surface beneath the
water.
The maximum depth of water should not
exceed 500 mm (19.7 inches).
E83206
Page 2751 of 3229
31
Quick start
R
Clock setting
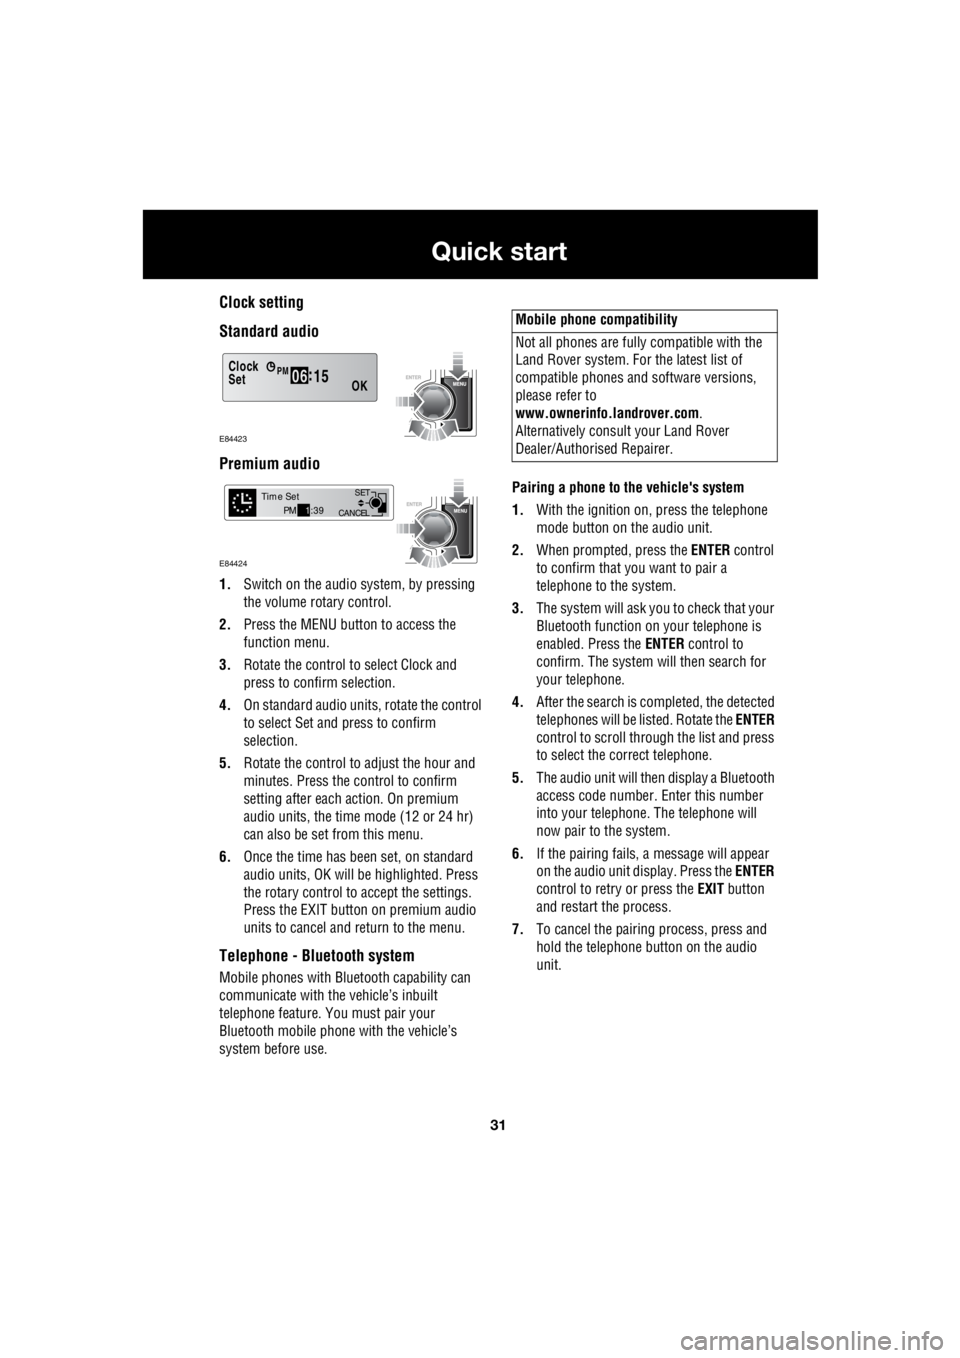
Standard audio
Premium audio
1. Switch on the audio system, by pressing
the volume rotary control.
2. Press the MENU button to access the
function menu.
3. Rotate the control to select Clock and
press to confirm selection.
4. On standard audio units, rotate the control
to select Set and press to confirm
selection.
5. Rotate the control to adjust the hour and
minutes. Press the c ontrol to confirm
setting after each action. On premium
audio units, the time mode (12 or 24 hr)
can also be set from this menu.
6. Once the time has been set, on standard
audio units, OK will be highlighted. Press
the rotary control to accept the settings.
Press the EXIT button on premium audio
units to cancel and return to the menu.
Telephone - Bluetooth system
Mobile phones with Blue tooth capability can
communicate with the vehicle’s inbuilt
telephone feature. You must pair your
Bluetooth mobile phone with the vehicle’s
system before use. Pairing a phone to the vehicle's system
1. With the ignition on, press the telephone
mode button on the audio unit.
2. When prompted, press the ENTER control
to confirm that you want to pair a
telephone to the system.
3. The system will ask you to check that your
Bluetooth function on your telephone is
enabled. Press the ENTER control to
confirm. The system will then search for
your telephone.
4. After the search is completed, the detected
telephones will be listed. Rotate the ENTER
control to scroll through the list and press
to select the correct telephone.
5. The audio unit will then display a Bluetooth
access code number. Enter this number
into your telephone. The telephone will
now pair to the system.
6. If the pairing fails, a message will appear
on the audio unit display. Press the ENTER
control to retry or press the EXIT button
and restart the process.
7. To cancel the pairing process, press and
hold the telephone button on the audio
unit.
Clock
OK06 :
15SetPM
E84423
CANCEL SET
Time SetPM
1:39
E84424
Mobile phone compatibility
Not all phones are fully compatible with the
Land Rover system. For the latest list of
compatible phones and software versions,
please refer to
www.ownerinfo.landrover.com .
Alternatively consult your Land Rover
Dealer/Authorised Repairer.
Page 2755 of 3229
35
Introduction
R
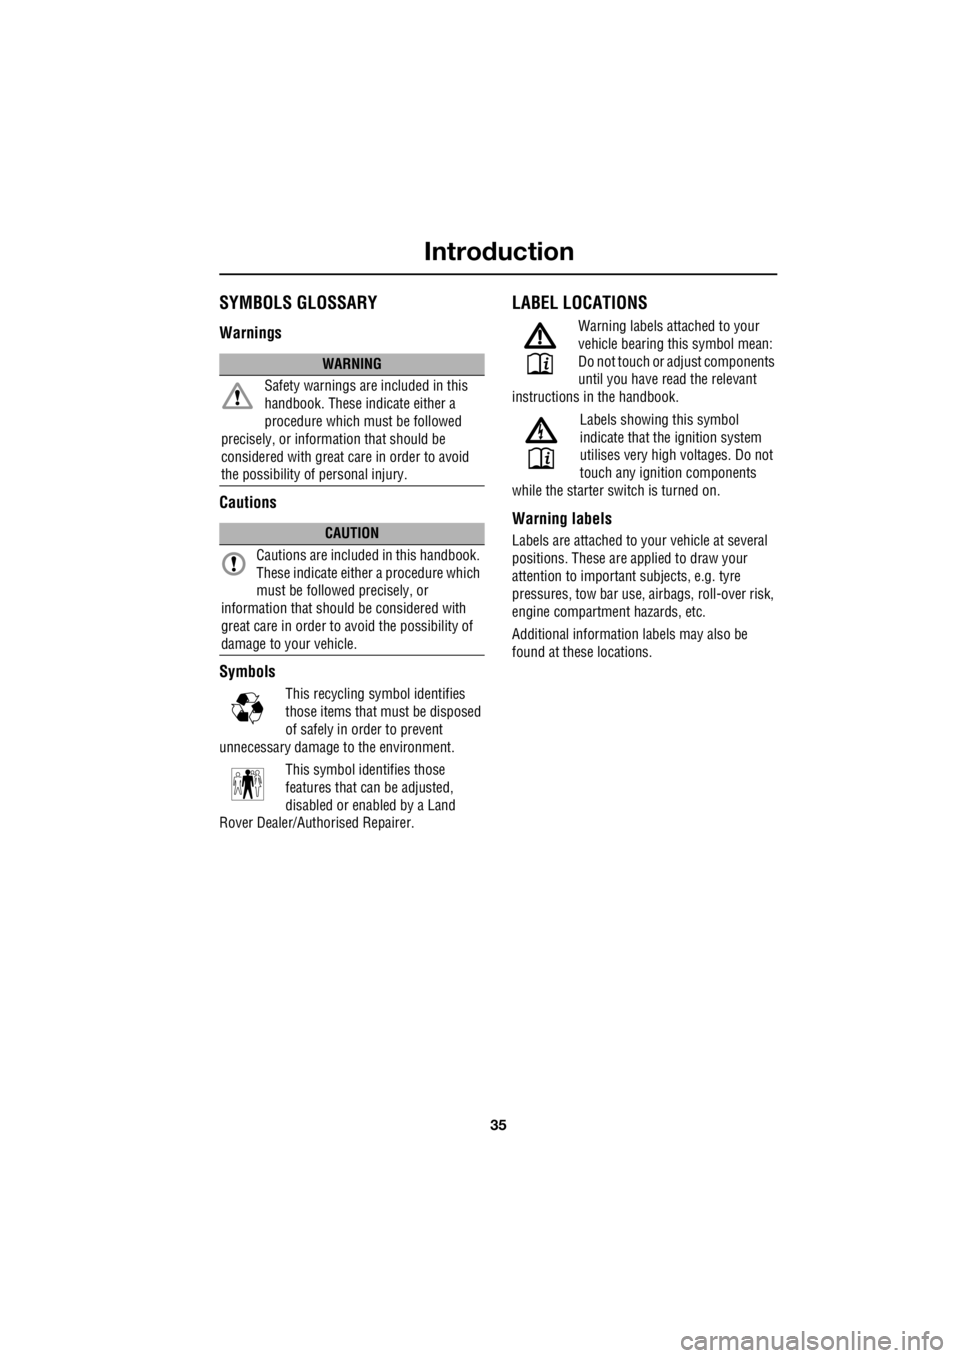
IntroductionSYMBOLS GLOSSARY
Warnings
Cautions
Symbols
This recycling symbol identifies
those items that mu st be disposed
of safely in order to prevent
unnecessary damage to the environment.
This symbol identifies those
features that can be adjusted,
disabled or enabled by a Land
Rover Dealer/Authorised Repairer.
LABEL LOCATIONS
Warning labels attached to your
vehicle bearing this symbol mean:
Do not touch or adjust components
until you have re ad the relevant
instructions in the handbook.
Labels showing this symbol
indicate that the ignition system
utilises very high voltages. Do not
touch any ignition components
while the starter switch is turned on.
Warning labels
Labels are attached to your vehicle at several
positions. These are ap plied to draw your
attention to important subjects, e.g. tyre
pressures, tow bar use, airbags, roll-over risk,
engine compartment hazards, etc.
Additional information labels may also be
found at these locations.
WARNING
Safety warnings ar e included in this
handbook. These indicate either a
procedure which must be followed
precisely, or information that should be
considered with great care in order to avoid
the possibility of personal injury.
CAUTION
Cautions are included in this handbook.
These indicate either a procedure which
must be followed precisely, or
information that should be considered with
great care in order to avoid the possibility of
damage to your vehicle.
E83651
E83652
Page 2770 of 3229
Seats
50
L
To adjust the seats, the remote control must be
inserted in the starter control unit and the
ignition on. On those ve hicles equipped with
the memory driver's seat, the seat has a 10
minute active peri od, initiated when the driver's
door is opened/closed or the remote control is
removed from the starter control unit.
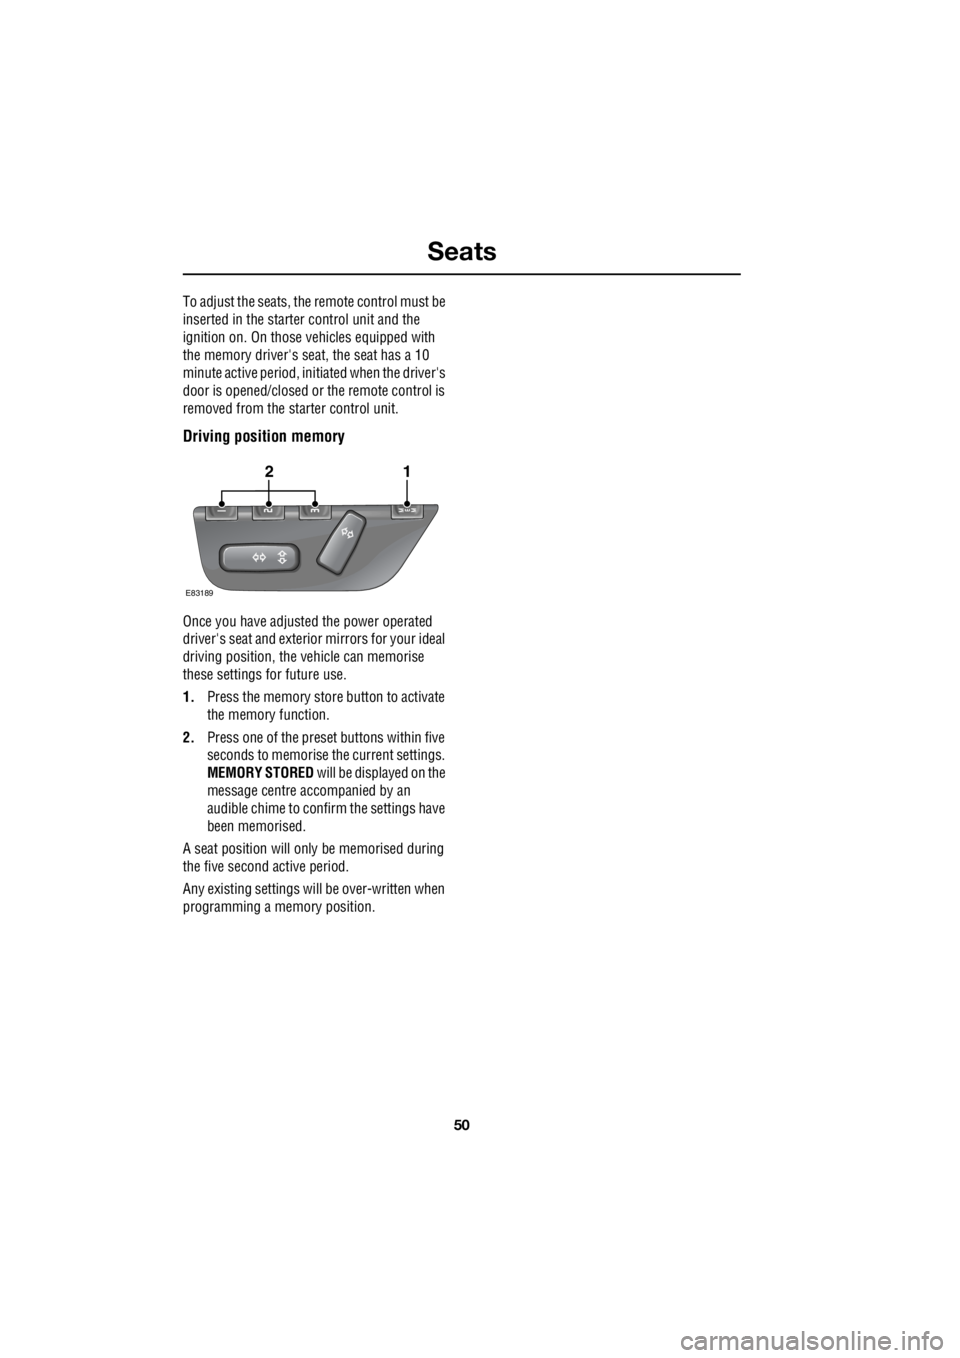
Driving position memory
Once you have adjusted the power operated
driver's seat and exterior mirrors for your ideal
driving position, the vehicle can memorise
these settings for future use.
1. Press the memory stor e button to activate
the memory function.
2. Press one of the preset buttons within five
seconds to memorise the current settings.
MEMORY STORED will be displayed on the
message centre accompanied by an
audible chime to conf irm the settings have
been memorised.
A seat position will only be memorised during
the five second active period.
Any existing settings will be over-written when
programming a memory position.
E83189
12
Page 2781 of 3229
61
Supplementary restraints system
R
Airbag deployment effectsAIRBAG WARNING LAMP
The airbag warning indicator is
mounted in the instrument pack,
and will illuminate as a bulb check
when the ignition is turned on.
If any of the following warning indicator
conditions occur, the vehicle should be
checked by your Land Ro ver Dealer/Authorised
repairer immediately.
• The warning indicator fails to illuminate
when the ignition is turned on.
• The warning indicator fails to extinguish
within six seconds of the ignition being
turned on.
• The warning indicator illuminates at any
time other than the bulb check, when the
ignition is turned on.WARNINGS
When an airbag inflates a fine powder
is released. This is normal, and not an
indication of a malf unction. However,
the powder may cause irritation to the skin,
and should be throughly flushed from eyes,
and any cuts or abrasions.
After inflation some airbag
components are at high temperatures.
To prevent injury, do no touch the
airbag components until they have cooled.
In order to react with sufficient speed,
airbags are deployed by an explosive
charge. Consequently airbag
deployment is accompan ied by a very loud
noise which may cause discomfort and
temporary loss of hearing.
WARNING
If the warning indicator signals that a
fault is present in the system, do not
use a child restraint on the front
passenger seat. Doing so will increase the risk
of death or serious injury to the child.