2006 LAND ROVER FRELANDER 2 open hood
[x] Cancel search: open hoodPage 2515 of 3229

Apply an even bead of adhes ive t o t he wi ndow or t o t he body fl ange.Ins ert the wi ndow glas s int o t he window apert ure and cent re i t (2 technicians required).Check t he gaps.• NOTE: Open t he windows and doors whi le the wi ndow is left t o dry and do not move the vehi cl e (sl amming doorscreates excess press ure which could cause the window t o become loos e).
Us e adhes i ve tape t o prevent the window from fall ing out or s li ppi ng.
Finis hing operat ions
Reconnect al l el ect ri cal connect ions and check t hat t he component s operate correctl y.Ins t all the at t ached part s and check t hat the fit i s accurat e and s ecure.- Carry out a vis ual ins pect ion t o ensure t hat t he gaps and joi nts are even.Thoroughl y clean t he window gl as s .
Protective equipment and safety at work
Vari ous safet y meas ures and l egal requi rements mus t be met when carryi ng out repairs. Al l regulati ons relat ing t oheal th and s afety at work mus t be followed.
W el di ng s afet y precaut ions
The fol lowing safety precauti ons mus t be observed to prevent t he ri s k of pers onal injury:- Safet y hood (face protecti on).- W el ding s hield.- Safet y gloves.- Safet y s hoes .- Extract ion unit for welding smoke.W el di ng s houl d always be carried out i n well venti lated areas. A fi re ext inguis her must al so always be wi thin reach.
General body repair safety measures
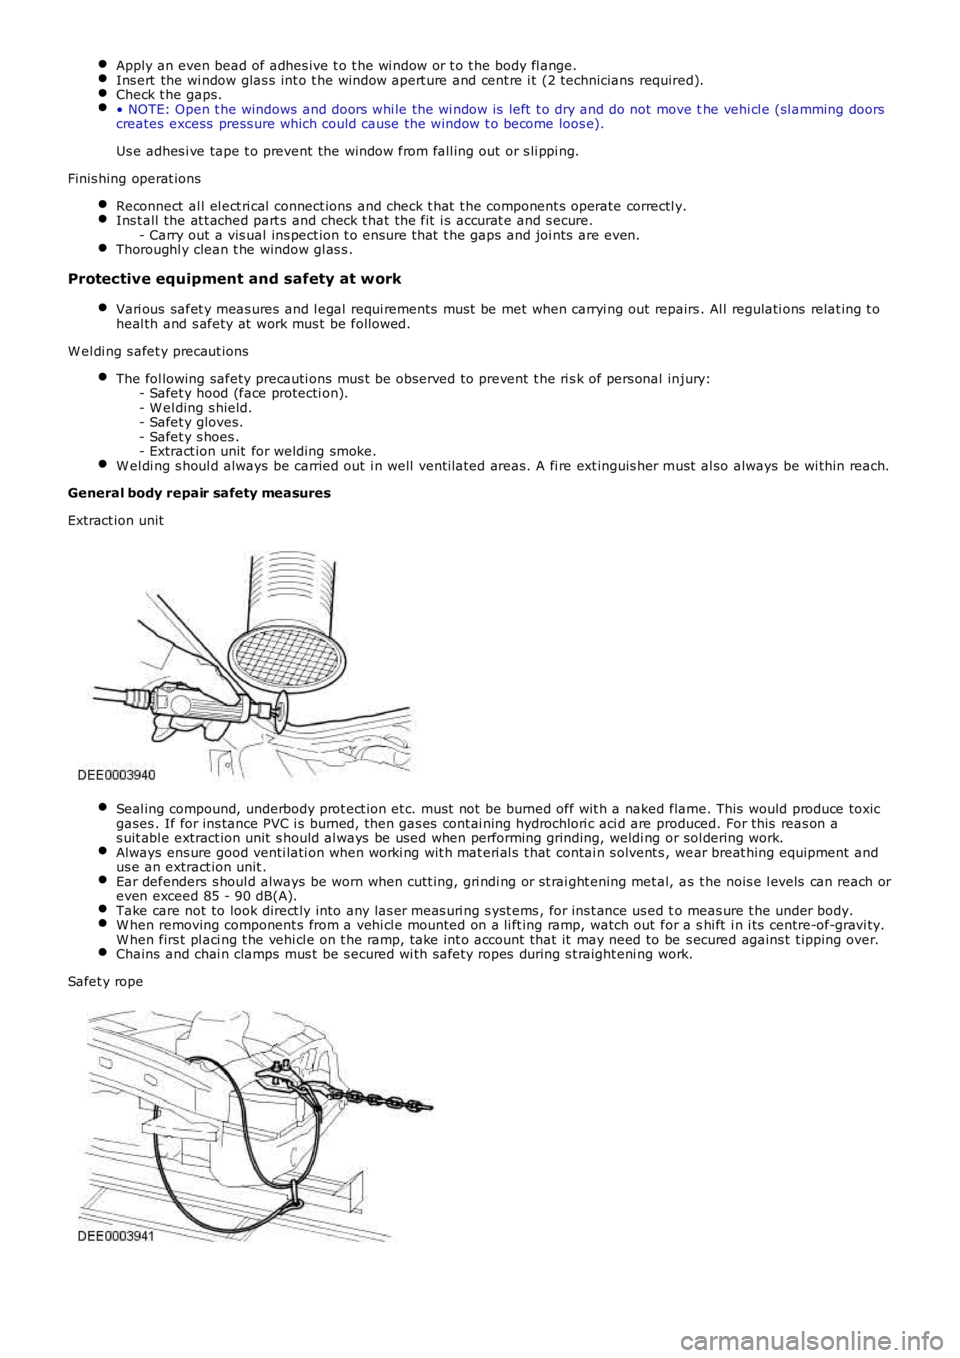
Extract ion unit
Seal ing compound, underbody prot ect ion et c. must not be burned off wit h a naked flame. This would produce toxicgases . If for ins tance PVC i s burned, then gas es cont ai ning hydrochlori c aci d are produced. For this reas on as uit abl e extract ion unit s hould al ways be used when performing grinding, weldi ng or sol dering work.Always ens ure good venti lati on when worki ng wit h mat eri al s t hat contai n s olvent s , wear breat hing equipment andus e an extract ion unit .Ear defenders s houl d always be worn when cutt ing, gri ndi ng or st rai ght ening met al, as t he nois e l evels can reach oreven exceed 85 - 90 dB(A).Take care not to look direct ly into any las er meas uri ng s yst ems , for ins t ance us ed to meas ure t he under body.W hen removing component s from a vehi cl e mounted on a li ft ing ramp, watch out for a shi ft i n i ts centre-of-gravi ty.W hen firs t pl aci ng t he vehi cl e on t he ramp, t ake int o account that it may need to be s ecured agains t t ipping over.Chains and chai n clamps mus t be s ecured wi th safety ropes during s t raight eni ng work.
Safet y rope
Page 2592 of 3229

Publis hed: 11-May-2011
Side Panel Sheet Metal Repairs - Side PanelRemoval and Installation
Removal
CAUTION: The side panel must be MIG slot brazed to its reinforcement, which contains DP600, (Dual Phase steel). MIG plug
w e lds / spot w e lds, must not be use d.
• NOTE: The side panel is serviced as a separate weld on panel, serviced less the fender mounting bracket, which is serviced
separately.
• NOTE: There are NVH elements attached inside this panel, they are not serviced on the new panel. If damaged, new element/s
will be required.
1. The s ide panel is replaced in conjunct ion wit h:
Front bumper cover
Front fender
Hood
Front door
Rear door
Quarter glass
Instrument panel
Windshield glass
Headliner
Rear bumper cover
2. For additional information relating to this repair procedure please
see the following:
Fo r a d d i t i o na l i nf o rma t i o n, re f e r t o : Body and Frame
(501-26 Body
Repairs - Vehicle Specific Information and Tolerance Checks,
Description and Operation) /
St a nd a rd W o rks ho p P ra ct i ce s
(100-00 General Informat ion,
Description and Operation).
3. Remove t he hood.
4. Remove the front fender.
5. Remove the front door.
Fo r a d d i t i o na l i nf o rma t i o n, re f e r t o : Front Door
(501-03 Body
Closures, Removal and Installation).
6. Remove t he rear door.
Fo r a d d i t i o na l i nf o rma t i o n, re f e r t o : Rear Door
(501-03 Body
Closures, Removal and Installation).
7. Remove the headliner.
Fo r a d d i t i o na l i nf o rma t i o n, re f e r t o : Headliner - Vehicles Without:
Tilting Roof Opening Panel (501-05 Int eri or Tri m and
Ornamentat ion, Removal and Inst all at ion) /
Headliner - Vehicles With: Tilting Roof Opening Panel
(501-05
Interior Trim and Ornamentation, Removal and Installation).
8. Re mo ve t he i ns t rume nt pa ne l .
Fo r a d d i t i o na l i nf o rma t i o n, re f e r t o : Inst rument Panel - TD4 2.2L
Di es e l (501-12 Inst rument Panel and Cons ole, Removal and
Installation).
9. Remove the windshield glass.
Fo r a d d i t i o na l i nf o rma t i o n, re f e r t o : Windshield Glass
(501-11
Glass, Frames and Mechanisms, Removal and Installation).
10. Remove the rear quarter glass.
Fo r a d d i t i o na l i nf o rma t i o n, re f e r t o : Rear Quarter Window Glass
(501-11 Glass, Frames and Mechanisms, Removal and Installation).
11. Re move t he re a r bumpe r co ve r.
Fo r a d d i t i o na l i nf o rma t i o n, re f e r t o : Rear Bumper Cover
(501-19
Bumpe rs , Re mo va l a nd I ns t a l l a t i o n).
12. Remove the upper and lower door hinges from the A-Pillar, 4 x
bolts.
13. Remove the upper and lower door hinges from the B-Pillar, 4 x
bolts.
14. Remove the front door striker from the B-Pillar.
15. Remove the rear door striker from the C-Pillar.
16. Remove the roof moulding, front and rear sect ions .
17. Re mo ve t he s i d e a i r curt a i n mo d ul e .
Fo r a d d i t i o na l i nf o rma t i o n, re f e r t o : Si d e A i r Curt a i n Mo d ul e
(501-20B Supplement al Res t raint Syst em, Removal and
Page 2600 of 3229

Publ is hed: 11-May-2011
Side Panel Sheet Metal Repairs - Side Panel Front Section
Removal and Installation
Removal
CAUTION: The side panel front section must be MIG slot brazed to its reinforcement, which contains DP600, (Dual
Phase steel). MIG plug we lds / spot w elds, must not be use d.
• NOTE: The side panel front section is serviced as a separate weld on panel, serviced less the fender mounting bracket,
which is serviced separately.
• NOTE: There are NVH elements attached inside this panel, they are not serviced on the new panel. If damaged, new
element/s will be required.
1. The s ide panel front s ect ion is replaced in conjunct ion wit h:
Front bumper cover
Front fender
Hood
Front door
Rear door
Instrument panel
Windshield glass
Headliner
2. Fo r a d d i t i o na l i nf o rma t i o n re l a t i ng t o t hi s re p a i r p ro ce d ure
please see the following:
Fo r a d d i t i o na l i nf o rma t i o n, re f e r t o : Body and Frame
(501-26
Body Repairs - Vehicle Specific Information and Tolerance
Checks, Description and Operation) /
St a nd a rd W o rks ho p P ra ct i ce s
(100-00 Ge ne ra l I nf o rma t i o n,
Description and Operation).
3. Remove the hood.
4. Remove the front fender.
5. Remove the front door.
Fo r a d d i t i o na l i nf o rma t i o n, re f e r t o : Front Door
(501-03 Body
Closures, Removal and Installation).
6. Remove the rear door.
Fo r a d d i t i o na l i nf o rma t i o n, re f e r t o : Rear Door
(501-03 Body
Closures, Removal and Installation).
7. Remove the headliner.
Fo r a d d i t i o na l i nf o rma t i o n, re f e r t o : Headliner - Vehicles
Without: Tilting Roof Opening Panel (501-05 Int eri or Tri m and
Ornamentation, Removal and Installation) /
Headliner - Vehicles With: Tilting Roof Opening Panel
(501-05
Int erior Trim and Ornamentat ion, Removal and Installat ion).
8. Re move t he i ns t rume nt pa ne l .
Fo r a d d i t i o na l i nf o rma t i o n, re f e r t o : Instrument Panel - TD4
2.2L Di es el (501-12 Ins t rument Panel and Cons ole, Removal
and Installation).
9. Remove the windshield glass.
Fo r a d d i t i o na l i nf o rma t i o n, re f e r t o : Windshield Glass
(501-11
Glass, Frames and Mechanisms, Removal and Installation).
10. Remove the upper and lower door hinges from the A-Pillar, 4
x bol t s .
11. Remove the upper and lower door hinges from the B-Pillar, 4
x bol t s .
12. Remove the front door striker from the B-Pillar.
13. Re mo ve t he s i d e a i r curt a i n mo d ul e .
Fo r a d d i t i o na l i nf o rma t i o n, re f e r t o : Si d e A i r Curt a i n Mo d ul e
(501-20B Suppl ement al Res t rai nt Sys t em, Removal and
Installation).
14. Remove the rear seat cushion.
Fo r a d d i t i o na l i nf o rma t i o n, re f e r t o : Rear Seat Cushion
(501-10
Seating, Removal and Installation).
15. Remove the RH & LH rocker panel inner trims.
16. Remove the B-Pillar side impact sensor.
Fo r a d d i t i o na l i nf o rma t i o n, re f e r t o : B-Pillar Side Impact Sensor
Page 2607 of 3229

Publ is hed: 11-May-2011
Side Panel Sheet Metal Repairs - A-Pillar Outer Panel
Removal and Installation
Removal
CAUTION: The A-Pillar outer panel must be MIG slot brazed to the reinforcement, which is DP600, (Dual Phase steel).
MIG plug we lds / spot we lds, must not be used.
• NOTE: The A-Pillar outer panel is serviced as a separate weld-on panel. The fender mounting bracket is serviced
separately.
• NOTE: There are NVH elements attached inside this panel; they are not serviced on the new panel. If damaged, new
element(s) will be required.
1. The A-Pillar out er panel is replaced in conjunct ion wit h:
Front bumper cover
Hood
Front fender
Front door
Instrument panel
Windshield glass
Headliner
2. Fo r a d d i t i o na l i nf o rma t i o n re l a t i ng t o t hi s re p a i r p ro ce d ure
please see the following:
Fo r a d d i t i o na l i nf o rma t i o n, re f e r t o : Body and Frame
(501-26
Body Repairs - Vehicle Specific Information and Tolerance
Checks, Description and Operation) /
St a nd a rd W o rks ho p P ra ct i ce s
(100-00 Ge ne ra l I nf o rma t i o n,
Description and Operation).
3. Remove the hood.
4. Remove the front fender.
5. Remove the front door.
Fo r a d d i t i o na l i nf o rma t i o n, re f e r t o : Front Door
(501-03 Body
Closures, Removal and Installation).
6. Remove the headliner.
Fo r a d d i t i o na l i nf o rma t i o n, re f e r t o : Headliner - Vehicles
Without: Tilting Roof Opening Panel (501-05 Int eri or Tri m and
Ornamentation, Removal and Installation) /
Headliner - Vehicles With: Tilting Roof Opening Panel
(501-05
Int erior Trim and Ornamentat ion, Removal and Installat ion).
7. Re move t he i ns t rume nt pa ne l .
Fo r a d d i t i o na l i nf o rma t i o n, re f e r t o : Instrument Panel - TD4
2.2L Di es el (501-12 Ins t rument Panel and Cons ole, Removal
and Installation).
8. Remove the windshield glass.
Fo r a d d i t i o na l i nf o rma t i o n, re f e r t o : Windshield Glass
(501-11
Glass, Frames and Mechanisms, Removal and Installation).
9. Remove t he upper and l ower door hi nges from t he pi l lar, 4 x
bolts.
10. Re mo ve t he ro cke r p a ne l i nne r t ri m.
11. Re mo ve t he s i d e a i r curt a i n mo d ul e .
Fo r a d d i t i o na l i nf o rma t i o n, re f e r t o : Si d e A i r Curt a i n Mo d ul e
(501-20B Suppl ement al Res t rai nt Sys t em, Removal and
Installation).
12. Remove the front wheel and tire.
Fo r a d d i t i o na l i nf o rma t i o n, re f e r t o : Wheel and Tire
(204-04
Wheels and Tires, Removal and Installation).
13. Remove the rocker panel outer moulding.
14. Release and lay aside the front carpet section.
15. Re mo ve t he re a r ca rp e t s e ct i o n.
16. Remove the roof moulding, front and rear sections.
17. Release and lay aside the wiring harness along the A-Pillar
i nne r a nd i nne r ro cke r p a ne l .
18. Release and lay aside the insulating material at the inner
bulkhead.