Page 888 of 3229
Publi s hed: 11-May-2011
Engine - TD4 2.2L Diesel - Balance Shaft Assembly
Removal and Inst all ati on
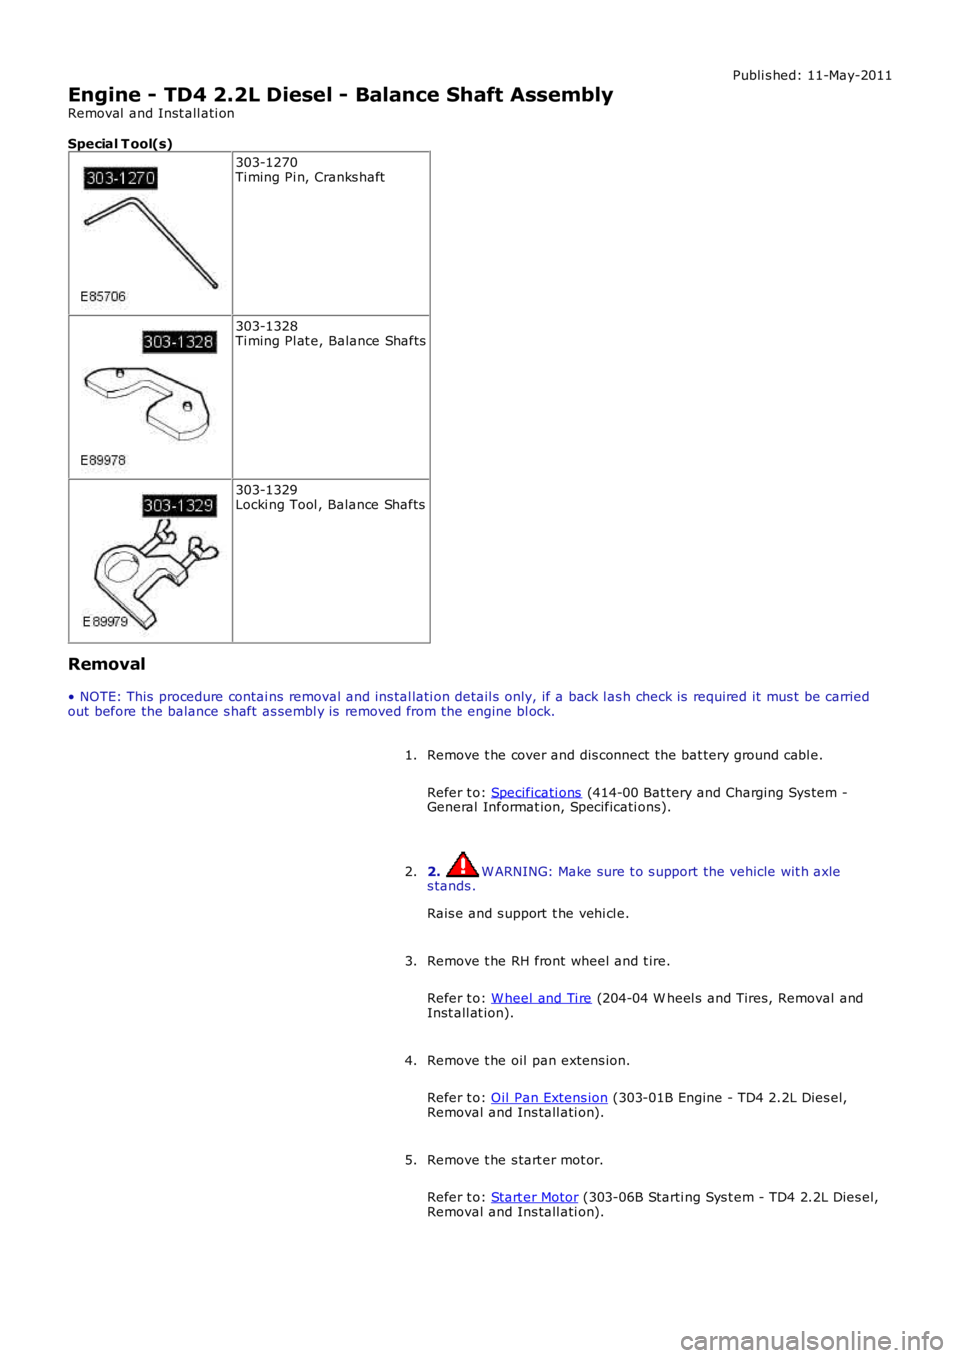
Special T ool(s)
303-1270Ti ming Pi n, Cranks haft
303-1328Ti ming Pl at e, Balance Shafts
303-1329Locki ng Tool , Balance Shafts
Removal
• NOTE: This procedure contai ns removal and ins tal lati on detail s only, if a back l ash check is required it mus t be carriedout before the balance s haft as sembl y is removed from the engine bl ock.
Remove t he cover and dis connect the bat tery ground cabl e.
Refer t o: Specificati ons (414-00 Bat tery and Charging Sys tem -General Informat ion, Specificati ons).
1.
2. W ARNING: Make sure t o s upport the vehicle wit h axles tands .
Rais e and s upport t he vehi cl e.
2.
Remove t he RH front wheel and t ire.
Refer t o: W heel and Ti re (204-04 W heel s and Tires, Removal andInst all at ion).
3.
Remove t he oil pan extens ion.
Refer t o: Oil Pan Extens ion (303-01B Engine - TD4 2.2L Dies el,Removal and Ins tall ati on).
4.
Remove t he s tart er mot or.
Refer t o: Start er Motor (303-06B Starti ng Sys t em - TD4 2.2L Dies el,Removal and Ins tall ati on).
5.
Page 892 of 3229
Stage 1:
Stage 2:
Stage 1:
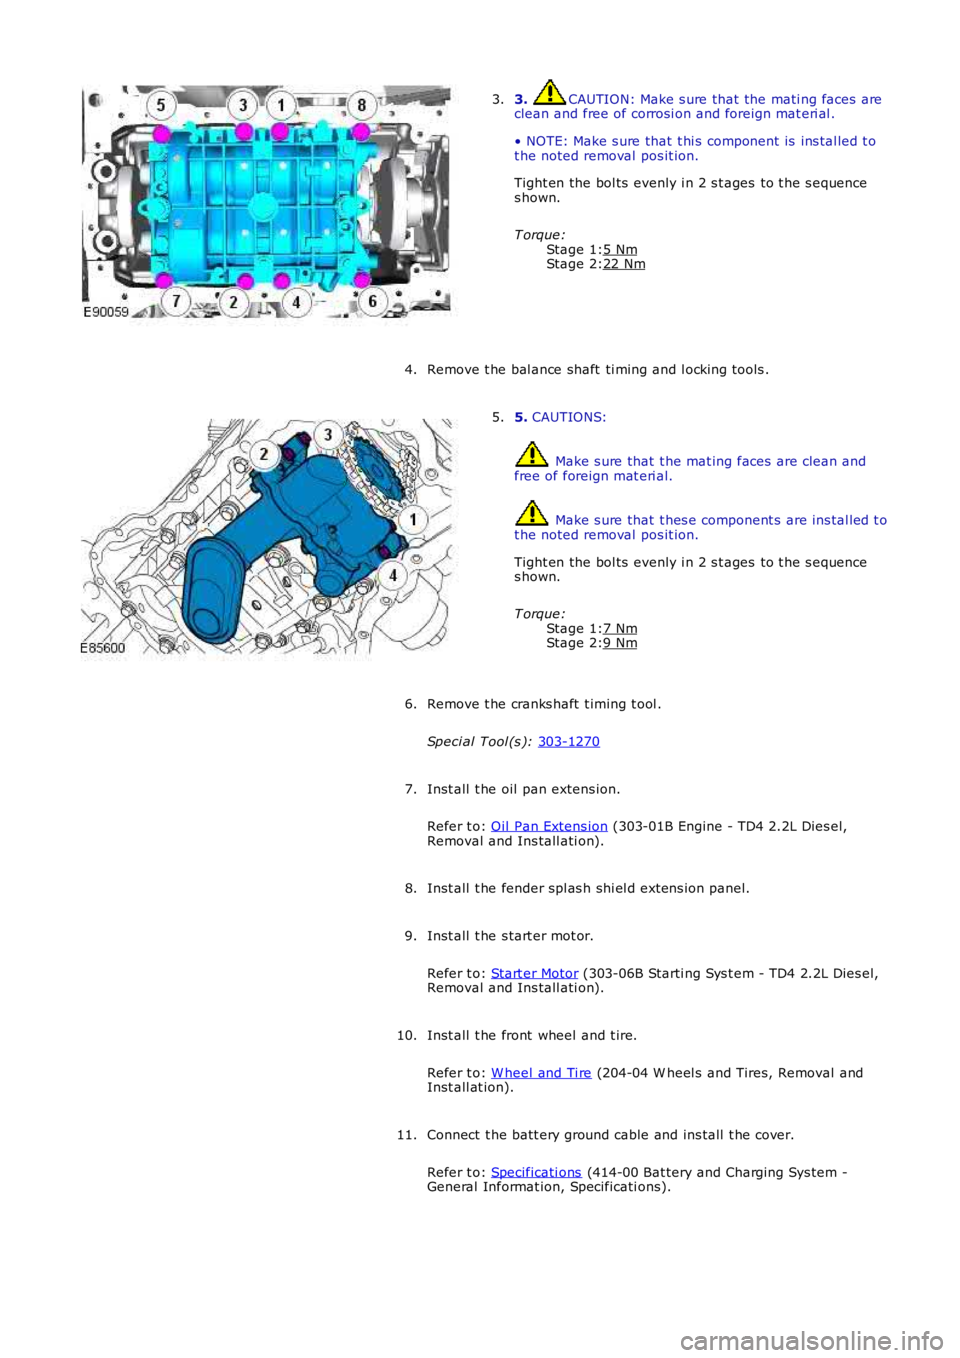
Stage 2: 3. CAUTION: Make s ure that the mati ng faces are
clean and free of corrosi on and foreign mat eri al .
• NOTE: Make s ure that t hi s component is ins tal led t o
t he noted removal pos it ion.
Tight en the bol ts evenly i n 2 s t ages to t he s equence
s hown.
T orque: 5 Nm 22 Nm3.
Remove t he bal ance shaft ti ming and l ocking tools .
4. 5.
CAUTIONS: Make s ure that t he mat ing faces are clean and
free of foreign mat eri al. Make s ure that t hes e component s are ins tal led t o
t he noted removal pos it ion.
Tight en the bol ts evenly i n 2 s t ages to t he s equence
s hown.
T orque: 7 Nm 9 Nm5.
Remove t he cranks haft t iming t ool .
Speci al Tool (s ): 303-1270 6.
Inst all t he oil pan extens ion.
Refer t o: Oil Pan Extens ion (303-01B Engine - TD4 2.2L Dies el,
Removal and Ins tall ati on).
7.
Inst all t he fender spl as h shi el d extens ion panel.
8.
Inst all t he s tart er mot or.
Refer t o: Start er Motor (303-06B Starti ng Sys t em - TD4 2.2L Dies el,
Removal and Ins tall ati on).
9.
Inst all t he front wheel and t ire.
Refer t o: W heel and Ti re (204-04 W heel s and Tires, Removal and
Inst all at ion).
10.
Connect t he batt ery ground cable and ins tall t he cover.
Refer t o: Specificati ons (414-00 Bat tery and Charging Sys tem -
General Informat ion, Specificati ons).
11.
Page 893 of 3229
Publi s hed: 11-May-2011
Engine - TD4 2.2L Diesel - Engine
Removal
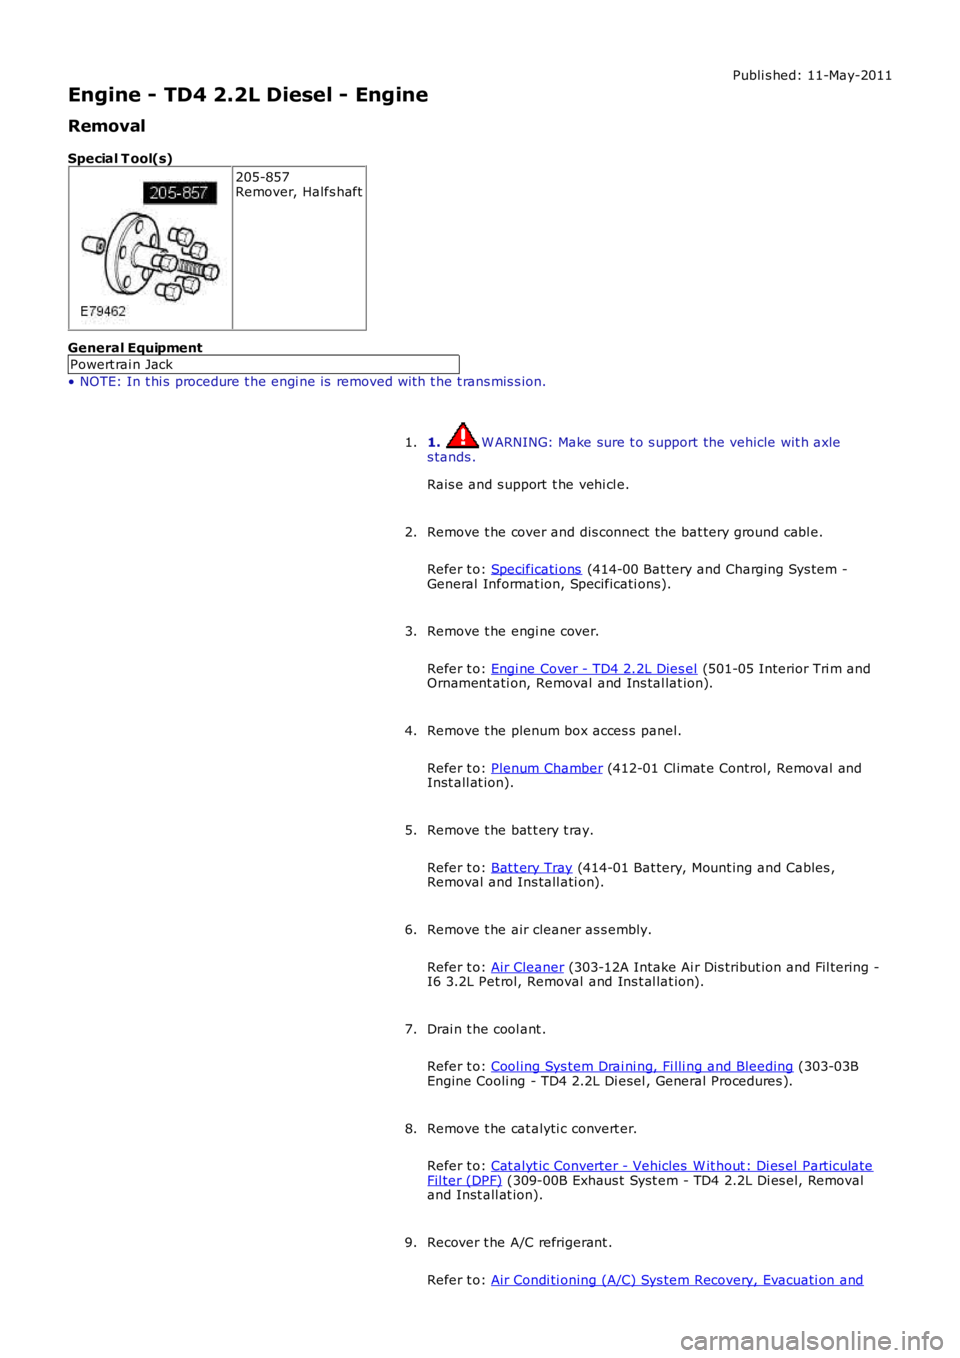
Special T ool(s)
205-857Remover, Halfs haft
General Equipment
Powert rai n Jack
• NOTE: In t hi s procedure t he engi ne is removed wi th t he t rans mis s ion.
1. W ARNING: Make sure t o s upport the vehicle wit h axles tands .
Rais e and s upport t he vehi cl e.
1.
Remove t he cover and dis connect the bat tery ground cabl e.
Refer t o: Specificati ons (414-00 Bat tery and Charging Sys tem -General Informat ion, Specificati ons).
2.
Remove t he engi ne cover.
Refer t o: Engi ne Cover - TD4 2.2L Dies el (501-05 Interior Tri m andOrnament ati on, Removal and Ins tal lat ion).
3.
Remove t he plenum box acces s panel.
Refer t o: Plenum Chamber (412-01 Cl imat e Control, Removal andInst all at ion).
4.
Remove t he bat t ery t ray.
Refer t o: Bat t ery Tray (414-01 Bat tery, Mount ing and Cables ,Removal and Ins tall ati on).
5.
Remove t he air cleaner as s embly.
Refer t o: Air Cleaner (303-12A Intake Ai r Dis tribut ion and Fil tering -I6 3.2L Pet rol, Removal and Ins t al lat ion).
6.
Drai n t he cool ant .
Refer t o: Cool ing Sys tem Drai ni ng, Fi lli ng and Bleeding (303-03BEngine Cooli ng - TD4 2.2L Di esel , General Procedures ).
7.
Remove t he cat alyti c convert er.
Refer t o: Cat alyt ic Converter - Vehicles W it hout : Di es el Part iculateFil ter (DPF) (309-00B Exhaus t Syst em - TD4 2.2L Di es el, Removaland Inst all at ion).
8.
Recover t he A/C refrigerant .
Refer t o: Air Condi ti oning (A/C) Sys tem Recovery, Evacuati on and
9.
Page 894 of 3229
Charging (412-00 Cl imat e Control Sys t em - General Informat ion,General Procedures).
Remove t he lower engi ne s tabil izer bar.
Refer t o: Engi ne Lower Support Ins ulat or (303-01A Engine - I6 3.2LPetrol, Removal and Ins tall ati on).
10.
Remove t he front subframe as s embly.
Refer t o: Front Subframe (502-00 Uni -Body, Subframe and Mount ingSyst em, Removal and Ins tall ati on).
11.
Siphon t he fl uid from t he power s t eering res ervoi r.12.
Di sconnect t he engi ne cont rol module (ECM).13.
14.
Page 907 of 3229
Inst all t he engi ne cover.
Refer t o: Engi ne Cover - TD4 2.2L Dies el (501-05 Interior Tri m andOrnament ati on, Removal and Ins tal lat ion).
36.
Carry out the low-press ure fuel s ys t em bl eedi ng.
Refer t o: Fuel Syst em Bl eedi ng - TD4 2.2L Dies el (310-00 FuelSyst em - General Informati on, General Procedures ).
37.
Bleed t he clut ch sys t em.
Refer t o: Clutch Sys tem Bleeding (308-00 ManualTrans mi ss ion/Transaxle and Clut ch - General Informati on, GeneralProcedures ).
38.
Connect t he batt ery ground cable and ins tall t he cover.
Refer t o: Specificati ons (414-00 Bat tery and Charging Sys tem -General Informat ion, Specificati ons).
39.
Recharge the A/C sys tem.
Refer t o: Air Condi ti oning (A/C) Sys tem Recovery, Evacuati on andCharging (412-00 Cl imat e Control Sys t em - General Informat ion,General Procedures).
40.
Refi ll and bleed t he power st eeri ng.
Refer t o: Power St eering Sys tem Bleeding (211-00 St eering Sys tem -General Informat ion, General Procedures ).
41.
Carry out the fi nal halfshaft and sus pensi on ti ghtening wi th thevehicle on it s wheel s .42.
Page 917 of 3229
Publi s hed: 11-May-2011
Engine Cooling - I6 3.2L Petrol - Cooling System Draining, Filling and
Bleeding
General Procedures
W ARNING: Si nce injury s uch as scaldi ng coul d be caus ed by es capi ng s team or coolant, do not remove the fi ller capfrom the coolant expans ion t ank while the sys tem is hot .
Pos it ion t he vehi cl e on a lift .1.
Set the heat er controls t o maxi mum.2.
Remove t he engi ne undershi eld.
Refer t o: Engi ne Unders hi eld (501-02 Front End Body Panel s ,Removal and Ins tall ati on).
3.
Di sconnect t he bat t ery ground cable.
Refer t o: Specificati ons (414-00 Bat tery and Charging Sys tem -General Informat ion, Specificati ons).
4.
5. W ARNING: Si nce injury s uch as scaldi ng coul d be caus ed byes caping st eam or coolant, do not remove the fil ler cap from t hecool ant expansi on t ank whi le the s ys tem is hot .
Remove t he cool ant expans i on tank cap.
5.
Pos it ion a contai ner t o coll ect t he fl uid.6.
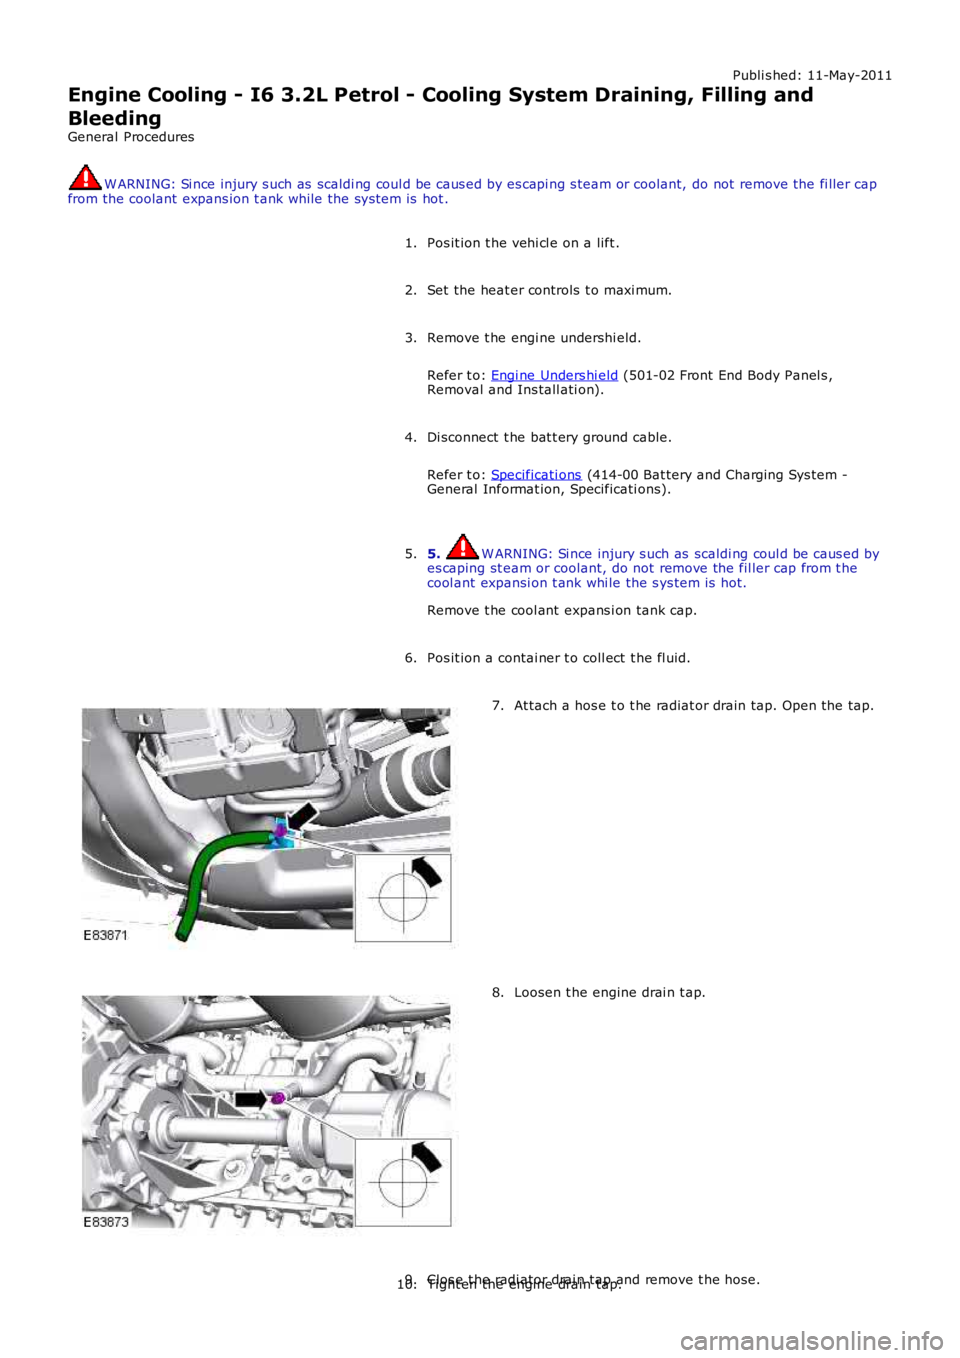
At tach a hos e t o t he radiat or drain tap. Open the tap.7.
Loosen t he engine drai n t ap.8.
Clos e t he radi ator drai n tap and remove t he hose.9.Tight en the engine drain tap.10.
Page 918 of 3229
T orque:
7 Nm Connect t he batt ery ground cable.
Refer t o: Specificati ons (414-00 Bat tery and Charging Sys tem -
General Informat ion, Specificati ons).
11.
Connect exhaus t extract ion hos es to the tail pi pes .
12.
Refi ll t he cool ing s yst em.
13.
St art t he engi ne and cont inue t o fill t he cool ant unt il t he maximum
l evel is reached.
14.
Inst all t he cool ant expans i on tank cap.
15.
All ow t he engine t o idl e, unt il hot air i s emit ted at the face
regi st ers .
16.
Swit ch t he engi ne off and all ow t o cool.
17.
Clean any s pil t cool ant from t he vehi cl e.
18.
Check and top-up the coolant if requi red.
19.
Inst all t he engi ne undershi eld.
Refer t o: Engi ne Unders hi eld (501-02 Front End Body Panel s ,
Removal and Ins tall ati on).
20.
Page 921 of 3229
Publi s hed: 11-May-2011
Engine Cooling - I6 3.2L Petrol - Coolant Pump
Removal and Inst all ati on
Removal
Remove t he cover and dis connect the bat tery ground cabl e.
Refer t o: Specificati ons (414-00 Bat tery and Charging Sys tem -General Informat ion, Specificati ons).
1.
Remove t he engi ne cover.
Refer t o: Engi ne Cover - I6 3.2L Pet rol (501-05 Int eri or Trim andOrnament ati on, Removal and Ins tal lat ion).
2.
Remove t he bat t ery t ray.
Refer t o: Bat t ery Tray (414-01 Bat tery, Mount ing and Cables ,Removal and Ins tall ati on).
3.
Remove t he air cleaner as s embly.
Refer t o: Air Cleaner (303-12A Intake Ai r Dis tribut ion and Fil tering -I6 3.2L Pet rol, Removal and Ins t al lat ion).
4.
Drai n t he cool ant .
Refer t o: Cool ing Sys tem Drai ni ng, Fi lli ng and Bleeding (303-03AEngine Cooli ng - I6 3.2L Petrol, General Procedures).
5.
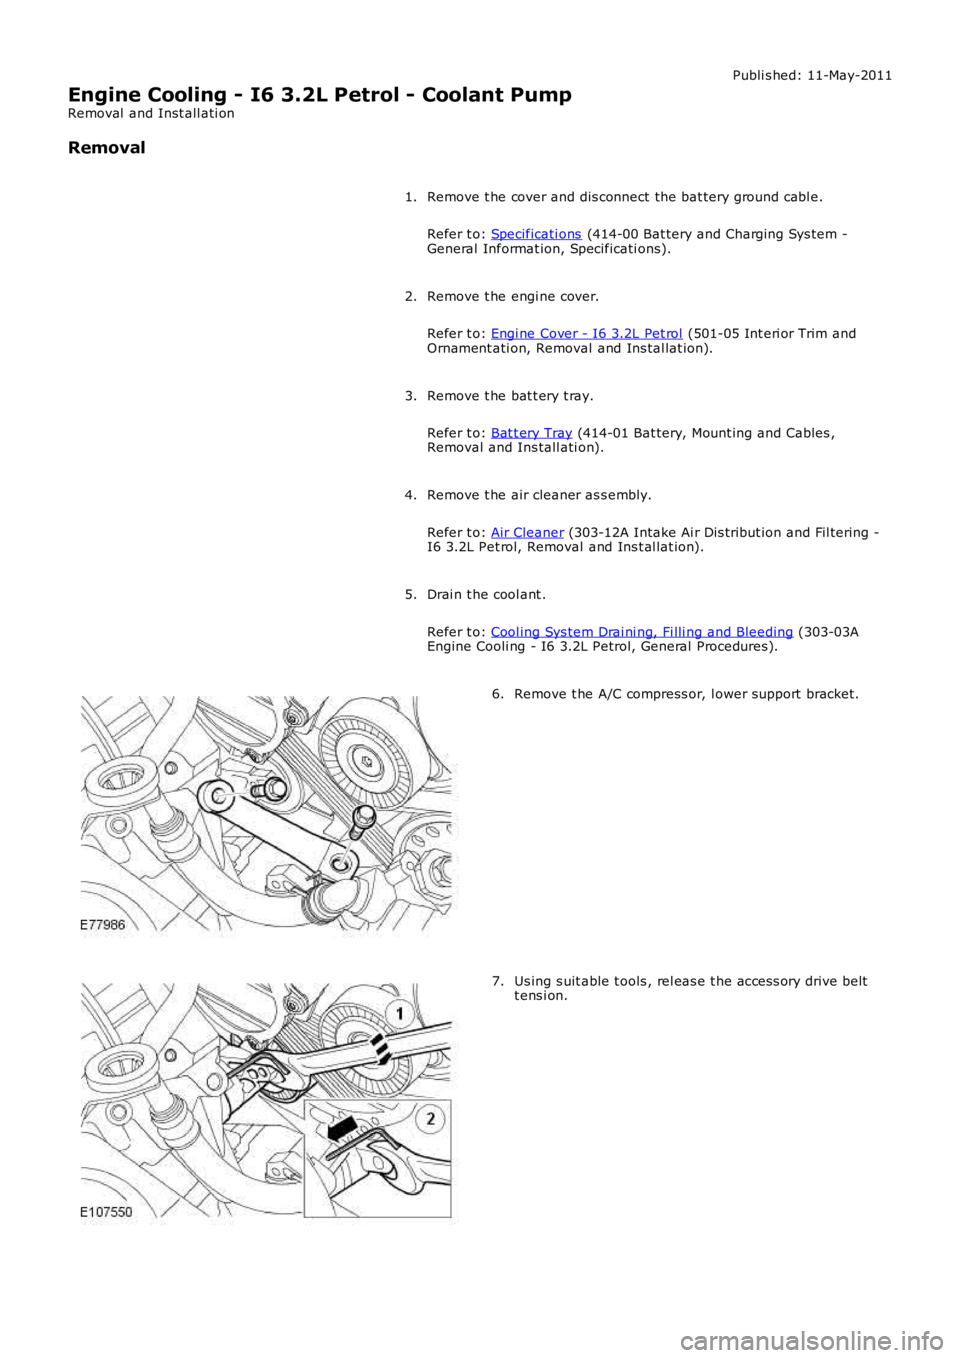
Remove t he A/C compress or, l ower support bracket.6.
Us ing s uit able t ools , rel eas e t he acces s ory drive beltt ens i on.7.