Page 1244 of 5267
15.ERRATIC CKP SIGNAL
Turn the ignition off.
With a lab scope probe and the Miller special tool #6801, backprobe the (K24) CKP Signal circuit in the CKP har-
ness connector.
WARNING: When the engine is operating, do not stand in direct line with the fan. Do not put your hands
near the pulleys, belts, or fan. Do notwear loose clothing. Failure to follow these instructions can result in
personal injury or death.
Ignition on, engine not running.
Wiggle the related wire harness and lightly tap on the Crankshaft PositionSensor.
Observe the lab scope screen.
Allow the engine to idle.
Observe the lab scope screen.
Did the CKP Sensor generate any erratic pulses?
Ye s>>
Replace the Crankshaft Position Sensor.
Perform the POWERTRAIN VERIFICATION TEST. (Refer to 9 - ENGINE - STANDARD PROCEDURE)
No>>
Test complete, the conditions that set this DTC are not present at this time
Page 1246 of 5267
When Monitored:
With battery voltage greater than 8 volts during engine cranking or greater than 12 volts with engine running,
engine rpm less than 2016, and none of the coils in dwell when checked.
Set Condition:
Peak current is not achieved with battery based dwell plus 1.5 ms of diagnostic offset. It takes less than 3
seconds during cranking or up to 6 seconds while running to set.
Possible Causes
(K343) ASD RELAY OUTPUT CIRCUIT
IGNITION COIL
(K17) IGNITION COIL NO.2 CONTROL CIRCUIT OPEN
(K17) IGNITION COIL NO.2 CONTROL CIRCUIT SHORTED TO GROUND
PCM
Always perform the Pre-Diagnostic Troubleshooting procedure before proceeding. (Refer to 9 - ENGINE -
DIAGNOSIS AND TESTING)
1.GOOD TRIP EQUAL TO ZERO
Ignition on, engine not running.
With the scan tool, read DTCs and record the related Freeze Frame data.
Is the Good Trip Counter displayed and equal to zero?
Ye s>>
Go To 2
No>>
Refer to the INTERMITTENT CONDTION Diagnostic Procedure.
Perform POWERTRAIN VERIFICATION TEST. (Refer to 9 - ENGINE - STANDARD PROCEDURE)
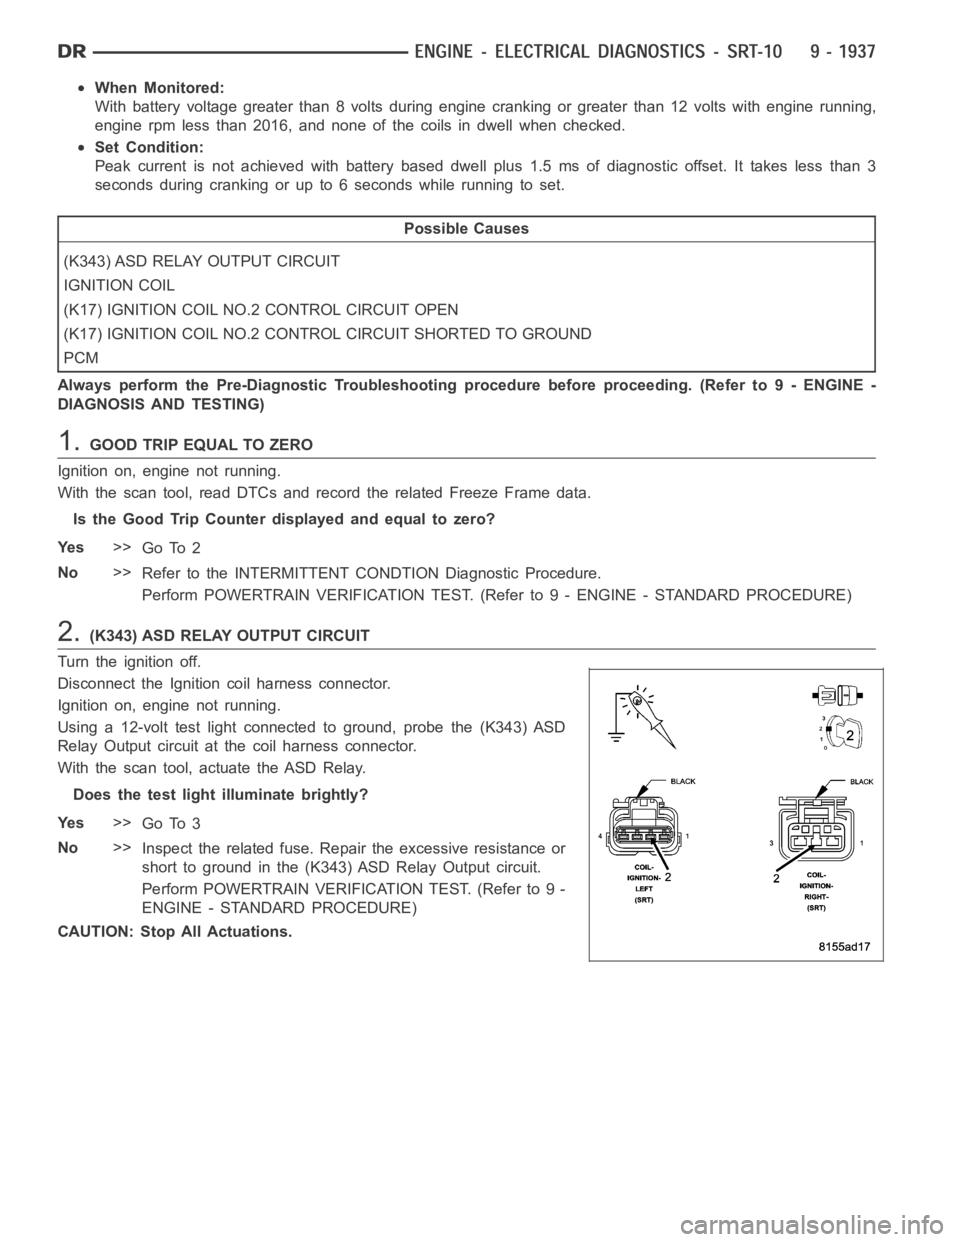
2.(K343) ASD RELAY OUTPUT CIRCUIT
Turn the ignition off.
Disconnect the Ignition coil harness connector.
Ignition on, engine not running.
Using a 12-volt test light connected to ground, probe the (K343) ASD
Relay Output circuit at the coil harness connector.
With the scan tool, actuate the ASD Relay.
Does the test light illuminate brightly?
Ye s>>
Go To 3
No>>
Inspect the related fuse. Repair the excessive resistance or
short to ground in the (K343) ASD Relay Output circuit.
Perform POWERTRAIN VERIFICATION TEST. (Refer to 9 -
ENGINE - STANDARD PROCEDURE)
CAUTION: Stop All Actuations.
Page 1247 of 5267
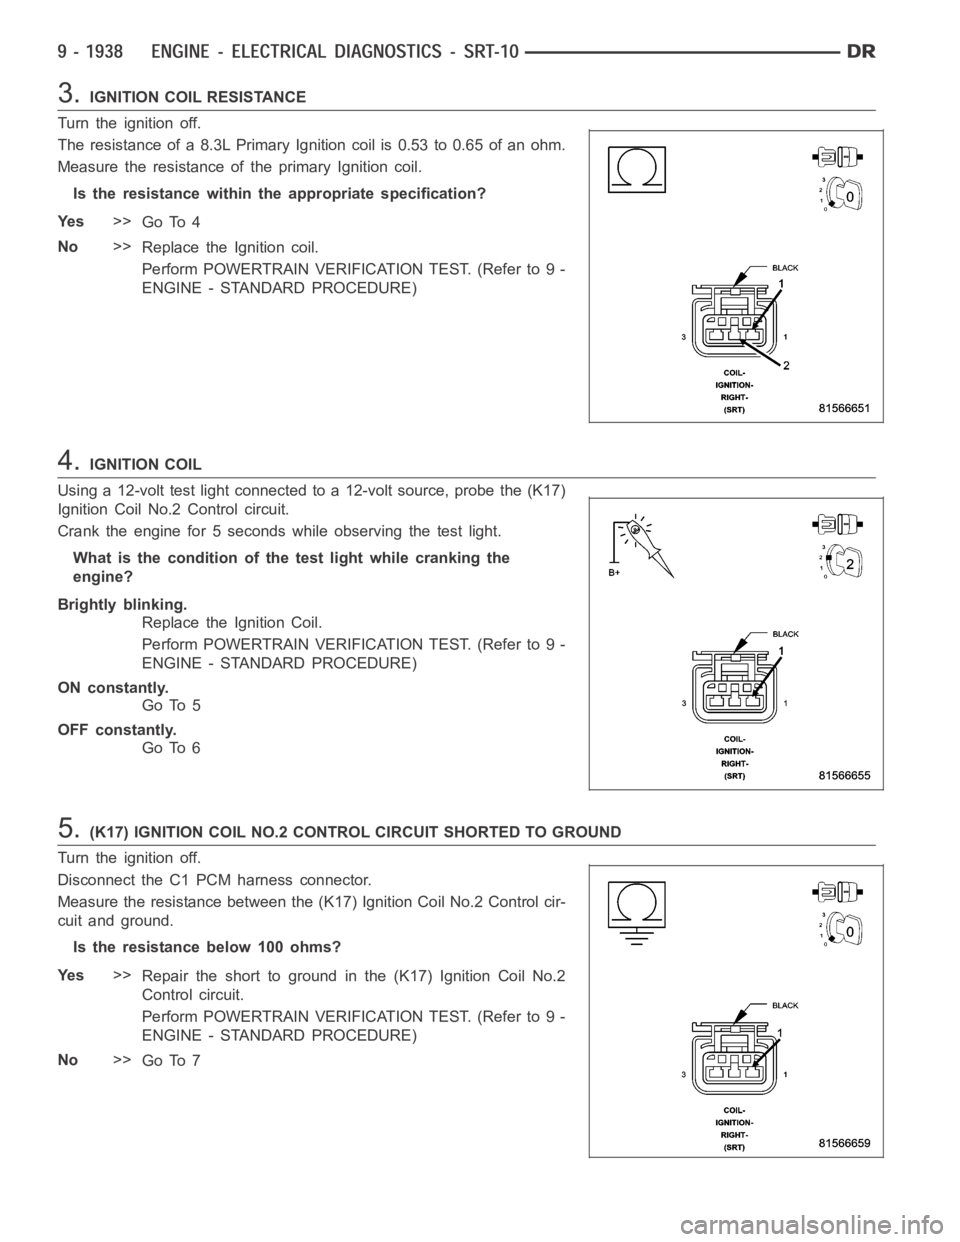
3.IGNITION COIL RESISTANCE
Turn the ignition off.
The resistance of a 8.3L Primary Ignition coil is 0.53 to 0.65 of an ohm.
Measure the resistance of the primary Ignition coil.
Is the resistance within the appropriate specification?
Ye s>>
Go To 4
No>>
Replace the Ignition coil.
Perform POWERTRAIN VERIFICATION TEST. (Refer to 9 -
ENGINE - STANDARD PROCEDURE)
4.IGNITION COIL
Using a 12-volt test light connected to a 12-volt source, probe the (K17)
Ignition Coil No.2 Control circuit.
Crank the engine for 5 seconds while observing the test light.
What is the condition of the test light while cranking the
engine?
Brightly blinking.
Replace the Ignition Coil.
Perform POWERTRAIN VERIFICATION TEST. (Refer to 9 -
ENGINE - STANDARD PROCEDURE)
ON constantly.
Go To 5
OFF constantly.
Go To 6
5.(K17) IGNITION COIL NO.2 CONTROL CIRCUIT SHORTED TO GROUND
Turn the ignition off.
Disconnect the C1 PCM harness connector.
Measure the resistance between the (K17) Ignition Coil No.2 Control cir-
cuit and ground.
Istheresistancebelow100ohms?
Ye s>>
Repair the short to ground in the (K17) Ignition Coil No.2
Control circuit.
Perform POWERTRAIN VERIFICATION TEST. (Refer to 9 -
ENGINE - STANDARD PROCEDURE)
No>>
Go To 7
Page 1248 of 5267
6.(K17) IGNITION COIL NO.2 CONTROL CIRCUIT OPEN
Turn the ignition off.
Disconnect the C1 PCM harness connector.
Measure the resistance of the (K17) Ignition Coil No.2 Control circuit
from the Ignition Coil connector to the PCM connector.
Is the resistance below 5.0 ohms?
Ye s>>
Go To 7
No>>
Repair the open in the (K17) Ignition Coil No.2 Control cir-
cuit.
Perform POWERTRAIN VERIFICATION TEST. (Refer to 9 -
ENGINE - STANDARD PROCEDURE)
7.PCM
NOTE: Before continuing, check the PCM harness connector terminals for corrosion, damage, or terminal
push out. Repair as necessary.
Using the schematics as a guide, inspect the wire harness and connectors. Pay particular attention to all Power and
Ground circuits.
If there are no possible causes remaining, view repair.
Repair
Replace and program the Powertrain Control Module per Service Information.
Perform POWERTRAIN VERIFICATION TEST. (Refer to 9 - ENGINE - STANDARD PROCEDURE)
Page 1250 of 5267
When Monitored:
With battery voltage greater than 8 volts during engine cranking or greater than 12 volts with engine running,
engine rpm less than 2016, and none of the coils in dwell when checked.
Set Condition:
Peak current is not achieved with battery based dwell plus 1.5 ms of diagnostic offset. It takes less than 3
seconds during cranking or up to 6 seconds while running to set.
Possible Causes
(K343) ASD RELAY OUTPUT CIRCUIT
IGNITION COIL
(K18) IGNITION COIL CONTROL NO.3 CIRCUIT OPEN
(K18) IGNITION COIL CONTROL NO.3 CIRCUIT SHORTED TO GROUND
PCM
Always perform the Pre-Diagnostic Troubleshooting procedure before proceeding. (Refer to 9 - ENGINE -
DIAGNOSIS AND TESTING)
1.GOOD TRIP EQUAL TO ZERO
Ignition on, engine not running.
With the scan tool, read DTCs and record the related Freeze Frame data.
Is the Good Trip Counter displayed and equal to zero?
Ye s>>
Go To 2
No>>
Refer to the INTERMITTENT CONDTION Diagnostic Procedure.
Perform POWERTRAIN VERIFICATION TEST. (Refer to 9 - ENGINE - STANDARD PROCEDURE)
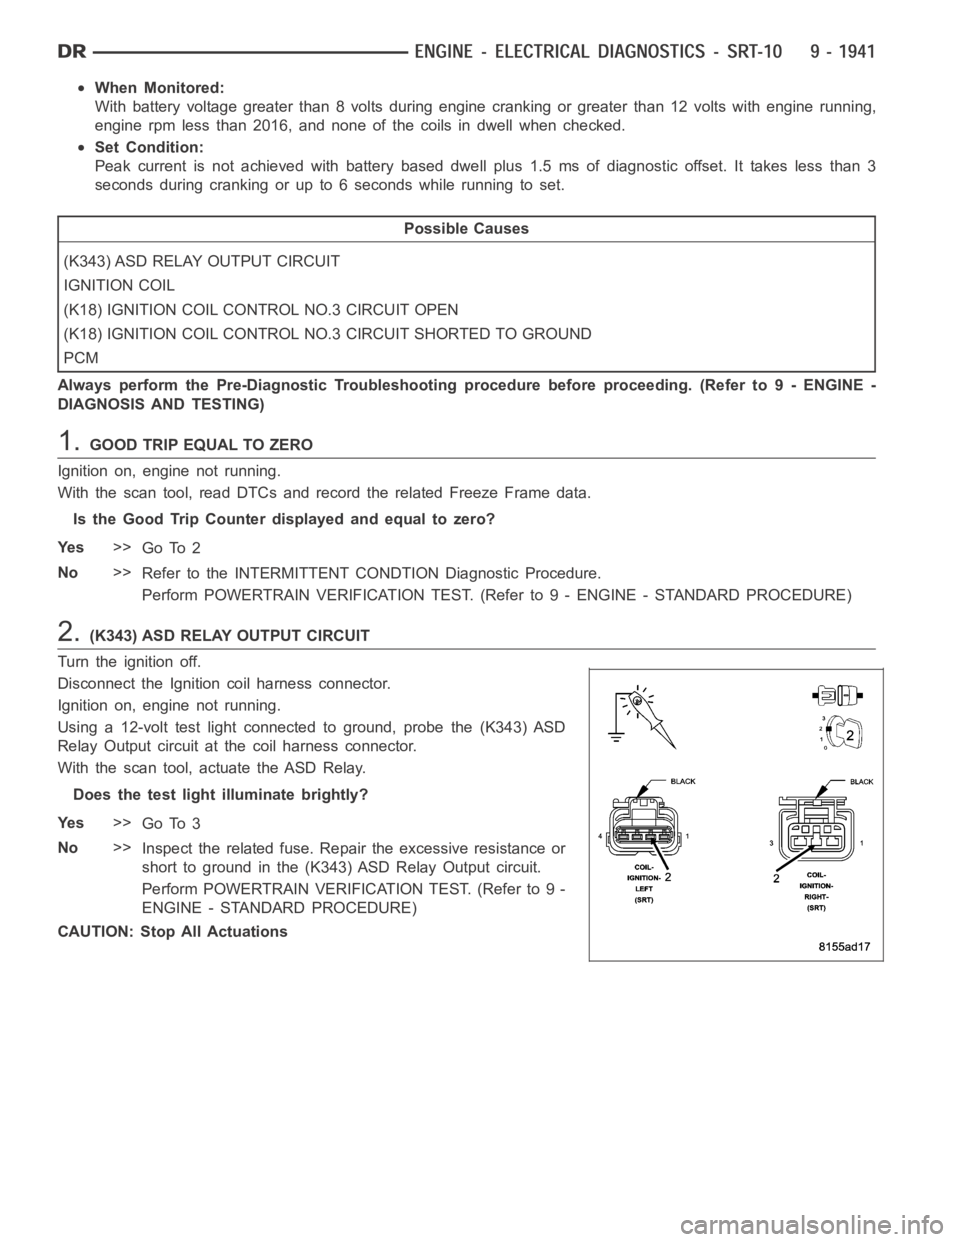
2.(K343) ASD RELAY OUTPUT CIRCUIT
Turn the ignition off.
Disconnect the Ignition coil harness connector.
Ignition on, engine not running.
Using a 12-volt test light connected to ground, probe the (K343) ASD
Relay Output circuit at the coil harness connector.
With the scan tool, actuate the ASD Relay.
Does the test light illuminate brightly?
Ye s>>
Go To 3
No>>
Inspect the related fuse. Repair the excessive resistance or
short to ground in the (K343) ASD Relay Output circuit.
Perform POWERTRAIN VERIFICATION TEST. (Refer to 9 -
ENGINE - STANDARD PROCEDURE)
CAUTION: Stop All Actuations
Page 1251 of 5267
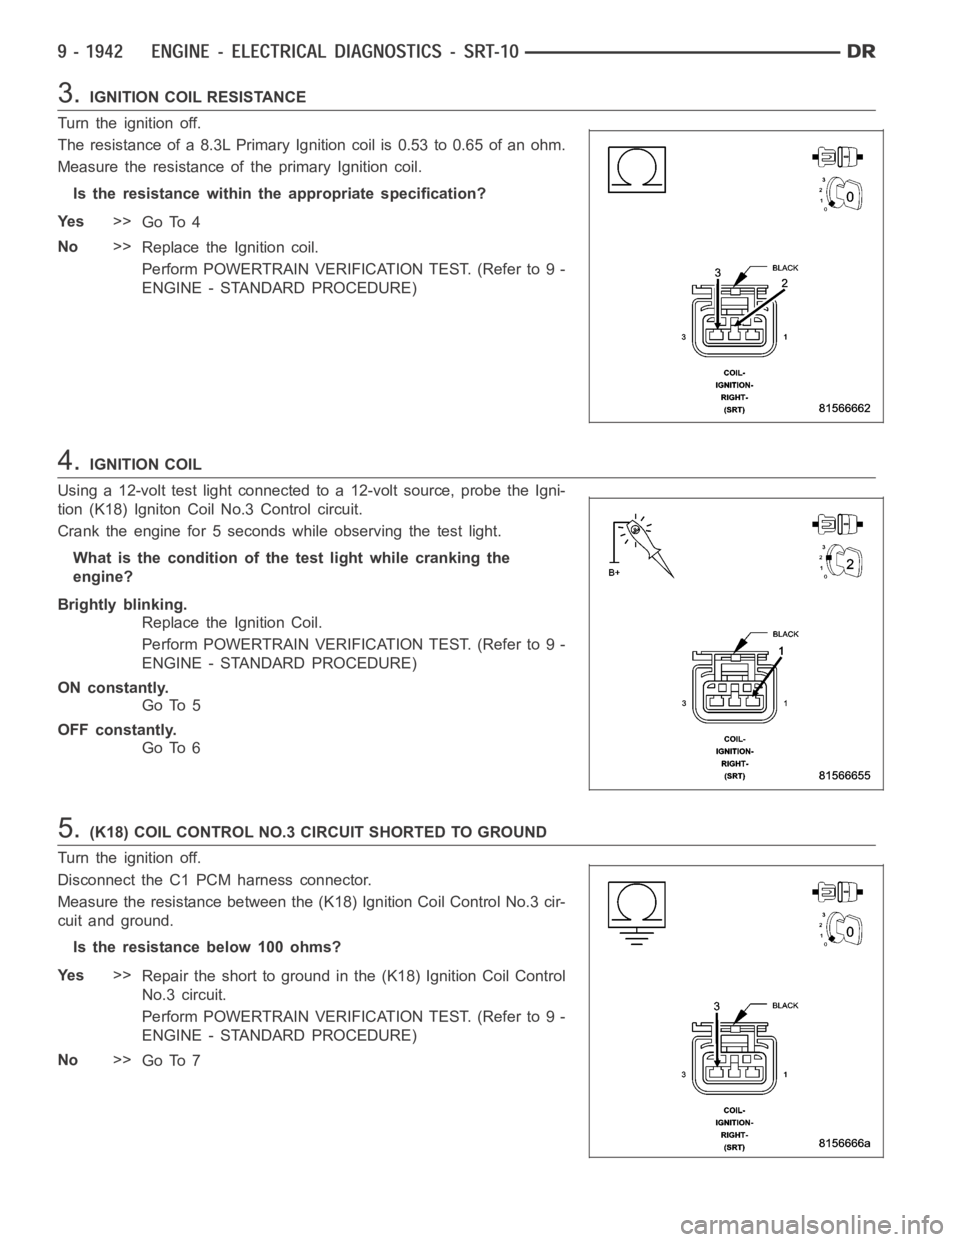
3.IGNITION COIL RESISTANCE
Turn the ignition off.
The resistance of a 8.3L Primary Ignition coil is 0.53 to 0.65 of an ohm.
Measure the resistance of the primary Ignition coil.
Is the resistance within the appropriate specification?
Ye s>>
Go To 4
No>>
Replace the Ignition coil.
Perform POWERTRAIN VERIFICATION TEST. (Refer to 9 -
ENGINE - STANDARD PROCEDURE)
4.IGNITION COIL
Using a 12-volt test light connected to a 12-volt source, probe the Igni-
tion (K18) Igniton Coil No.3 Control circuit.
Crank the engine for 5 seconds while observing the test light.
What is the condition of the test light while cranking the
engine?
Brightly blinking.
Replace the Ignition Coil.
Perform POWERTRAIN VERIFICATION TEST. (Refer to 9 -
ENGINE - STANDARD PROCEDURE)
ON constantly.
Go To 5
OFF constantly.
Go To 6
5.(K18) COIL CONTROL NO.3 CIRCUIT SHORTED TO GROUND
Turn the ignition off.
Disconnect the C1 PCM harness connector.
Measure the resistance between the (K18) Ignition Coil Control No.3 cir-
cuit and ground.
Istheresistancebelow100ohms?
Ye s>>
Repair the short to ground in the (K18) Ignition Coil Control
No.3 circuit.
Perform POWERTRAIN VERIFICATION TEST. (Refer to 9 -
ENGINE - STANDARD PROCEDURE)
No>>
Go To 7
Page 1252 of 5267
6.(K18) IGNITION COIL CONTROL NO.3 CIRCUIT OPEN
Turn the ignition off.
Disconnect the C1 PCM harness connector.
Measure the resistance of the (K18) Ignition Coil Control No.3 circuit
from the Ignition Coil connector to the PCM connector.
Is the resistance below 5.0 ohms?
Ye s>>
Go To 7
No>>
Repair the open in the (K18) Ignition Coil Control No.3 cir-
cuit.
Perform POWERTRAIN VERIFICATION TEST. (Refer to 9 -
ENGINE - STANDARD PROCEDURE)
7.PCM
NOTE: Before continuing, check the PCM harness connector terminals for corrosion, damage, or terminal
push out. Repair as necessary.
Using the schematics as a guide, inspect the wire harness and connectors. Pay particular attention to all Power and
Ground circuits.
If there are no possible causes remaining, view repair.
Repair
Replace and program the Powertrain Control Module per Service Information.
Perform POWERTRAIN VERIFICATION TEST. (Refer to 9 - ENGINE - STANDARD PROCEDURE)
Page 1254 of 5267
When Monitored:
With battery voltage greater than 8 volts during engine cranking or greater than 12 volts with engine running,
engine rpm less than 2016, and none of the coils in dwell when checked.
Set Condition:
Peak current is not achieved with battery based dwell plus 1.5 ms of diagnostic offset. It takes less than 3
seconds during cranking or up to 6 seconds while running to set.
Possible Causes
(K343) ASD RELAY OUTPUT CIRCUIT
IGNITION COIL
(K133) IGNITION COIL CONTROL NO.4 CIRCUIT OPEN
(K133) IGNITION COIL CONTROL NO.4 CIRCUIT SHORTED TO GROUND
PCM
Always perform the Pre-Diagnostic Troubleshooting procedure before proceeding. (Refer to 9 - ENGINE -
DIAGNOSIS AND TESTING)
1.GOOD TRIP EQUAL TO ZERO
Ignition on, engine not running.
With the scan tool, read DTCs and record the related Freeze Frame data.
Is the Good Trip Counter displayed and equal to zero?
Ye s>>
Go To 2
No>>
Refer to the INTERMITTENT CONDTION Diagnostic Procedure.
Perform POWERTRAIN VERIFICATION TEST. (Refer to 9 - ENGINE - STANDARD PROCEDURE)
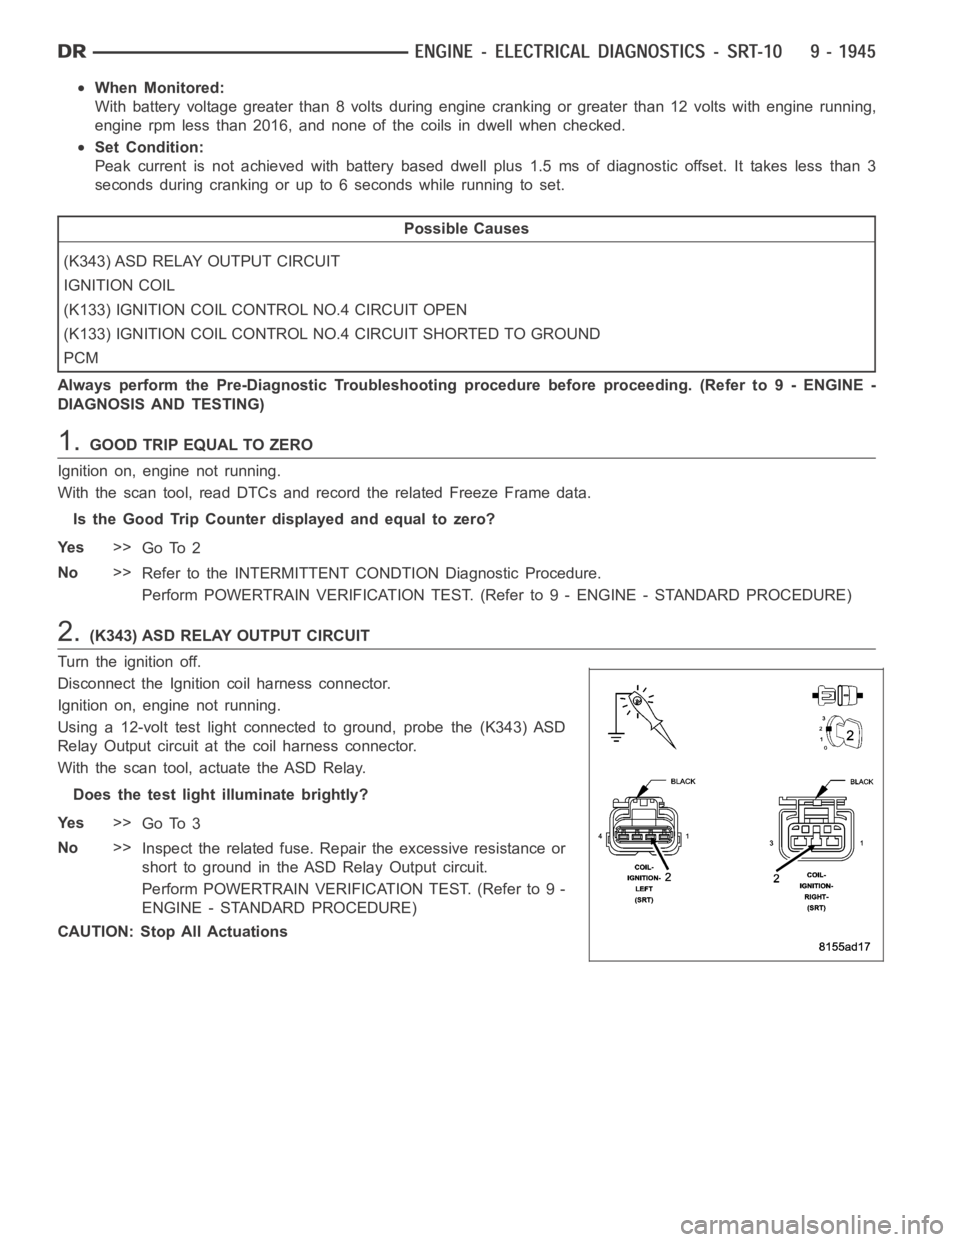
2.(K343) ASD RELAY OUTPUT CIRCUIT
Turn the ignition off.
Disconnect the Ignition coil harness connector.
Ignition on, engine not running.
Using a 12-volt test light connected to ground, probe the (K343) ASD
Relay Output circuit at the coil harness connector.
With the scan tool, actuate the ASD Relay.
Does the test light illuminate brightly?
Ye s>>
Go To 3
No>>
Inspect the related fuse. Repair the excessive resistance or
short to ground in the ASD Relay Output circuit.
Perform POWERTRAIN VERIFICATION TEST. (Refer to 9 -
ENGINE - STANDARD PROCEDURE)
CAUTION: Stop All Actuations