Page 2042 of 4500
a. Stop the vehicle on a level place.
b. Using a hexagon wrench (10 mm), remove the rear differential filler plug and gasket.
c. Check that the oil surface is within 5 mm (0.20 in.) of the lowest position of the inner surface of the
differential filler plug opening.
Fig. 4: Inspecting And Adjusting Differential Oil
Courtesy of TOYOTA MOTOR SALES, U.S.A., INC.
d. Check for oil leakage when the oil level is low.
e. Using a hexagon wrench (10 mm), install the rear differential filler plug with a new gasket.
Torque: 49 N.m (500 kgf.cm, 36 ft.lbf)
2.ADD DIFFERENTIAL OIL
a. Using a hexagon wrench (10 mm), remove the rear differential filler plug and gasket.
b. Add oil.
Oil type: Differential synthetic gear oil GL-5 75W-90 or equivalent
Capacity: 1.35 +/- 0.05 liters (1.43 +/- 0.05 US qts, 1.19 +/- 0.04 Imp. qts)
Page 2043 of 4500
c. Check the oil level.
d. Using a hexagon wrench (10 mm), install the rear differential filler plug with a new gasket.
Torque: 49 N.m (500 kgf.cm, 36 ft.lbf)
REPLACEMENT
HINT:
See COMPONENTS
Use the same procedures for the RH side and LH side.
1.REMOVE REAR WHEEL
2.REMOVE REAR DIFFERENTIAL FILLER PLUG
a. Using a hexagon wrench (10 mm), remove the filler plug and gasket.
3.REMOVE REAR DIFFERENTIAL DRAIN PLUG
a. Using a hexagon wrench (10 mm), remove the drain plug and gasket.
b. Drain the differential oil.
4.REMOVE REAR DRIVE SHAFT ASSY LH (SEE REPLACEMENT
)
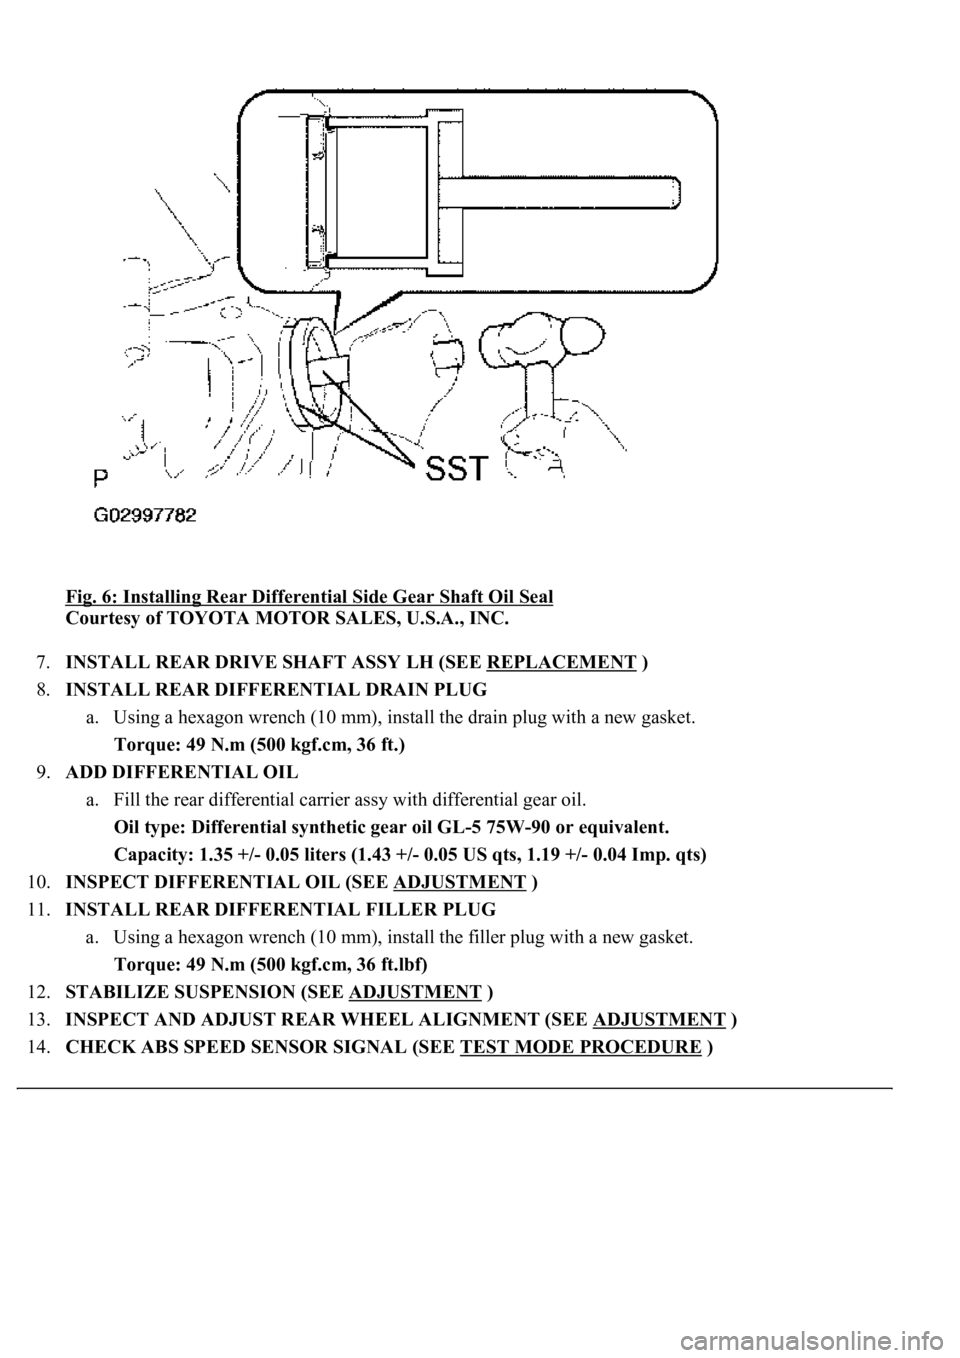
5.REMOVE REAR DIFFERENTIAL SIDE GEAR SHAFT OIL SEAL
a. Using SST, remove the oil seal.
SST 09308-10010
Page 2045 of 4500

Fig. 6: Installing Rear Differential Side Gear Shaft Oil Seal
Courtesy of TOYOTA MOTOR SALES, U.S.A., INC.
7.INSTALL REAR DRIVE SHAFT ASSY LH (SEE REPLACEMENT
)
8.INSTALL REAR DIFFERENTIAL DRAIN PLUG
a. Using a hexagon wrench (10 mm), install the drain plug with a new gasket.
Torque: 49 N.m (500 kgf.cm, 36 ft.)
9.ADD DIFFERENTIAL OIL
a. Fill the rear differential carrier assy with differential gear oil.
Oil type: Differential synthetic gear oil GL-5 75W-90 or equivalent.
<00260044005300440046004c0057005c001d000300140011001600180003000e00120010000300130011001300180003004f004c00570048005500560003000b00140011001700160003000e00120010000300130011001300180003003800360003005400
570056000f0003001400110014001c0003000e001200100003[0.04 Imp. qts)
10.INSPECT DIFFERENTIAL OIL (SEE ADJUSTMENT
)
11.INSTALL REAR DIFFERENTIAL FILLER PLUG
a. Using a hexagon wrench (10 mm), install the filler plug with a new gasket.
Torque: 49 N.m (500 kgf.cm, 36 ft.lbf)
12.STABILIZE SUSPENSION (SEE ADJUSTMENT
)
13.INSPECT AND ADJUST REAR WHEEL ALIGNMENT (SEE ADJUSTMENT
)
14.CHECK ABS SPEED SENSOR SIGNAL (SEE TEST MODE PROCEDURE
)
Page 2061 of 4500
If the runout is greater than the maximum, replace the drive pinion and ring gear.
Fig. 21: Inspecting Runout Of Differential Drive Pinion
Courtesy of TOYOTA MOTOR SALES, U.S.A., INC.
22.INSPECT DIFFERENTIAL DRIVE PINION PRELOAD
a. Using SST and a torque wrench, measure the preload using the backlash of the drive pinion and
ring gear.
SST 09229-55010
Drive pinion preload (at starting):
0.5 to 0.8 N.m (5 to 8 kgf.cm, 4.3 to 6.9 in..lbf)
If the preload is not within the specification, adjust the rear differential drive pinion preload or repair as
necessar
y.
Page 2062 of 4500
Fig. 22: Inspecting Differential Drive Pinion Preload
Courtesy of TOYOTA MOTOR SALES, U.S.A., INC.
23.INSPECT TOTAL PRELOAD
a. Using SST and a torque wrench, measure the preload with the teeth of the drive pinion and ring
gear in contact.
SST 09229-55010
Total preload (at starting):
Drive pinion preload plus 0.46 to 1.37 N.m
(4.69 to 13.97 kgf.cm, 4.07 to 12.13 in..lbf)
If necessary, disassemble and inspect the differential.
Page 2099 of 4500
Fig. 59: Installing Rear Differential Case Bolt
Courtesy of TOYOTA MOTOR SALES, U.S.A., INC.
c. Torque the 10 set bolts uniformly and a little at a time.
Torque: 64 N.m (650 kgf.cm, 47 ft.lbf)
Tighten the bolts further by 60 to 90°
Page 2107 of 4500
Fig. 67: Adjusting Drive Pinion Preload
Courtesy of TOYOTA MOTOR SALES, U.S.A., INC.
c. Using SST and a torque wrench, measure the preload.
Drive pinion preload (at starting):
New bearing:
1.5 to 2.0 N.m (15 to 21 kgf.cm, 13 to 18 in..lbf)
Reused bearing:
0.5 to 0.8 N.m (5 to 8 kgf.cm, 4.3 to 6.9 in..lbf)
HINT:
Do not apply hypoid gear oil if a new bearing is used.
Turn the bearing clockwise and counterclockwise several times to stabilize the bearing,
and then measure the backlash.
If the preload is not within the specification, adjust the rear differential drive pinion
preload or repair as necessar
y.
Page 2130 of 4500
Fig. 90: Checking Ring Gear Backlash
Courtesy of TOYOTA MOTOR SALES, U.S.A., INC.
ADJUST TOTAL PRELOAD
a. Using SST and a torque wrench, measure the preload with the teeth of the drive pinion
and ring gear in contact.
b. SST 09229-55010
Total preload (at starting):
Drive pinion preload plus 0.46 to 1.37 N.m
(4.69 to 13.97 kgf.cm, 4.07 to 12.13 in..lbf)
If the preload is greater than the specification, replace the rear differential side
gear shaft snap ring of the ring gear's tooth surface side with a thinner one.