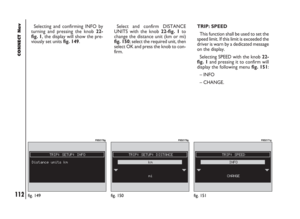
Page 129 of 246

CONNECT Nav
128
Calling a destination
from the list of destinations
with voice recognition
Pronouncing 1
stlevel keyword “Nav-
igator” and then the 2ndlevel one
“Destination” opens a dialogue en-
abling the following keywords:
– Cancel
– Delete
– Abort
– Repeat
– Send.First example:
User: Navigator -
Destination
CONNECT: The destination,
please
User: Office
CONNECT: Office
User: Send
CONNECT: The destination
is being entered.
Second example:
User: Navigator -
Destination
CONNECT: The list of
destinations is
empty.
Third example:
User: Navigator -
Destination
CONNECT: The destination,
please
User: Office Milano
CONNECT: Please repeat
User: Milano Office
CONNECT: Milano Office
User: Send
CONNECT: The destination
is being entered.Fourth example:
User: Navigator -
Destination
CONNECT: The destination,
please
User: Anna’s house
CONNECT: Vanna’s house
User: Repeat
CONNECT: Vanna’s house
User: Delete
CONNECT: The destination,
please
User: Anna’s house
CONNECT: Anna’s house
User: Send
CONNECT: The destination
is being entered.
Page 130 of 246
CONNECT Nav
129
Deleting a destination
from the list of destinations
Pronouncing 1
stlevel keyword “Nav-
igator” and then “List of destinations,
Delete, Destination” will open a dia-
logue enabling the following keywords:
– Yes
– No
– Cancel
– Delete
– Abort
– Repeat.First example:
User: Navigator -
List of destinations -
Delete -
Destination.
CONNECT: The destination,
please
User: Home
CONNECT: Do you wish to
delete (Home)?
User: Yes
CONNECT: The destination
has been deleted.Second example:
User: Navigator -
List of destinations -
Delete -
Destination.
CONNECT: The destination,
please
User: Torino
CONNECT: Do you wish to
delete (Toirano)?
User: Repeat
CONNECT: Do you wish to
delete (Toirano)?
User: No
CONNECT: Abort.
Third example:
User: Navigator -
List of destinations -
Delete -
Destination.
CONNECT: The list of
destinations is
empty.
Page 131 of 246
CONNECT Nav
130
First example:
CONNECT: The destination,
please
User: Office
CONNECT: Office
User: Abort
CONNECT Abort. Fourth example:
User: Navigator -
List of destinations -
Delete -
Destination.
CONNECT: The destination,
please
User: Office Milano
CONNECT: Do you wish
to delete
(Office Milano)?
User: Cancel
CONNECT: The destination,
please
User: Paola’s house
CONNECT: Do you wish
to delete
(Paola’s house)?
User: Yes
CONNECT: The destination
has been deleted.Stopping the dialogue
To stop a dialogue, pronounce
“Abort” keyword. Keywords entered
before pronouncing “abort”, are delet-
ed.
“Abort” is recognized by the system
only in “voice recognition without
voice identification” mode.
Page 132 of 246

CONNECT Nav
131
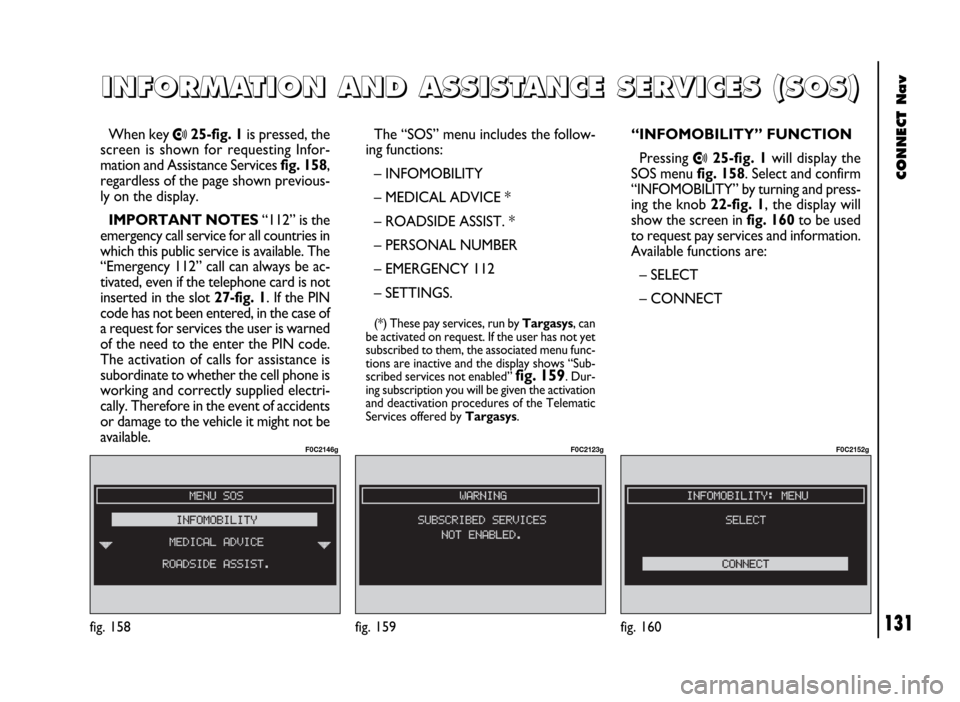
When key •25-fig. 1is pressed, the
screen is shown for requesting Infor-
mation and Assistance Services fig. 158,
regardless of the page shown previous-
ly on the display.
IMPORTANT NOTES“112” is the
emergency call service for all countries in
which this public service is available. The
“Emergency 112” call can always be ac-
tivated, even if the telephone card is not
inserted in the slot 27-fig. 1. If the PIN
code has not been entered, in the case of
a request for services the user is warned
of the need to the enter the PIN code.
The activation of calls for assistance is
subordinate to whether the cell phone is
working and correctly supplied electri-
cally. Therefore in the event of accidents
or damage to the vehicle it might not be
available.The “SOS” menu includes the follow-
ing functions:
– INFOMOBILITY
– MEDICAL ADVICE *
– ROADSIDE ASSIST. *
– PERSONAL NUMBER
– EMERGENCY 112
– SETTINGS.
(*) These pay services, run by Targasys, can
be activated on request. If the user has not yet
subscribed to them, the associated menu func-
tions are inactive and the display shows “Sub-
scribed services not enabled”
fig. 159. Dur-
ing subscription you will be given the activation
and deactivation procedures of the Telematic
Services offered by Targasys.
I I
N N
F F
O O
R R
M M
A A
T T
I I
O O
N N
A A
N N
D D
A A
S S
S S
I I
S S
T T
A A
N N
C C
E E
S S
E E
R R
V V
I I
C C
E E
S S
( (
S S
O O
S S
) )
fig. 158
F0C2146g
“INFOMOBILITY” FUNCTION
Pressing
•25-fig. 1will display the
SOS menu fig. 158. Select and confirm
“INFOMOBILITY” by turning and press-
ing the knob 22-fig. 1, the display will
show the screen in fig. 160to be used
to request pay services and information.
Available functions are:
– SELECT
– CONNECT
fig. 160
F0C2152g
fig. 159
F0C2123g
Page 133 of 246

CONNECT Nav
132
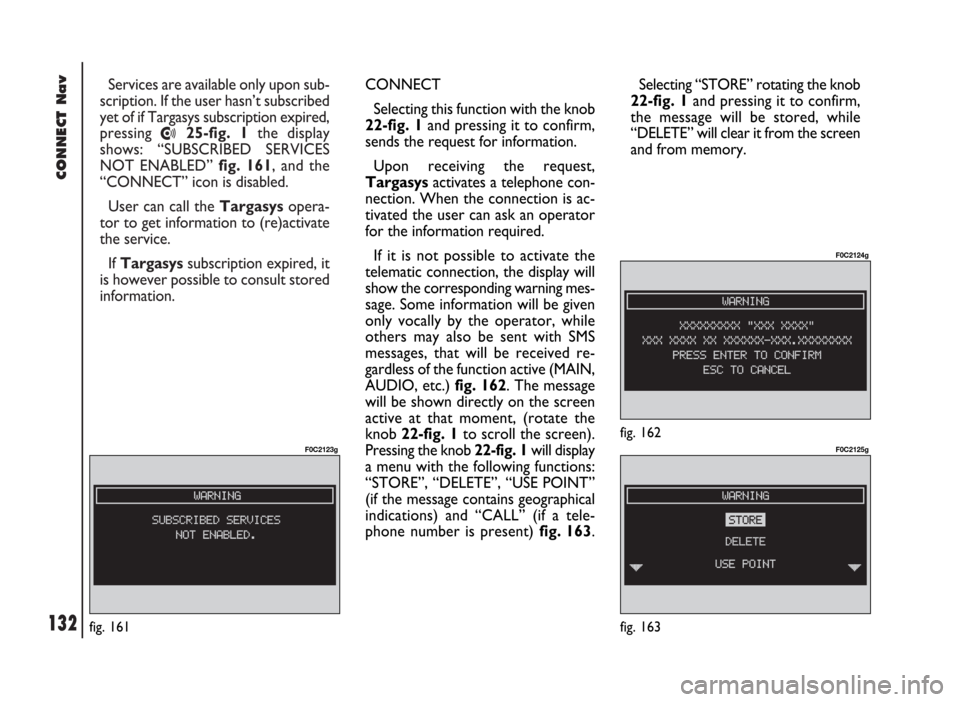
Services are available only upon sub-
scription. If the user hasn’t subscribed
yet of if Targasys subscription expired,
pressing
•25-fig. 1the display
shows: “SUBSCRIBED SERVICES
NOT ENABLED” fig. 161, and the
“CONNECT” icon is disabled.
User can call the Targasysopera-
tor to get information to (re)activate
the service.
If Targasyssubscription expired, it
is however possible to consult stored
information.
fig. 161
F0C2123g
CONNECT
Selecting this function with the knob
22-fig. 1and pressing it to confirm,
sends the request for information.
Upon receiving the request,
Targasysactivates a telephone con-
nection. When the connection is ac-
tivated the user can ask an operator
for the information required.
If it is not possible to activate the
telematic connection, the display will
show the corresponding warning mes-
sage. Some information will be given
only vocally by the operator, while
others may also be sent with SMS
messages, that will be received re-
gardless of the function active (MAIN,
AUDIO, etc.) fig. 162. The message
will be shown directly on the screen
active at that moment, (rotate the
knob 22-fig. 1to scroll the screen).
Pressing the knob 22-fig. 1 will display
a menu with the following functions:
“STORE”, “DELETE”, “USE POINT”
(if the message contains geographical
indications) and “CALL” (if a tele-
phone number is present) fig. 163. Selecting “STORE” rotating the knob
22-fig. 1and pressing it to confirm,
the message will be stored, while
“DELETE” will clear it from the screen
and from memory.
fig. 162
F0C2124g
fig. 163
F0C2125g
Page 134 of 246

CONNECT Nav
133
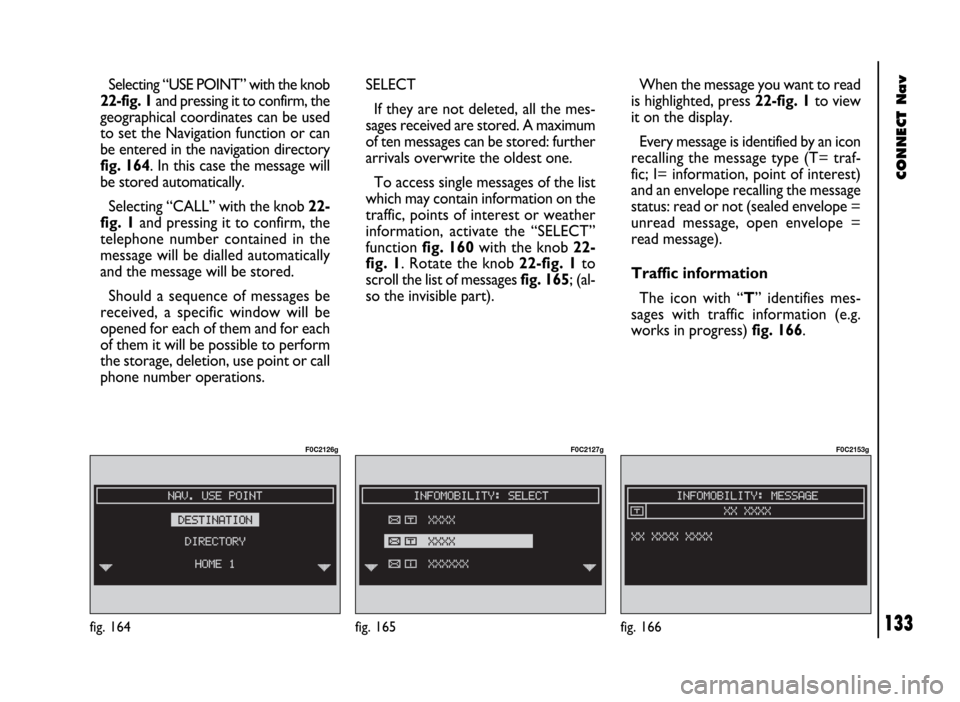
Selecting “USE POINT” with the knob
22-fig. 1and pressing it to confirm, the
geographical coordinates can be used
to set the Navigation function or can
be entered in the navigation directory
fig. 164. In this case the message will
be stored automatically.
Selecting “CALL” with the knob 22-
fig. 1and pressing it to confirm, the
telephone number contained in the
message will be dialled automatically
and the message will be stored.
Should a sequence of messages be
received, a specific window will be
opened for each of them and for each
of them it will be possible to perform
the storage, deletion, use point or call
phone number operations.
fig. 164
F0C2126g
SELECT
If they are not deleted, all the mes-
sages received are stored. A maximum
of ten messages can be stored: further
arrivals overwrite the oldest one.
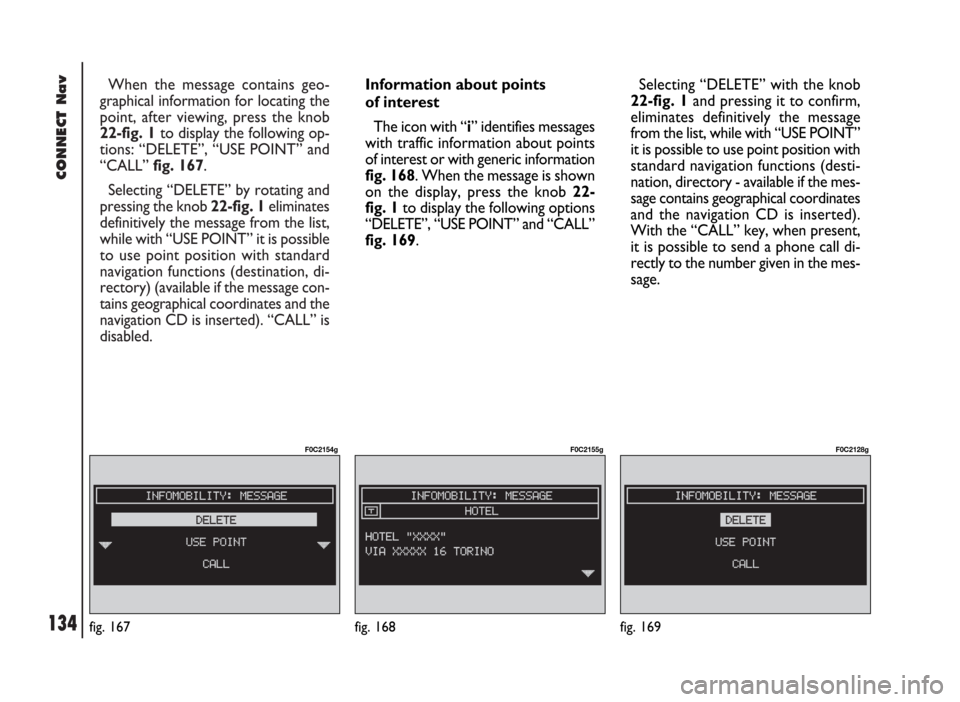
To access single messages of the list
which may contain information on the
traffic, points of interest or weather
information, activate the “SELECT”
function fig. 160with the knob 22-
fig. 1. Rotate the knob 22-fig. 1to
scroll the list of messages fig. 165; (al-
so the invisible part).When the message you want to read
is highlighted, press 22-fig. 1to view
it on the display.
Every message is identified by an icon
recalling the message type (T= traf-
fic; I= information, point of interest)
and an envelope recalling the message
status: read or not (sealed envelope =
unread message, open envelope =
read message).
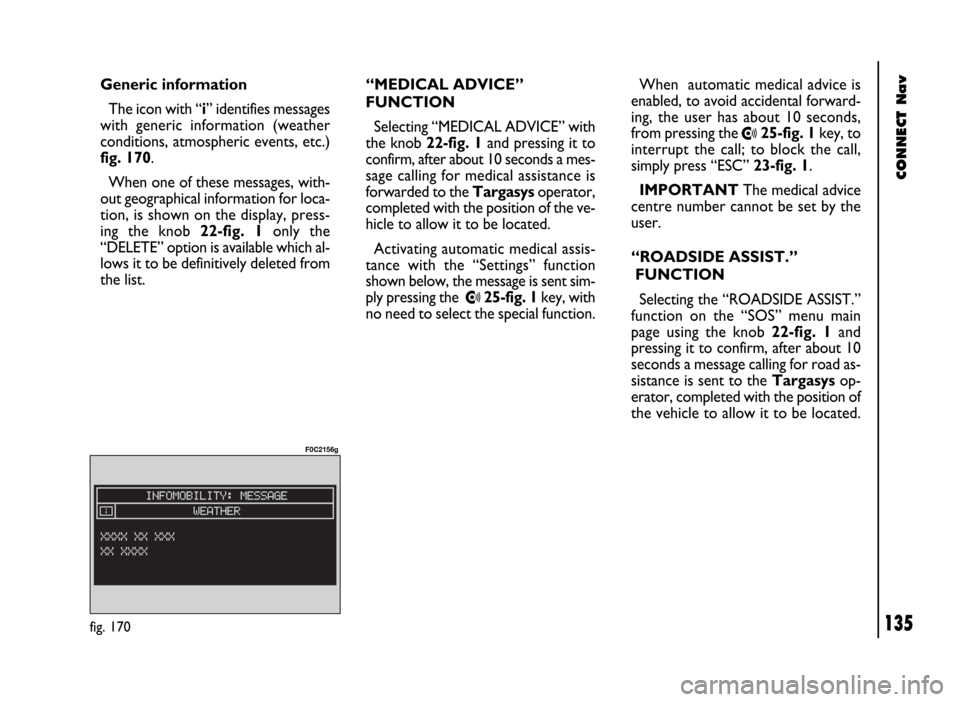
Traffic information
The icon with “T” identifies mes-
sages with traffic information (e.g.
works in progress) fig. 166.
fig. 165
F0C2127g
fig. 166
F0C2153g
Page 135 of 246

CONNECT Nav
134
When the message contains geo-
graphical information for locating the
point, after viewing, press the knob
22-fig. 1to display the following op-
tions: “DELETE”, “USE POINT” and
“CALL” fig. 167.
Selecting “DELETE” by rotating and
pressing the knob 22-fig. 1eliminates
definitively the message from the list,
while with “USE POINT” it is possible
to use point position with standard
navigation functions (destination, di-
rectory) (available if the message con-
tains geographical coordinates and the
navigation CD is inserted). “CALL” is
disabled.
fig. 167
F0C2154g
Information about points
of interest
The icon with “i” identifies messages
with traffic information about points
of interest or with generic information
fig. 168. When the message is shown
on the display, press the knob 22-
fig. 1to display the following options
“DELETE”, “USE POINT” and “CALL”
fig. 169.Selecting “DELETE” with the knob
22-fig. 1and pressing it to confirm,
eliminates definitively the message
from the list, while with “USE POINT”
it is possible to use point position with
standard navigation functions (desti-
nation, directory - available if the mes-
sage contains geographical coordinates
and the navigation CD is inserted).
With the “CALL” key, when present,
it is possible to send a phone call di-
rectly to the number given in the mes-
sage.
fig. 168
F0C2155g
fig. 169
F0C2128g
Page 136 of 246

CONNECT Nav
135
When automatic medical advice is
enabled, to avoid accidental forward-
ing, the user has about 10 seconds,
from pressing the
•25-fig. 1key, to
interrupt the call; to block the call,
simply press “ESC” 23-fig. 1.
IMPORTANTThe medical advice
centre number cannot be set by the
user.
“ROADSIDE ASSIST.”
FUNCTION
Selecting the “ROADSIDE ASSIST.”
function on the “SOS” menu main
page using the knob 22-fig. 1and
pressing it to confirm, after about 10
seconds a message calling for road as-
sistance is sent to the Targasysop-
erator, completed with the position of
the vehicle to allow it to be located. Generic information
The icon with “i” identifies messages
with generic information (weather
conditions, atmospheric events, etc.)
fig. 170.
When one of these messages, with-
out geographical information for loca-
tion, is shown on the display, press-
ing the knob 22-fig. 1 only the
“DELETE” option is available which al-
lows it to be definitively deleted from
the list.“MEDICAL ADVICE”
FUNCTION
Selecting “MEDICAL ADVICE” with
the knob 22-fig. 1and pressing it to
confirm, after about 10 seconds a mes-
sage calling for medical assistance is
forwarded to the Targasysoperator,
completed with the position of the ve-
hicle to allow it to be located.
Activating automatic medical assis-
tance with the “Settings” function
shown below, the message is sent sim-
ply pressing the
•25-fig. 1key, with
no need to select the special function.
fig. 170
F0C2156g