Page 169 of 246

CONNECT Nav+
168
IMPORTANTStarting the engine
when the modem function is on, will
cause the connection drop with data
loss as a consequence. Stooping the
engine has no effect on data transmis-
sion since the CONNECT Nav+ will
stay on for other 20 minutes. If a GSM
communication is in progress the sys-
tem will automatically activate a new
window for other 20 minutes. Long
GSM communications (with data
transmission) can run down the vehi-
cle battery.
Operation requirements
The modem function is operational
if the following conditions are present:
– CONNECT Nav+ on;
– SIM card inserted;
– sufficient credit;
– GSM coverage.Portable computer setting
SERIAL PORT SETTING
The computer serial port shall be set
for 9600bps data transmission speed.
For “Windows 95” proceed as fol-
lows:
– open “computer resources”
– open “control panel”
– open “system”
– open “peripheral control”
– select “com and LPT ports”
– select “COM1 communications
port”
– select “port setting”
– check: bit per second = 9600
data bit = 8
parity = no parity
stop bit = 1
flow control = Xon/Xoff
MODEM SETTING
The portable computer shall have the
modem. For “Windows 95” proceed
as follows:
– open “computer resources”
– open “control panel”
– open “modem”:
select add
select “modem types” = other
select “next” and follow the dis-
played instructions.
Page 170 of 246

CONNECT Nav+
169
Once the modem has been proper-
ly installed, the portable computer can
use all the applications provided for
telematic connections to data base -
external servers, etc.; more particu-
larly the following can be used:
– Hiper Terminal;
– Microsoft Explorer or Netscape
for Internet and its applications (pro-
vided the user has an “Internet
provider”);
– Microsoft Mail or Groupwise (for
e-mail address).To activate the Modem function,
proceed as follows:
– press the “MAIN” button17-fig. 1
to display the main screen;
– press the knob 22-fig. 1and turn
it to select “Setup” then press the
knob to confirm; the display will show
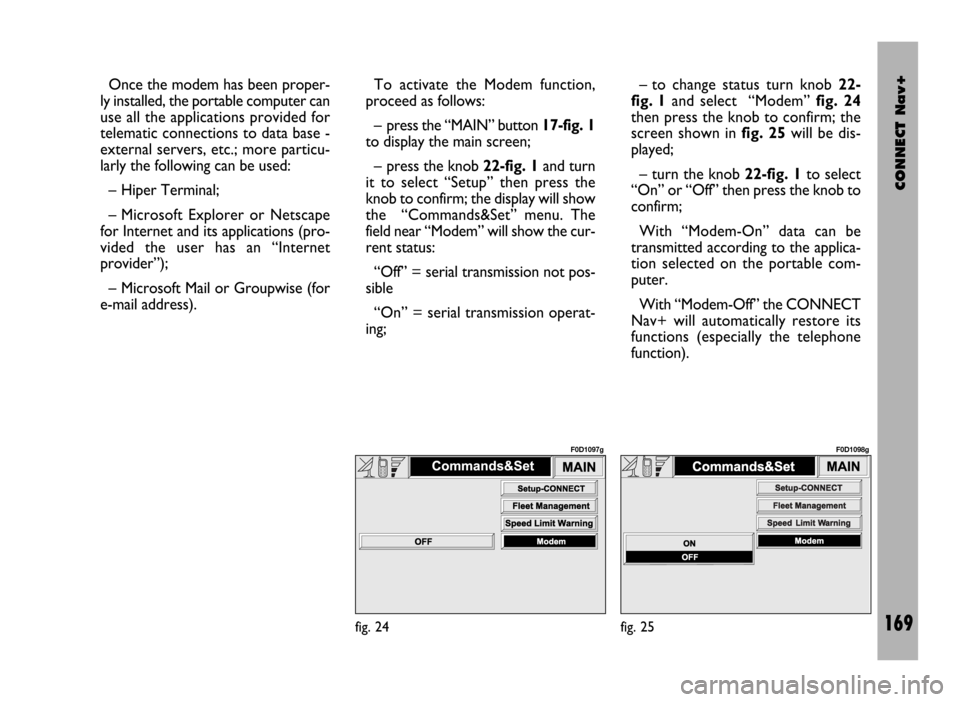
the “Commands&Set” menu. The
field near “Modem” will show the cur-
rent status:
“Off” = serial transmission not pos-
sible
“On” = serial transmission operat-
ing;– to change status turn knob 22-
fig. 1and select “Modem” fig. 24
then press the knob to confirm; the
screen shown in fig. 25will be dis-
played;
– turn the knob 22-fig. 1to select
“On” or “Off” then press the knob to
confirm;
With “Modem-On” data can be
transmitted according to the applica-
tion selected on the portable com-
puter.
With “Modem-Off” the CONNECT
Nav+ will automatically restore its
functions (especially the telephone
function).
fig. 24
F0D1097g
fig. 25
F0D1098g
Page 171 of 246
CONNECT Nav+
170
SETUP-CONNECT
Choosing this function, a screen with
the following system setup functions
is displayed fig. 26:
– Daytime brightness
– Nighttime brightness
– Colours
– Voice language
– Text language
– Distance units.“Daytime brightness” or “Nighttime
brightness” selected and confirmed
with knob 22-fig. 1, enable to vary the
display brightness in the provided val-
ue range.
“Colours” is used to select display
setting between “Day”, “Night” and
“Automatic”. “Automatic” enables au-
tomatic switching from day to night
(and vice versa) when turning the ex-
ternal lights on/off and according to
the light intensity in the passenger
compartment.Selecting “VR language” will enable
to set the language for the voice
recognition only.
– ITALIANO
– DEUTSCH
– ENGLISH
– ESPÃNOL
– FRANÇAIS
– PORTUGUÊS
– NEDERLANDS.
fig. 26
F0D1072g
Page 172 of 246

CONNECT Nav+
171
To change the CONNECT Nav+
language, set the required language and
the press “OK” to confirm.
A special message will then be dis-
played, asking the user to insert the
provided SETUP CD or to wait if the
SETUP CD is already inserted. A se-
ries of messages will inform the user
about procedure progress and end:
it is essential to not “disturb” the sys-
tem during this operation.
Do not start the engine or discon-
nect the battery during the language
change operation. Should this take place, the first time
you turn the CONNECT NAV+ on,
a special message will be displayed
communicating that the language
change operation shall be concluded
inserting the SETUP CD:
“WARNING: Language change failed.
Repeat procedure”.Distance units: this selection enables
to set the required unit (see “On-
board computer” - TRIP). Two selec-
tions are possible: km or mi, that can
be activated by turning knob
22-fig. 1; then press to confirm. Per-
formed selection will be immediately
displayed.
To quit the “Setup” screen and save
the chosen settings, select and confirm
“OK” with the knob 22-fig. 1.
Page 173 of 246

CONNECT Nav+
172
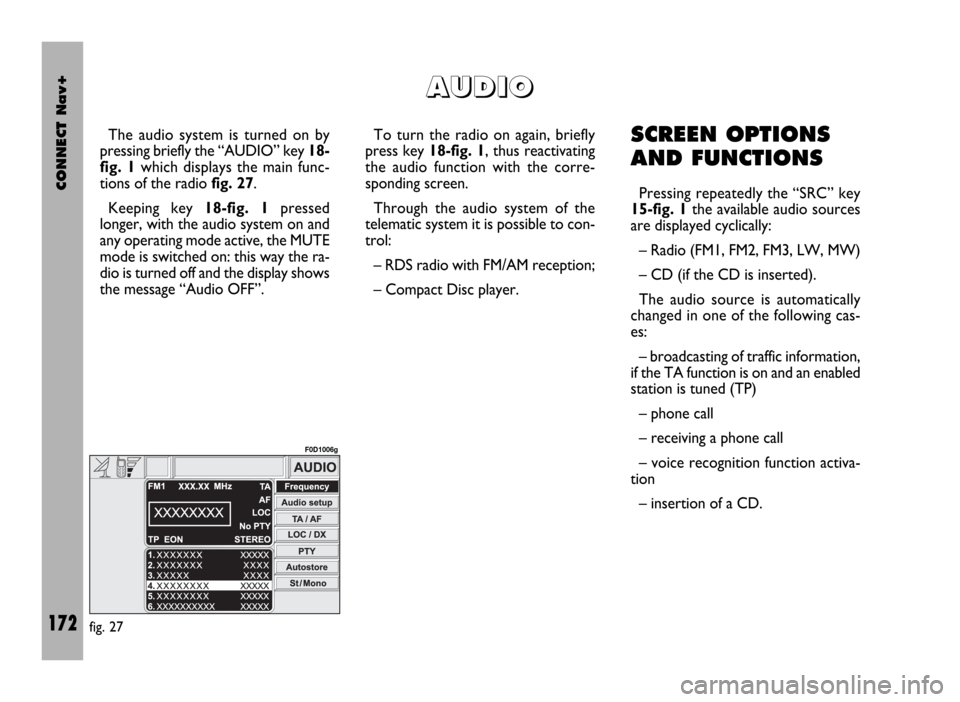
The audio system is turned on by
pressing briefly the “AUDIO” key 18-
fig. 1which displays the main func-
tions of the radio fig. 27.
Keeping key 18-fig. 1pressed
longer, with the audio system on and
any operating mode active, the MUTE
mode is switched on: this way the ra-
dio is turned off and the display shows
the message “Audio OFF”. To turn the radio on again, briefly
press key 18-fig. 1, thus reactivating
the audio function with the corre-
sponding screen.
Through the audio system of the
telematic system it is possible to con-
trol:
– RDS radio with FM/AM reception;
– Compact Disc player.SCREEN OPTIONS
AND FUNCTIONS
Pressing repeatedly the “SRC” key
15-fig. 1the available audio sources
are displayed cyclically:
– Radio (FM1, FM2, FM3, LW, MW)
– CD (if the CD is inserted).
The audio source is automatically
changed in one of the following cas-
es:
– broadcasting of traffic information,
if the TA function is on and an enabled
station is tuned (TP)
– phone call
– receiving a phone call
– voice recognition function activa-
tion
– insertion of a CD.
A A
U U
D D
I I
O O
fig. 27
F0D1006g
Page 174 of 246

CONNECT Nav+
173
“AUDIO SETUP”
FUNCTION
(AUDIO ADJUSTMENTS)
The audio parameters described in
this paragraph can be activated and
adjusted with all the audio sources
(Radio, CD).
Select and confirm “Audio setup”
from the main menu of one of the au-
dio sources, turning and pressing the
knob 22-fig. 1.
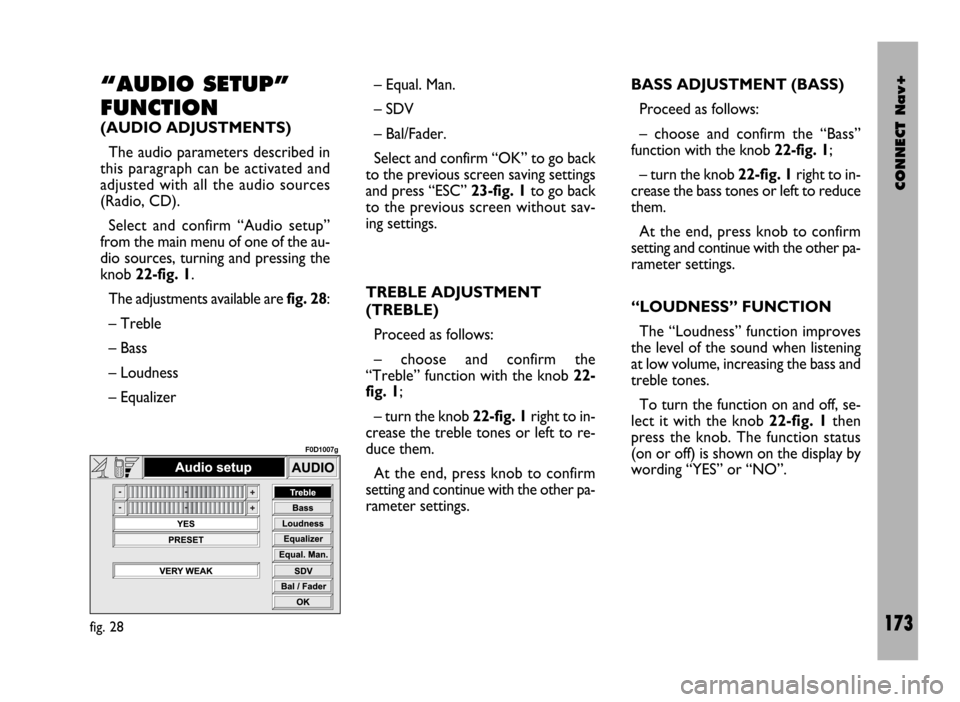
The adjustments available are fig. 28:
– Treble
– Bass
– Loudness
– Equalizer– Equal. Man.
– SDV
– Bal/Fader.
Select and confirm “OK” to go back
to the previous screen saving settings
and press “ESC” 23-fig. 1to go back
to the previous screen without sav-
ing settings.
TREBLE ADJUSTMENT
(TREBLE)
Proceed as follows:
– choose and confirm the
“Treble” function with the knob 22-
fig. 1;
– turn the knob 22-fig. 1right to in-
crease the treble tones or left to re-
duce them.
At the end, press knob to confirm
setting and continue with the other pa-
rameter settings. BASS ADJUSTMENT (BASS)
Proceed as follows:
– choose and confirm the “Bass”
function with the knob 22-fig. 1;
– turn the knob 22-fig. 1right to in-
crease the bass tones or left to reduce
them.
At the end, press knob to confirm
setting and continue with the other pa-
rameter settings.
“LOUDNESS” FUNCTION
The “Loudness” function improves
the level of the sound when listening
at low volume, increasing the bass and
treble tones.
To turn the function on and off, se-
lect it with the knob 22-fig. 1then
press the knob. The function status
(on or off) is shown on the display by
wording “YES” or “NO”.
fig. 28
F0D1007g
Page 175 of 246

CONNECT Nav+
174
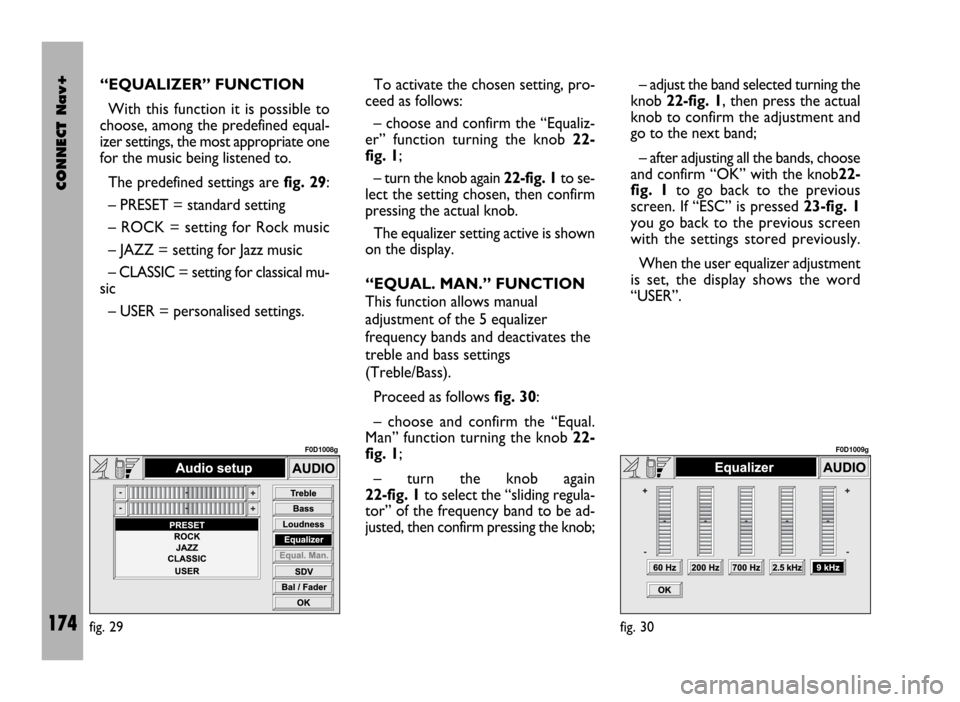
“EQUALIZER” FUNCTION
With this function it is possible to
choose, among the predefined equal-
izer settings, the most appropriate one
for the music being listened to.
The predefined settings are fig. 29:
– PRESET = standard setting
– ROCK = setting for Rock music
– JAZZ = setting for Jazz music
– CLASSIC = setting for classical mu-
sic
– USER = personalised settings.To activate the chosen setting, pro-
ceed as follows:
– choose and confirm the “Equaliz-
er” function turning the knob 22-
fig. 1;
– turn the knob again 22-fig. 1to se-
lect the setting chosen, then confirm
pressing the actual knob.
The equalizer setting active is shown
on the display.
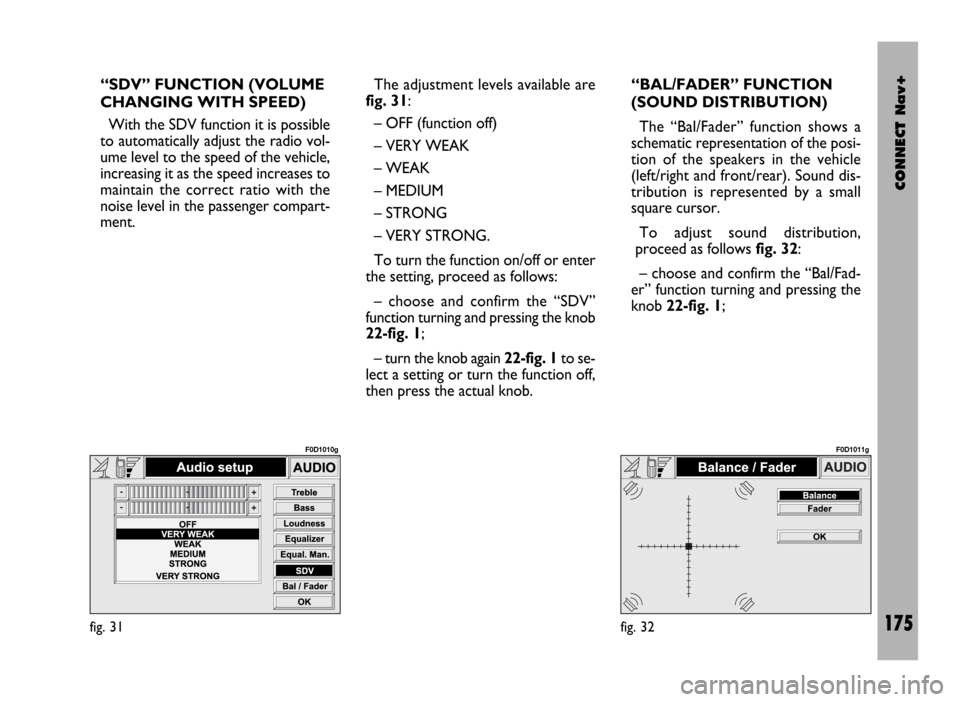
“EQUAL. MAN.” FUNCTION
This function allows manual
adjustment of the 5 equalizer
frequency bands and deactivates the
treble and bass settings
(Treble/Bass).
Proceed as follows fig. 30:
– choose and confirm the “Equal.
Man” function turning the knob 22-
fig. 1;
– turn the knob again
22-fig. 1to select the “sliding regula-
tor” of the frequency band to be ad-
justed, then confirm pressing the knob;– adjust the band selected turning the
knob 22-fig. 1, then press the actual
knob to confirm the adjustment and
go to the next band;
– after adjusting all the bands, choose
and confirm “OK” with the knob22-
fig. 1to go back to the previous
screen. If “ESC” is pressed 23-fig. 1
you go back to the previous screen
with the settings stored previously.
When the user equalizer adjustment
is set, the display shows the word
“USER”.
fig. 29
F0D1008g
fig. 30
F0D1009g
Page 176 of 246

CONNECT Nav+
175
“SDV” FUNCTION (VOLUME
CHANGING WITH SPEED)
With the SDV function it is possible
to automatically adjust the radio vol-
ume level to the speed of the vehicle,
increasing it as the speed increases to
maintain the correct ratio with the
noise level in the passenger compart-
ment.The adjustment levels available are
fig. 31:
– OFF (function off)
– VERY WEAK
– WEAK
– MEDIUM
– STRONG
– VERY STRONG.
To turn the function on/off or enter
the setting, proceed as follows:
– choose and confirm the “SDV”
function turning and pressing the knob
22-fig. 1;
– turn the knob again 22-fig. 1to se-
lect a setting or turn the function off,
then press the actual knob.“BAL/FADER” FUNCTION
(SOUND DISTRIBUTION)
The “Bal/Fader” function shows a
schematic representation of the posi-
tion of the speakers in the vehicle
(left/right and front/rear). Sound dis-
tribution is represented by a small
square cursor.
To adjust sound distribution,
proceed as follows fig. 32:
– choose and confirm the “Bal/Fad-
er” function turning and pressing the
knob 22-fig. 1;
fig. 31
F0D1010g
fig. 32
F0D1011g