Page 3712 of 4323

BO4SO±01
H17260
H17261
± BODYREAR NO.1 SEAT (Split Type RH)
BO±151
3704 Author�: Date�:
2005 SEQUOIA (RM1146U)
DISASSEMBLY
CAUTION:
Wear safety gloves, because the sharp edges and surfaces
of the seat frame may cause injury to the hands.
HINT:
�A bolt without a torque specification is shown in the stan-
dard bolt chart (see page SS±2).
�Tape the screwdriver tip before using it to remove the
parts.
1. REMOVE HEADREST
2. REMOVE RECLINING ADJUSTER RELEASE HANDLE
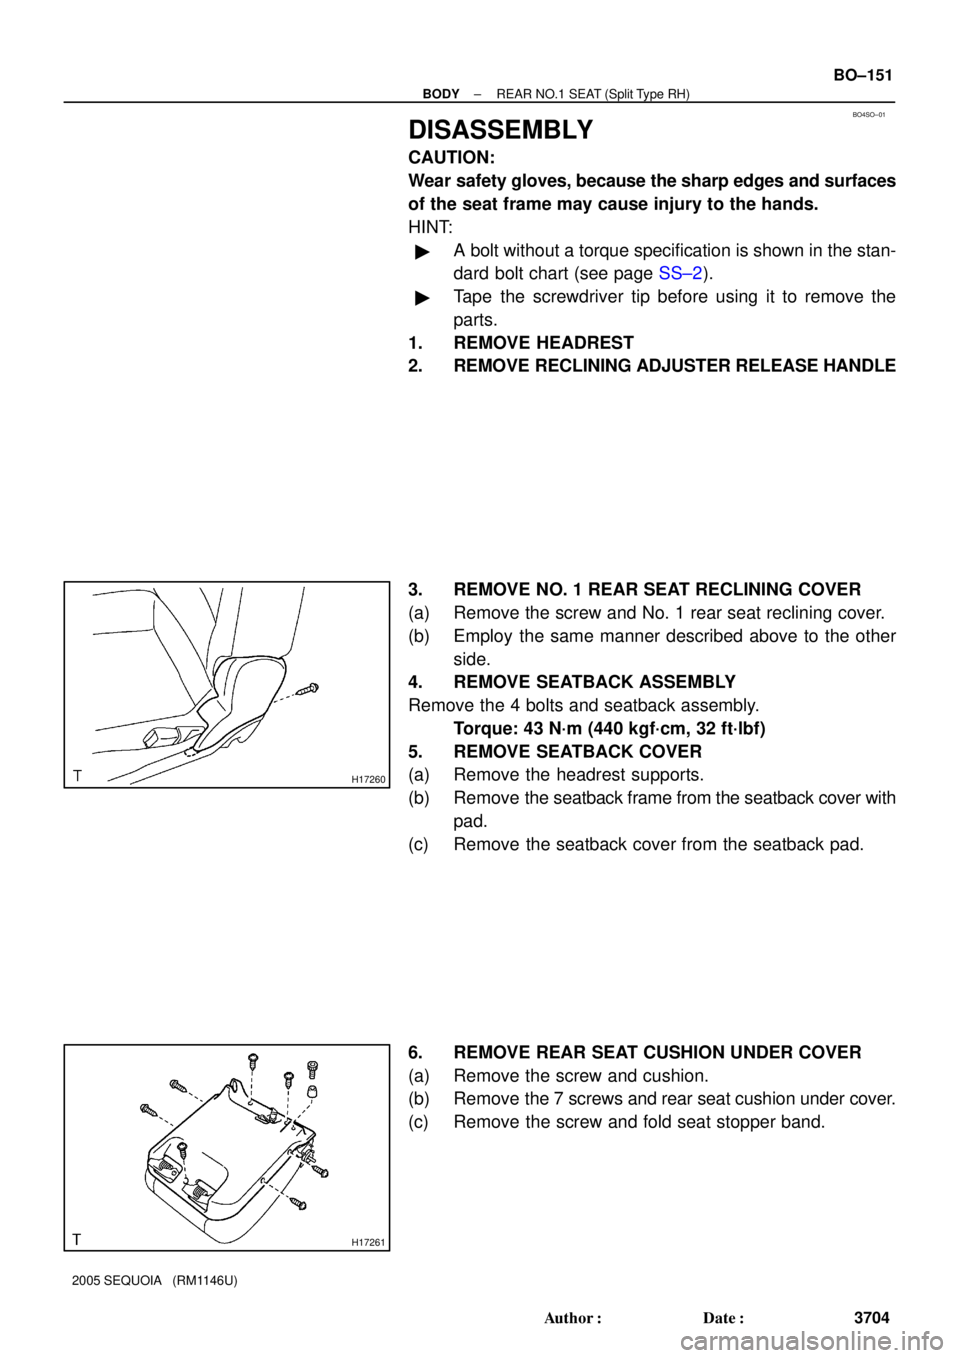
3. REMOVE NO. 1 REAR SEAT RECLINING COVER
(a) Remove the screw and No. 1 rear seat reclining cover.
(b) Employ the same manner described above to the other
side.
4. REMOVE SEATBACK ASSEMBLY
Remove the 4 bolts and seatback assembly.
Torque: 43 N´m (440 kgf´cm, 32 ft´lbf)
5. REMOVE SEATBACK COVER
(a) Remove the headrest supports.
(b) Remove the seatback frame from the seatback cover with
pad.
(c) Remove the seatback cover from the seatback pad.
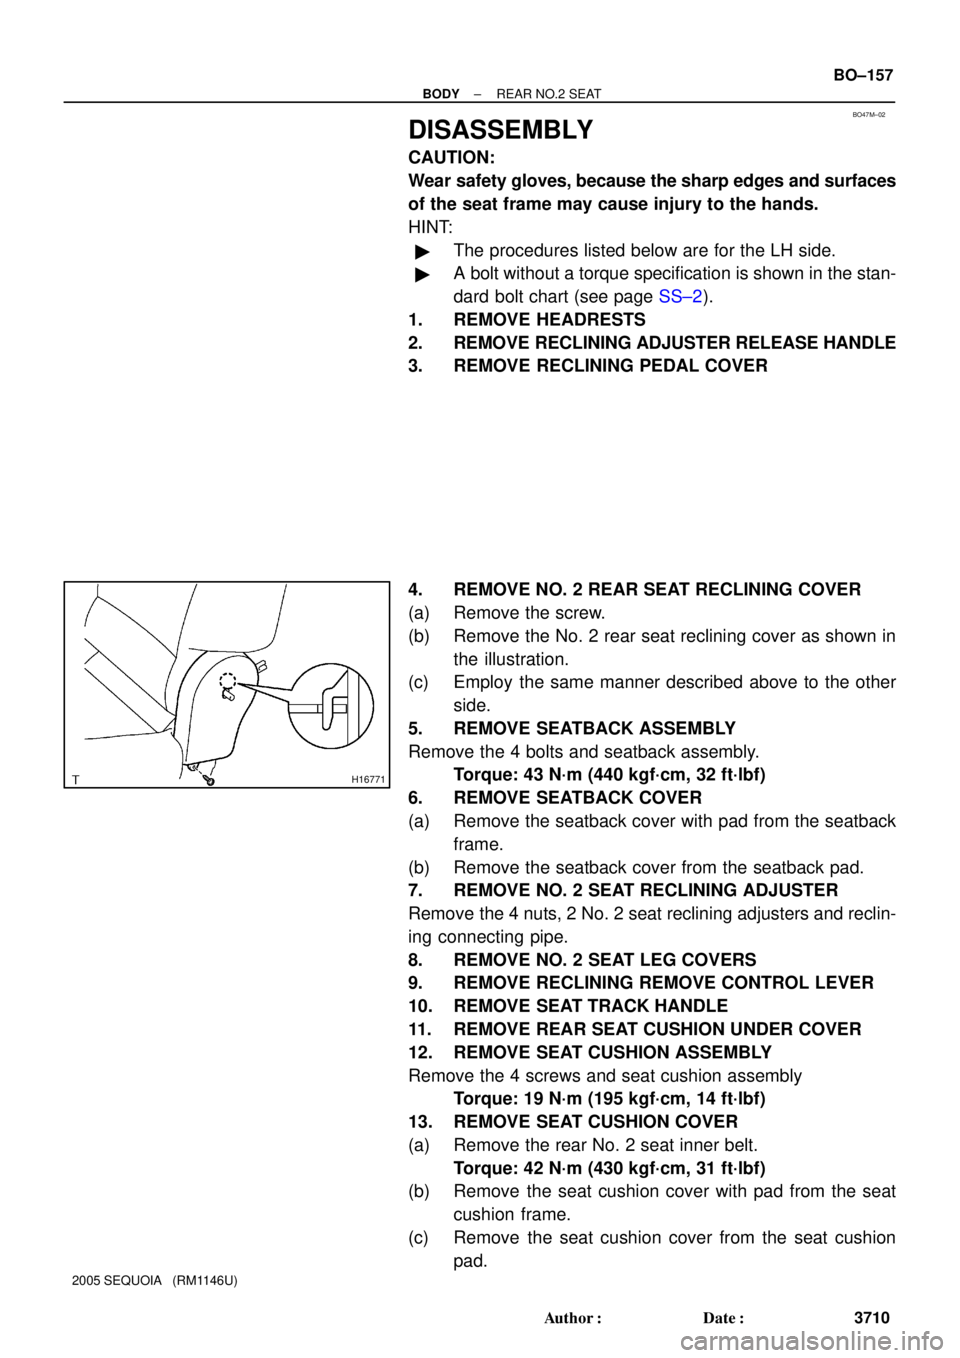
6. REMOVE REAR SEAT CUSHION UNDER COVER
(a) Remove the screw and cushion.
(b) Remove the 7 screws and rear seat cushion under cover.
(c) Remove the screw and fold seat stopper band.
Page 3715 of 4323
BO4SQ±01
BO±154
± BODYREAR NO.1 SEAT (Split Type RH)
3707 Author�: Date�:
2005 SEQUOIA (RM1146U)
REASSEMBLY
Reassembly is in the reverse order of disassembly (See page BO±151).
Page 3716 of 4323
BO4SR±01
± BODYREAR NO.1 SEAT (Split Type RH)
BO±155
3708 Author�: Date�:
2005 SEQUOIA (RM1146U)
INSTALLATION
Installation is in the reverse order of removal (See page BO±150).
Page 3718 of 4323

BO47M±02
H16771
± BODYREAR NO.2 SEAT
BO±157
3710 Author�: Date�:
2005 SEQUOIA (RM1146U)
DISASSEMBLY
CAUTION:
Wear safety gloves, because the sharp edges and surfaces
of the seat frame may cause injury to the hands.
HINT:
�The procedures listed below are for the LH side.
�A bolt without a torque specification is shown in the stan-
dard bolt chart (see page SS±2).
1. REMOVE HEADRESTS
2. REMOVE RECLINING ADJUSTER RELEASE HANDLE
3. REMOVE RECLINING PEDAL COVER
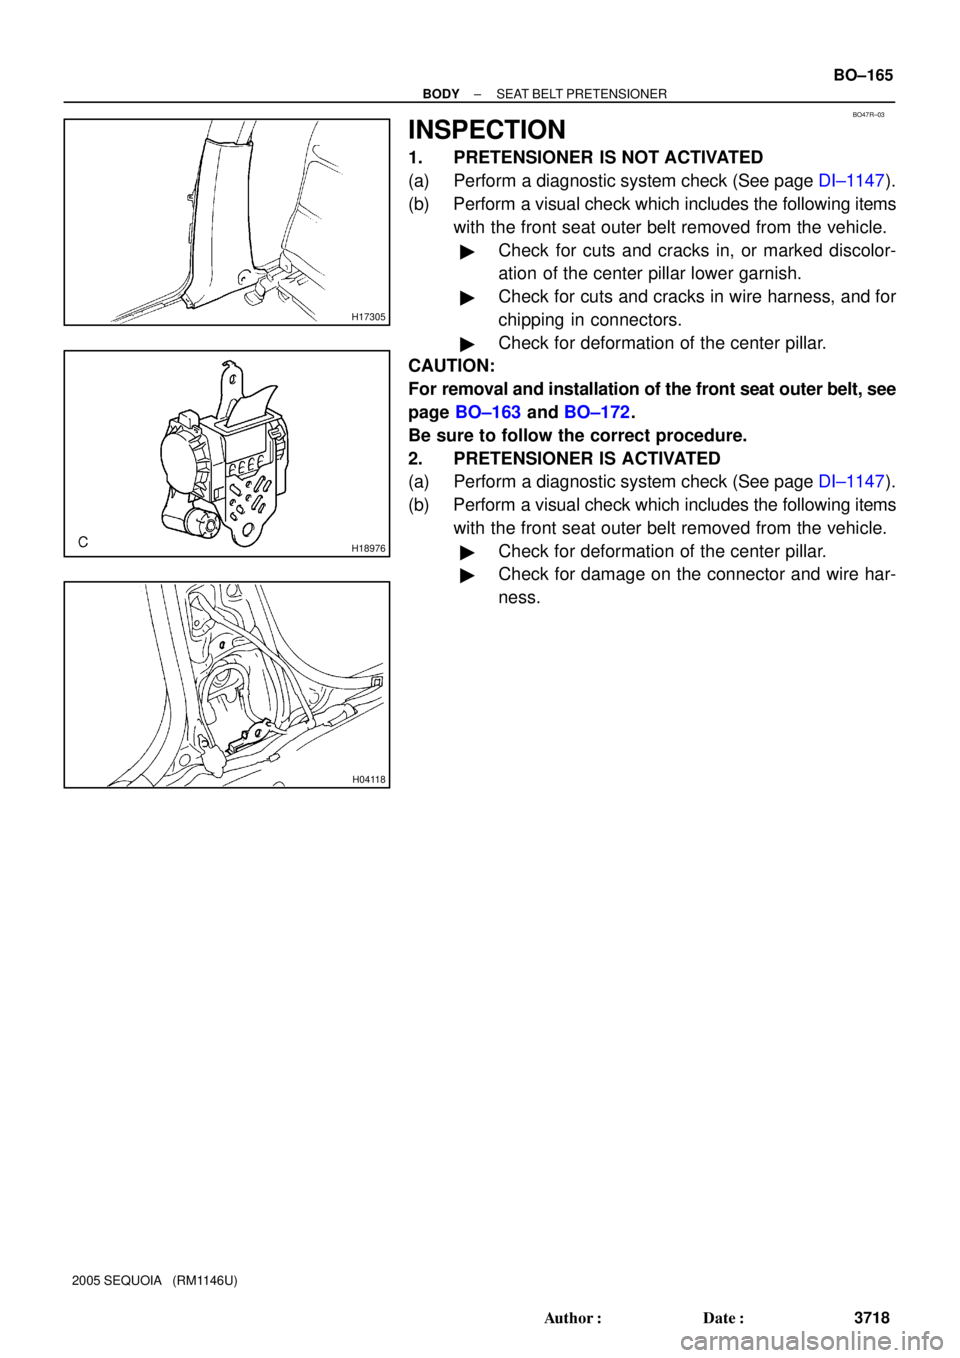
4. REMOVE NO. 2 REAR SEAT RECLINING COVER
(a) Remove the screw.
(b) Remove the No. 2 rear seat reclining cover as shown in
the illustration.
(c) Employ the same manner described above to the other
side.
5. REMOVE SEATBACK ASSEMBLY
Remove the 4 bolts and seatback assembly.
Torque: 43 N´m (440 kgf´cm, 32 ft´lbf)
6. REMOVE SEATBACK COVER
(a) Remove the seatback cover with pad from the seatback
frame.
(b) Remove the seatback cover from the seatback pad.
7. REMOVE NO. 2 SEAT RECLINING ADJUSTER
Remove the 4 nuts, 2 No. 2 seat reclining adjusters and reclin-
ing connecting pipe.
8. REMOVE NO. 2 SEAT LEG COVERS
9. REMOVE RECLINING REMOVE CONTROL LEVER
10. REMOVE SEAT TRACK HANDLE
11. REMOVE REAR SEAT CUSHION UNDER COVER
12. REMOVE SEAT CUSHION ASSEMBLY
Remove the 4 screws and seat cushion assembly
Torque: 19 N´m (195 kgf´cm, 14 ft´lbf)
13. REMOVE SEAT CUSHION COVER
(a) Remove the rear No. 2 seat inner belt.
Torque: 42 N´m (430 kgf´cm, 31 ft´lbf)
(b) Remove the seat cushion cover with pad from the seat
cushion frame.
(c) Remove the seat cushion cover from the seat cushion
pad.
Page 3719 of 4323
BO47N±01
BO±158
± BODYREAR NO.2 SEAT
3711 Author�: Date�:
2005 SEQUOIA (RM1146U)
REASSEMBLY
Reassembly is in the reverse order of disassembly (See page BO±157).
Page 3726 of 4323

H17305
H18976
H04118
BO47R±03
± BODYSEAT BELT PRETENSIONER
BO±165
3718 Author�: Date�:
2005 SEQUOIA (RM1146U)
INSPECTION
1. PRETENSIONER IS NOT ACTIVATED
(a) Perform a diagnostic system check (See page DI±1147).
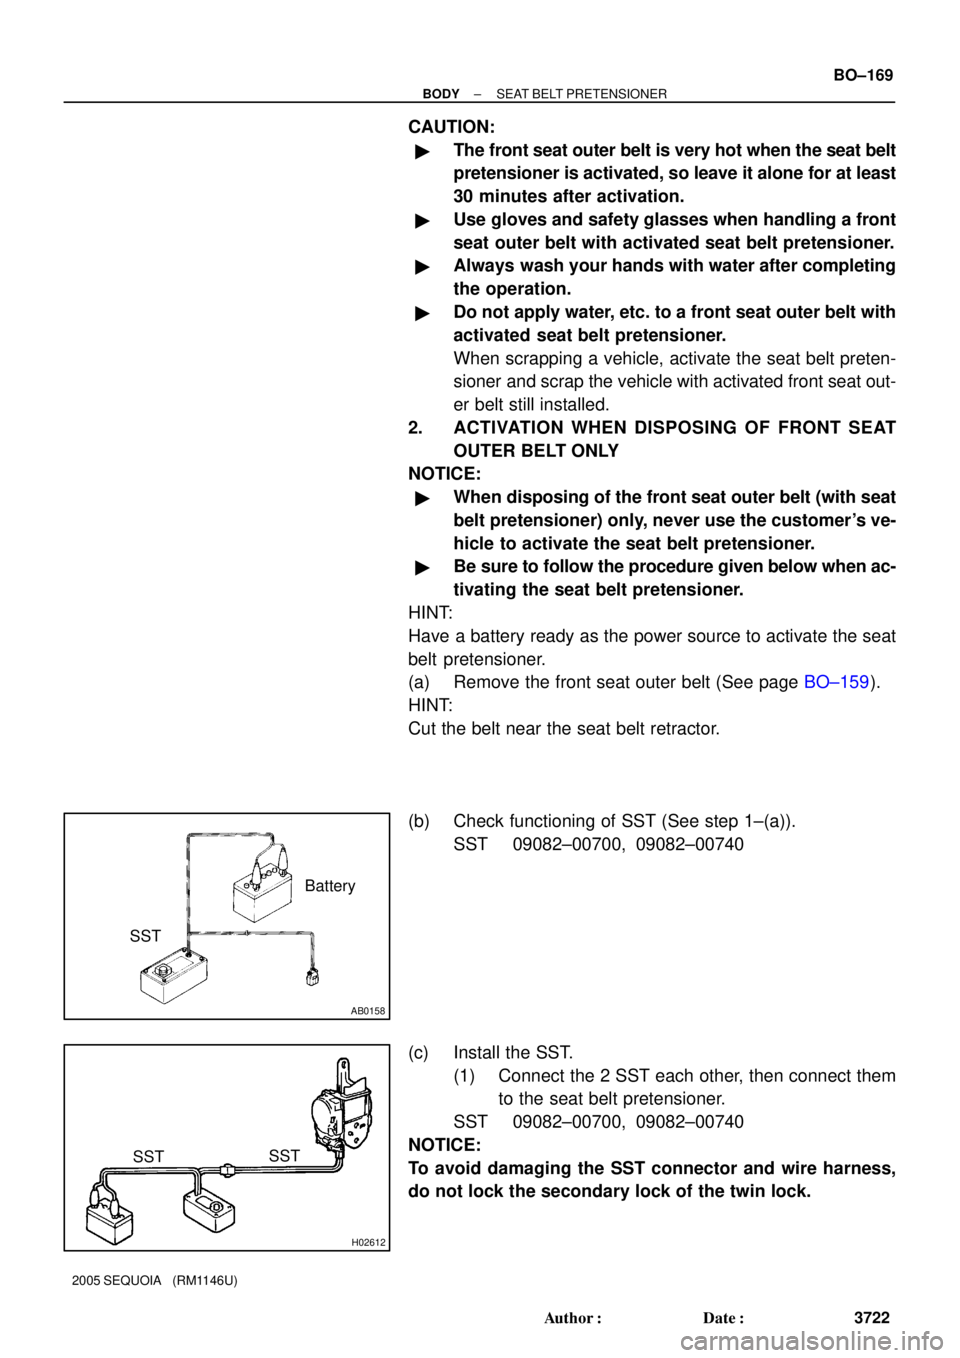
(b) Perform a visual check which includes the following items
with the front seat outer belt removed from the vehicle.
�Check for cuts and cracks in, or marked discolor-
ation of the center pillar lower garnish.
�Check for cuts and cracks in wire harness, and for
chipping in connectors.
�Check for deformation of the center pillar.
CAUTION:
For removal and installation of the front seat outer belt, see
page BO±163 and BO±172.
Be sure to follow the correct procedure.
2. PRETENSIONER IS ACTIVATED
(a) Perform a diagnostic system check (See page DI±1147).
(b) Perform a visual check which includes the following items
with the front seat outer belt removed from the vehicle.
�Check for deformation of the center pillar.
�Check for damage on the connector and wire har-
ness.
Page 3730 of 4323

AB0158
SSTBattery
H02612
SST
SST
± BODYSEAT BELT PRETENSIONER
BO±169
3722 Author�: Date�:
2005 SEQUOIA (RM1146U)
CAUTION:
�The front seat outer belt is very hot when the seat belt
pretensioner is activated, so leave it alone for at least
30 minutes after activation.
�Use gloves and safety glasses when handling a front
seat outer belt with activated seat belt pretensioner.
�Always wash your hands with water after completing
the operation.
�Do not apply water, etc. to a front seat outer belt with
activated seat belt pretensioner.
When scrapping a vehicle, activate the seat belt preten-
sioner and scrap the vehicle with activated front seat out-
er belt still installed.
2. ACTIVATION WHEN DISPOSING OF FRONT SEAT
OUTER BELT ONLY
NOTICE:
�When disposing of the front seat outer belt (with seat
belt pretensioner) only, never use the customer's ve-
hicle to activate the seat belt pretensioner.
�Be sure to follow the procedure given below when ac-
tivating the seat belt pretensioner.
HINT:
Have a battery ready as the power source to activate the seat
belt pretensioner.
(a) Remove the front seat outer belt (See page BO±159).
HINT:
Cut the belt near the seat belt retractor.
(b) Check functioning of SST (See step 1±(a)).
SST 09082±00700, 09082±00740
(c) Install the SST.
(1) Connect the 2 SST each other, then connect them
to the seat belt pretensioner.
SST 09082±00700, 09082±00740
NOTICE:
To avoid damaging the SST connector and wire harness,
do not lock the secondary lock of the twin lock.
Page 3732 of 4323
BO47T±01
± BODYSEAT BELT PRETENSIONER
BO±171
3724 Author�: Date�:
2005 SEQUOIA (RM1146U)
REPLACEMENT
REPLACE REQUIREMENTS
In the following cases, replace the seat belt pretensioner.
�If the seat belt pretensioner has been activated.
�If the seat belt pretensioner has been found to be faulty in troubleshooting.
�If the front seat outer belt has been found to be faulty during the check in items 1±(b) or 2±(b).
�If the front seat outer belt has been dropped.
CAUTION:
For removal and installation of the seat belt pretensioner, see page BO±163 and BO±172.
Be sure to follow the correct procedure.