Page 313 of 4592
AUTOMATIC TRANSAXLEPREPARATION ±
AX±7
(09351±32100)Drive Pinion Bearing Replacer
(09351±32120)Overdrive Bearing Replacer
(09351±32140)Oil Seal Replacer
(09351±32150)Oil Seal Replacer
(09351±32190)Measure Terminal
(09351±32200)No.3 Piston Spring Compressor
09608±16011Rear Hub Bearing Tool±Remove differential side bearing
09612±65014Steering Worm Bearing PullerRemove pinion shaft bearing outer
race
09950±40010Puller B Set
RECOMMENDED COOL
09031±00030Pin Punch .
AX02M±02
Page 314 of 4592
AUTOMATIC TRANSAXLEPREPARATION ±
AX±8
EQUIPMENT
Feeler gaugeCheck major clearance.
Vernier calipersCheck length of second coast
brake piston rod.
Dial indicator with magnetic baseCheck piston stroke and end play
of the output shaft.
Dial indicatorCheck inside diameter of
major bushing.
Straight edgeCheck side clearance of oil pump.
Torque wrench
LUBRICANT
ItemCapacityClassification
Automatic transaxle fluid:
Dry fill
Drain and refill
6.75 liters (7.10 US qts, 5.94 Imp.qts)
2.5 liters (2.6 US qts, 2.2 Imp.qts)
ATF D±@@@@@: [g 2] or
DEXRON®@@@@@: [g
3](DEXRON®@@@@@: [g 2])
Differential oil0.85 liters (0.89 US qts, 0.75 Imp.qts)
ATF D±@@@@@: [g 2] or
DEXRON®@@@@@: [g
3](DEXRON®@@@@@: [g 2])
SSM (SPECIAL SERVICE MATERIALS)
08826±00090Seal Packing 1281,
THREE BOND 1281 or equivalent
(FIPG)Differential LH bearing retainer
Differential RH retainer
08833±00070Adhesive 1324,
THREE BOND 1324 or equivalentDifferential RH retainer set bolt
AX02N±02
AX01V±08
AX02P±02
Page 334 of 4592
AUTOMATIC TRANSAXLECOMPONENT PARTS REMOVAL ±
AX±28
49. REMOVE PIN, SPRING AND PARKING LOCK PAWL
DIFFERENTIAL COMPONENT PARTS
REMOVAL
1. MEASURE DIFFERENTIAL TOTAL PRELOAD
Using a small torque wrench, measure the total preload
and make a note of it.
2. REMOVE LH BEARING RETAINER
(a) Remove the 6 bolts.
(b) Using a large screwdriver, remove the LH bearing retain-
er.
NOTICE: Wrap the screwdriver tip in a rag, etc. to avoid
damaging the case and retainer.
3. REMOVE RH RETAINER
(a) Remove the 5 bolts.
AX02S±04
Page 335 of 4592
AUTOMATIC TRANSAXLECOMPONENT PARTS REMOVAL ±
AX±29
(b) Using a large screwdriver, remove the RH retainer.
NOTICE: Wrap the screwdriver tip in a rag, etc. to avoid
damaging the case and retainer.
4. REMOVE CARRIER COVER
(a) Remove the 10 bolts.
(b) Tap the carrier cover with a plastic hammer to remove it.
(c) Remove the apply gasket.
5. REMOVE DIFFERENTIAL CASE
Remove the differential case, outer case and shim from
the transaxle case.
Page 401 of 4592
AUTOMATIC TRANSAXLEDIFFERENTIAL ASSEMBLY ±
AX±95
DIFFERENTIAL ASSEMBLY
COMPONENTS
AX04D±02
Page 402 of 4592
AUTOMATIC TRANSAXLEDIFFERENTIAL ASSEMBLY ±
AX±96
DIFFERENTIAL CASE DISASSEMBLY
1. REMOVE SIDE BEARING
Using SST, remove the 2 side bearings.
SST 09608±16011, 09550±40010
2. REMOVE RING GEAR
(a) Place matchmarks on both the differential case and ring
gear.
(b) Remove the 12 bolts.
(c) Using a plastic hammer, tap out the ring gear.
3. CHECK SIDE GEAR BACKLASH
Using a dial gauge, measure the backlash of each side
gear while holding one pinion toward the case.
Standard backlash:
0.05 ± 0.20 mm (0.0020 ± 0.0079 in.)
AX0TZ±02
Page 403 of 4592
AUTOMATIC TRANSAXLEDIFFERENTIAL ASSEMBLY ±
AX±97
4. DISASSEMBLE DIFFERENTIAL CASE
(a) Drive out the pinion shaft lock pin from the side on which
the ring gear is installed.
(b) Remove the pinion shaft from the case.
(c) Remove the 2 pinions and side gears with the 4 thrust
washers.
DIFFERENTIAL CASE ASSEMBLY
1. ASSEMBLE DIFFERENTIAL CASE
(a) Install the removed thrust washers to the side gears.
(b) Install the side gears with thrust washers, pinion thrust
washers and pinion gears.
(c) Install the pinion shaft.
AX0U0±02
Page 404 of 4592

AUTOMATIC TRANSAXLEDIFFERENTIAL ASSEMBLY ±
AX±98
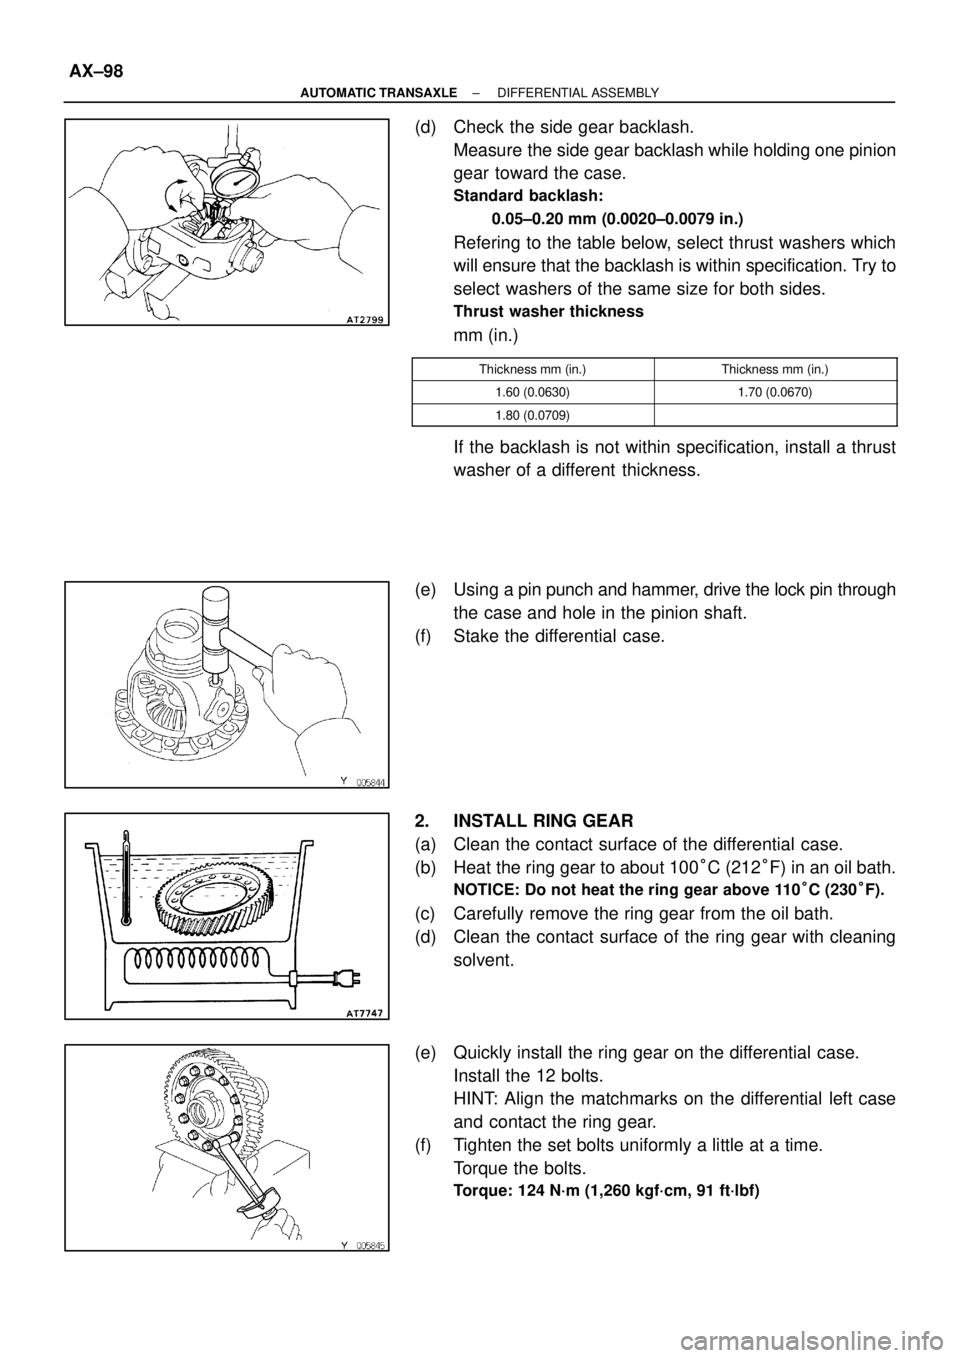
(d) Check the side gear backlash.
Measure the side gear backlash while holding one pinion
gear toward the case.
Standard backlash:
0.05±0.20 mm (0.0020±0.0079 in.)
Refering to the table below, select thrust washers which
will ensure that the backlash is within specification. Try to
select washers of the same size for both sides.
Thrust washer thickness
mm (in.)
Thickness mm (in.)Thickness mm (in.)
1.60 (0.0630)1.70 (0.0670)
1.80 (0.0709)
If the backlash is not within specification, install a thrust
washer of a different thickness.
(e) Using a pin punch and hammer, drive the lock pin through
the case and hole in the pinion shaft.
(f) Stake the differential case.
2. INSTALL RING GEAR
(a) Clean the contact surface of the differential case.
(b) Heat the ring gear to about 100°C (212°F) in an oil bath.
NOTICE: Do not heat the ring gear above 110°C (230°F).
(c) Carefully remove the ring gear from the oil bath.
(d) Clean the contact surface of the ring gear with cleaning
solvent.
(e) Quickly install the ring gear on the differential case.
Install the 12 bolts.
HINT: Align the matchmarks on the differential left case
and contact the ring gear.
(f) Tighten the set bolts uniformly a little at a time.
Torque the bolts.
Torque: 124 N´m (1,260 kgf´cm, 91 ft´lbf)